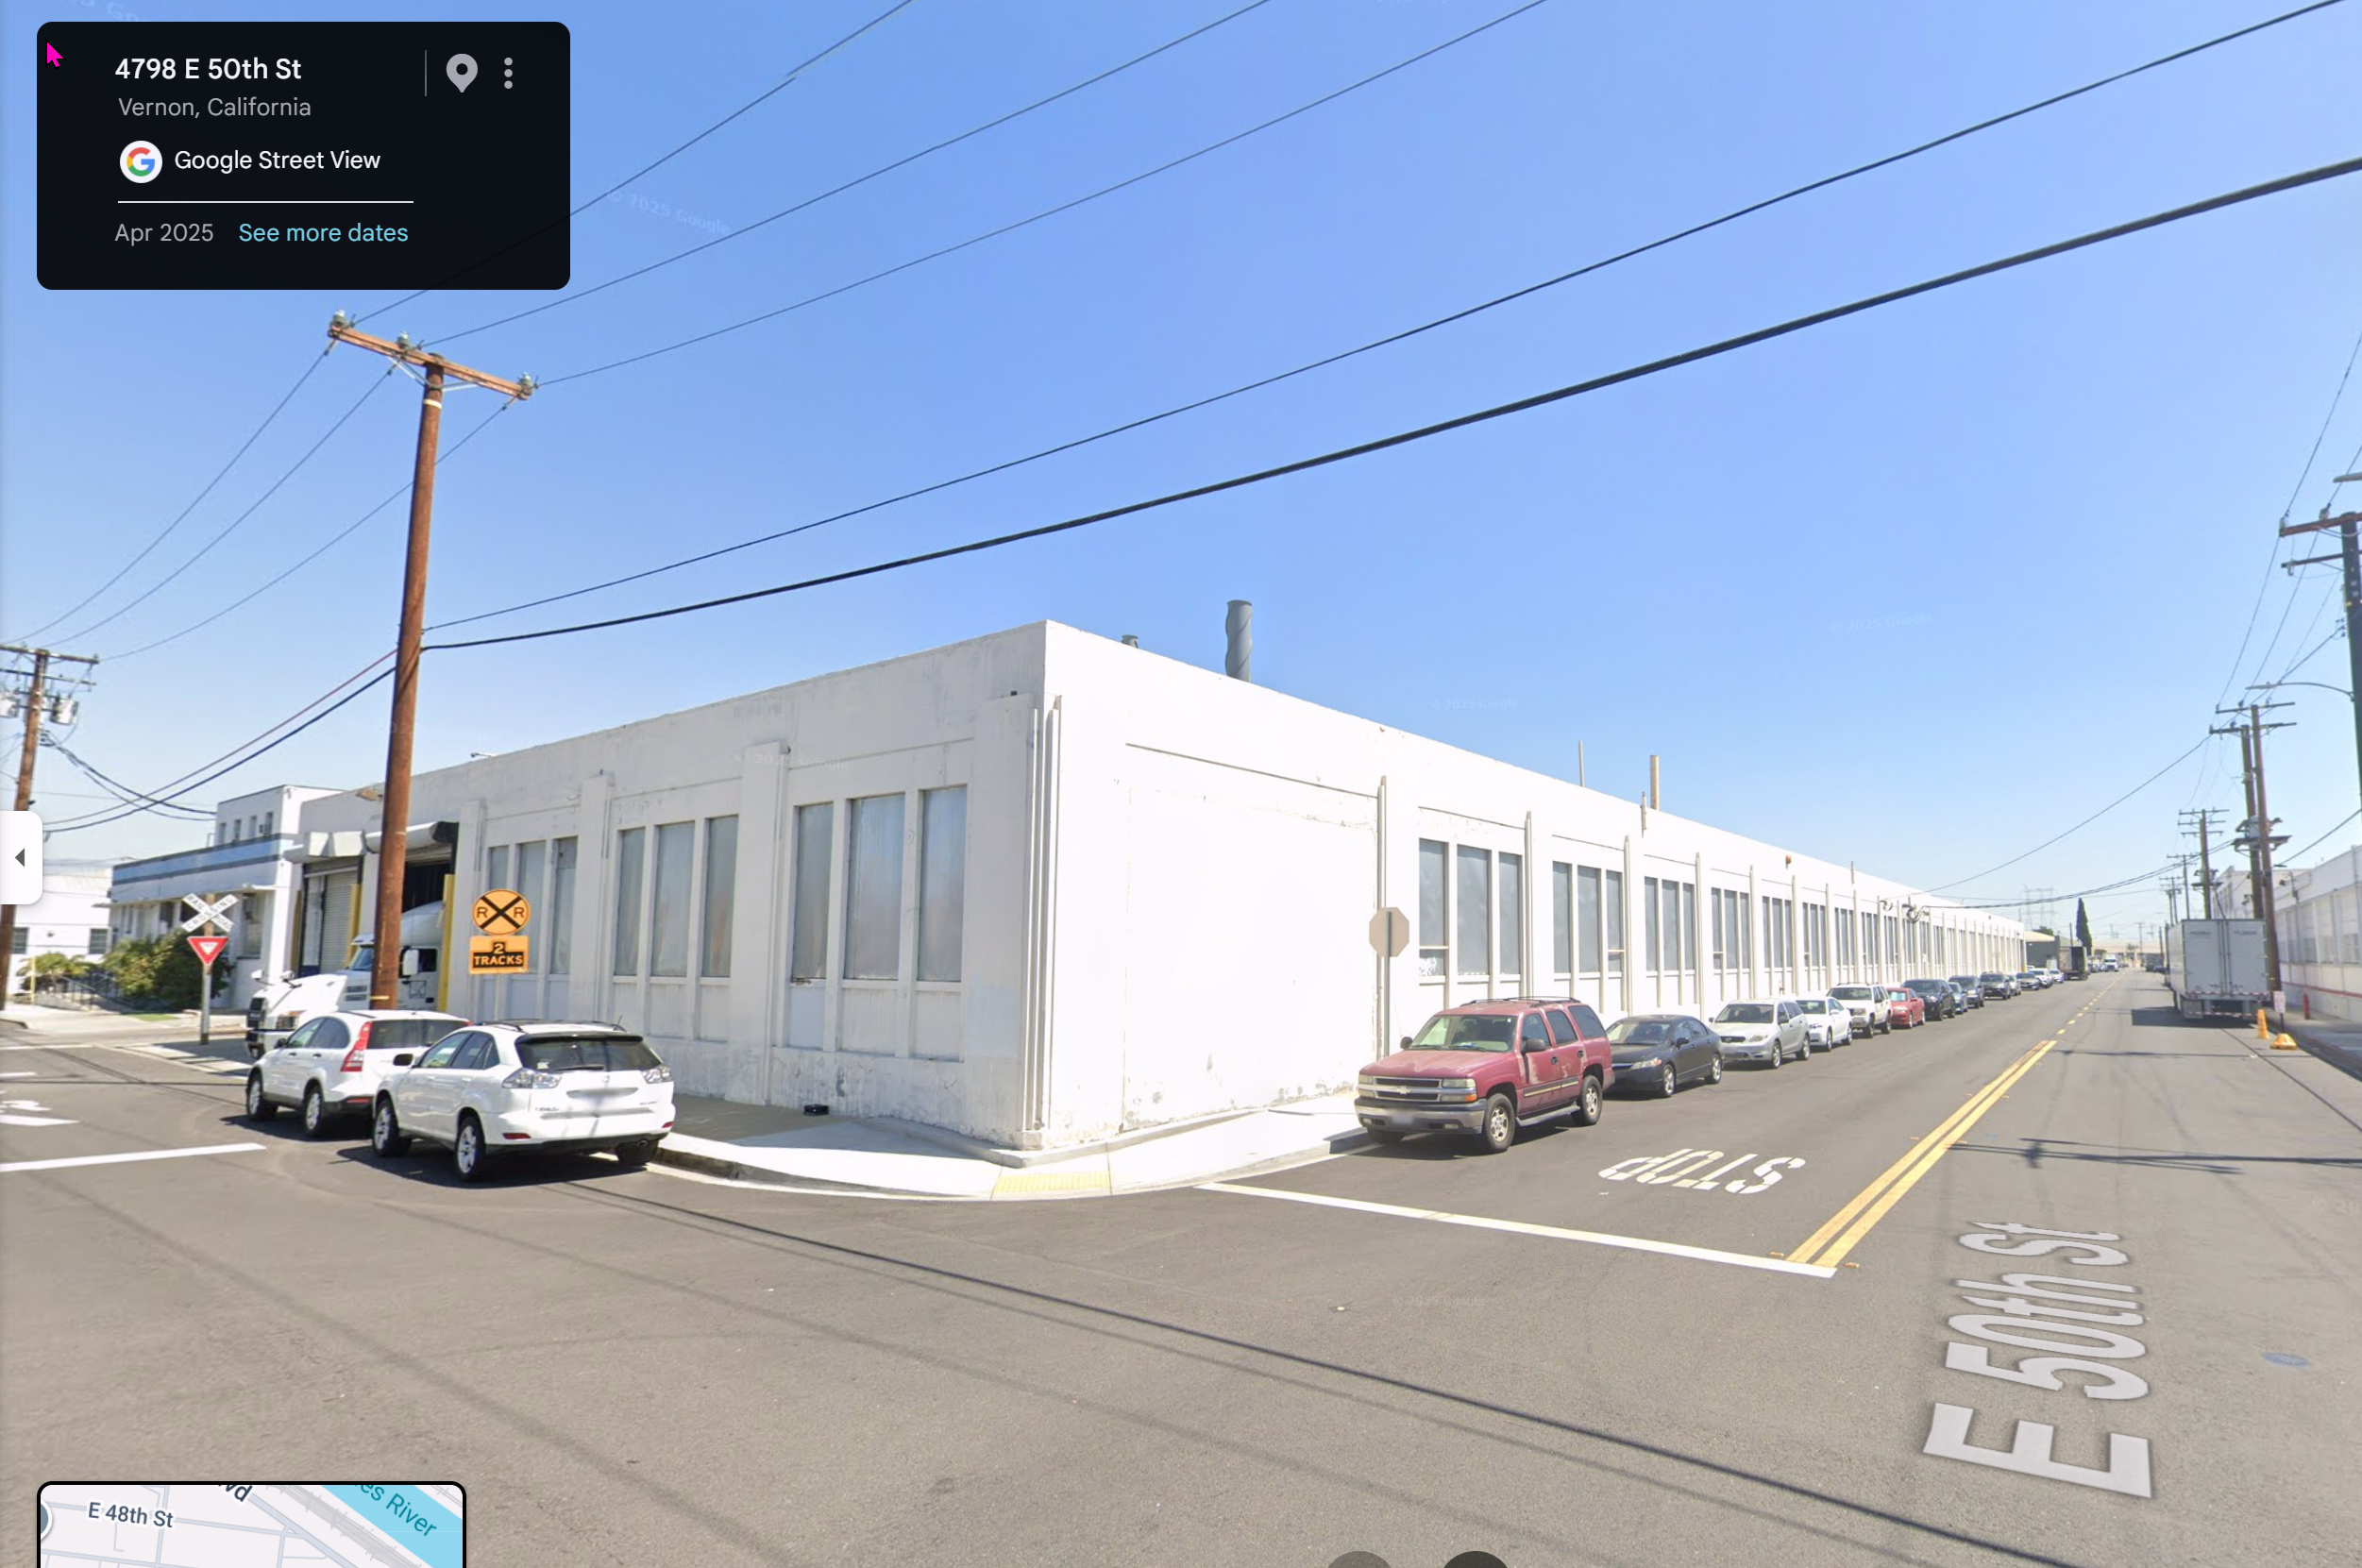
On the workbench now is the primary structure for the LAJ extension. To be specific, the warehouse. My primary goal was to pick a subject that was representative of the Central Manufacturing District. I wanted it to be what you’d expect to see. I wanted typical and ordinary. After some online surfing and research, I settled on the subject above, located at the intersection of 50th Street and Gifford Avenue. Adding to the experience is that fact that I’ve been there. I’ve stood on the exact corner this Google image was taken.
If you want to move beyond being a casual recreationalist, you need to develop a comfort level with scratch-building. Doing so drops your hobby costs immensely and it’s the only way to create the prototype subjects you need. If you model the modern era, the structures are fairly simple.
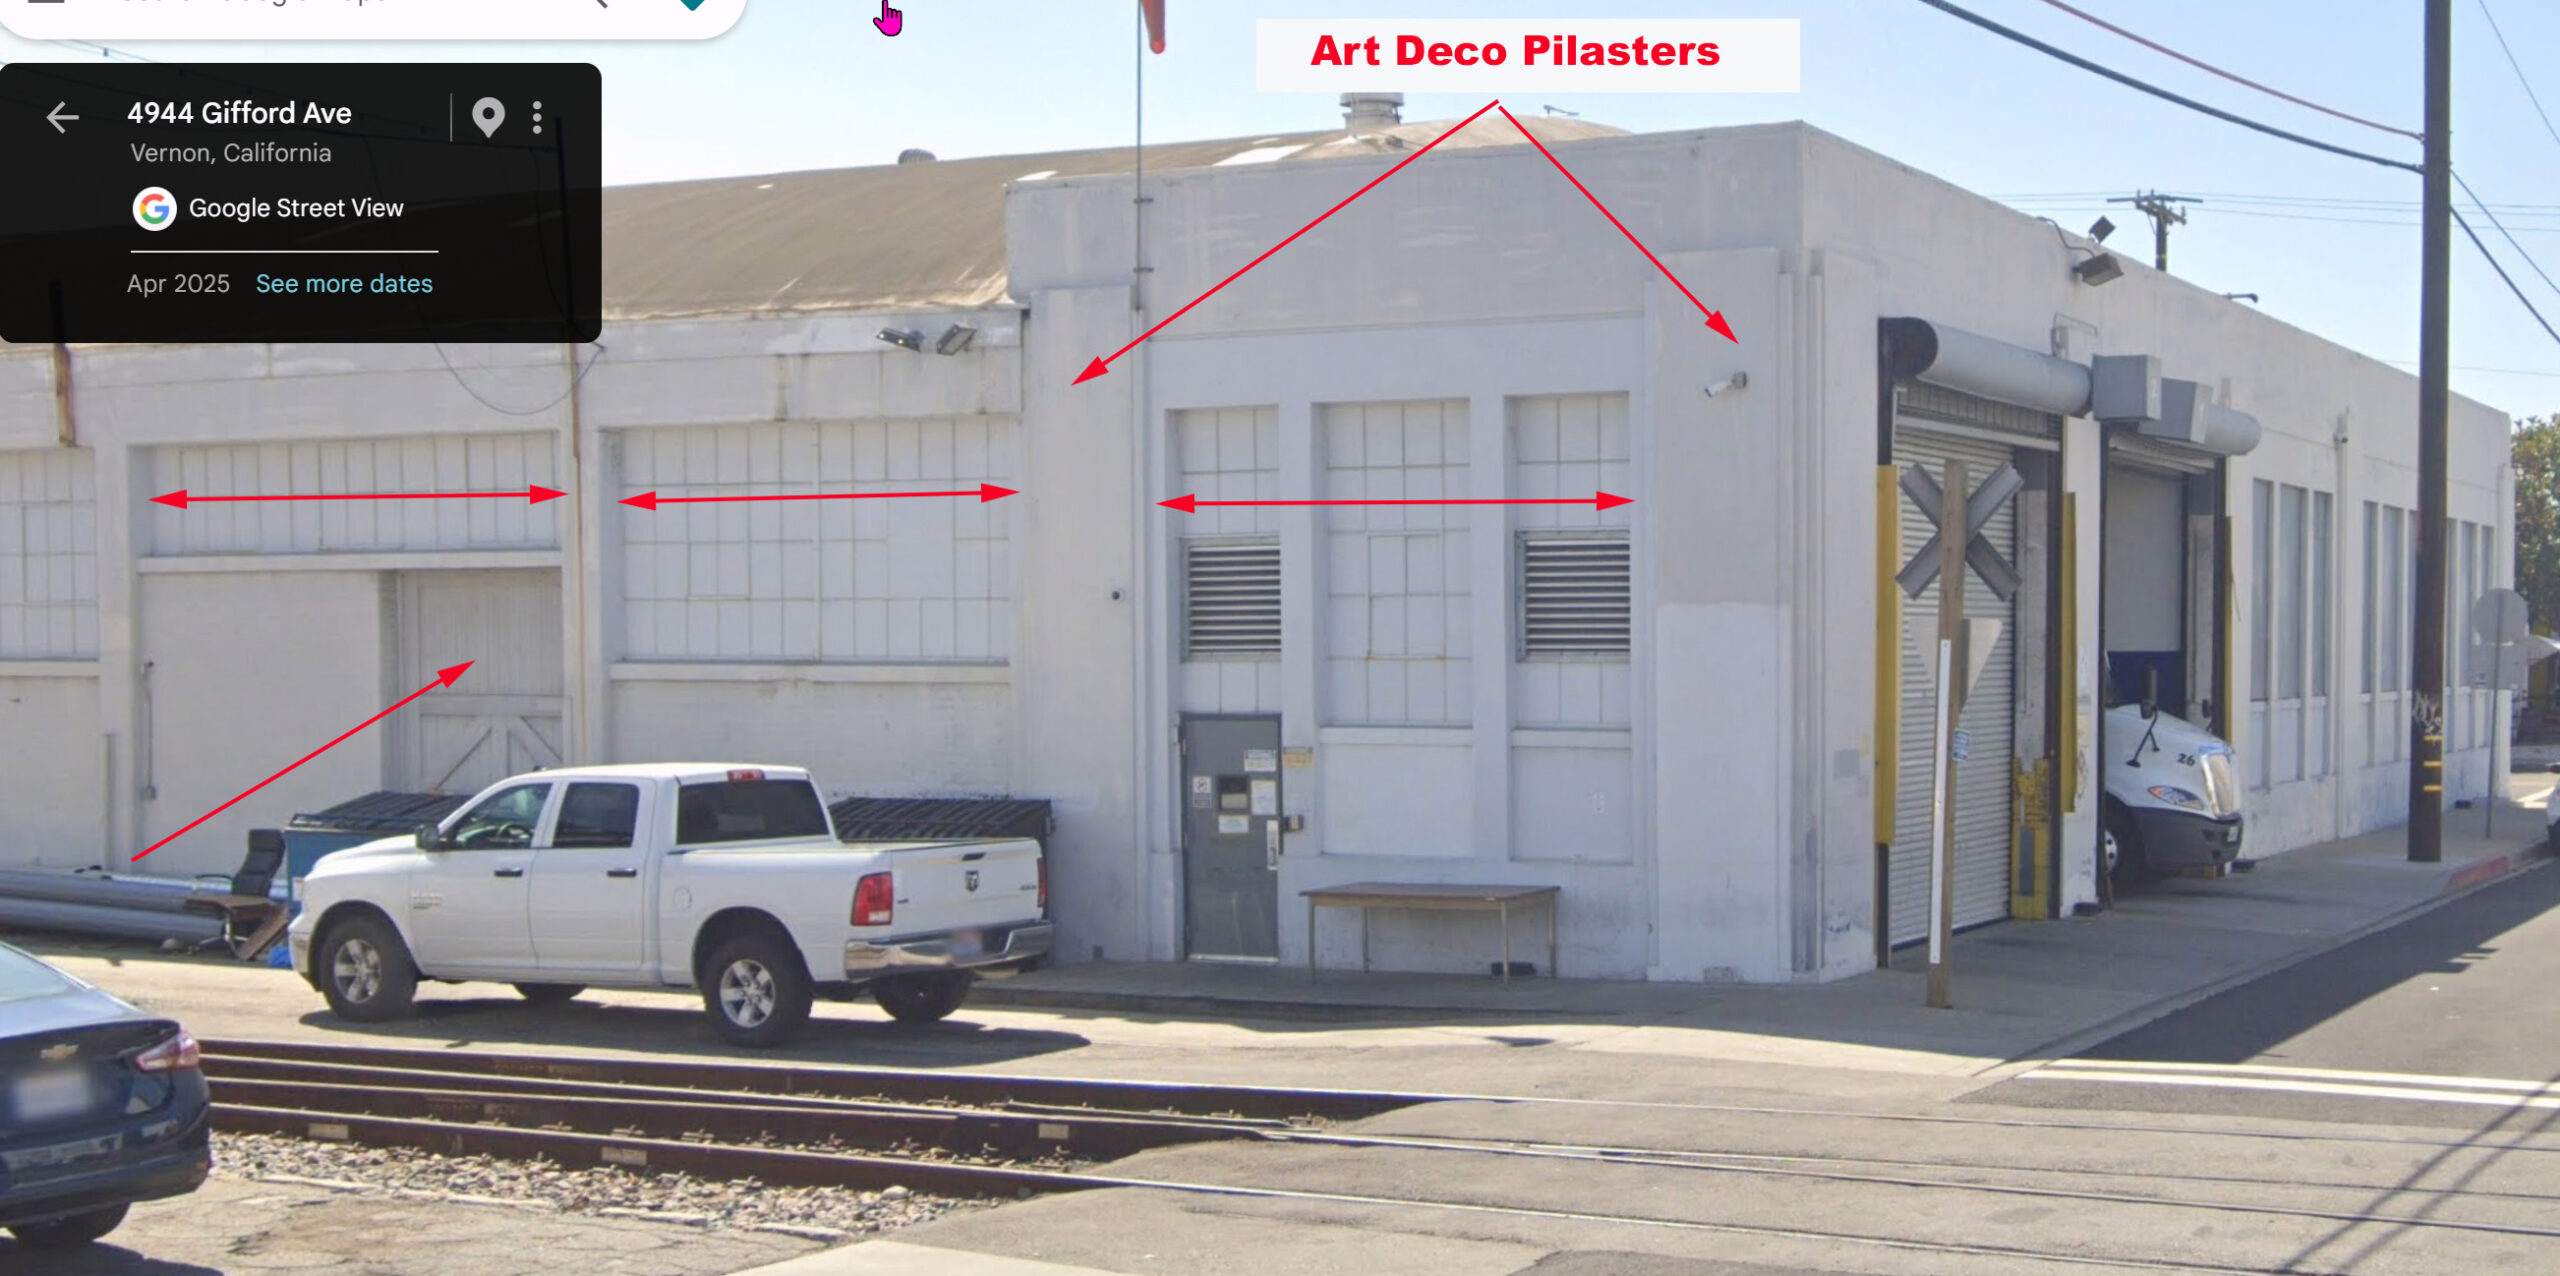
I like the understated elegance of this building. Yes, it’s “just” a warehouse but back in the day they sprinkled on a bit of art deco ornamentation. It’s not just a box. Getting actual dimensions is easy. We know the personnel door is 82 inches tall. We know the freight door is 4 feet off the ground. We can prorate everything else from there and be good enough for government work.
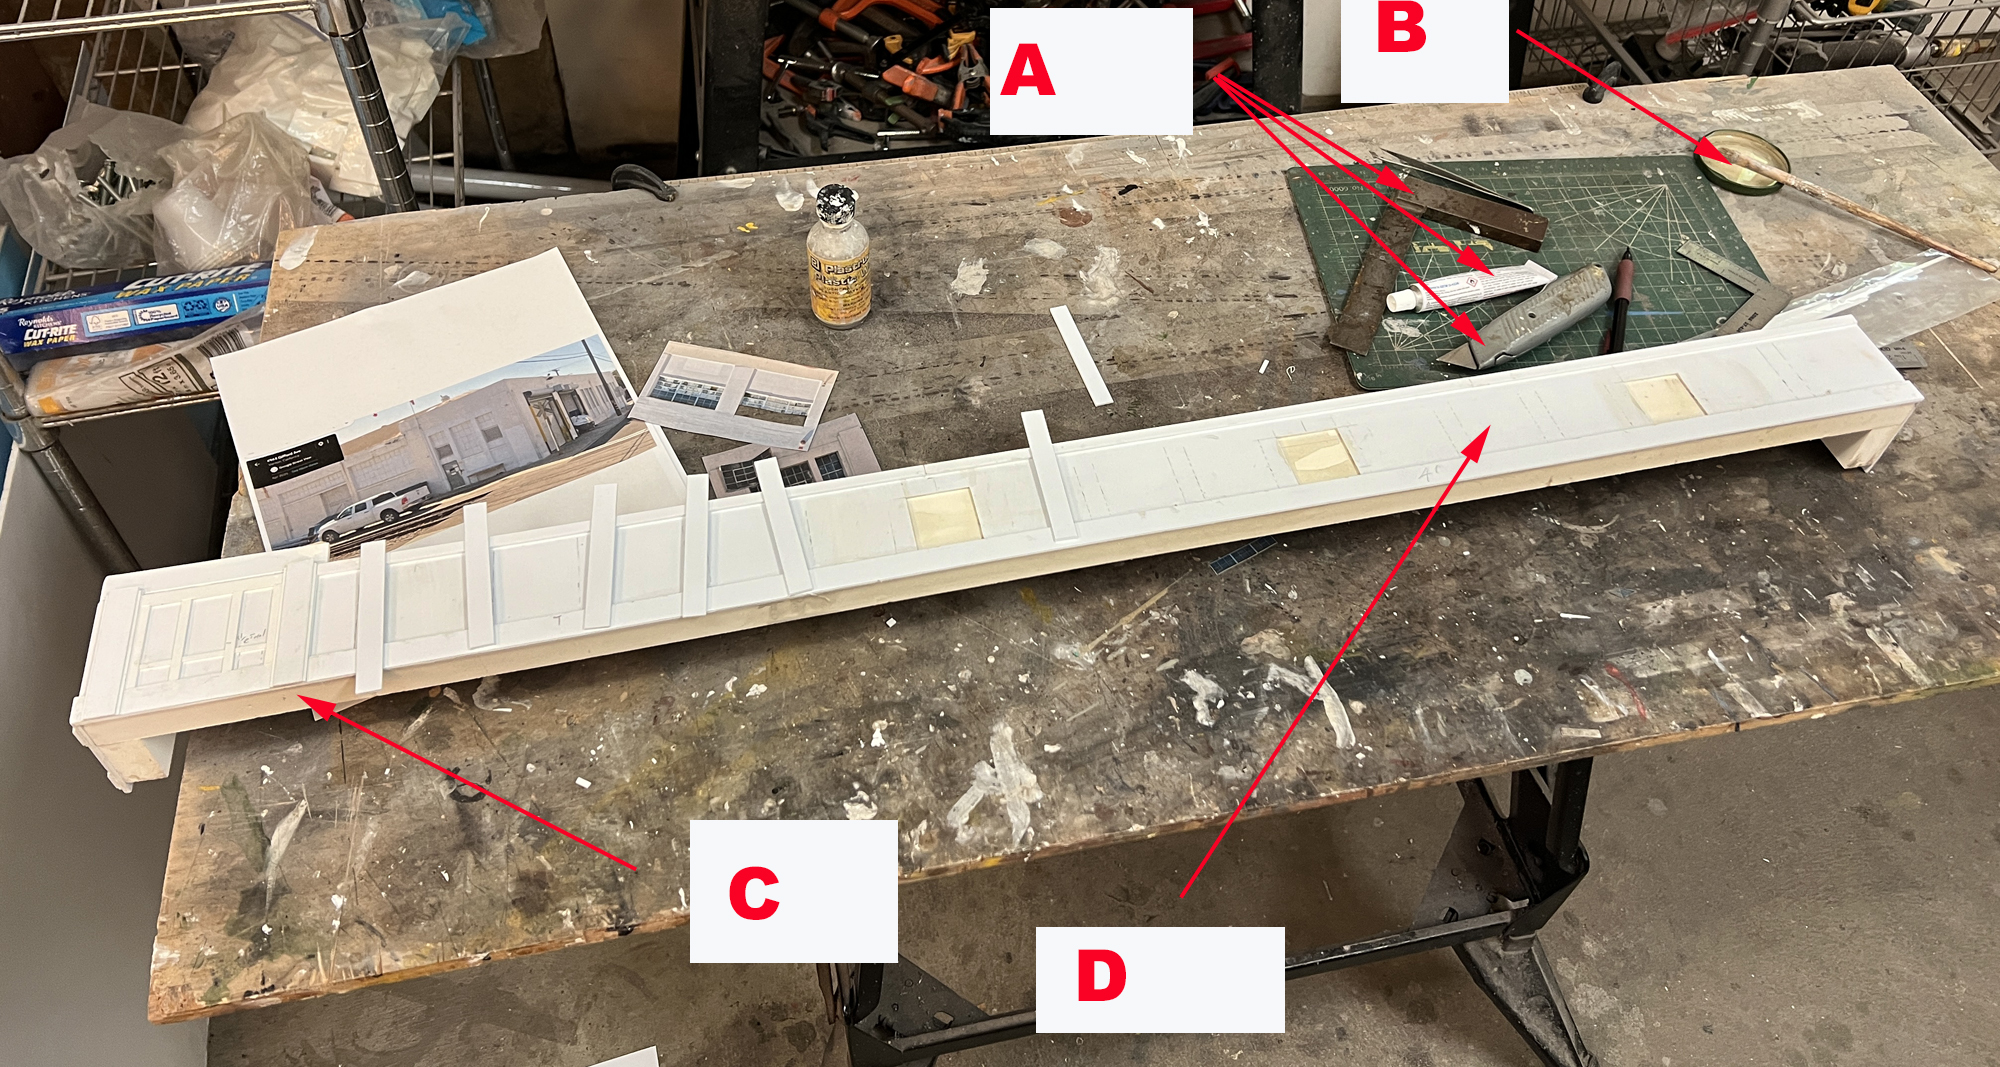
Here’s a real time photo taken earlier today in the midst of contruction. A: The primary tools you’ll need are a heavy blade. I use box cutters. You’ll need an angle and Tamiya white putty to fill gaps. B: I use MEK for adhesive, pour it in an old lid and apply it with a ratty brush. C. The core of the structure is 1×3 PVC dimensional lumber picked up in the lumber aisle of The Home Depot. The structure facing is .060″ styrene glued to the PVC core with MEK. D: I buy the styrene facing in 24″ x 48″ sheets on Amazon. Most of the features were cut with the heavy blade from styrene sheet. The smaller pieces around the windows are Evergreen styrene strips.
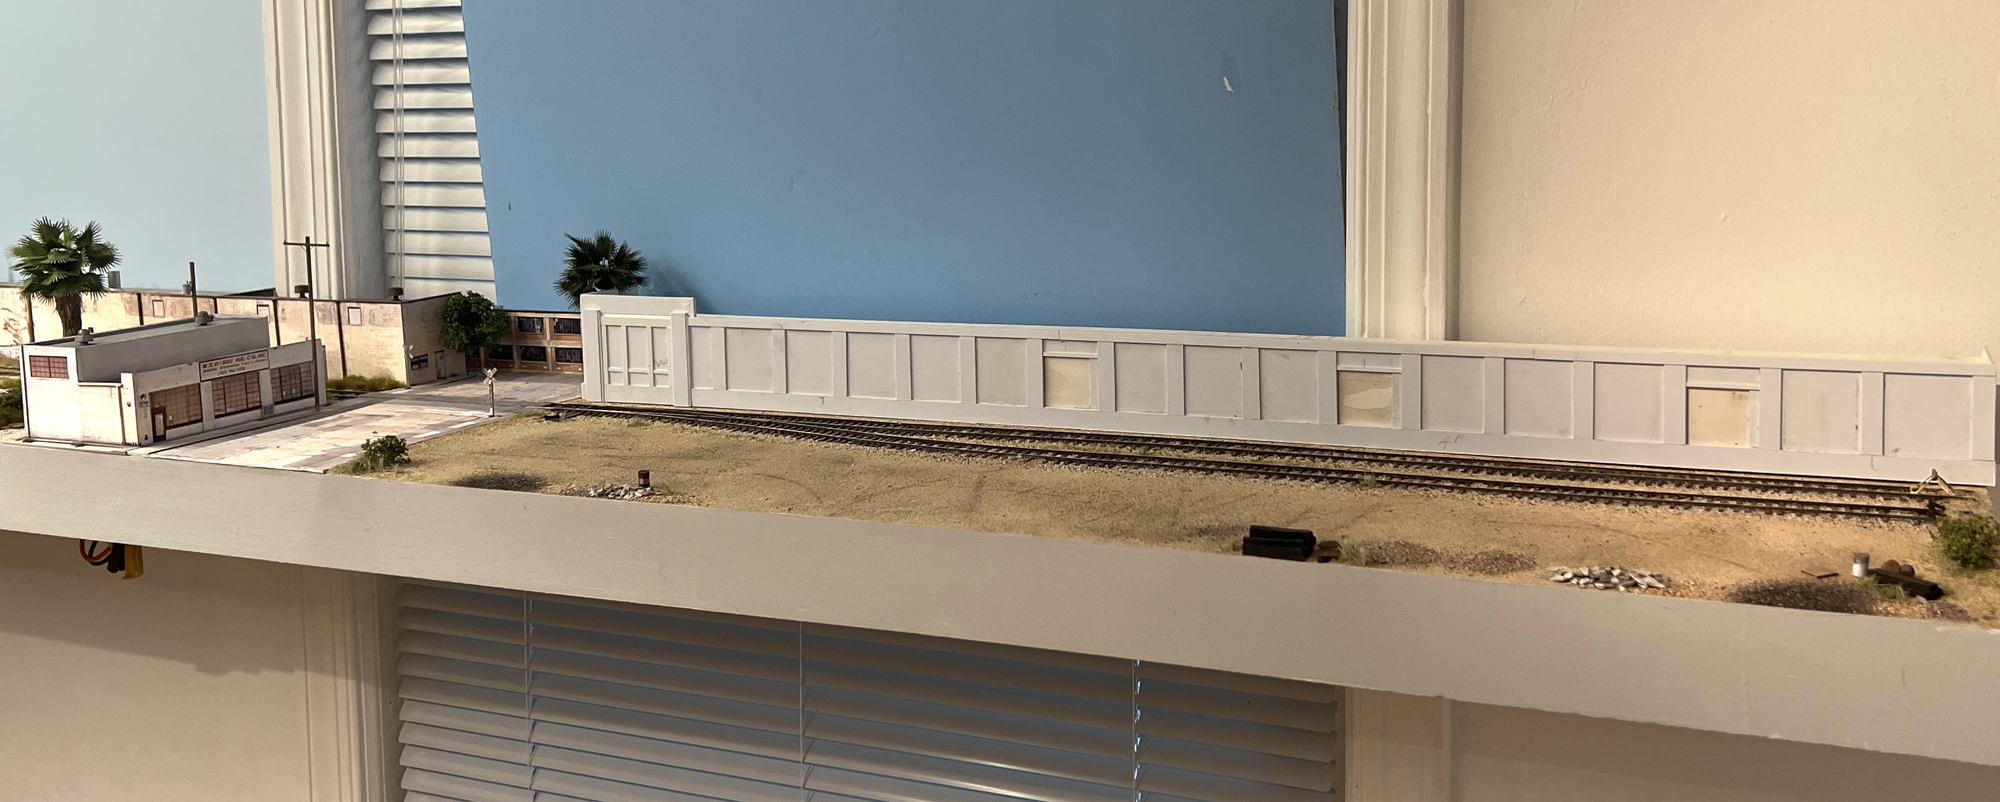
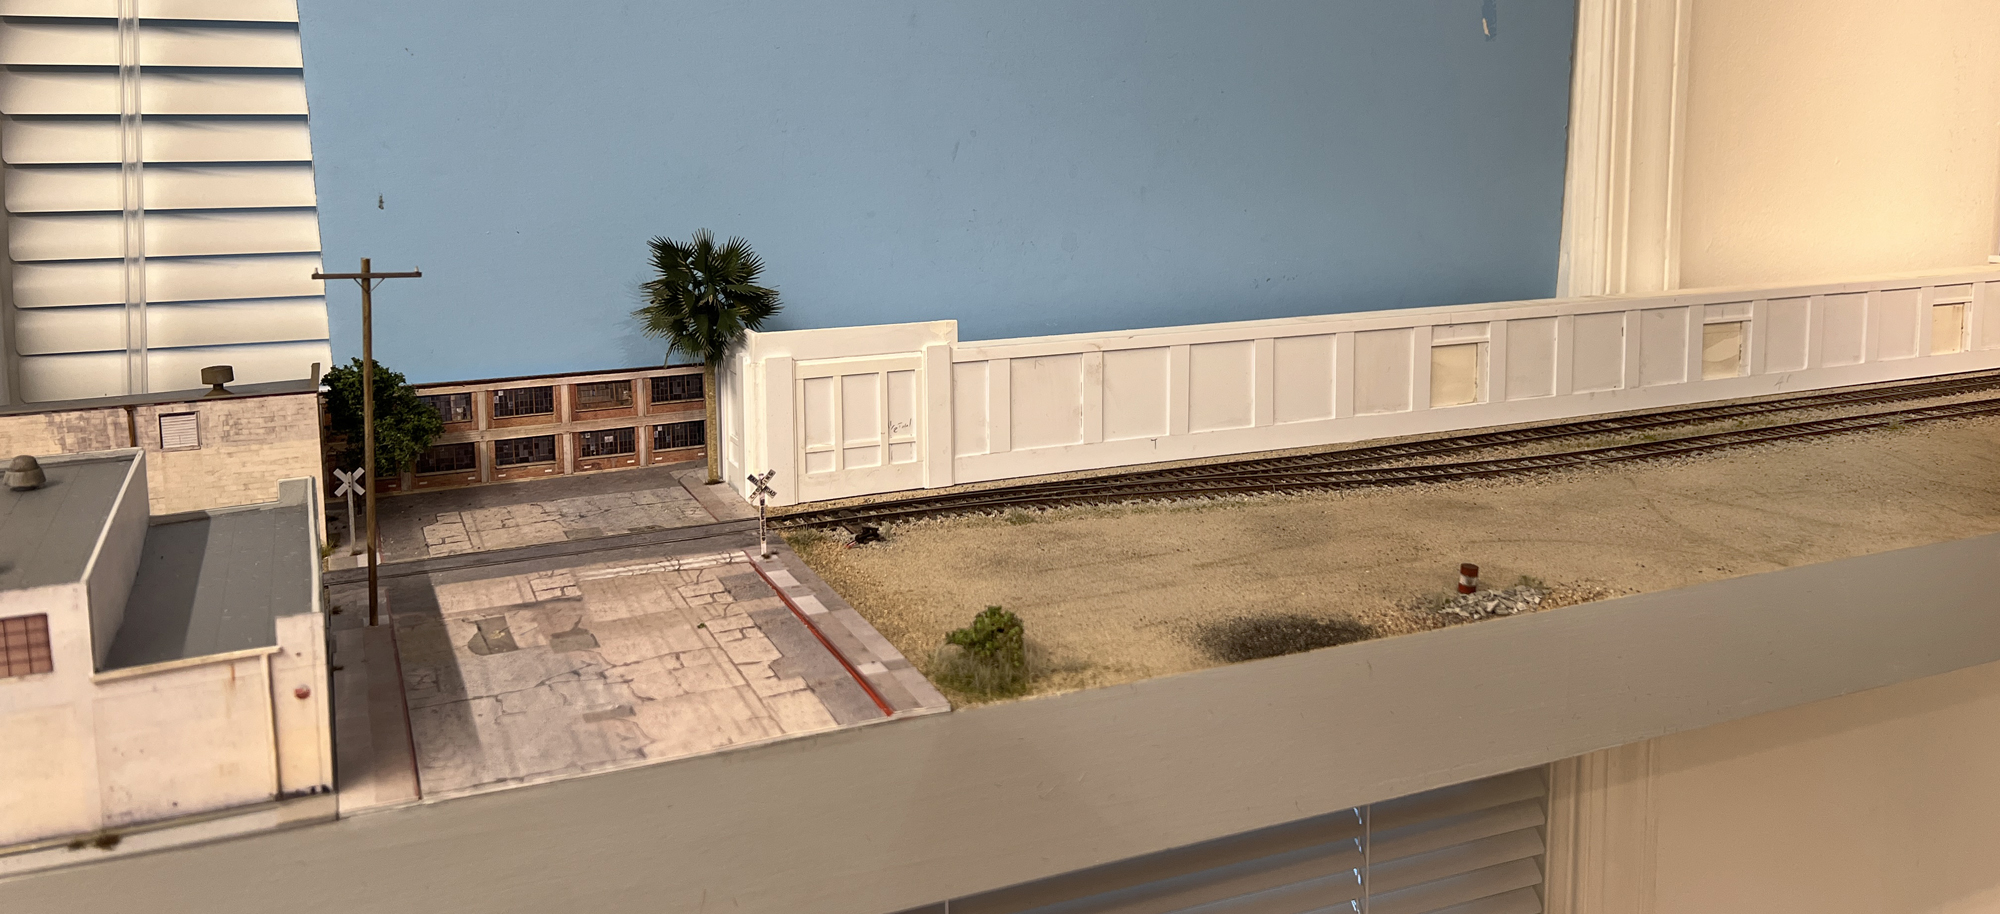
Here it is sitting loosely in place on the layout. Note how the art deco elements on the far left add so much to the look.
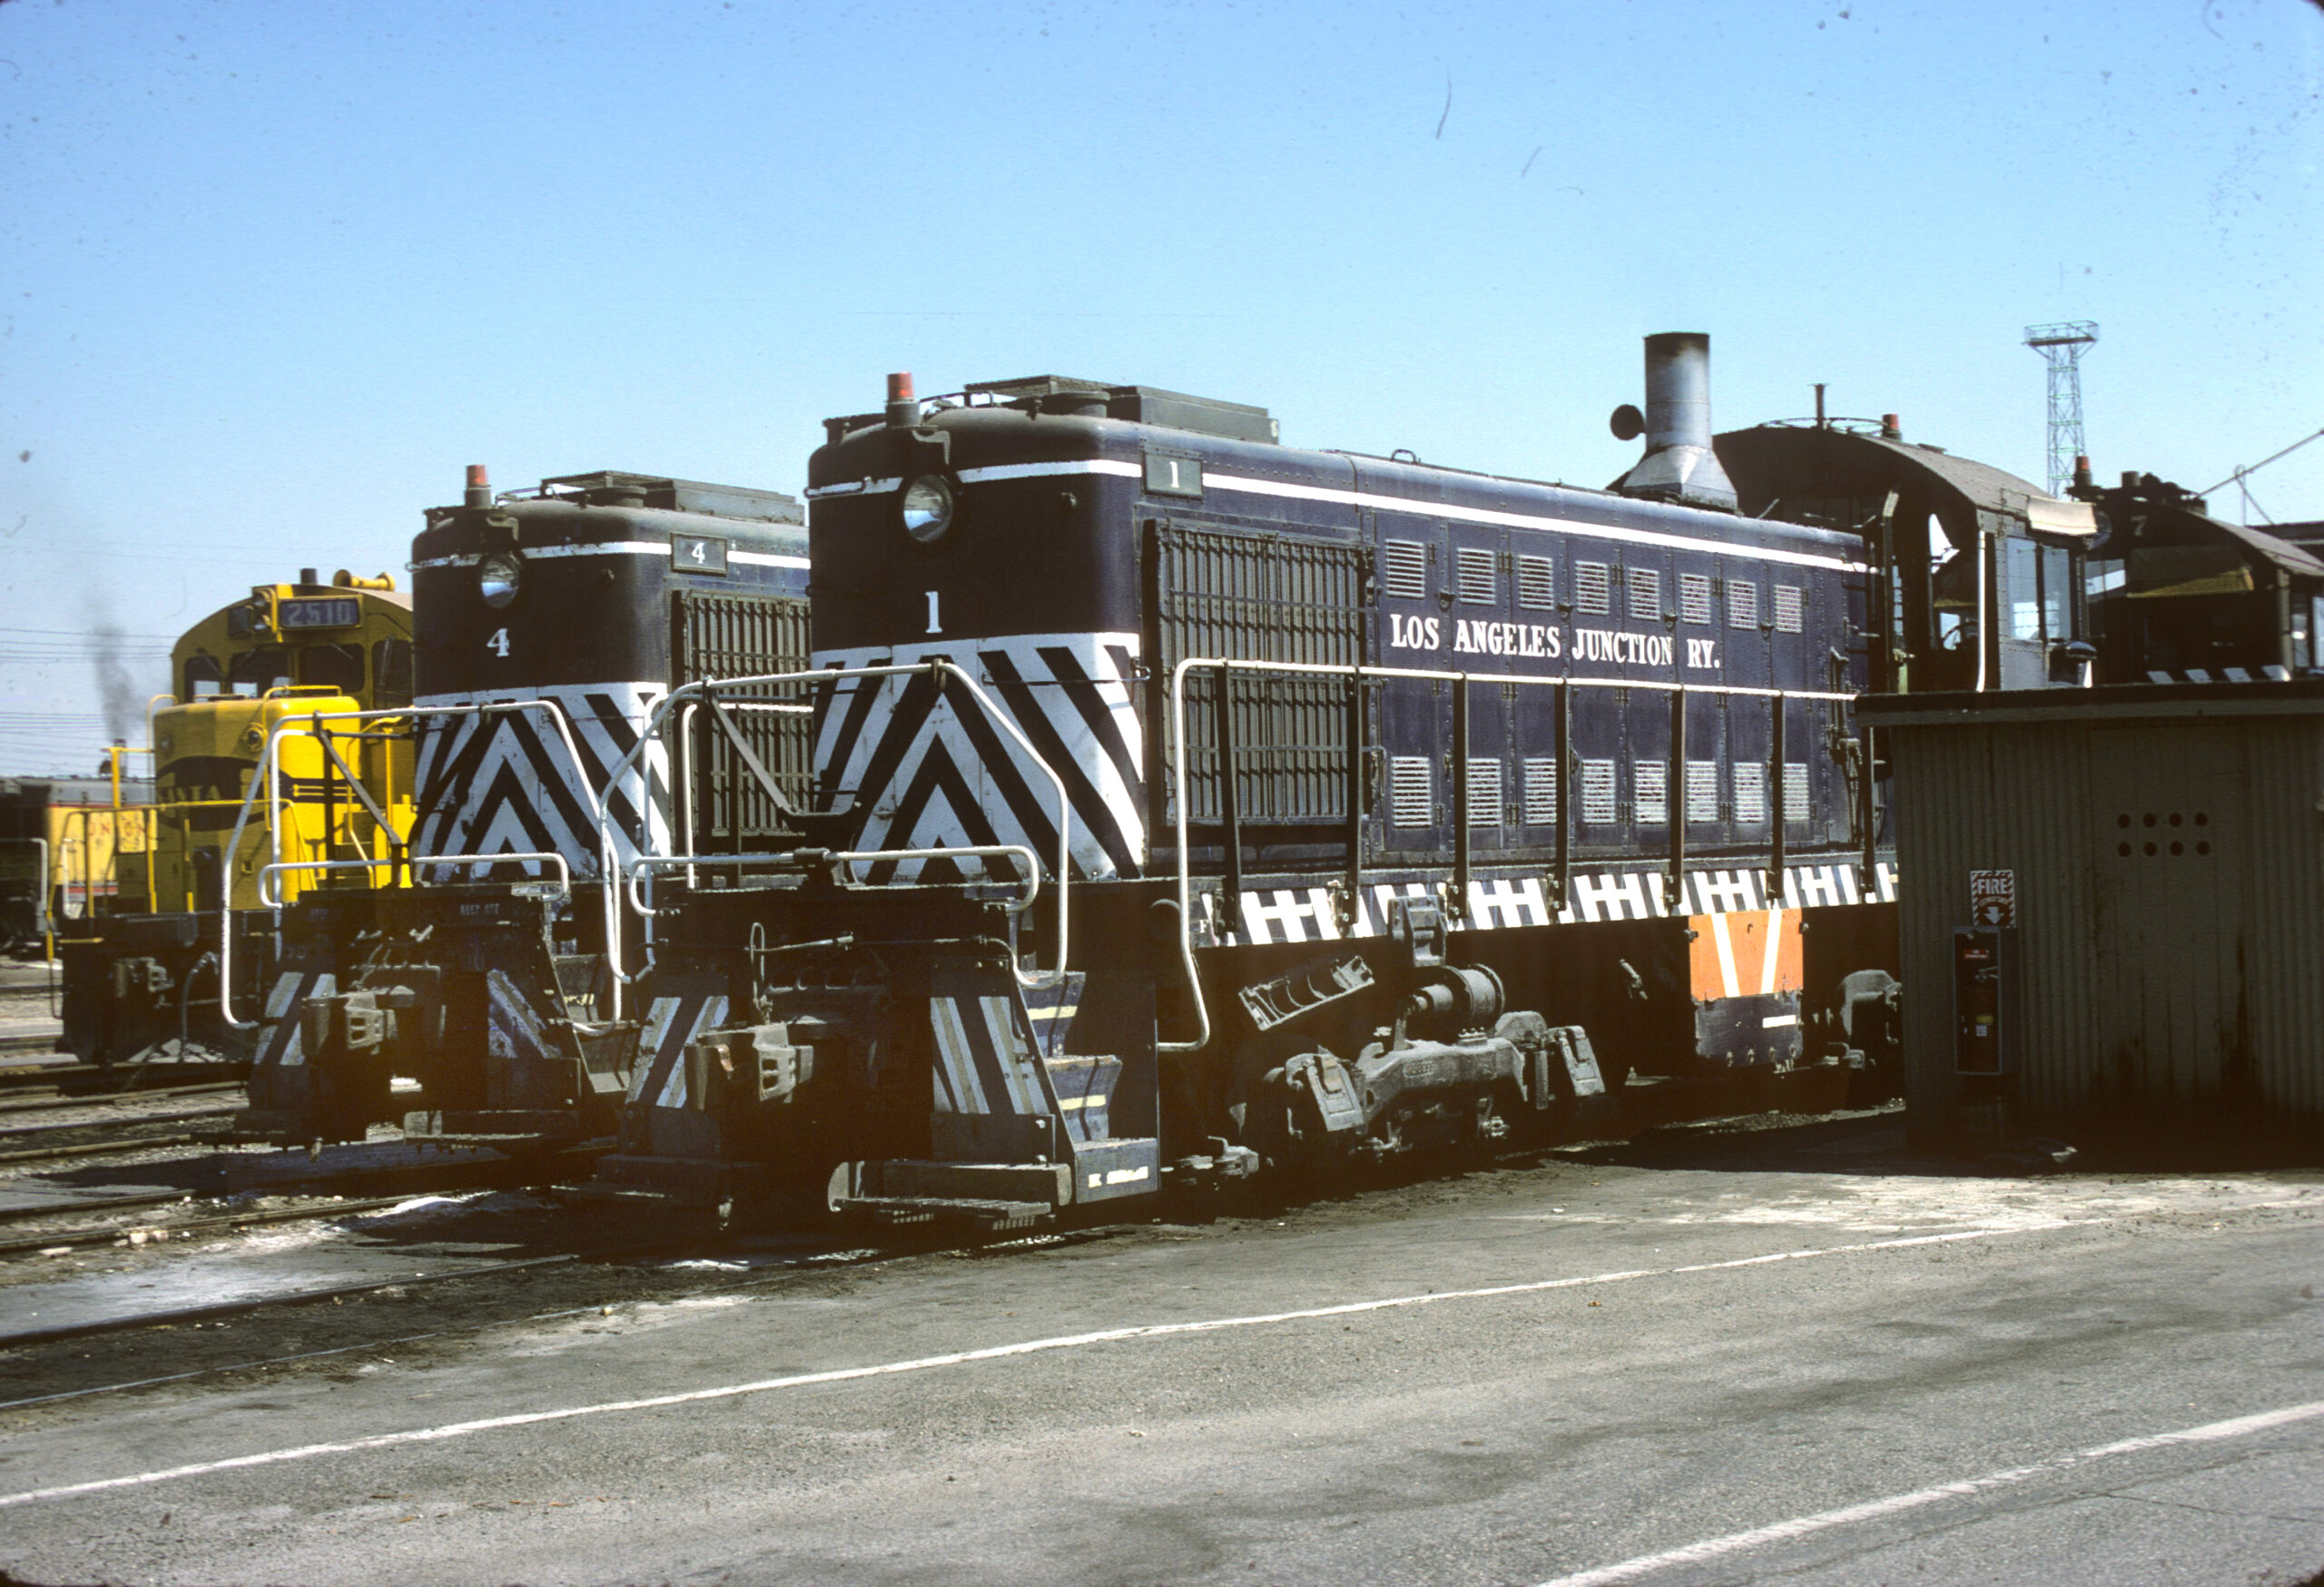
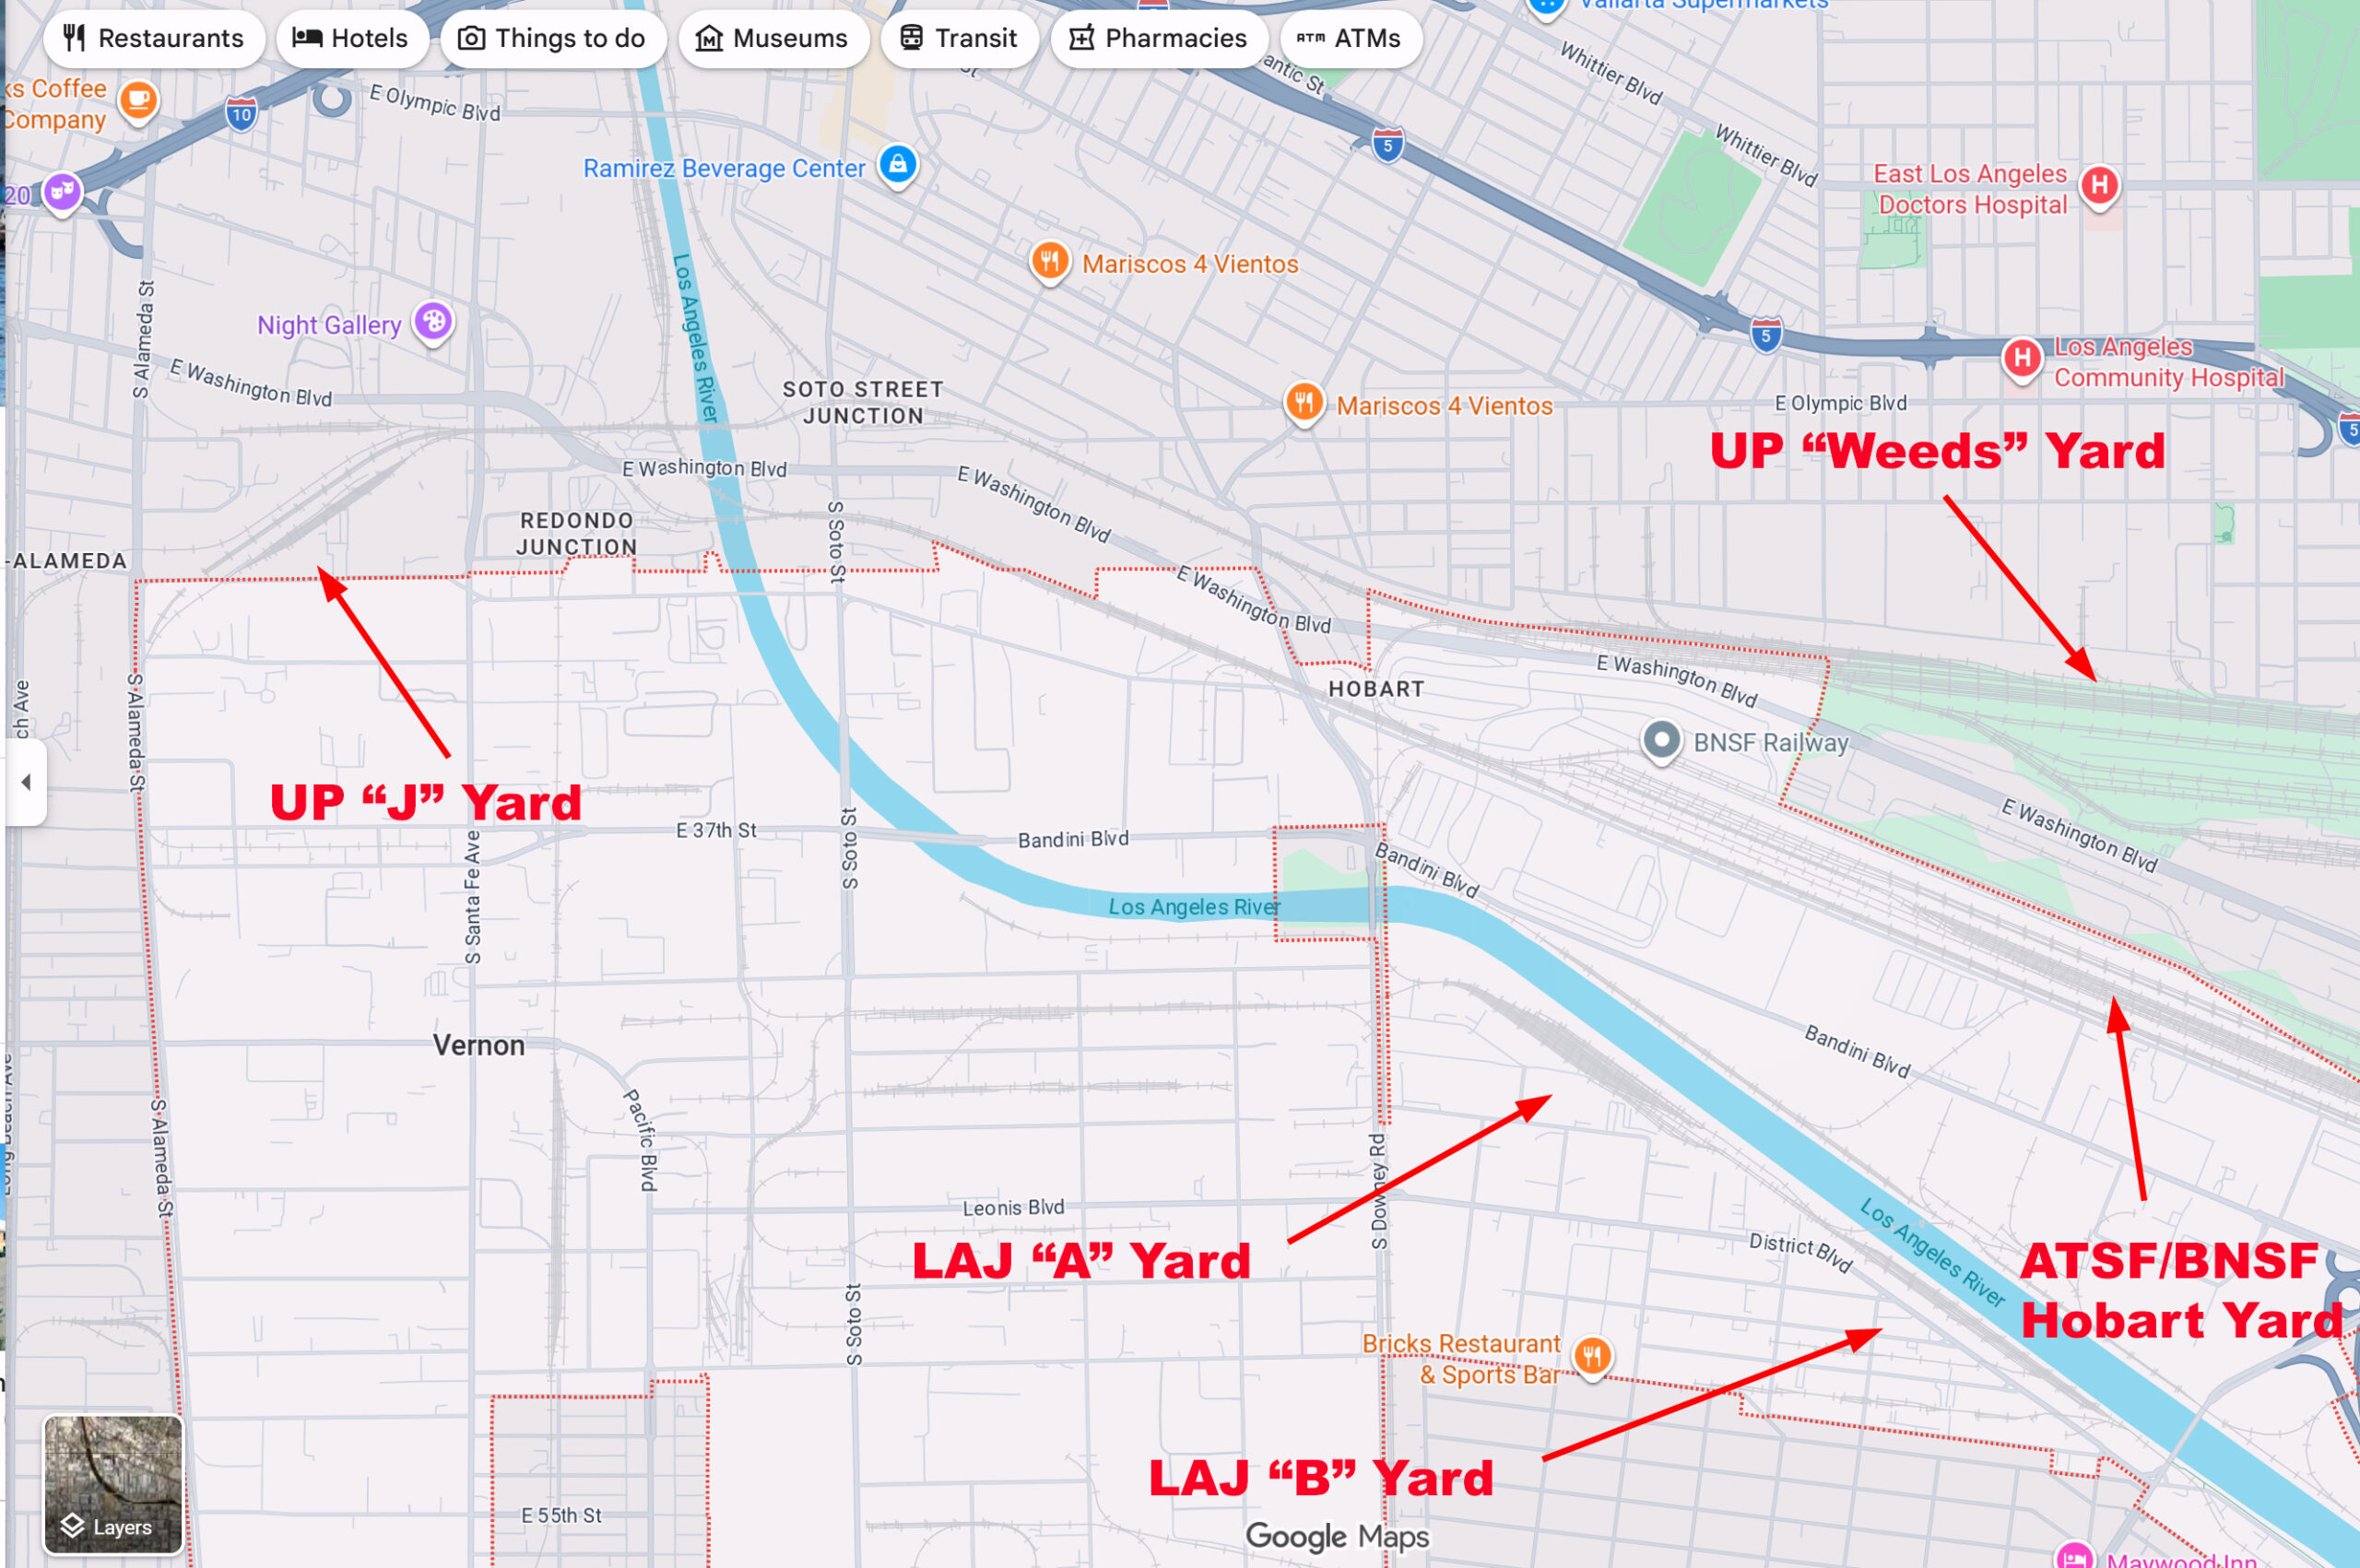
Perfect subjects. Perfect lighting. Captured with the best film of all time, Kodachrome. A trio of Los Angeles Junction Alcos sit in front of the engine house at “A” Yard. In the distance we can see power from the Santa Fe and UP. Both roads made frequent interchange runs to the LAJ, the UP out of “J” Yard, the Santa Fe out of Hobart. I recently purchased this slide and had it scanned by my local MotoFoto. Date: 1974. Photographer unknown.
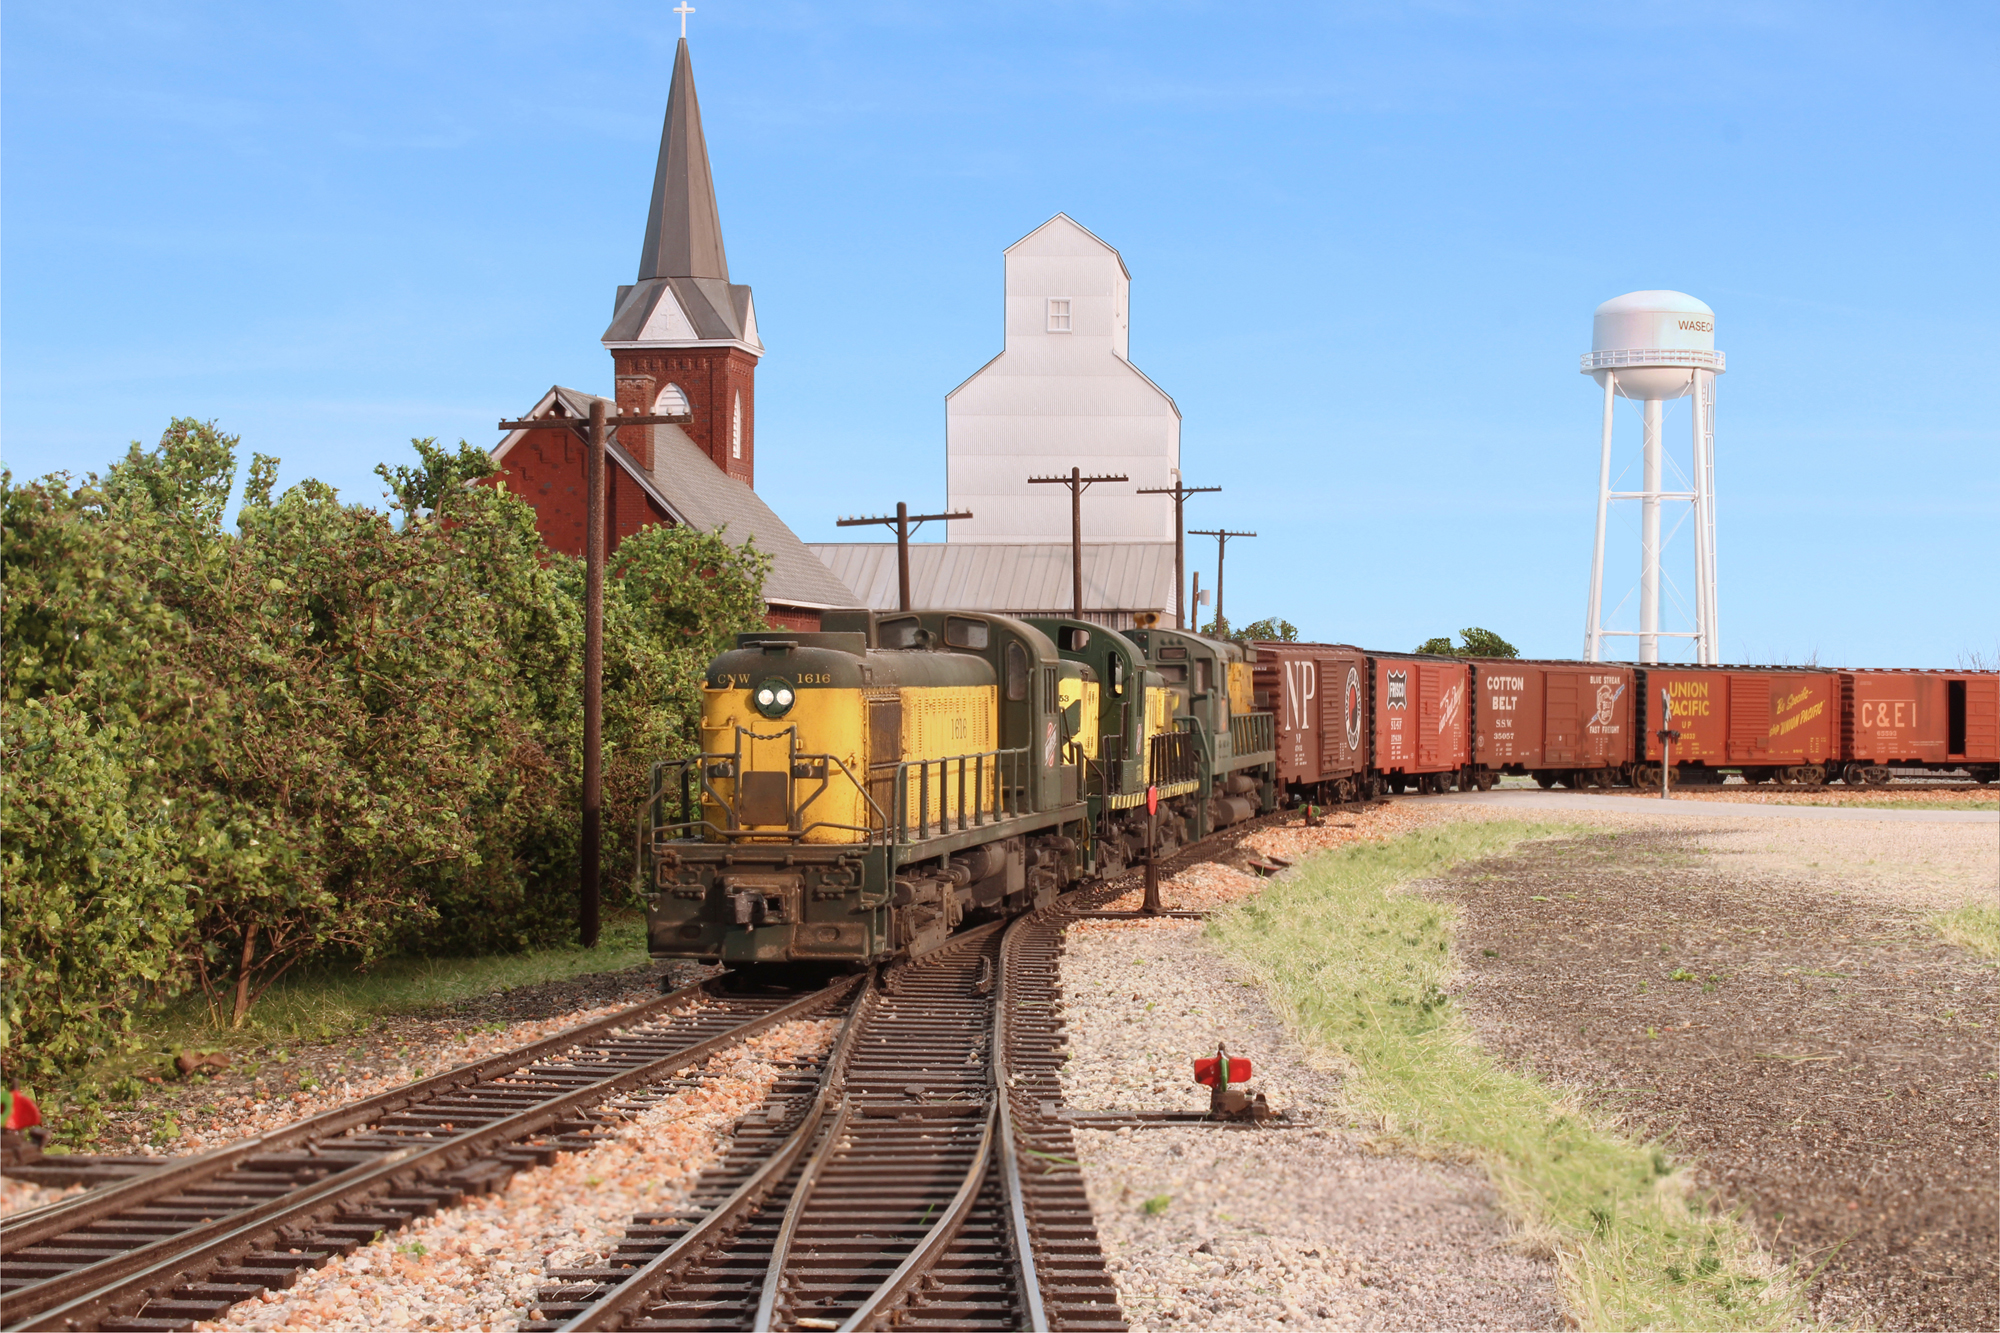
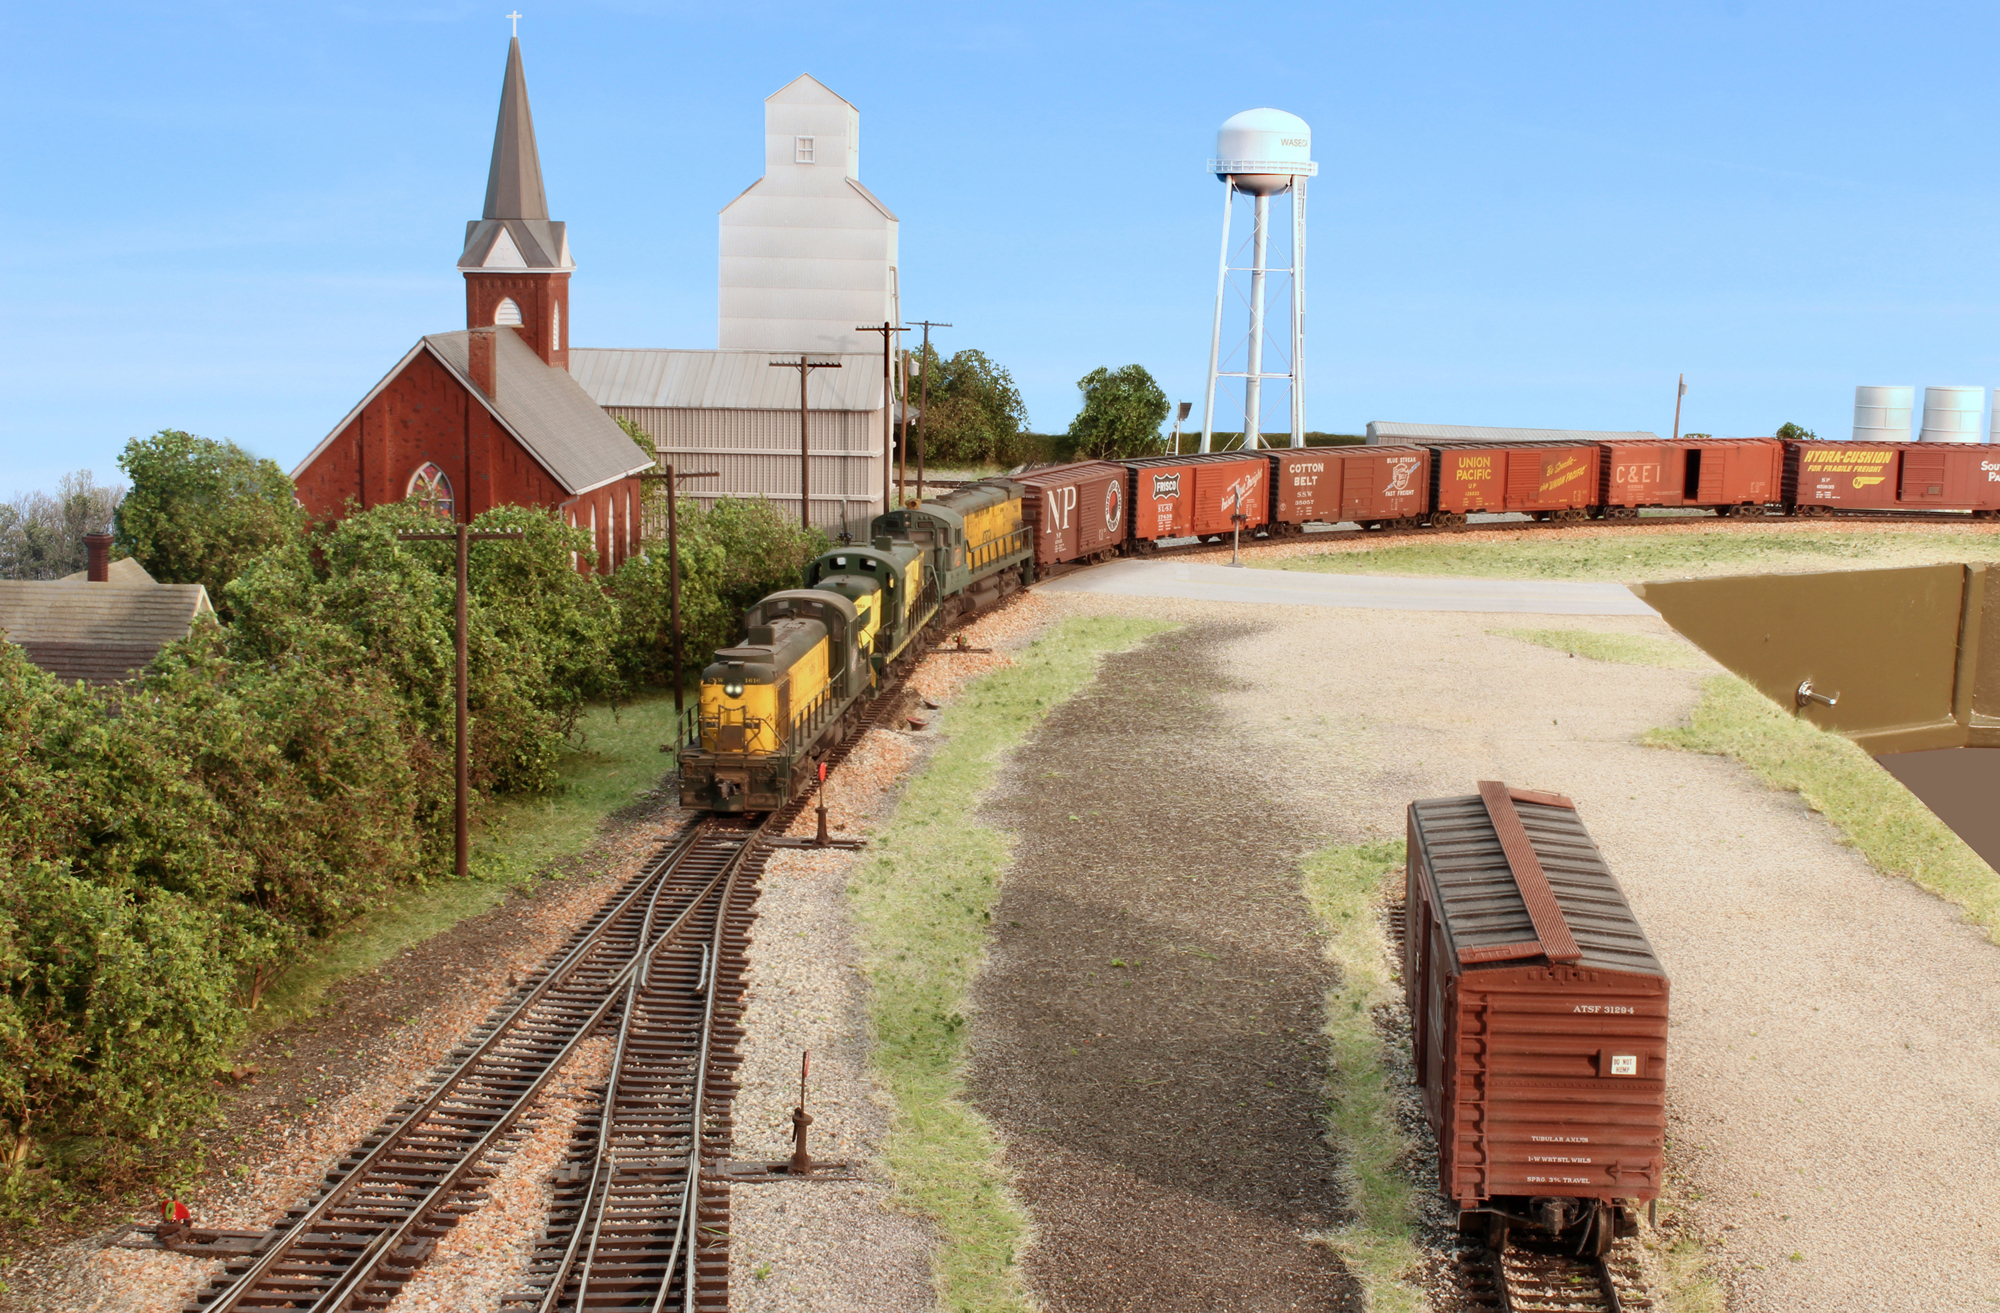
A trio of Alco’s rounds the big bend and heads westward into the yard at Waseca on the Alco Line project I’m custom building in my shop.
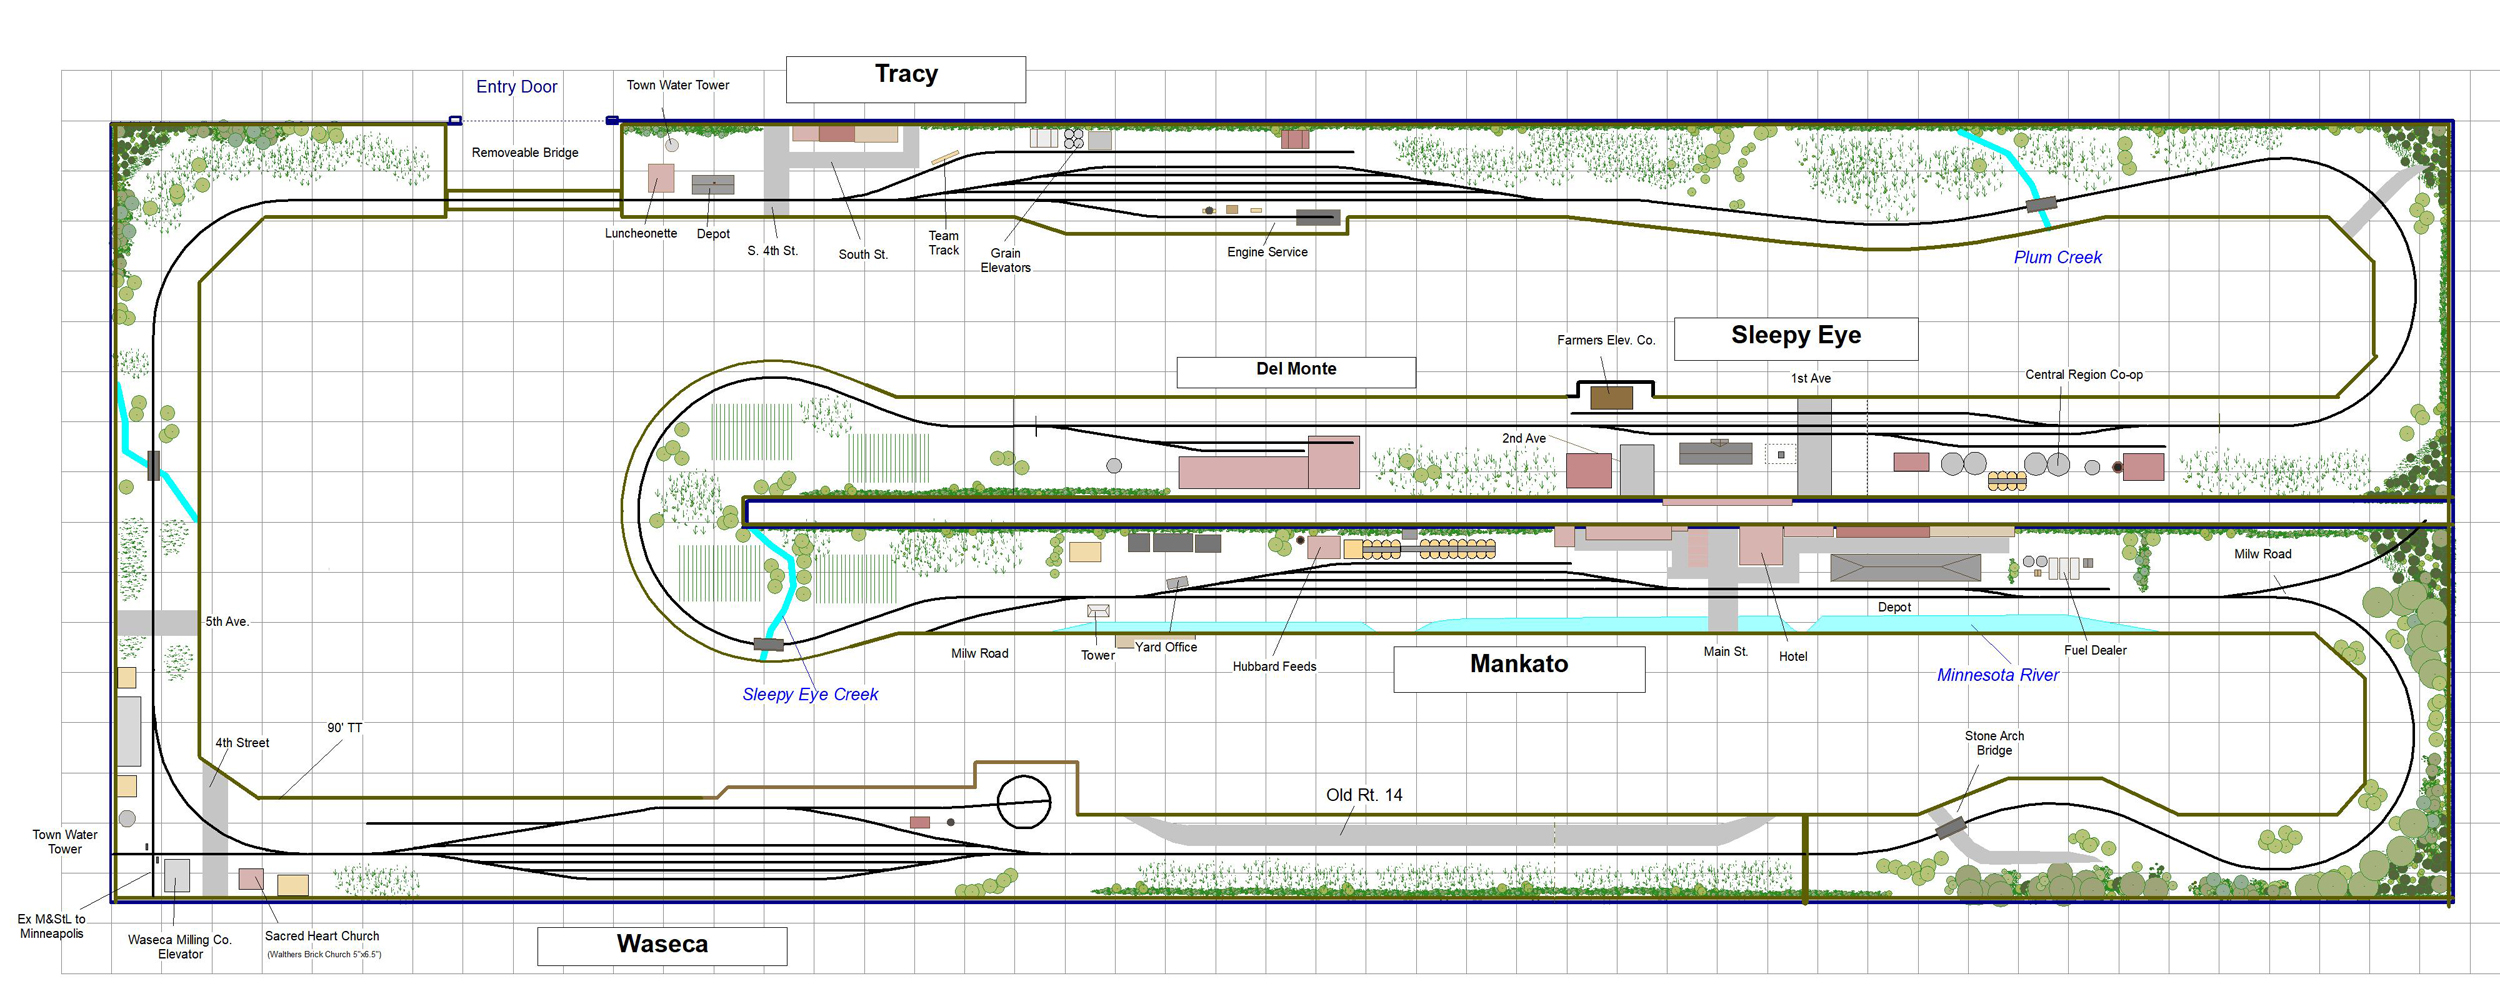
For the last eighteen months I’ve been building a custom layout based on CNW’s Alco Line in Southern Minnesota. Because of the project size, we’ve handled it in phases. The first two phases have been installed and appeared as the cover story in the November issue of RMC.
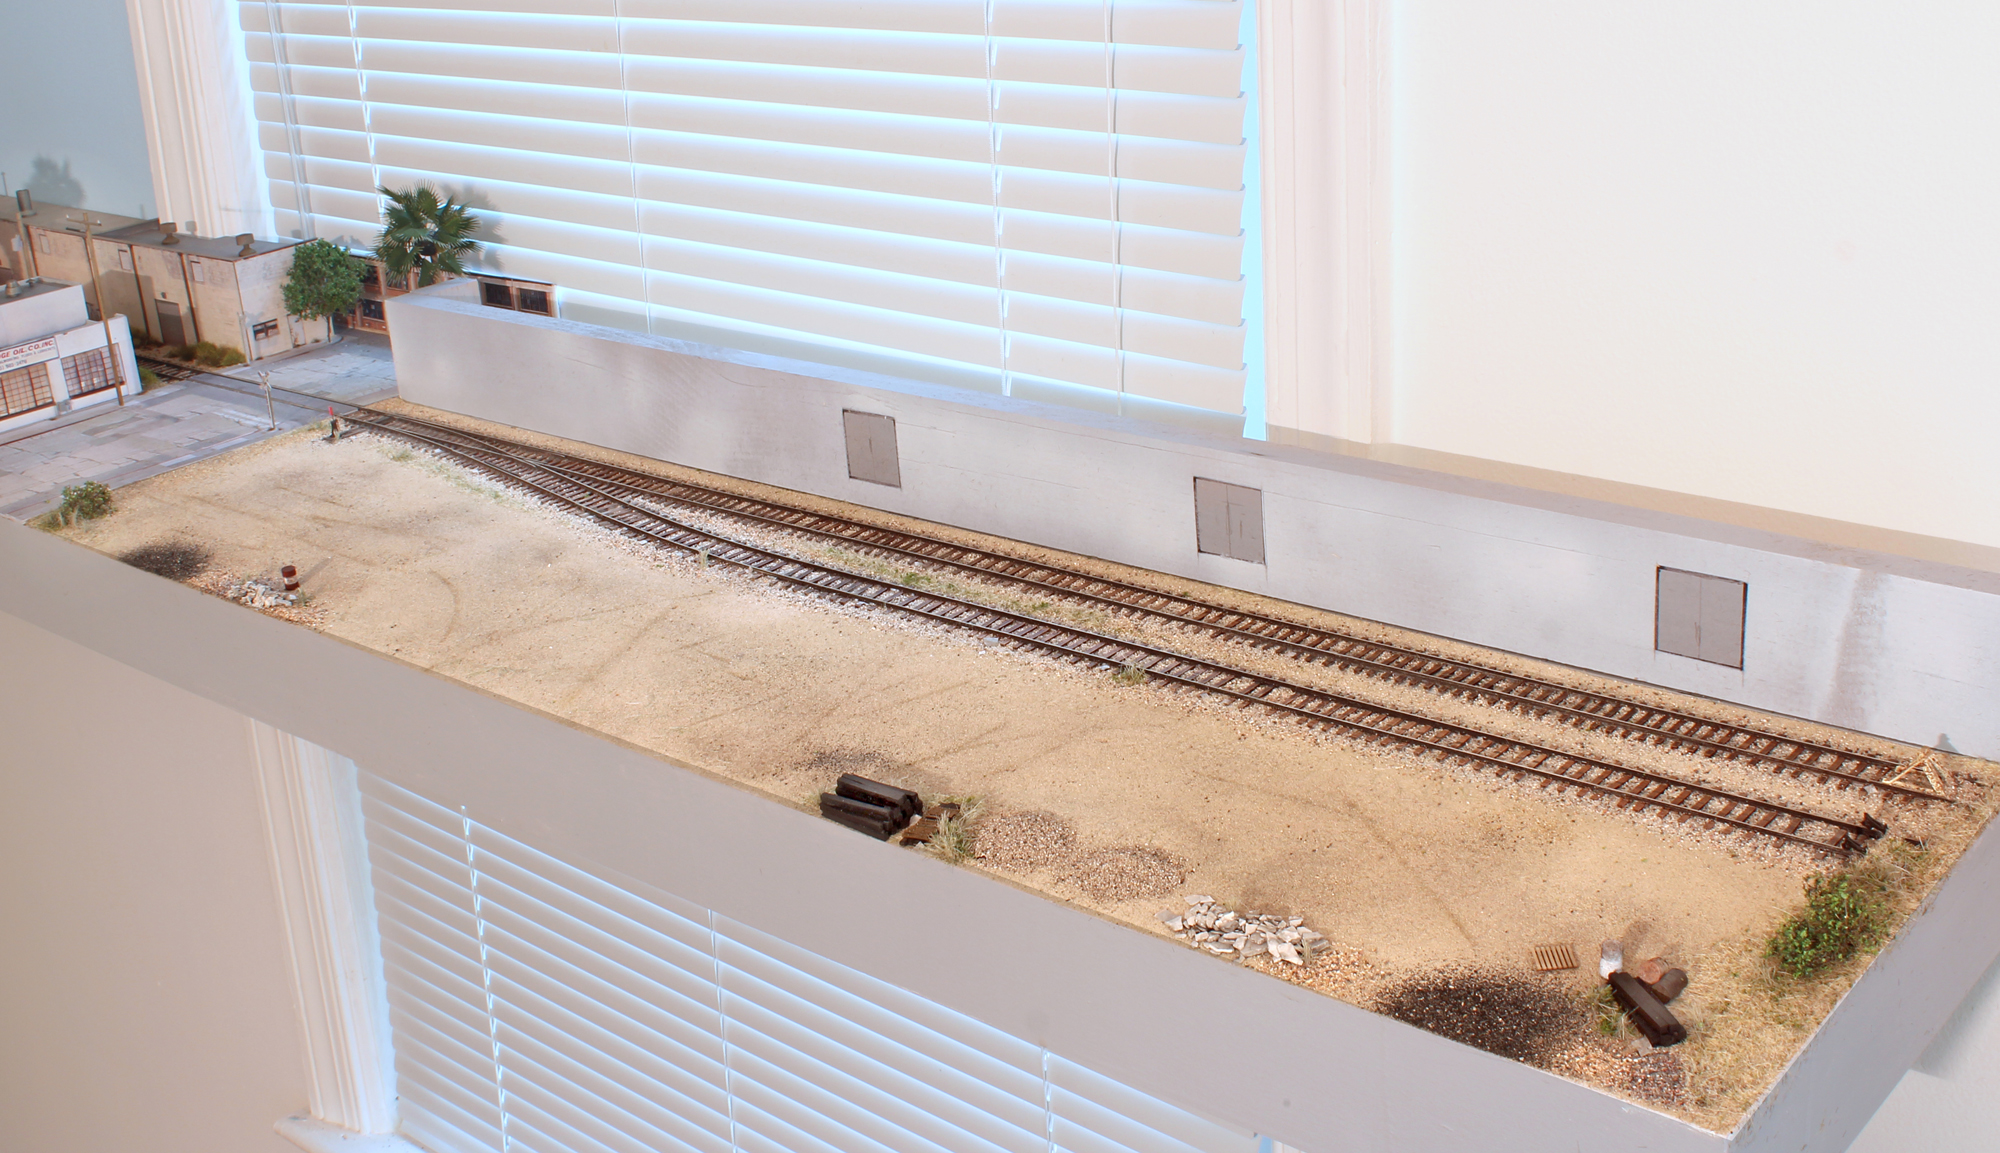
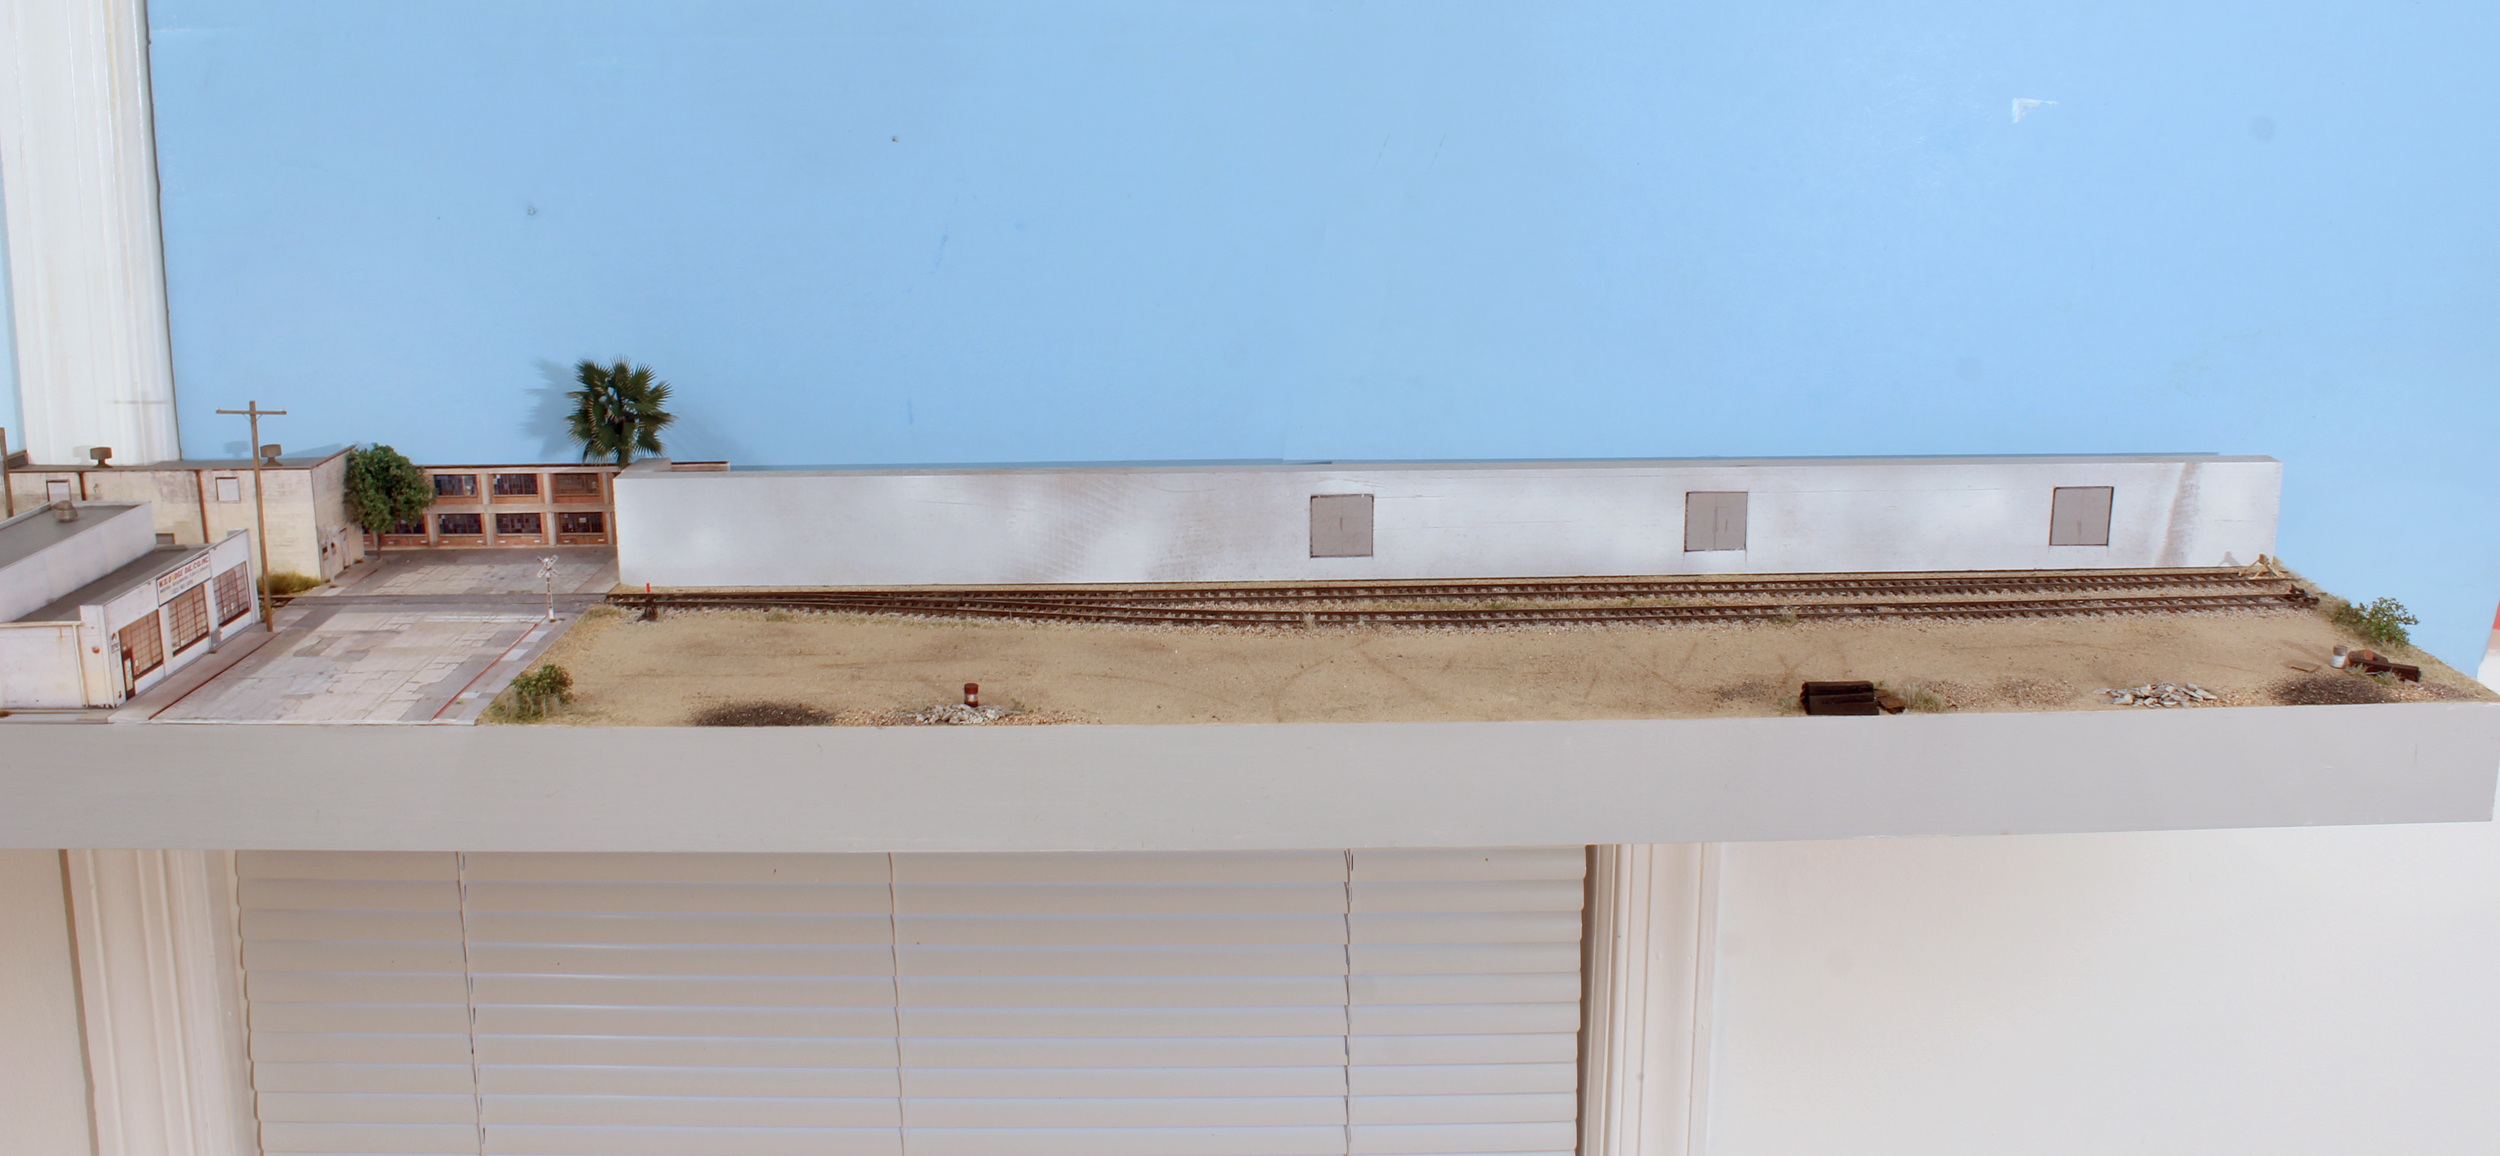
The final phase, centered on the region around Waseca, is now complete and will be installed next week. Shown below are images of that last phase as well as the trackplan.
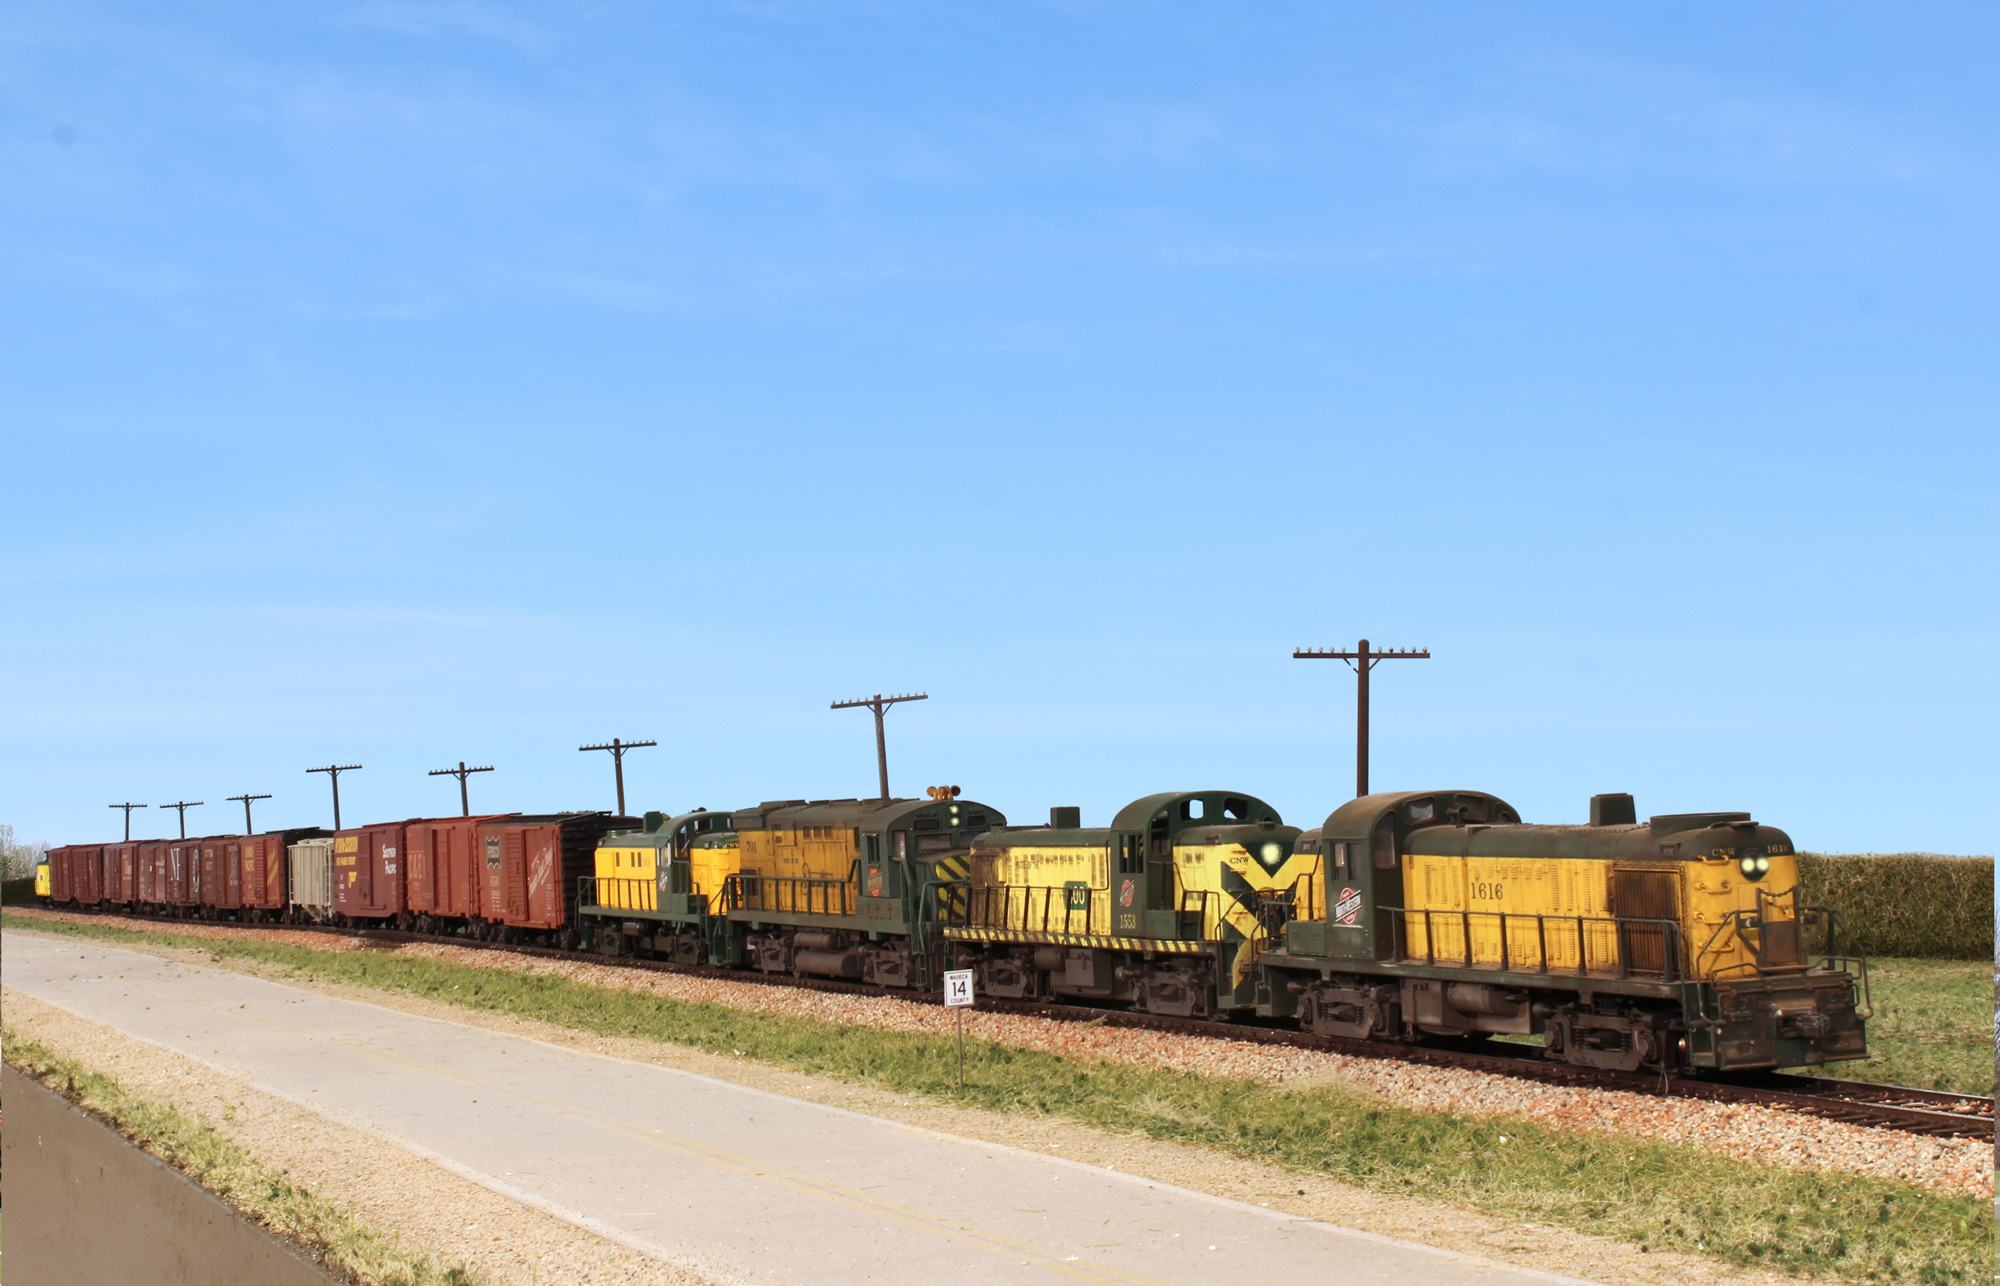
Running through the prairies west of Waseca. Route 14 is in the foreground.
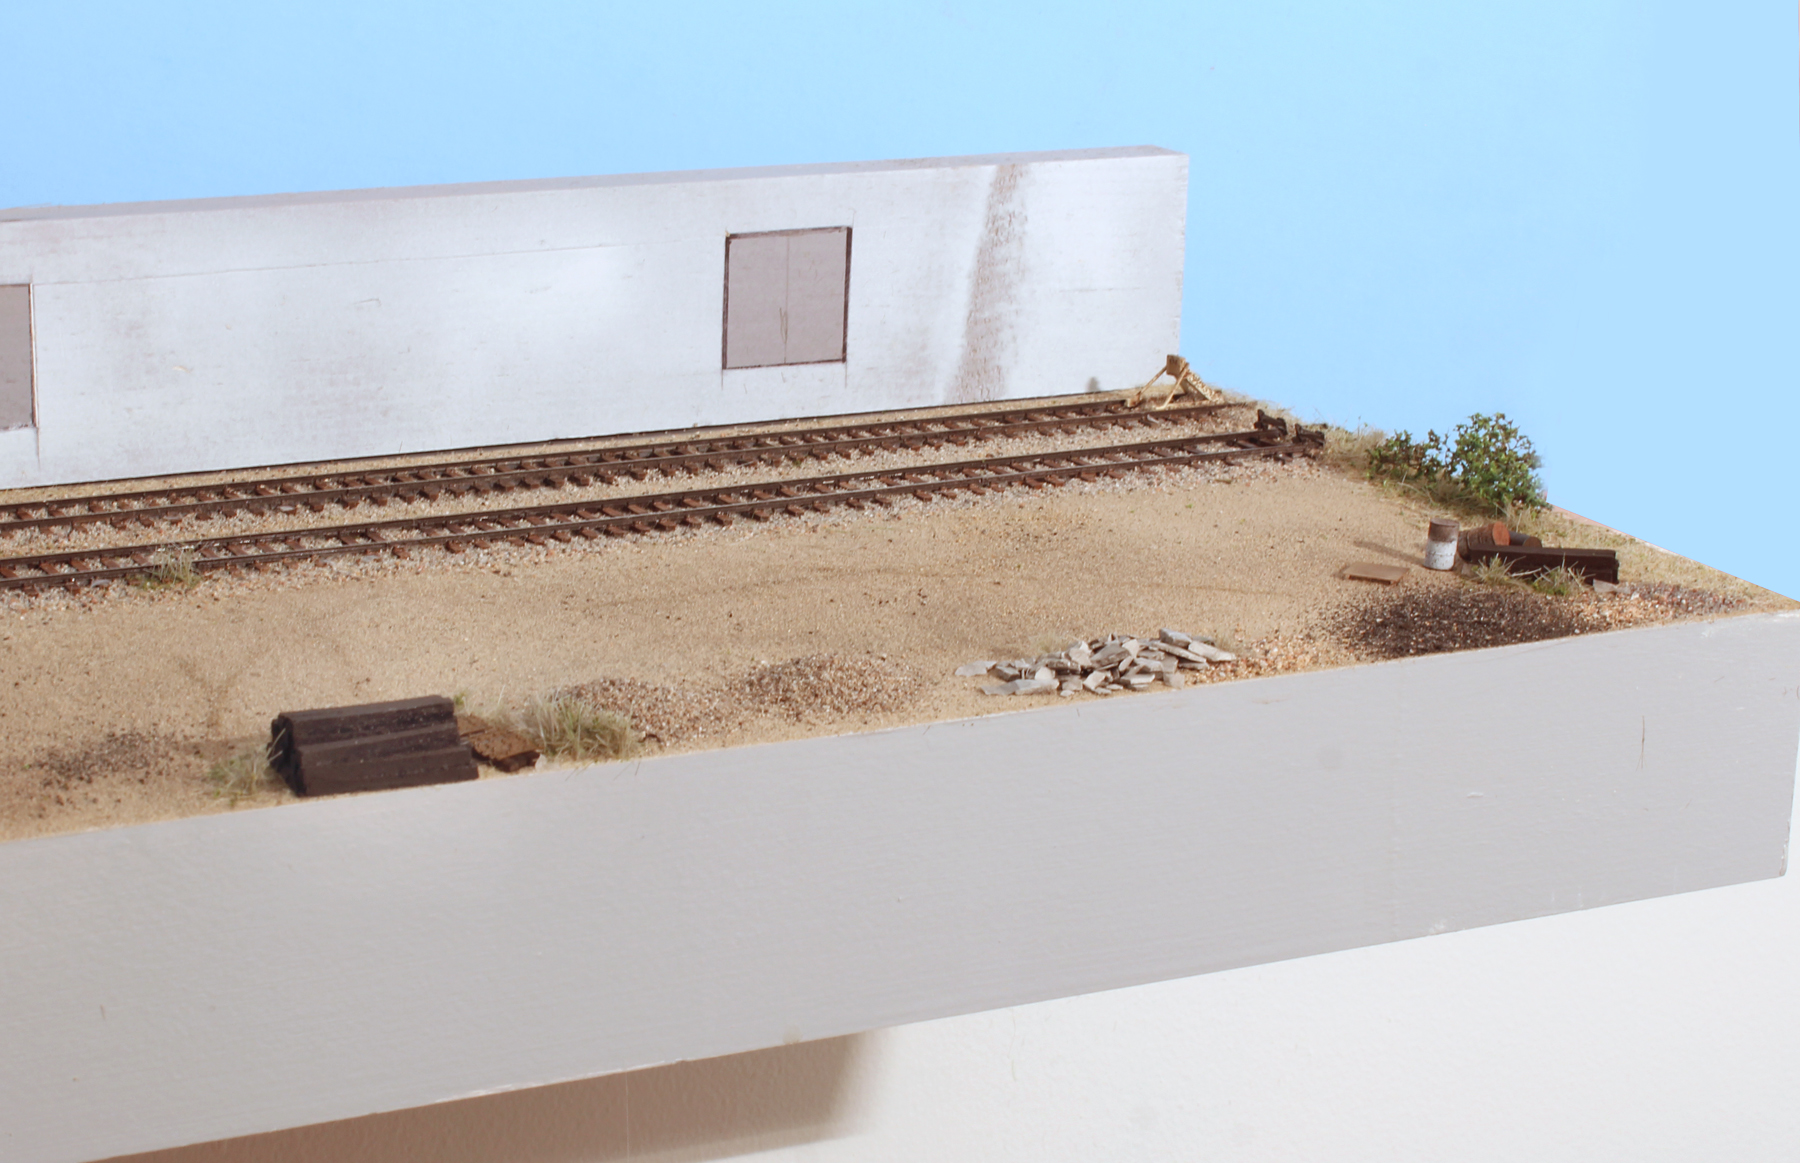
Vacant lots are a signature element of many industrial scenes. Including them on your layout can heighten realism. They have a certain, “looks like they should be there” aspect to them. The aren’t as easy to model as you might think. About five years ago I started putting a lot more thought into how I approach them. The challenge is you have a lot of colors that are close in hue but just a hair different and the color transitions feather gradually. You have different textures. The base layer is very fine, finer than many ballast products. You have tire marks which aren’t that easy to represent. Looking back on my efforts on my early Miami layouts the color and textures were too uniform.
For the base layer I mix up a few similar shades of grout (sanded or unsanded is ok) and apply it with a sifter. I then sift on some N scale ballast and soil products here and there. (I use Arizona Rock and Mineral for these. To be specific, CSX, Pennsy, NP, and Yard Mix). The fine sifter is the key tool needed to make this all work. Having a super soft “fan” brush helps too.
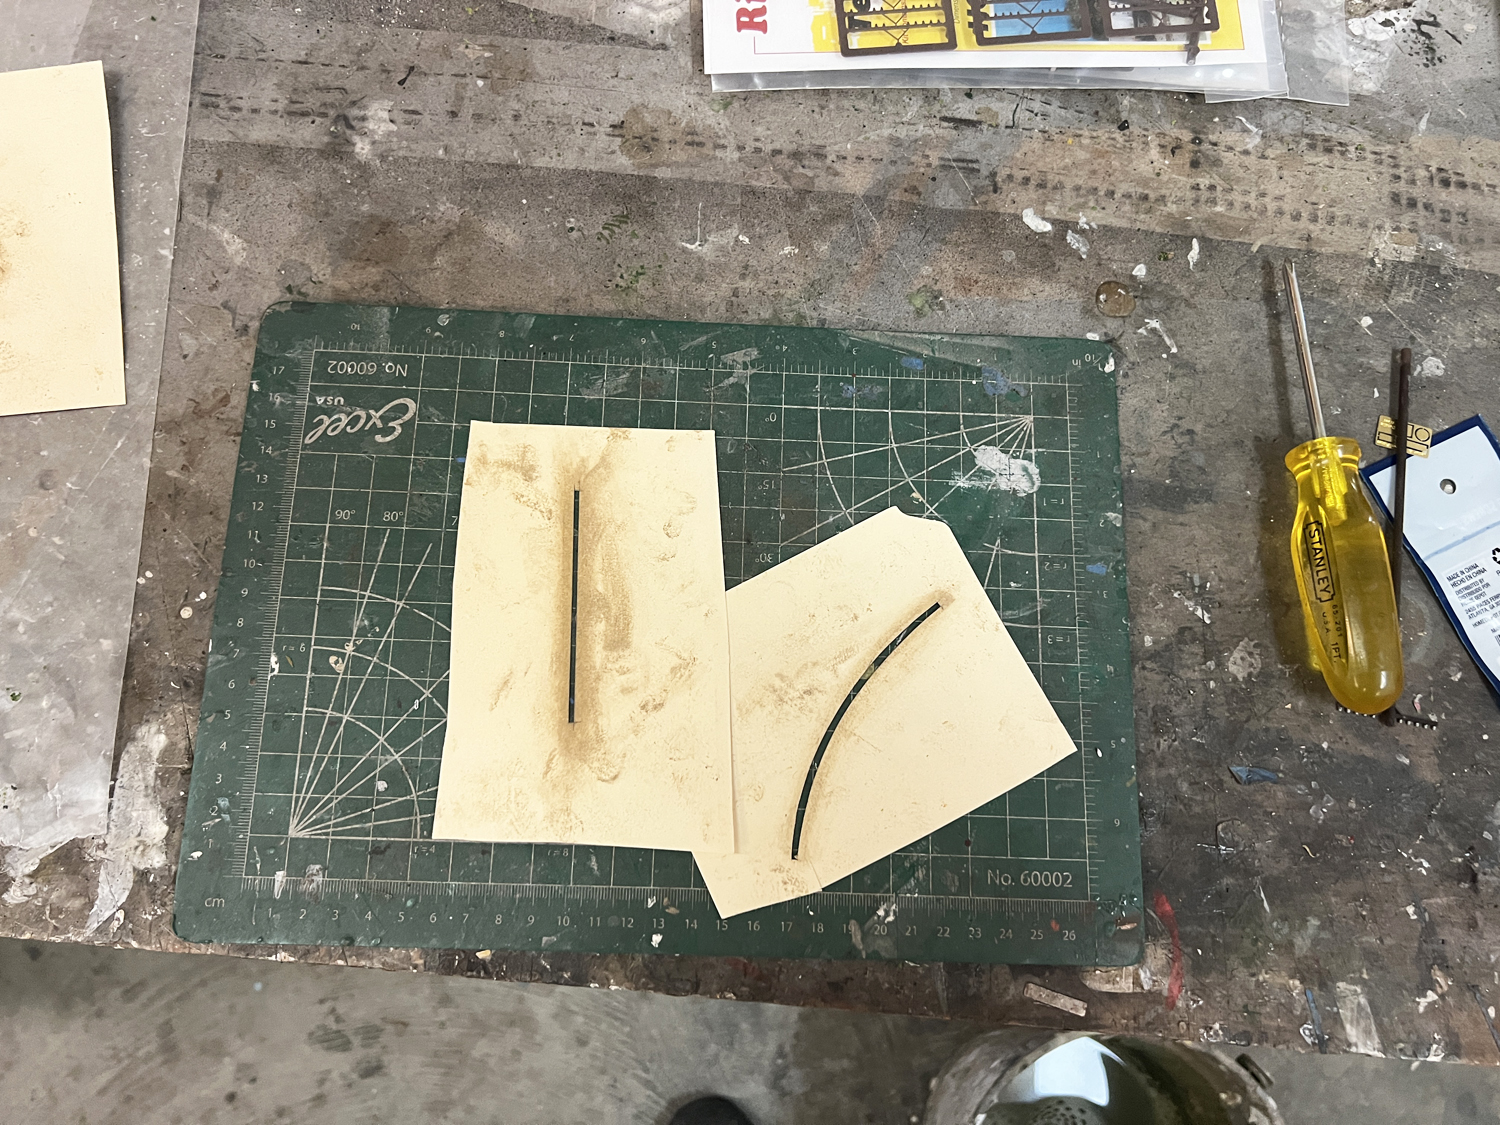
For the tire marks I make masks by cutting thin slots in a manila folder. I then grind a slightly darker grout color over the mask. If you don’t use a mask, the tread marks will be too wide. After my first application, the marks were too dark. I toned them down by applying a light second sprinkling of my base soil/gravel layer.
Details
Details add a lot ….but…they need to be the right details. The best way to get everything right is to study photos and just copy what you see in them. This prevents you from drifting into that caricaturish “model railroady” look.
These are two of the photos I worked off of. Note the very subtle color variations. Note how subtle the tire marks are.
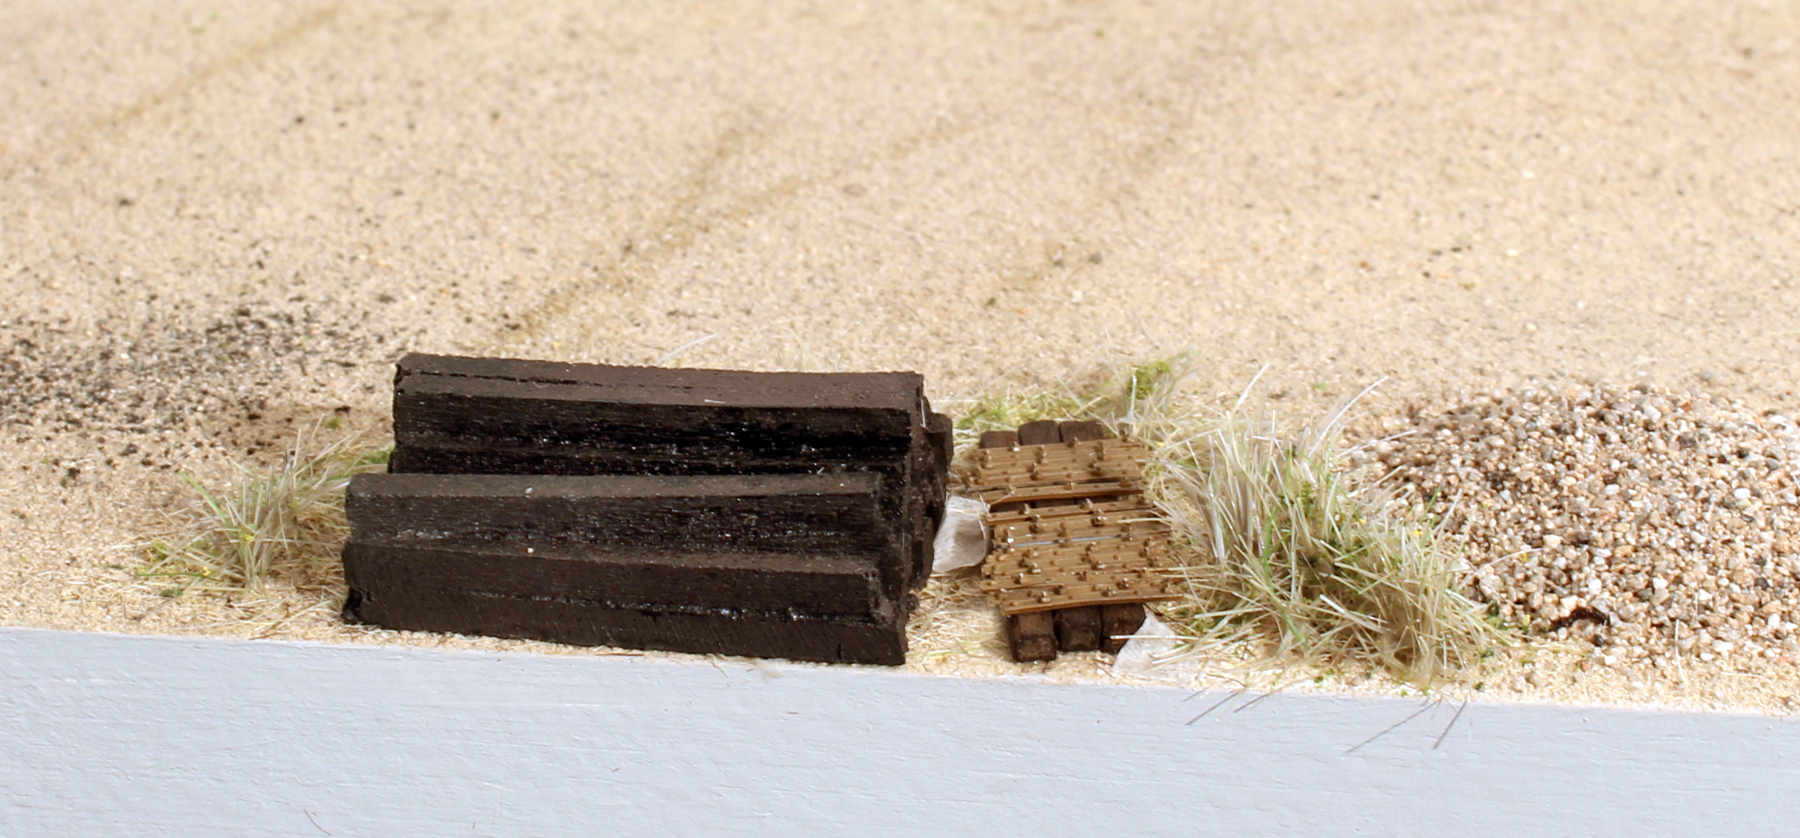
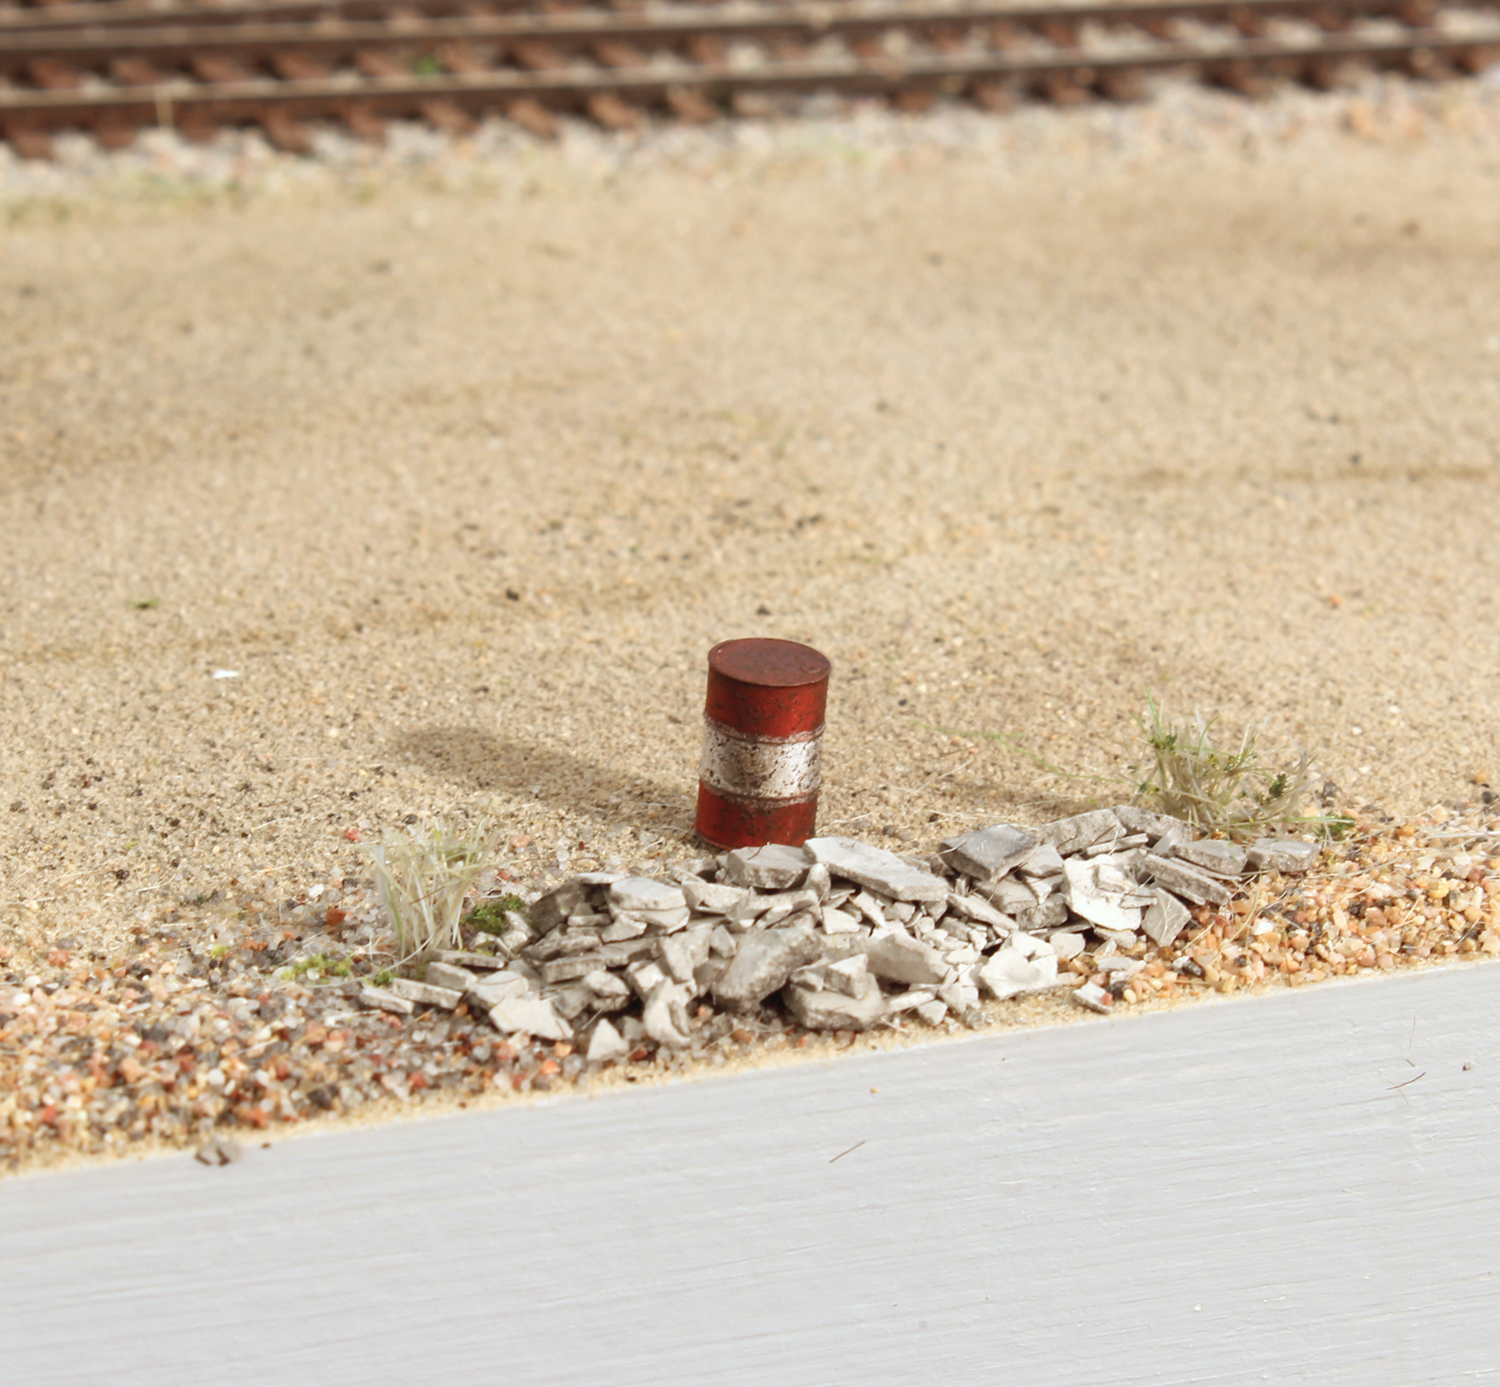
Details added were: gravel piles, piles of old pavement, barrels, fresh tie stacks, stacks of rail bars, some white specs of white paper waste, and pallets.
On an unrelated note, I’ve also finished the street scene to the left of the lot. Since the last post I added: crossbucks, a utility pole, and a palm.
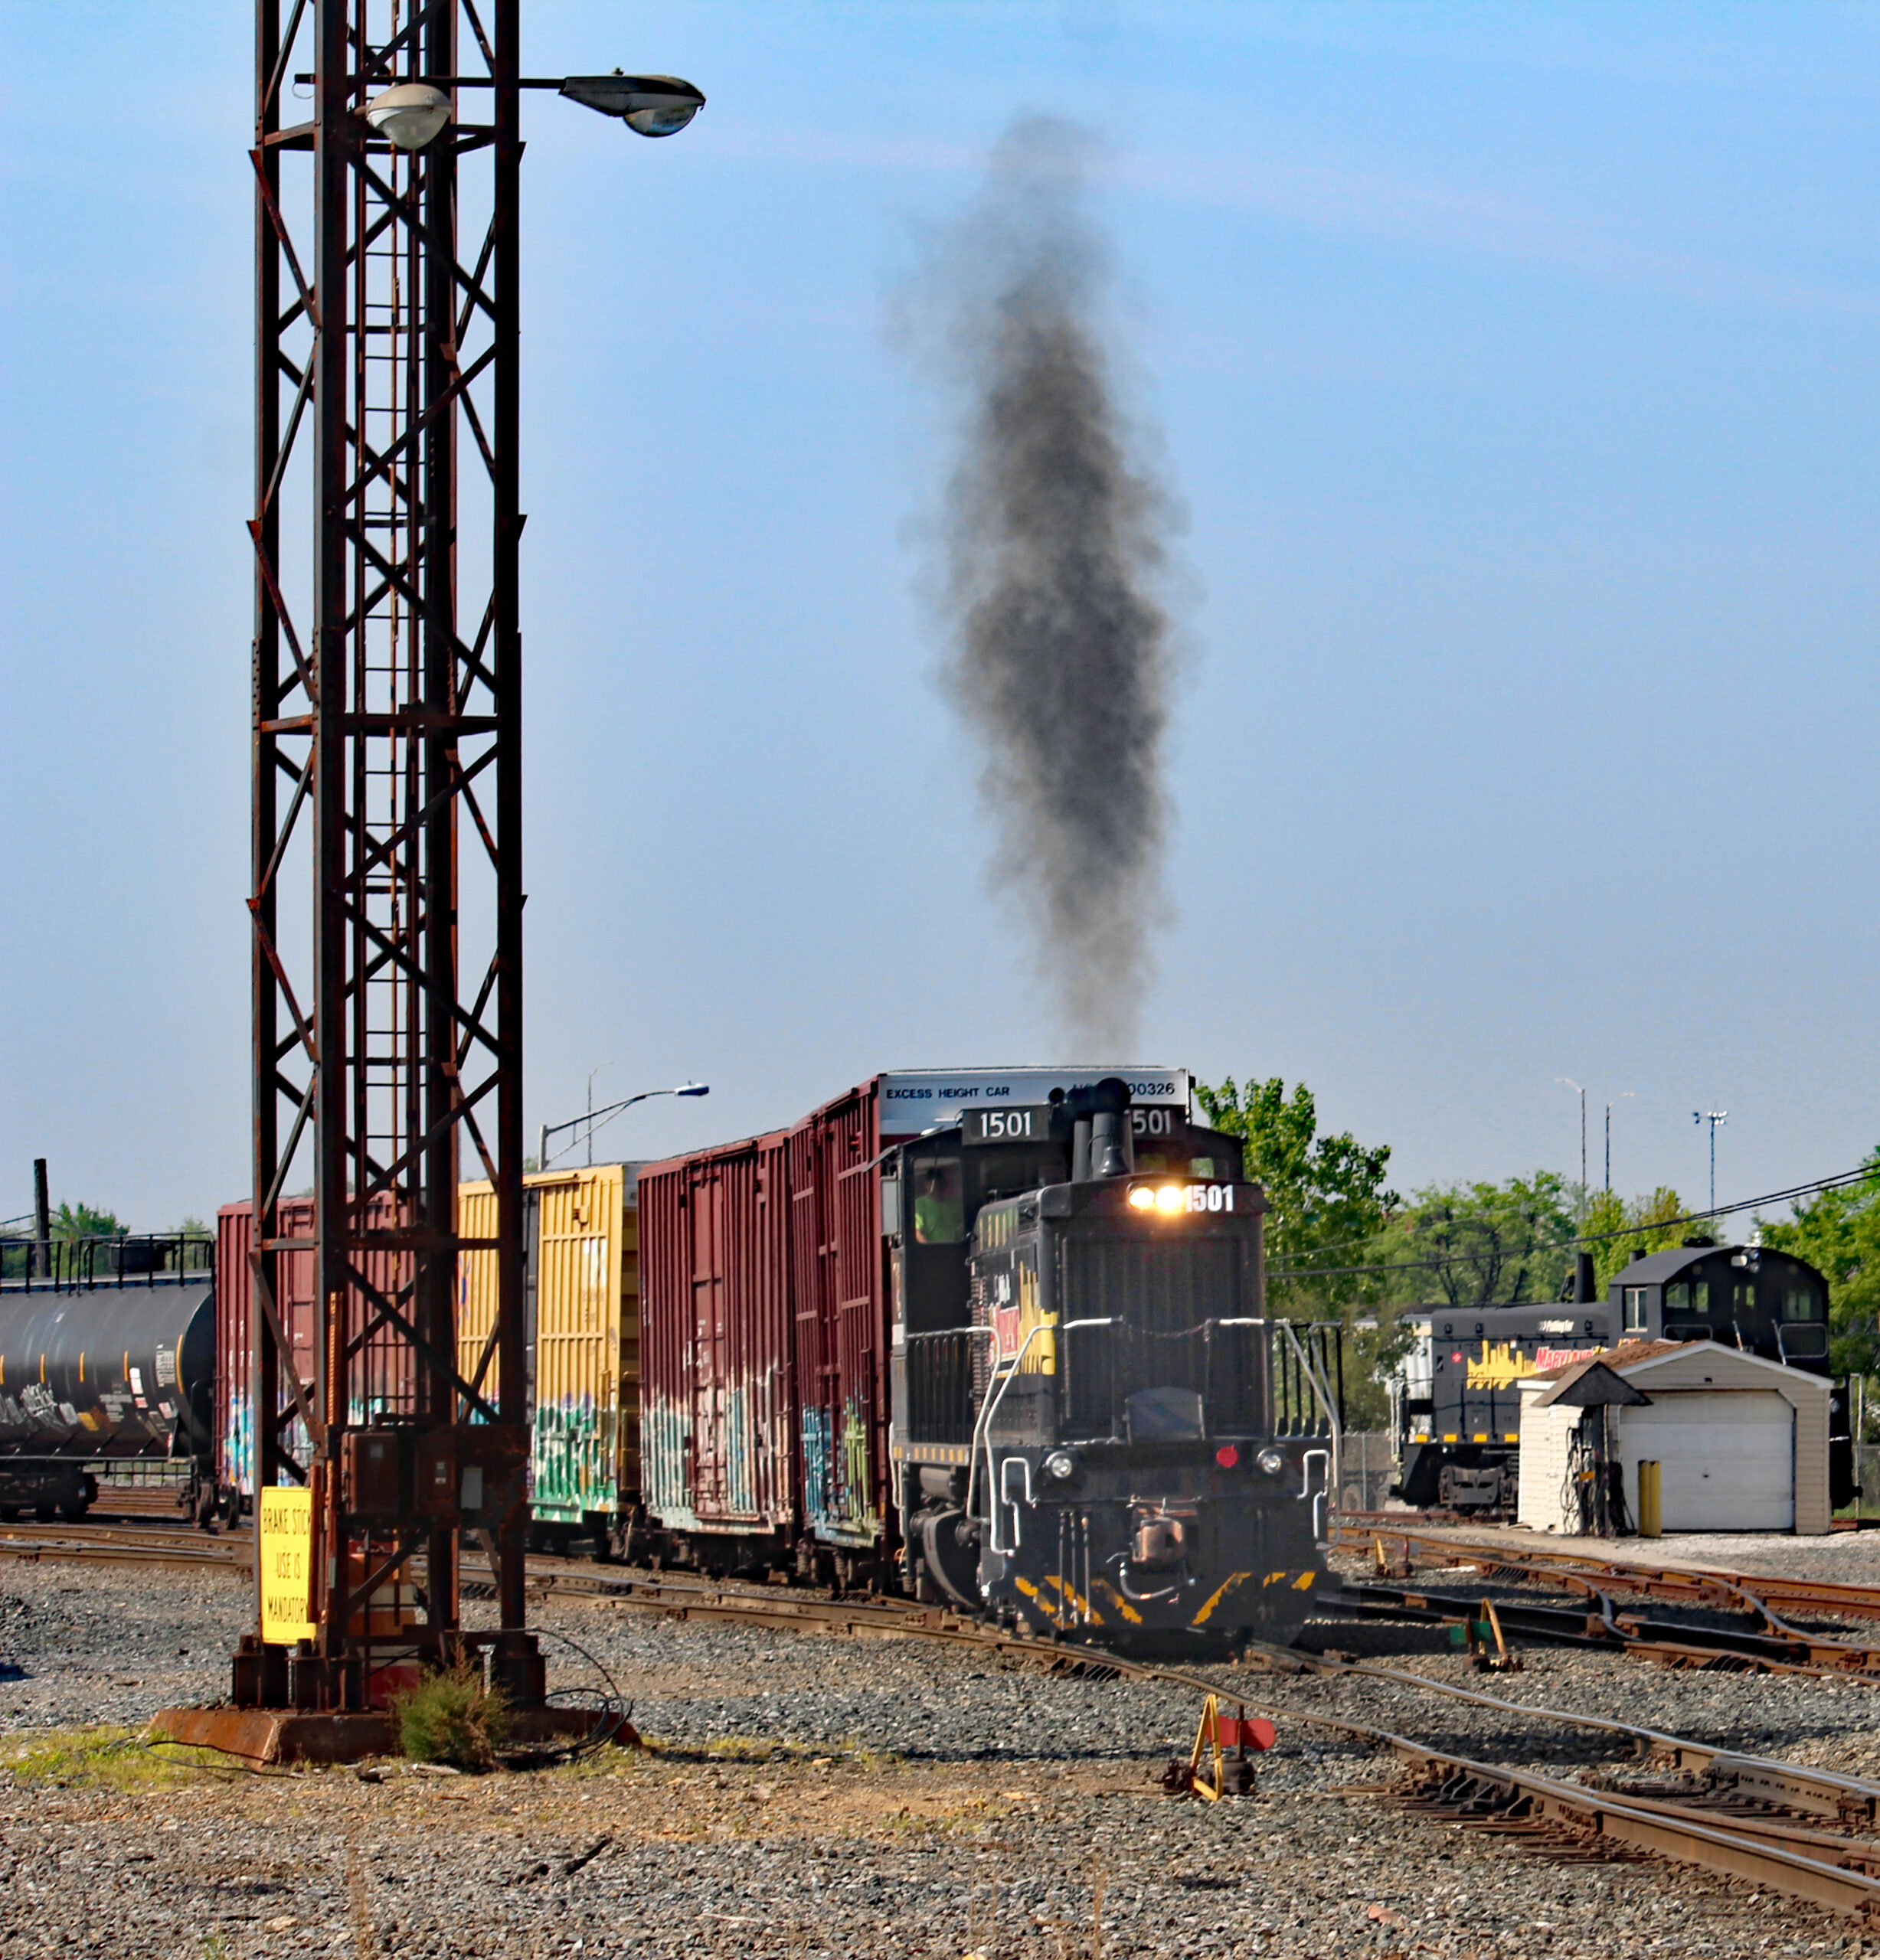
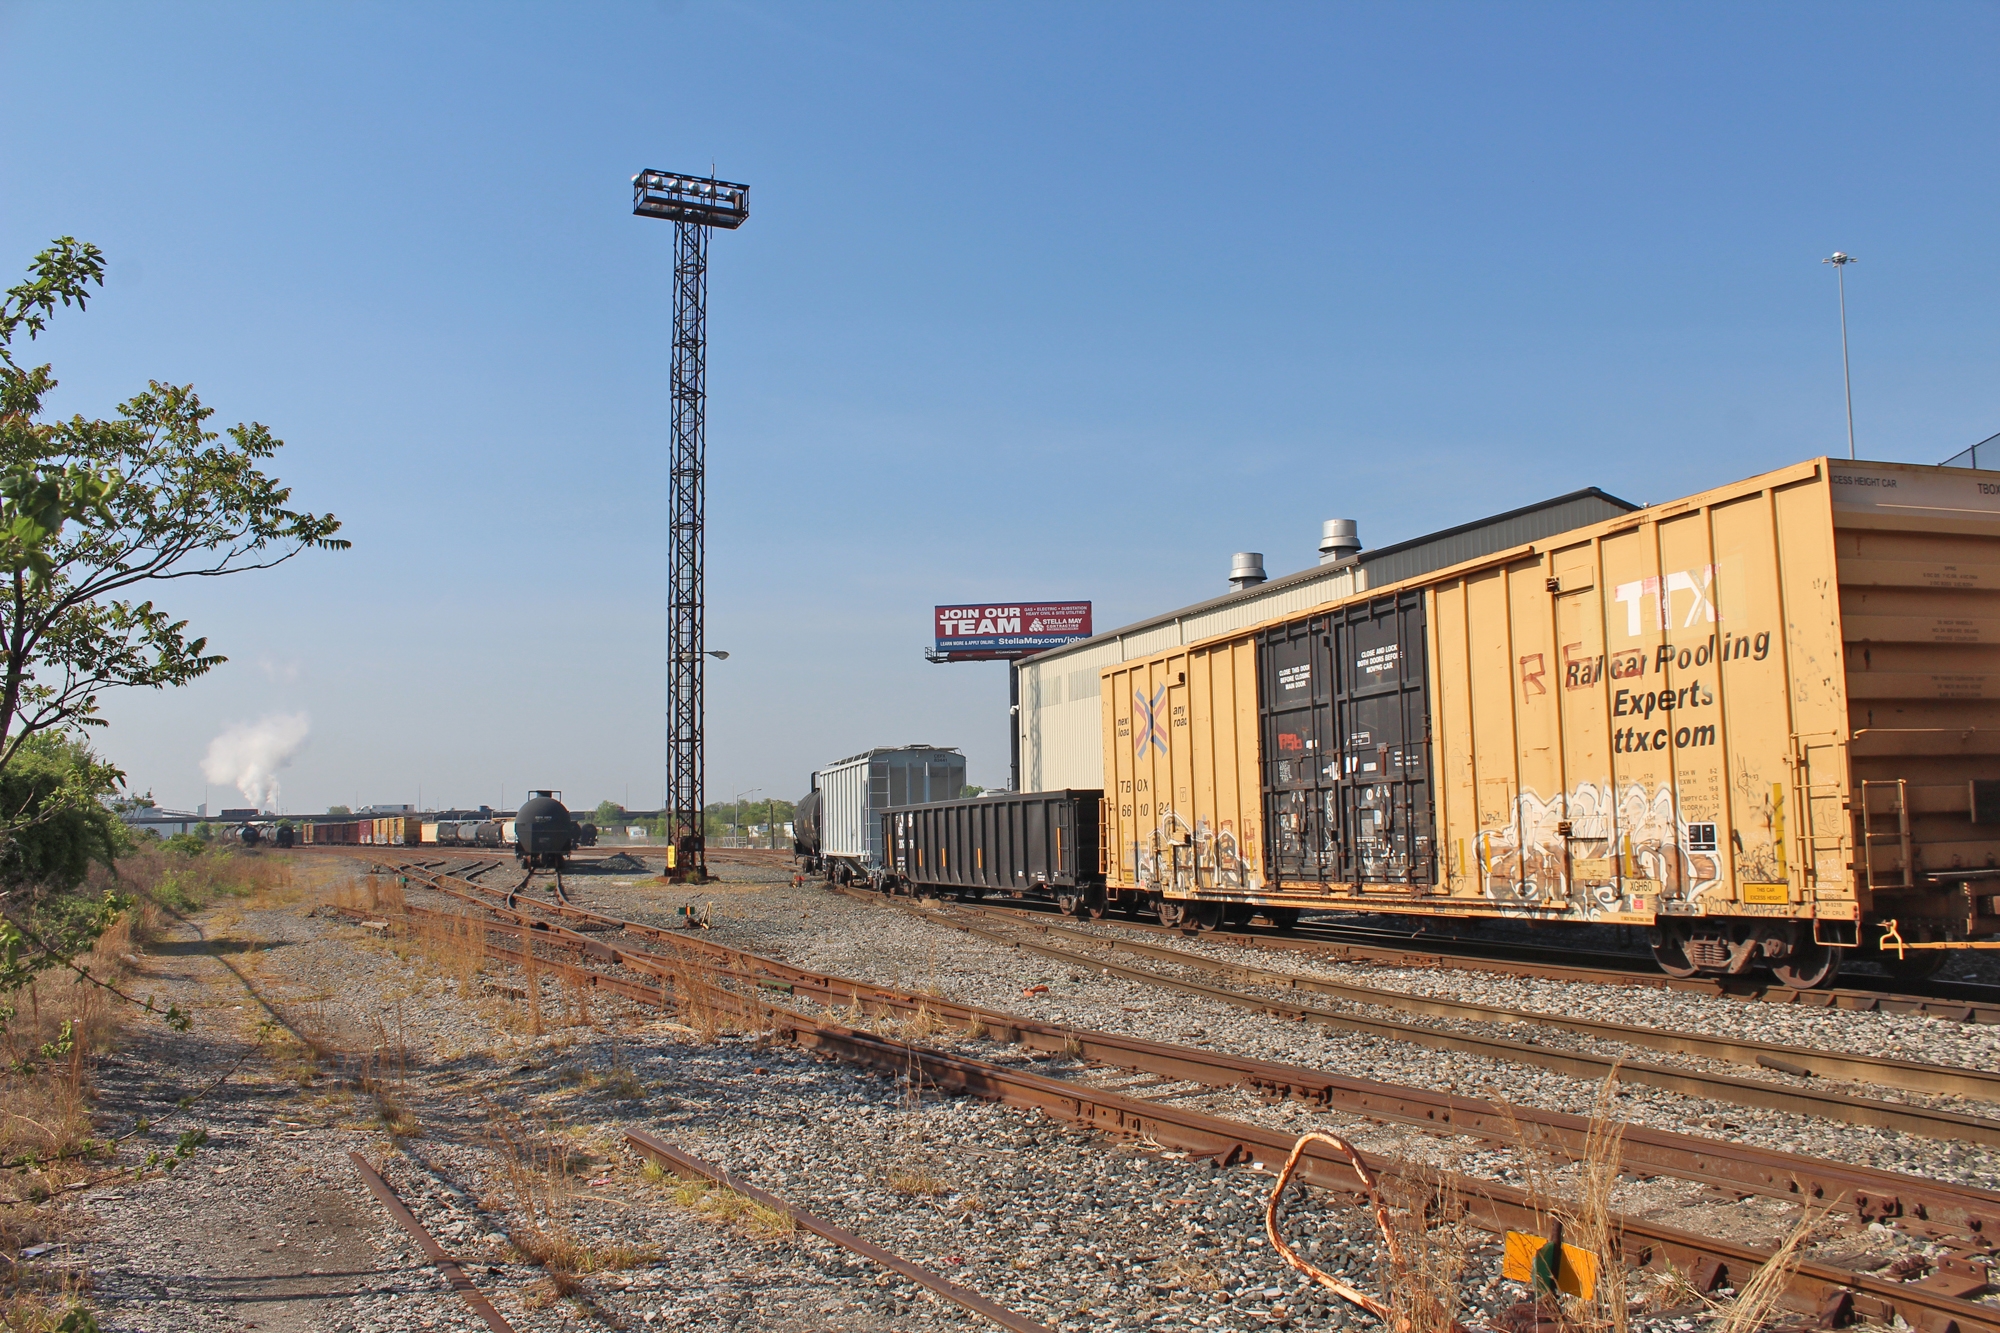
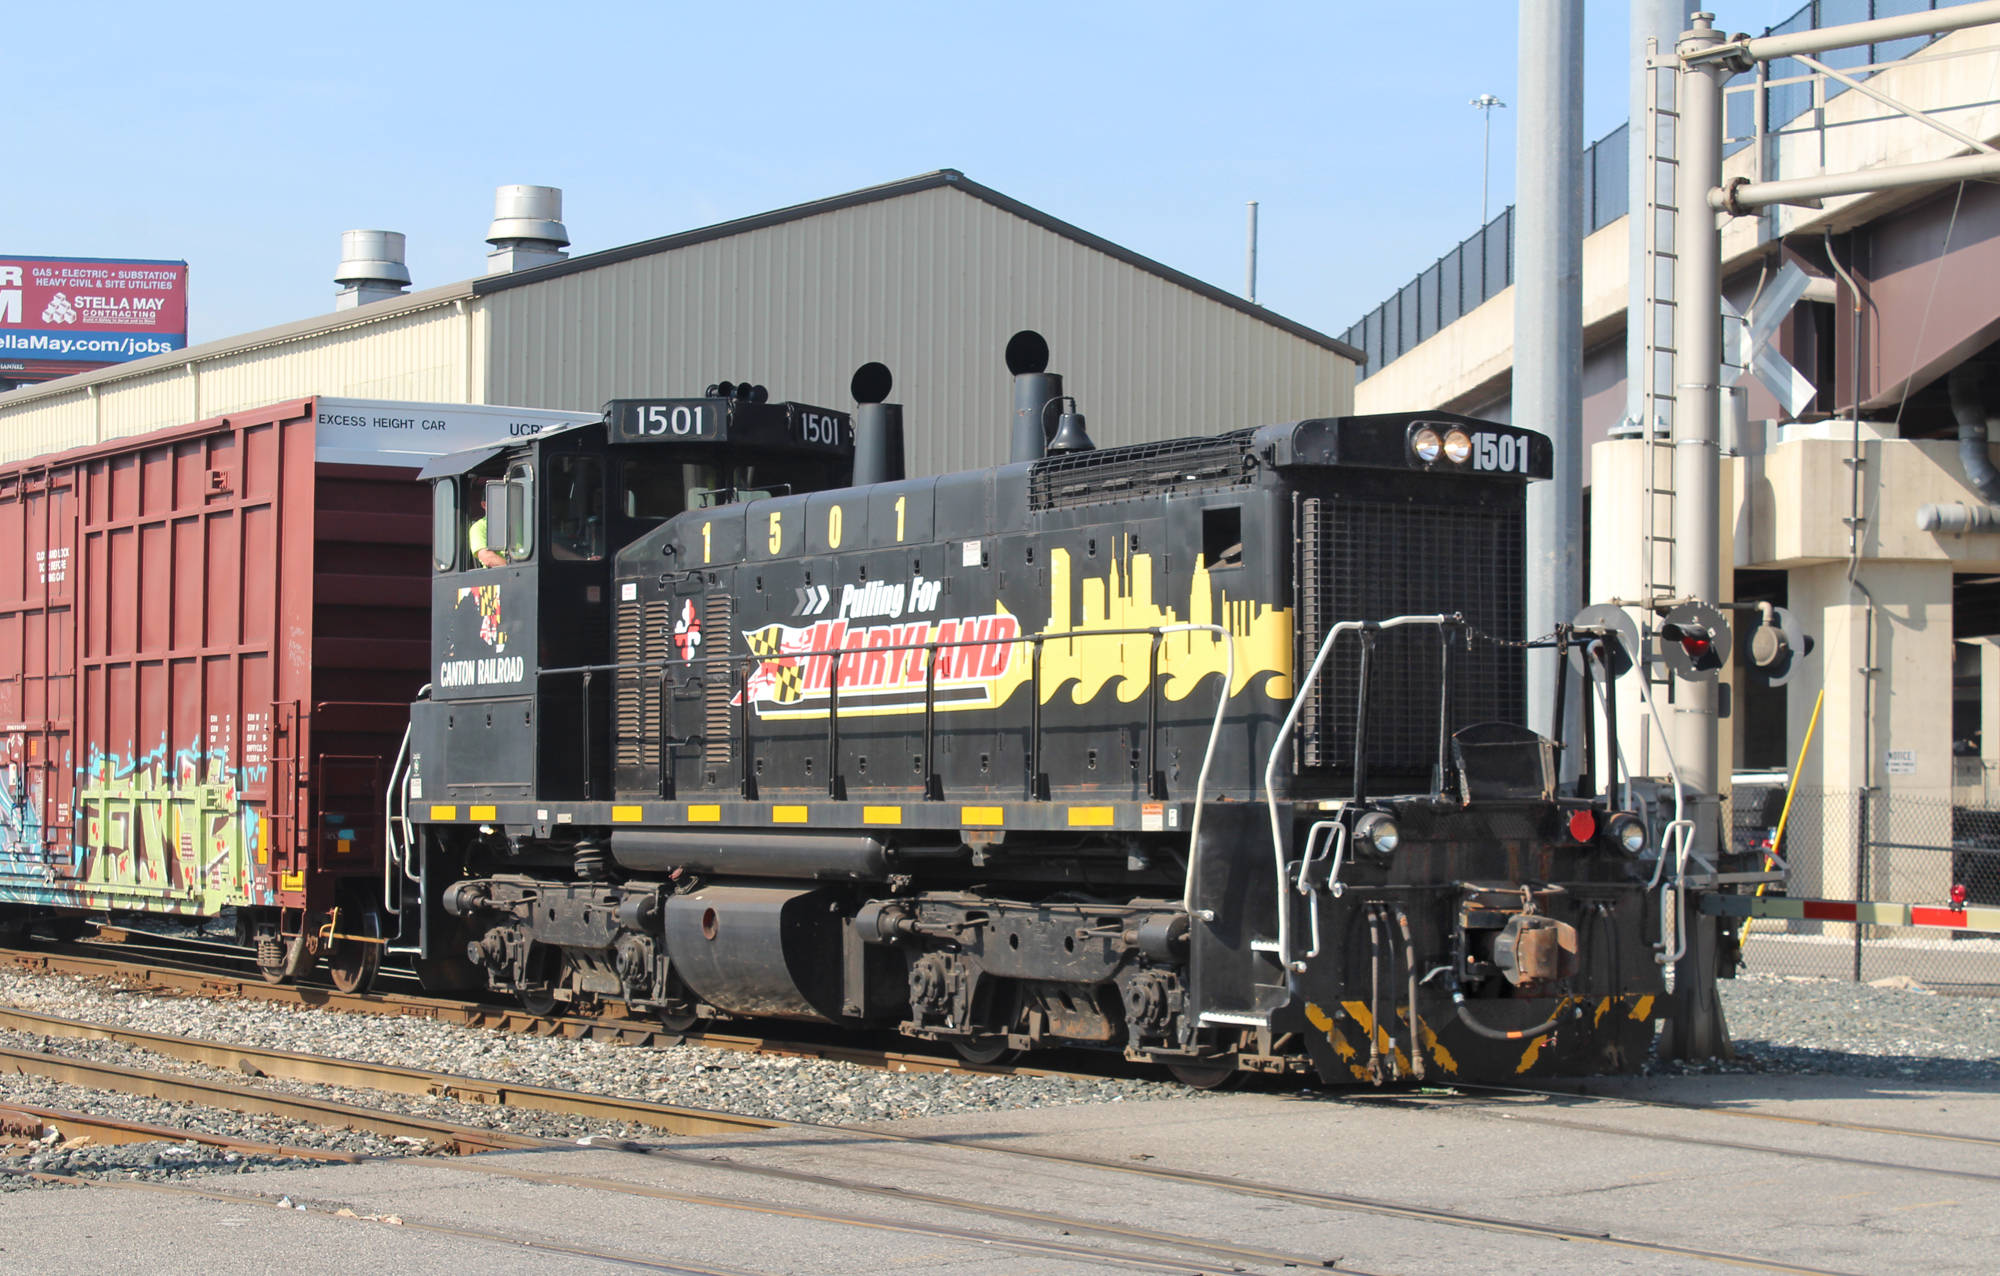
Railfanning can be a lot like storm chasing. Lot’s of whiffs, dry holes, and hours of getting nothing. Then, a window of opportunity opens up, often for just a few seconds, making the entire outing worth it.Canton SW1500 number 1501 blasts a column of exhaust skyward as it blocks recently pulled cars in Penn Mary Yard.
Nothing increases my enjoyment of modeling more than railfanning. Without it, I drift into feeling like I’m ‘pushing plastic’ across a tabletop. I forget about what I’m representing in miniature. It can be exhilarating, frustrating, and humbling. At times the railroads and/or the weather are wholely uncooperative. It can be addictive. You have those days where after hours of “nothing” you feel it’s been a complete waste of time. Then, without warning, the gods serve up a money shot for the ages…just to keep you coming back for more so they can dormant you again on a future date. I believe the technical term is “intermittent reinforcement”.
While you can’t control what the railroads will be doing on any given day, you can increase your chances of success by a) going on business days not weekends and b) having a sense for what time a specific railroad usually does their work. (In Baltimore they start early, i.e. 6am, and wrap up by early afternoon.)
That leaves the weather. A sunny day determines whether you’ll have high contrast brilliant colors or drab, low contrast, uninspiring junk. I was thinking about how I’d been planning my railfan outings and it dawned on me that I bring any weather-related misery entirely on myself. I’d look at my calendar, and pick a day. When that day arrived, come hell or high water, I’d go even if the weather totally sucked. That’s nuts, especially if plane tickets are involved.
I now take the totally opposite approach. I let weather drive my planning, not my calendar, sort of like storm chasers. I no longer make firm trip plans. I watch the weather and if the next day is going to be a perfect ten, then I go. I also pay attention to where I set up for shooting at any given time of day and location. You need the sun to your back. So, shots facing west are best taken in the morning, those facing east are best taken after lunch.
Off to Canton!
This past Wednesday, the news headlines were all about what spectacular weather we’d be having the next day. Seventy degrees and cloudless skies. Go Time. Canton Railroad. My primary goal was trying to catch them switching Terminal H, home of those massive Cryo reefers I love so much.
The day is NOT off to a good start. As usual, I got to Penn Mary Yard a little after 8am expecting to catch the switcher doing some blocking. Today? No switcher. That means he’s already gone out into the field to start working.
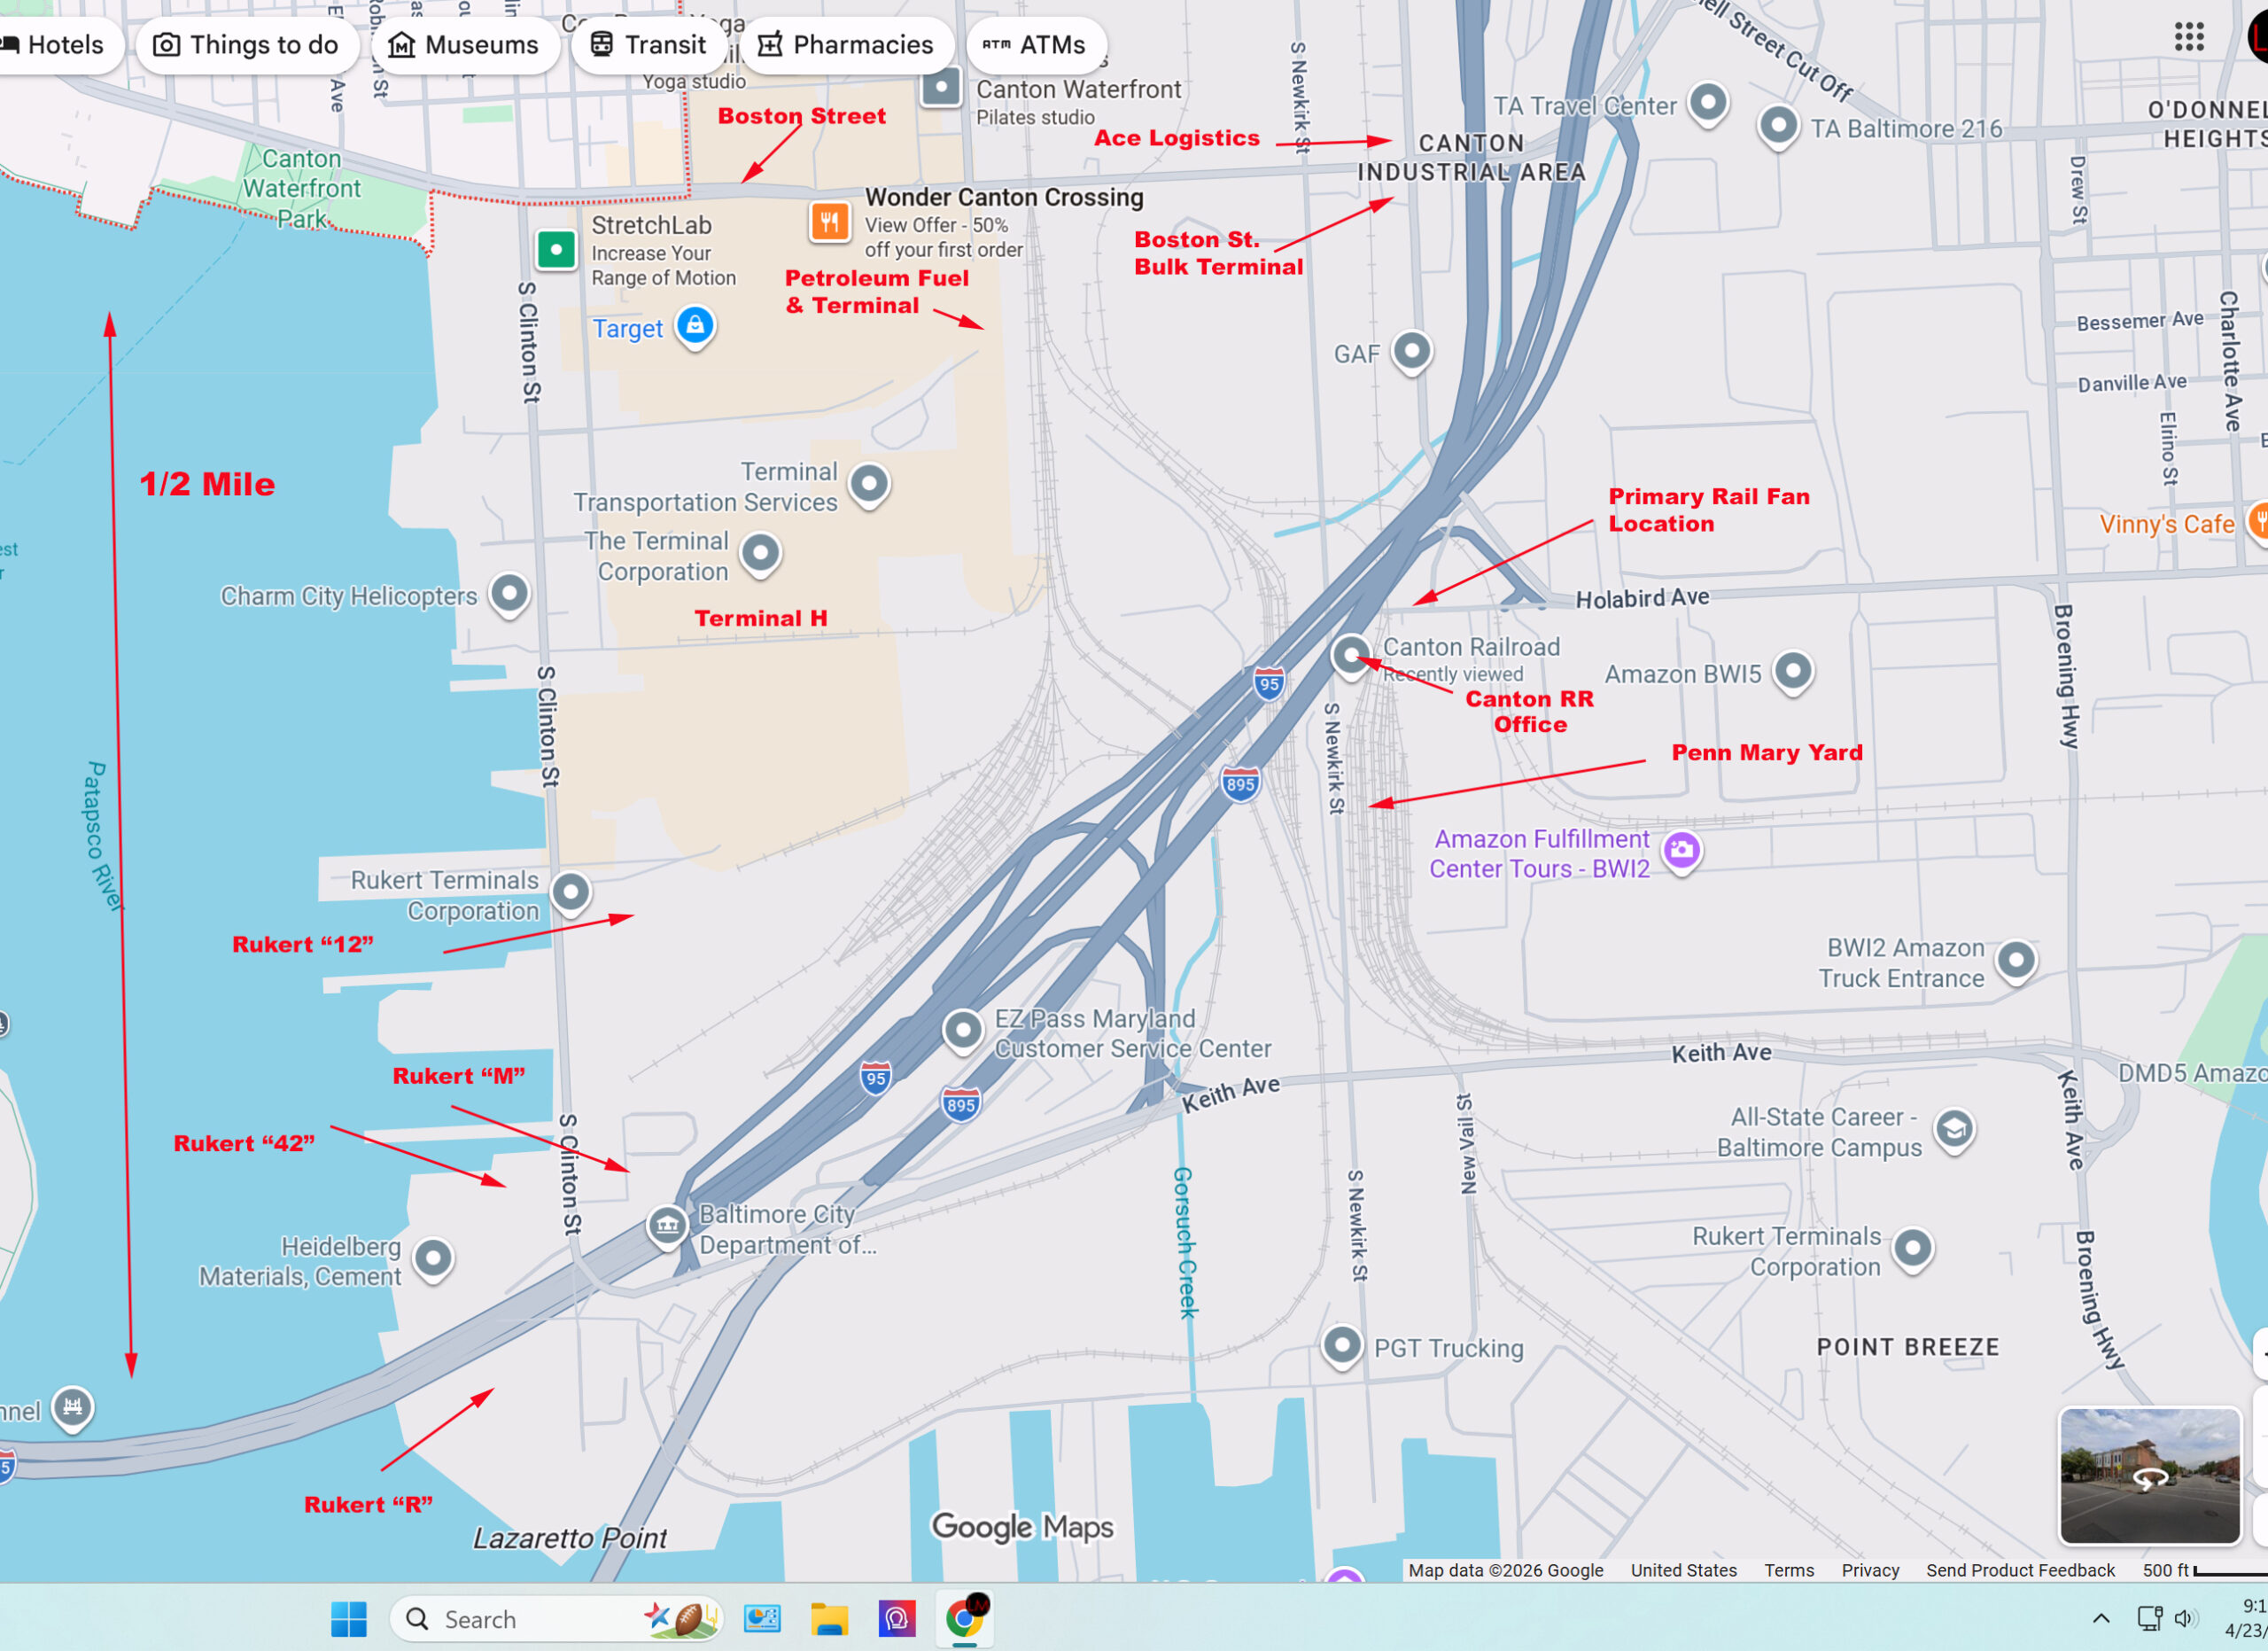
When railfanning The Canton Railroad, I always start at Penn Mary Yard. In the past when I got there around 8:15 or so, the local is making up it’s train so I set that as my arrival time. I arrived early. No switcher. Not good. I go into the office and ask if they’d be working terminal H today. “Nope.” Damn. The guy added, “Right now they’re switching Ruckert Terminals.” (Rukert is a a labyrinth of weathered warehouses on the bank of the Patapsco River about a half mile from Penn Mary).
Well, catching them switching Rukert could be just as good! Then he added, “They’ve been there all morning.” Back to “not good.” Rukert isn’t that big and if they’ve been there a while they’re either done or close to it. It’s not that far from the yard…as the crow flies but I can’t fly so getting over there in rush hour traffic took a good ten minutes. North up Newkirk, west down Boston, then left and south on S. Clinton. I’m scanning the horizon as I drive down Clinton towards Rukert. Nothing. No movement. They have to be here somewhere. Then I see a boxcar….then a conductor walking…..Damn, the unmistakable sound of a 1500 revving up. I knew I was screwed. He’d just finished and was heading back to the yard…the exact place I’d just come from! The law of the jungle. Railfanning can be frustrating and humbling.
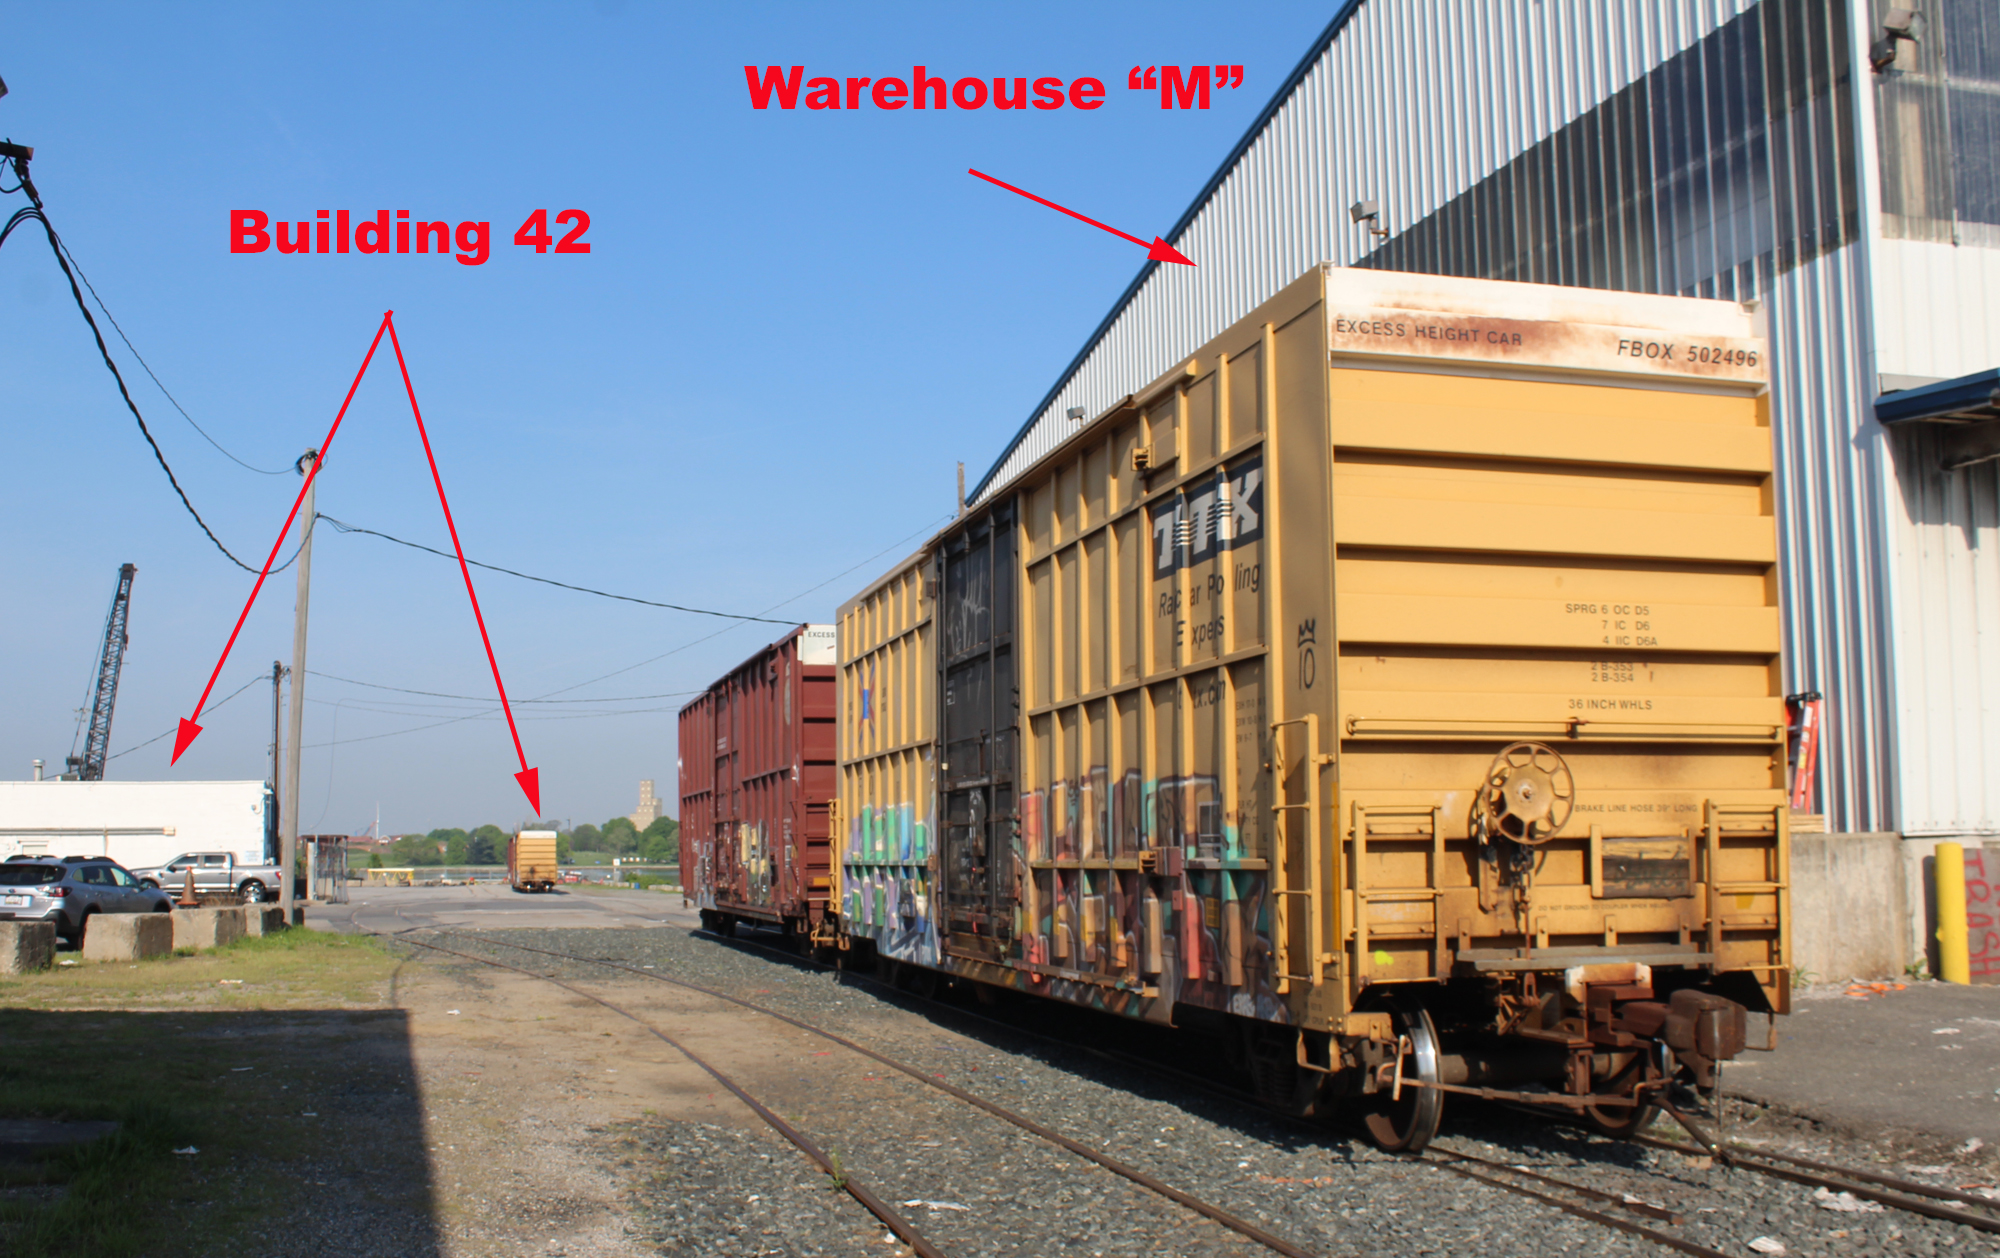
From experience, I knew I’d missed my opportunity to see them switching in the field. He’d be blocking in the yard the rest of the morning so no rush to get back there. I decided to poke around the various terminals to see what had been spotted. The Rukert warehouses are all labeled. Today they worked R, M, 12 and 42.
Looking west towards the Patapsco River. Building 42 is on a pier. Warehouse M is on the other side of Clinton Street.
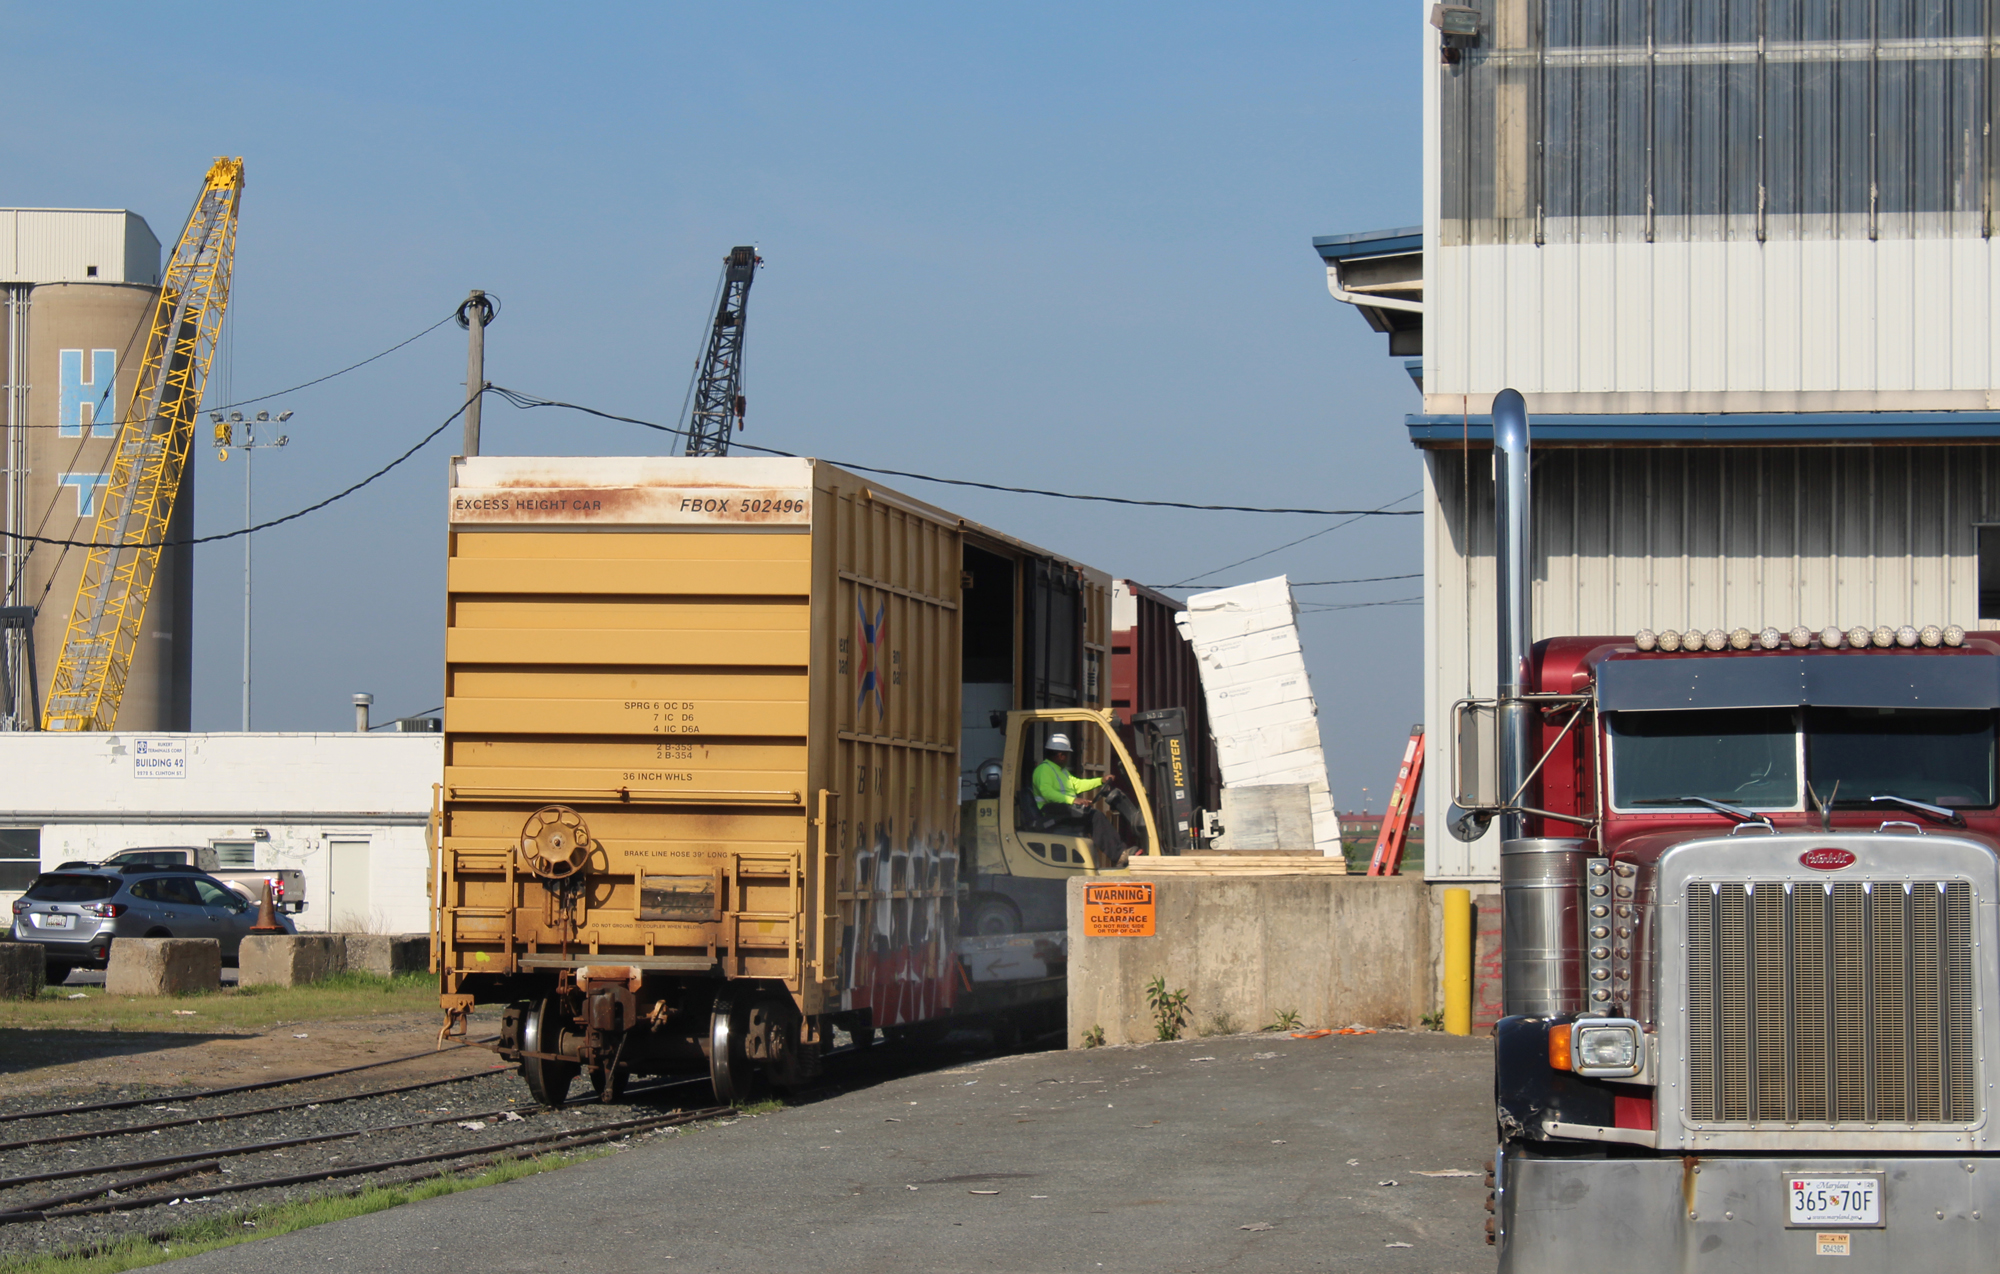
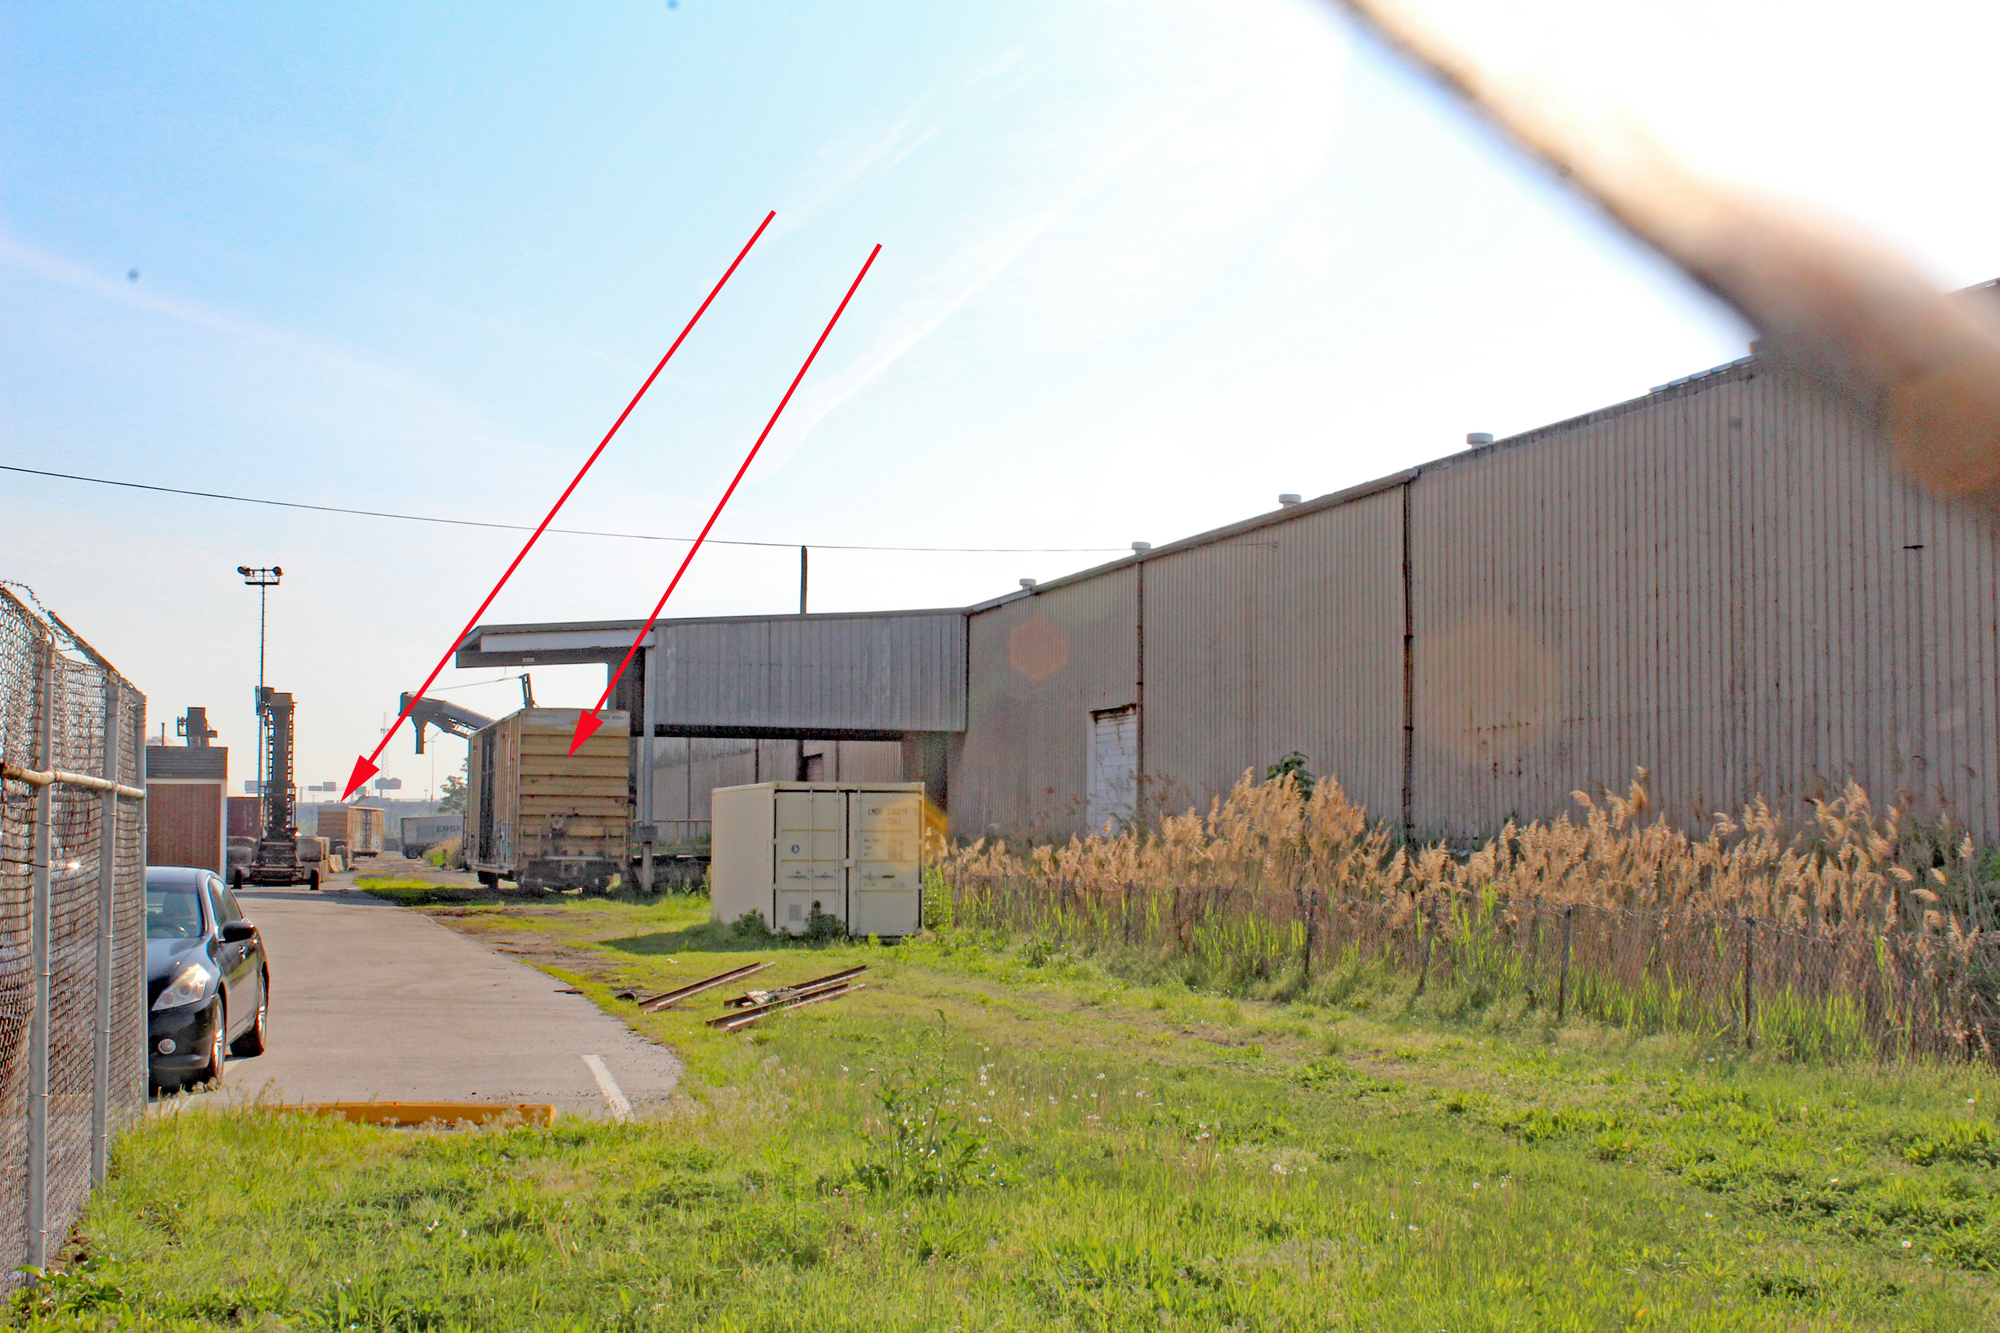
A rolling stone gathers no moss. These two cars had just been spotted at warehouse M less than an hour ago and they’ve already started loading them with outgoing product. Note the ramp between the loading dock and car.
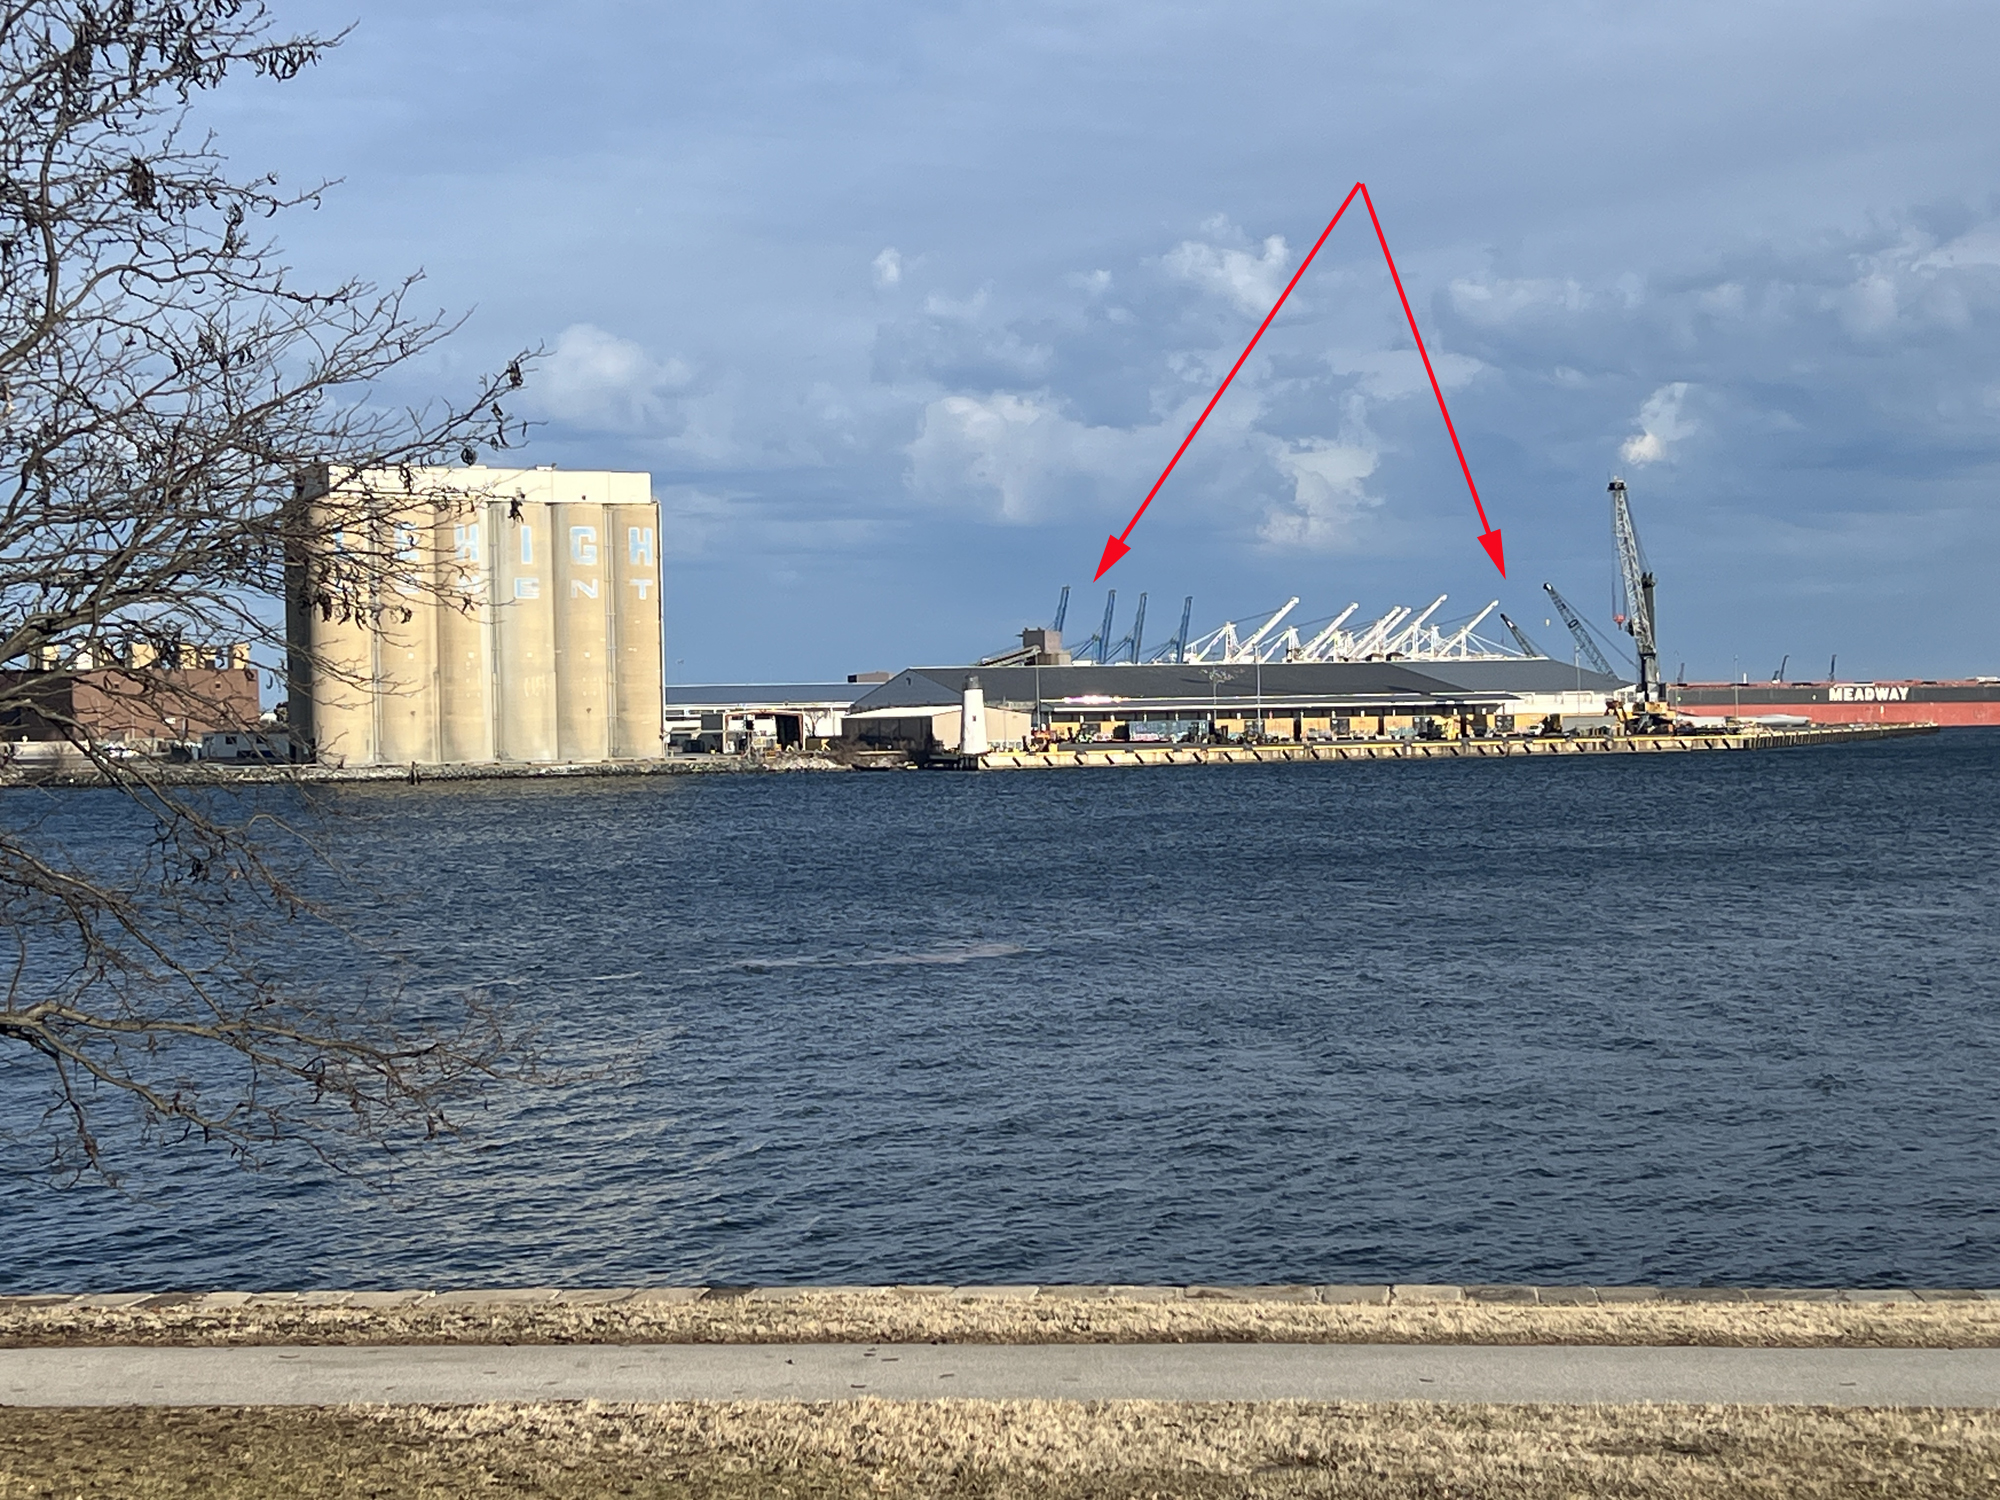
Building R is one of the more active locations and handles rail-to-ship. The way the fencing is laid out, it’s hard to see from Clinton Street. I took this shot last year from Fort McHenry, facing east across the river.
Rukert “Building 12”. I did a hard u-turn when I saw this. For as long as I can remember this spur had been engulfed in chest-high weeds. I was surprised to see that it’s now active. I’m not sure what the offspot car in the distance is.
This is where the “storm chasing” approach finally paves off. Early morning sun to my back and blue skies. High contrast. Brilliant colors. Pay day! The yard throat crosses Holabird Avenue meaning that any motorists that are new to the area quickly learn they are going to be behind those crossing dates for….quite…some….time!You don’t just hear that 645 prime mover, you feel it. It’s like somebody is grabbing you by the shoulders and shaking you.
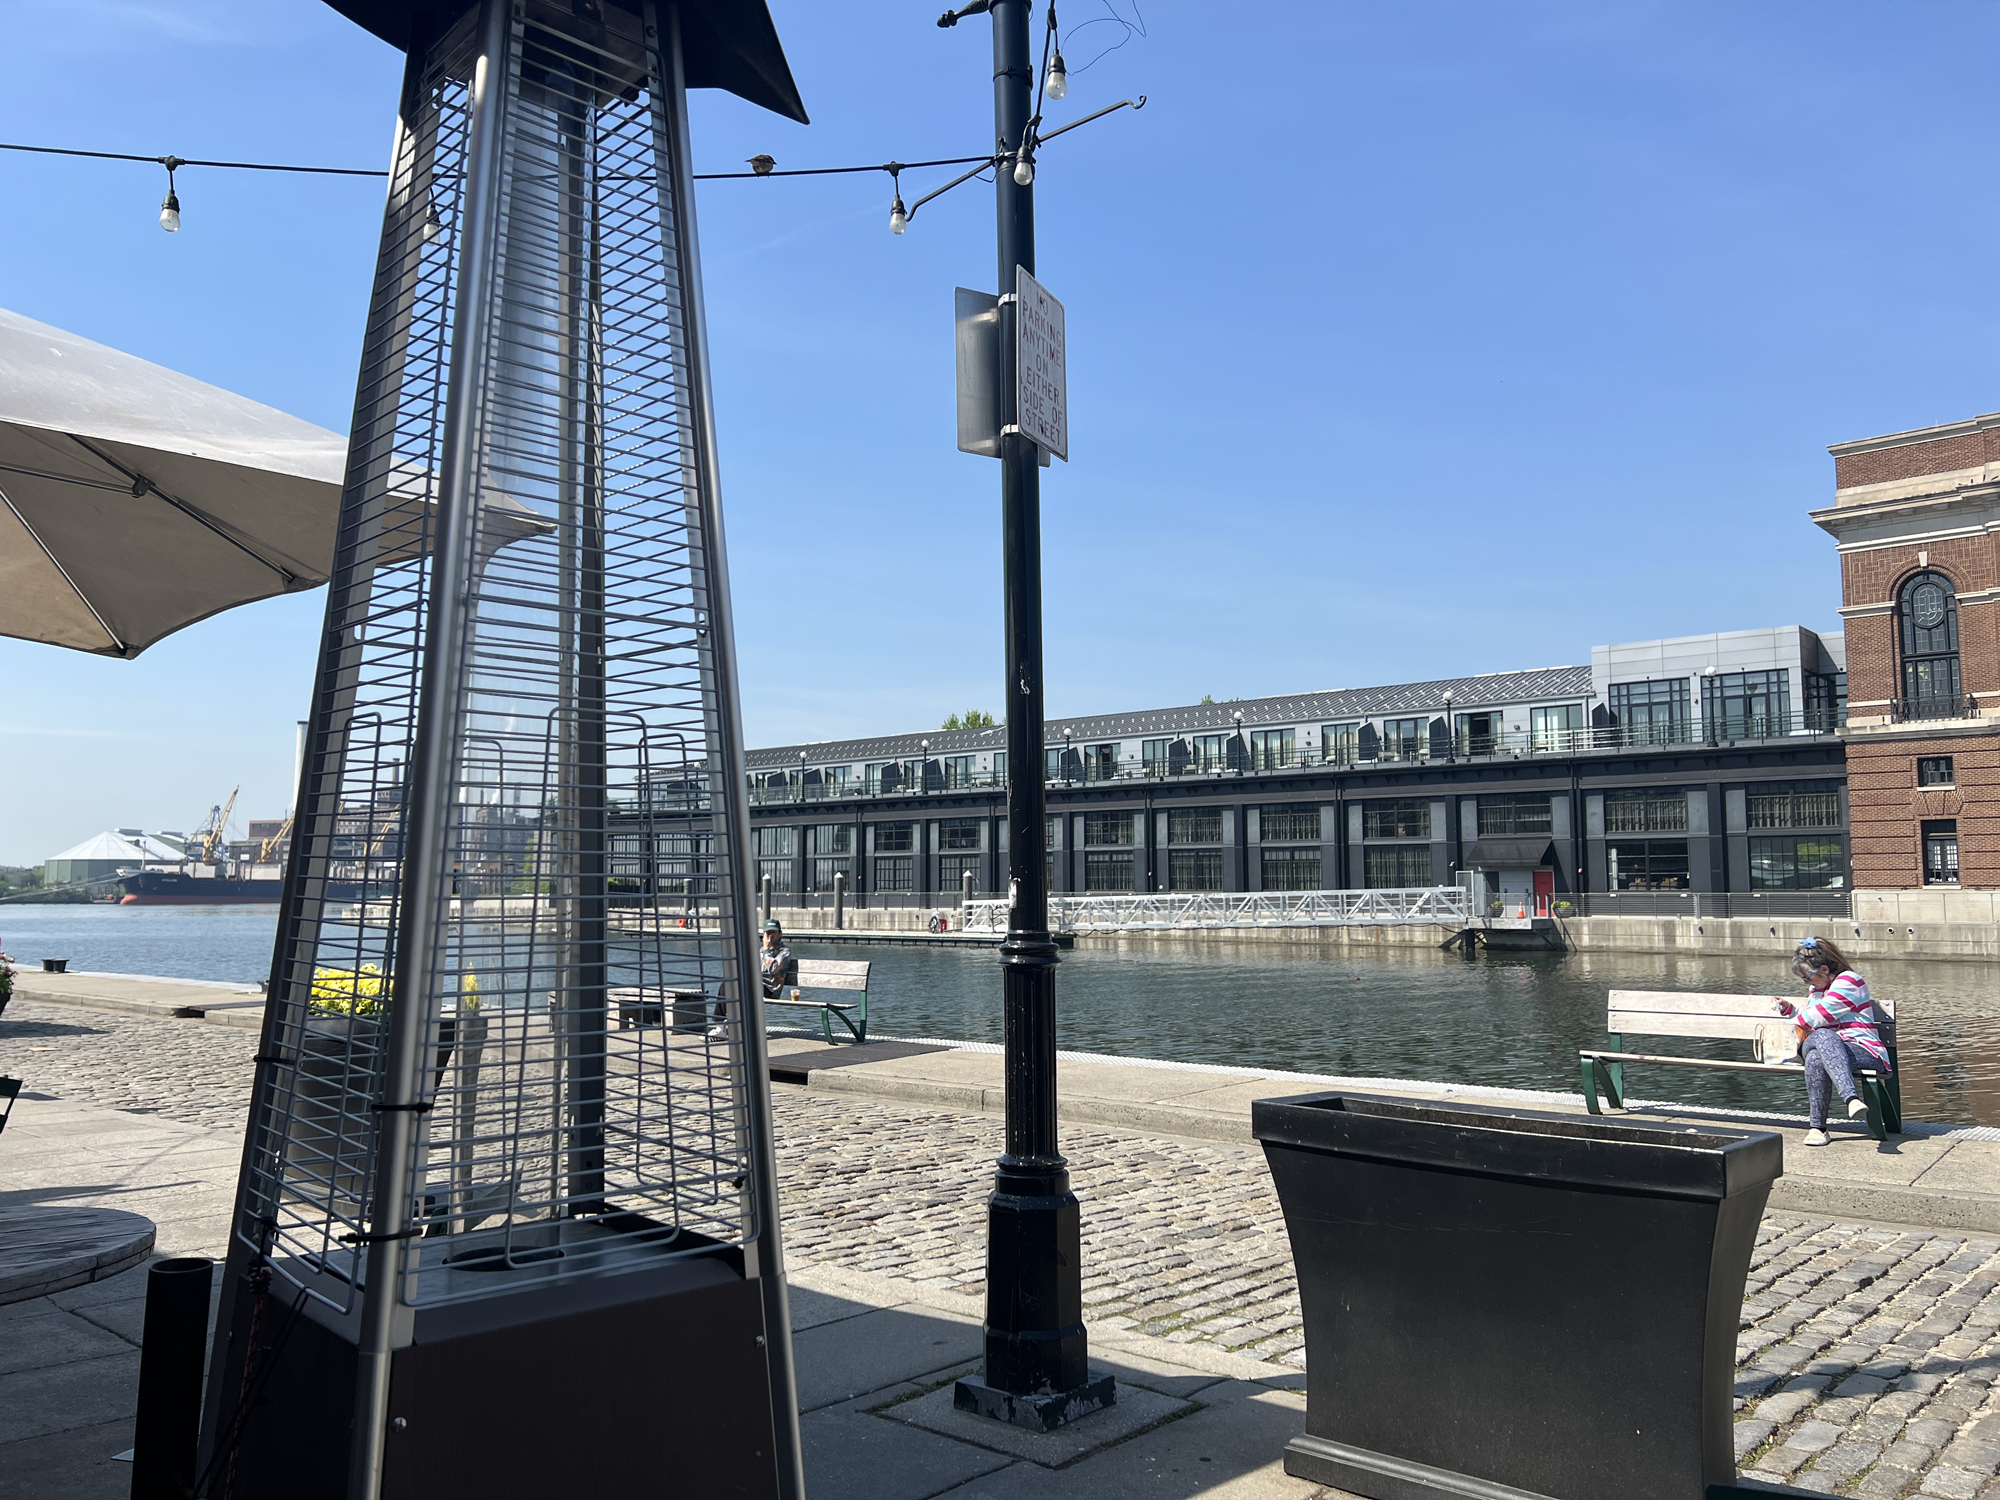
Ahhhh…..the difficult life of a railfan…so much stress! After a morning of photography I decided I’d earned coffee and a cranberry muffin at Pitango Bakery & Cafe on the Fells Point waterfront.The lesson learned from this trip? Next time, get up there an hour earlier.