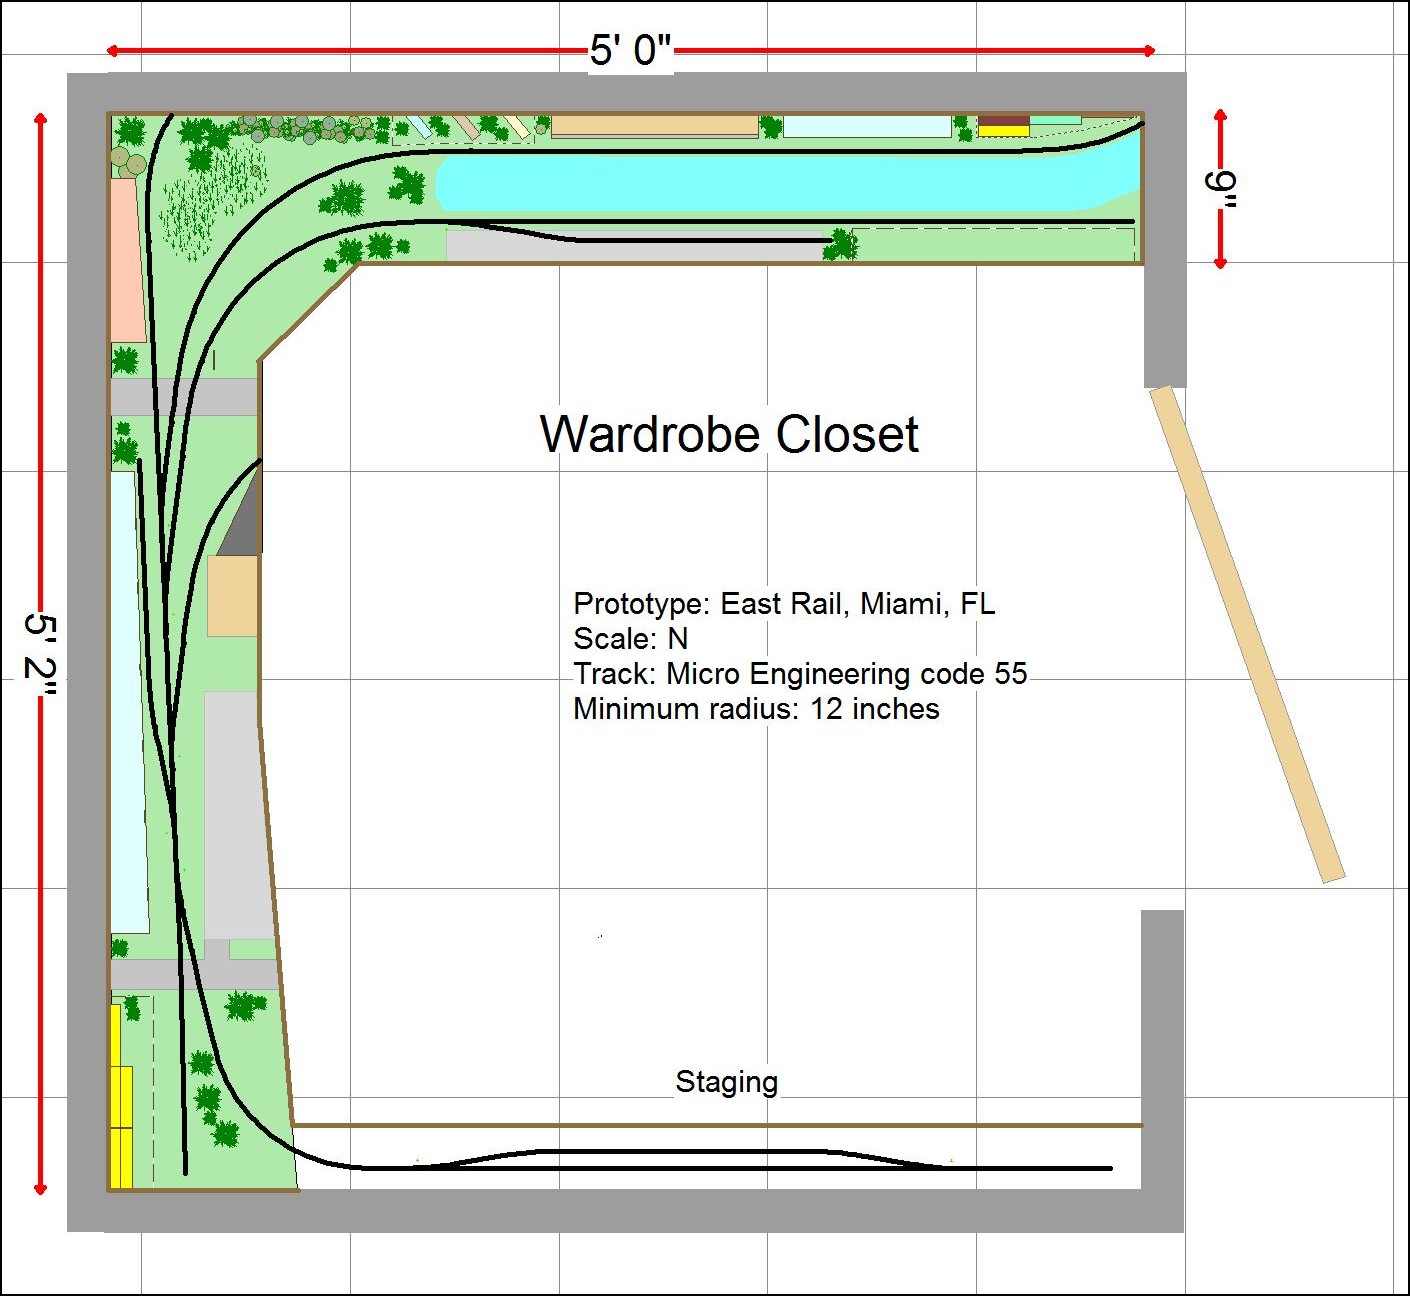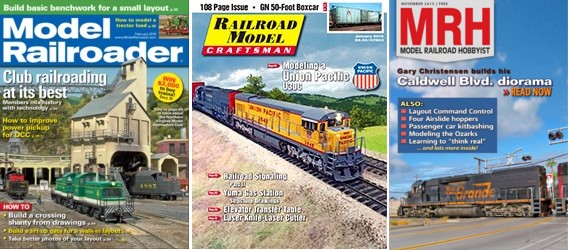
If I had to pick one entity that is the lifeblood of our hobby, I wouldn’t even have to stop to think about it. Without question, it’s the model railroad press, particularly Model Railroader, Model Railroad Hobbyist, and Railroad Model Craftsman. The healthier the magazines are, the more robust their circulation, the better for the hobby as a whole. In the pre-net days the model railroad press served as the town square, the central rallying point for all of us. It provided inspiration and leadership. Not only did it provide information but, just as important, information that was vetted and edited for accuracy. Although we didn’t realize it at the time, this town square aspect was vital to our hobby.
The world changed about fifteen years ago as the net started hitting overdrive. The hobby press has faced enormous challenges since. Whether it’s the Washington Post, Sports Illustrated, or Model Railroader, print circulation is in a steady decline across all interest groups. Does this equate to decreased interest in Model Railroading? Not necessarily. SI’s 56% decline in newsstand sales since 2007 doesn’t mean the public is any less interested in watching the Super Bowl.
The arrival of the net created a massive dispersal of the hobby population as other information sources, all free and instantly accessible, became available. At first we thought all of this was wonderful. Unlimited information at our fingertips. What could be better? After a decade of euphoria, reality is starting to unfurl and the flip side of the coin is slowly starting to emerge. As Barry Schwartz wrote in the Paradox of Choice, more choices doesn’t mean better choices. Whereas in the past we only had print now we have: YouTube, forums, blogs, websites, Facebook, etc.
How do you sift through the pile? What is accurate? What isn’t? Sitting around on a Tuesday night and have the urge to look at some cool layouts? You could Google “cool layouts” but god knows what would show up. The majority are likely to be poorly photographed and short on lucid text. There is no guarantee that such a search will yield the better players out there. Have a technical question? A search on the net gives you equal third probability of the following: average advice, great advice, and really poor advice. The editorial value added of print or ezines starts becoming more and more apparent.
While Darwin’s law makes sense in most of the business world, that’s not always the case with the press. Society needs dig deep investigative journalism, writing that digs beyond the typical “5 ways to do X”, bullet pointed, way that things are presented on the net. Model Railroading is a community and one that’s health is dependent on a vibrant press. Even if it’s from the standpoint of total selfishness, we all have an interest in the success of the big three.
So how do they turn it around? To an extent any business (or person) largely brings their lot in life upon themselves and is responsible to find ways to fix the messes they’re faced with. The hobby press, like the press in general, underestimated the impact of the net, was caught totally off guard, and fell way behind the curve. It’s a combination of being nailed by technological advances like any industry (anybody use a typewriter anymore?), not seeing it coming, and being slow to respond. The difference is that, while a typewriter has been replaced by something better, the model railroad press has not. We have more stuff (information) but absolutely NOT better stuff. It’s a dispersed mess, a witch’s brew.
How do they “fix” the problem? Nobody really knows. Sports Illustrated, Vogue, The Washington Post, Model Railroader; everybody is in a mad scramble to adjust. I will say it is a much, much harder task than we all might think. A common gripe is that publication X doesn’t have inspiring layouts anymore. Well, they can only print what is submitted. Does anybody honestly think there is some mind blowing layout out there that was submitted and rejected? C’mon, that defies common sense. Another gripe is that Rockstar X’s work isn’t featured enough. Here’s a newsflash, not all Rockstar X modelers are easy to work with. Some are damn near impossible. Finally, there are decent layouts out there can’t be presented in print because the layout owner won’t learn the basics of photography. It’s a visual medium. Without images, you can’t present the railroad in print.
Finally, do any of us really know if improved content will push circulation upward? A good argument could be made that RMC’s V&O series was the pinnacle of model railroad journalism, probably the best ever served up. For years I pressed those behind the scenes as to whether that resulted in increased circulation. For a while everybody was pretty tight lipped. Eventually the answers I got were: probably not, no, hard to say. And what is “inspiring” anyway? Birds of feather flock together. What inspires you and I likely bores the hell out of mass segments of the modeling population. You and I are a minority. There are vast pools of modelers who are inspired by three tiers of viaducts stepped over one another while locomotives from different era’s cross over them and then dive into a tunnel.
To a large extent it will be up to them to sort it out and right the ship. I would remind everybody that we are all part of a community and our long term health is dependent upon them doing so. Am I suggesting that anybody subscribe to a magazine through some sense of charity? No. I will suggest that there are ways to either be a part of the solution or at least not make it worse.
Part of the solution? A number of times a year I get photos of layouts that are of a quality level higher than what you typically see in the press. Learn to take a passable photo and submit them. Second, as community members, at a minimum, it’s our duty to at least not make the problem worse. Complaining to your buddies at the hobby store is one thing. It’s a whole new ballgame though when you take it online, in writing. Online conspiracy rants about the magazines, magazine bashing on the forums, any form of non-objective written, destructive criticism online is toxic to the hobby. Constructive criticism is just that. If you don’t like what you see, write a letter to the editor; non-confrontational, totally objective, and explain what you would like to see more of and what you’d like to see less of.
We’ve already lost Rail Model Journal, Model Railroading, and Mainline Modeler. How’s that working for us? The model railroad press is too basic to our own self-interest to let it become a marginalized, bit player. Let’s not become too flippant about it or stick our head in the sand and think otherwise.