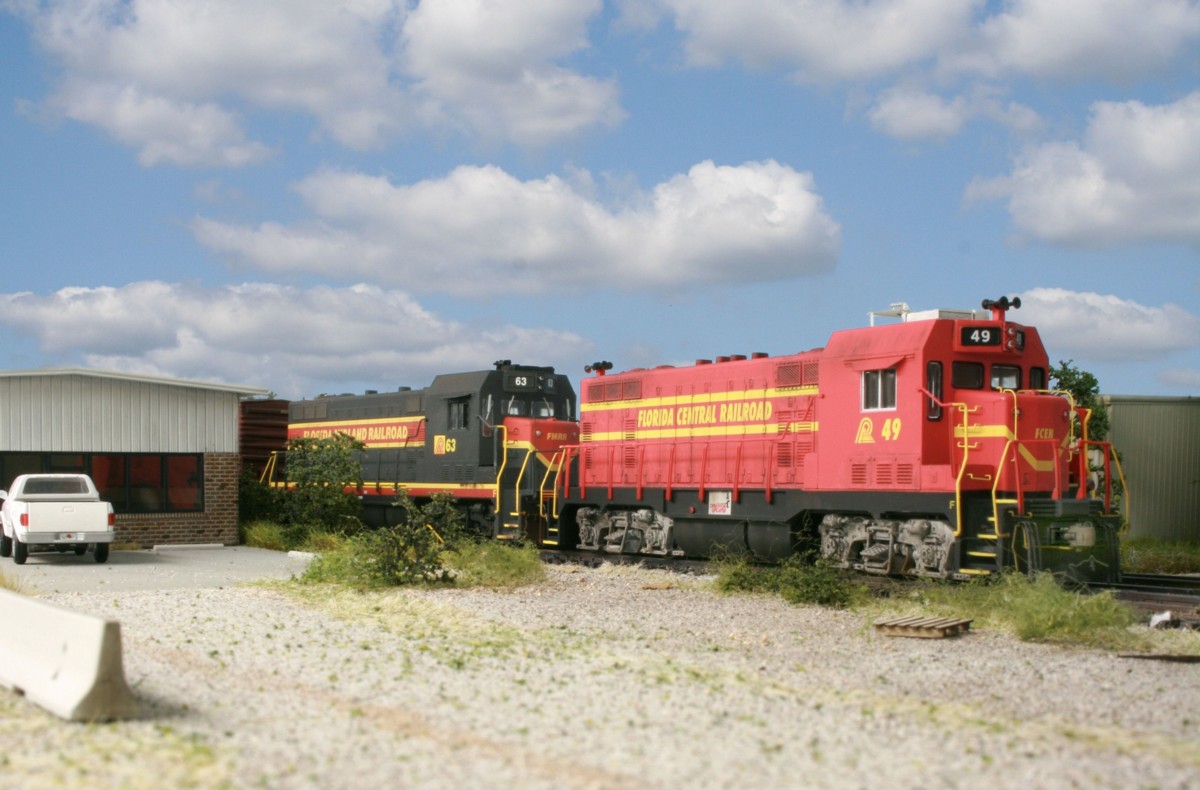
Model Railroad Blog

What the Hobby Greats Do Differently

Mastery of scene composition is probably the foremost skill Mike Confalone employs to put him on the list of all-time hobby greats.

Throughout any given year, there’s the recurring thread of what makes a model railroad great. Given the subjective nature of the topic, everybody’s answer will be different. Not discussed that often is what sets these layouts apart. What do the greats do differently?

Without question, modeling skill matters. They are….highly skilled…damn good modelers. That can be a little misleading, though. Basic modeling skills aren’t what sets their work apart. They approach things differently at the strategic level. The groundwork for their success begins before the first piece of track is laid. Conversely, hobbyists at large are behind the eight ball from the get-go because they take the opposite approach.

At the core of visual success, the foundation of everything, is composition. Awareness and mastery of this fundamental truth are what set these guys apart. Composition refers to the elements selected, their size, shape, relative position, and, of crucial importance, the space between them.

The hobby greats start with identifying a certain look, a certain feel to their work. They study prototypes intently to identify what it is about them that makes them what they are.

The hobby greats have a keen awareness of spatial relationships. They are relentless in creating ample space between scenes and between elements within a scene. If a desired element squeezes into that no fly zone of negative space, they give it the axe.

They start with a blank canvas and the goal of creating an overall look. It’s the overall sum that drives everything, not one specific kit or element. They don’t wander off the range and go, “Wow, that’s a cool Walthers structure, where can I squeeze that in?” They rely heavily on kitbashing to get the structures they want. They don’t succumb to the temptation of visual dopamine fixes, the proverbial blinking lights everywhere. Their comfort zone is that of the ordinary, not the extraordinary.

By contrast, the hobby at large tends to be very element-driven. Their starting point is a very large bucket of “must-have” elements that they feel compelled to jigsaw puzzle onto the layout. Before they’ve even started, they’ve dug themselves into a hole that is impossible to get out of, the visual death sentence of over compression, squeezing too much into a layout of individual scenes. Often, the elements chosen are only loosely related to any central theme. Using existing kit inventory is a driving factor. There is a general discomfort with kitbashing a structure. The focus of the layout is a carnival of blinking lights, each competing for attention, rather than the overall look.

Compositions like this are what put Tom Johnson into the rarified air of all-time hobby greats. Note the spacing between elements, the overall openness. Note the ordinary nature of the elements and the scene as a whole. Note the massive space given to an ordinary parking lot.

The Hobby Greats:

1. Study what makes a scene what it is. What are its defining, and generally quite ordinary, elements? They emphasize the ordinary.

2. Their focus and emphasis is on the overall look, not individual pieces.

3. They spread their scenes out

4. They create space between the elements in a scene.

5. They kitbash to get the look they need from their structures.

We all have our own goals as to what we want to get out of the hobby and how deeply immersed we want to be in it. I always caution folks to get away from external validation as a means of judging their work. Instead, look at what you have in your layout room. If you’re happy, grab a beer and stay happy. If you’d like to nudge the needle a bit further in the skills department a good starting point is to closely study the work of the greats. (Study means examining photos and reading, not scanning photos for a second at a time on social media.) Here are five folks I’d study intently: Tom Johnson, Mike Confalone, Seb SG, Tim Nicholson, John Wright (Federal Street Pennsy layout).

1 Industry, 2 Locos

GP38-2 #715 idles in the distance while SW7 number 2 does ALL of the work in this April 2024 shot at Waste Management’s Jessup, MD facility. I learned yesterday that such is not always the case. At times, two switchers work simultaneously side by side.

Waste Management’s Jessup, MD facility is one of my favorite rail fan locations. If you go during business hours, you are one hundred percent guaranteed to see heavy switching action. Located a stone’s throw from BWI airport, next to a major highway, it’s easy to get to. All of the action can be taken in from public property. Finally, they have THREE photogenic switchers. You never know which ones you’ll see on any given day.

Here’s an aerial view of the facility. The switchers shuttle gondolas back and forth across Brock Bridge Road all day.

The switching cycle involves three steps: Pick up empties from the CSX interchange yard and spot them for loading. Slowly pull the empties under a backhoe to be loaded. (I believe trash trucks also dump directly into empty gons as well.) Take the loads back to the interchange yard.

On past trips I’ve always seen just one loco. performing all three steps. Yesterday’s trip was fascinating from the standpoint that they had two switchers working at the same time. The locos didn’t have dedicated tasks. It was more of a circular cycle. A loco would load, and then pull the loads to the interchange. At the same time, the other loco. would be gathering empties. As I watched, they seemed to swap tasks. This would be a really interesting operations plan to model on a layout.

Just as I arrived yesterday morning, #8379 (GP10) ran light over to the CSX interchange to pick up a string of empties. In this view, he’s coupled onto them and is heading back to the industry. Check out the color and weathering!

Number 8379 is out of sight at this point, somewhere in the back with the empties. While that was going on, #715 (GP38-2) was slowly pulling a cut of cars (ten or so) under the backhoe in the distance where they were loaded. He then pulled the cut of loads across Brock Bridge Road to the interchange yard. The two engines repeated the cycle over and over, swapping duties in the switching cycle.

Time & Memory

Dolton Junction number 3, an Athearn SW7, was my first serious effort at building a decent model. I was sixteen at the time, which puts it at almost five decades old. Note the faded lettering on the grill and the custom logo.

Time, and our recollection of it, is a funny thing. I’ll be 65 this summer. I imagine like many my age, you find yourself in periods of reflection more often. It’s during those periods of reviewing the past that time seems almost elastic. What we remember and what we don’t, seems so bizarrely arbitrary. Why do we remember some distant events with such precision (or at least we think we do), and other, often very long periods, just don’t conjure much up?

For reasons I haven’t fully processed, the model above stirs up some hard-to-define emotions. It’s amazing to me that I was able to build something of this quality at the age of sixteen. Many decades passed afterward before I could get back to this skill level. I’d even go so far as to say that if I tried to replicate it now, a full five decades later, the end result would be about the same. I have such vivid memories of how it came to be and the process of building it (said from the person who can’t find his car keys).

We lived in the South Pacific (Guam to be precise) during my teenage years in the 1970s. This was still the golden age of hobby stores and there was a pretty darn good one in Tamuning, Guam. I remember going there one afternoon. The day had started with me having no interest in model railroading. I walked into the store, was drawn to the magazine rack, and a switch clicked. I went from zero to full immersion in the hobby just like that. Weird. I imagine others have had similar experiences.

I became an avid rail magazine reader and started building models. The results were what you’d expect from a sixteen year old newbie, not ready for primetime to say the least. Ouch, they were rough.

We returned to Indiana for my last two years of high school. There was another well-stocked hobby store in Bloomington and it wasn’t long before I was at the magazine rack. I picked up the December issue of Railroad Modeler. Inside was my hobby game-changing article, a piece on the LAJ by the legendary Don Simms. I couldn’t put it down, reading it over and over. Inspired by the article, I decided to build myself a freelance switching layout similar to the LAJ but called The Dolton Junction (based in Chicago). I remember drawing up a track plan but have no memory of what it looked like. I do know the layout was never built.

Here’s the weird part about memory. I recall so vividly making the decision that I would build an LAJ-like switcher that wasn’t a soap carving. Total focus and concentration. I recall getting the detail parts mail order. I recall getting in touch with Rail Graphics, sending them the freelance logo, and having custom decals made. I recall the owner (I believe his name was Ron) sending me a friendly note saying the lines on my initial drawing were too thin and asking if I could redo it. I recall getting into a total “zone” from start to finish building the model. It’s still astounding to me that I pulled something like that off at age sixteen given it would take a lot of work for me to replicate that degree of finish even now.

Getting back to the subject of time, it’s sort of a weird melancholy feeling to look back on the life of fifty years that have elapsed since then, the changes in the hobby and the world. I could never have guessed that five decades later I would still be holding that same model in my hands. Five decades later I finally have that LAJ layout and am still fascinated by the line.

The Dolton Junction switcher is in surprisingly good shape but has some minor damage. My fun project of the month will be carefully restoring it. I wonder if it even runs. I pulled the shell off and there isn’t a hint of rust on it. Stay tuned.

The New Layout Room

The “new” LAJ layout room, renovated into a Mid-Century Modern (MCM) interior design style. Mid-century modern elements are the bullet planter and faux succulent (from Hip Haven), Z chair (Wayfair), painting (Bed, Bath, and Beyond), and lamp (MCM Gal).


A better title tag for today’s post would be “renovated” layout room. There is no new room per se and certainly no new layout. Although only indirectly related to modeling, my efforts in the past six weeks have been spent giving the room that contains the LAJ layout a total makeover and repurposing.

I was getting tired of crawling over the Brooklyn Terminal that was also in the room. I wasn’t happy with the dark closet which contained a ratty old desk. My second computer was in there and I was getting tired of walking from room to room to use each machine. I gutted the space and gave myself a clean slate.

Interior design can fall into the same traps as layout design. “Here’s an empty space, what can I fill it with”? Instead, it’s worth taking a breath, examining the room, and thinking through what its ultimate purpose is. By virtue of its orientation, the LAJ layout room is flooded with magnificent light at the golden sunset hour. I needed a library upstairs. There was my purpose, a library/sun room/space for the LAJ. I hate useless clutter. I hate climbing over crap I don’t need. When I walk up to the window to take in the sunset I don’t want that nagging feeling at my knees of leaning over furniture. I’m a minimalist. If an element doesn’t serve a purpose I don’t include it. I’ve always liked the feeling of walking into a room at an art gallery and being enveloped by the openness. Nothing in the space except art on the walls and perhaps a single bench. The smell of the wood floors. The slight echo of the acoustics. I wanted that.

Facing the opposite direction. In the back is the mini-library mentioned in previous blogs. The “Bellet” print on the left was a generous gift from fellow modeler and friend Fred Scheer.

Many years ago my close friend Tom Klimoski introduced me to the mid-century modern design style. The style is synonymous with Los Angeles, especially in the late 1950s and early 1960s. You’ve seen it on the series Mad Men. It’s Stahl House. It’s Palm Springs.

I’ll never own a mid-century home but thought it would be fun to have one room in my house designed in that style.

Here’s a view of how the LAJ fits into the space. I run it several times a week but view it more in terms of “3D wall art”.

Several years after Tom Klimoski introduced me to the MCM scene, another modeler, Fred Scheer brought to my attention a magazine dedicated to the subject, Atomic Ranch. I spent a year or so reading through it to get a better sense of appropriate design ideas.

Stahl House in LA is the personification of MCM design. An argument could be made that it’s the most famous home in the US.

The Finished Mini-Library

The mini-library I first mentioned in my April 3rd post is now complete. Our hobby is heavily research and media-based. If you can’t find something, or it takes forever to dig it out, you’re always behind the eightball. Mounds of unused items become something you need to continually crawl over. I spent a number of days going through decades of old magazines and books and really thinking through which ones I actually use. In the end, not many. A good measuring stick is that if you don’t know what’s in a box, magazine, etc., and you haven’t looked at it in a decade, you can live without it. I’m not a hoarder and it was time to fill up a few full-sized trashcans with things I’ll never use again.

The library is located on the first floor of my house in a room next to my office. I gutted a clothes closet and rebuilt it to make it more suitable for its new purpose. Shelves and cabinets are positioned ninety degrees to the entrance, creating a walk-in alcove. 1. Lighting is provided by a very slick, lithium battery powered, motion activated LED.

Here’s a view of the left-side arrangement. The rolling cabinet was picked up from The Home Depot’s online catalog. I made the shelves myself out of finished shelf slabs, also from The Home Depot. Going through the labeled callouts we have:

1. Vintage 1950’s Official Guide. I use this a lot for work. It’s fragile so I bought a special book sleeve from Bindertek to hold it. 2. Magazine articles on the LAJ and other favorite branch lines. These are held in the binders with the special magazine holders I mentioned in the April 3rd blog. 3. Feature articles on my personal layouts. If I were to do it again, I’d use more binders, but thinner ones rather than putting everything in one big binder 4. Diesel loco guide 5. Frequently used art supplies (pens, rulers, etc.)

Here’s a view of the right side. Unlike a clothes dresser, having more drawers, that are shallower is desirable.

Going through the callouts on this side we have: 1. Frequently used books, books on historic layouts such as The V&O, John Allen, etc. 2. Issues of Model Railroad Planning 3. Frequently used soft cover books 4. Hard plastic SAYEEC desktop magazine holder & organizer (this is much stronger than the traditional cardboard variety. Nice product!) 5. Open top staging for the LAJ. 6. Recent magazines (note our buddy James McNab on the cover of this year’s GMR!) 7. Drawer holding camera equipment (batteries, etc.) I can’t remember where I bought this cabinet.

The new mini-library has made a noticeable improvement in making the media I use the most, much easier and more pleasant to access. It also protects some of the print stuff that is starting to age. I still have plenty of empty shelves. I want to get used to what I have so far before filling that out.