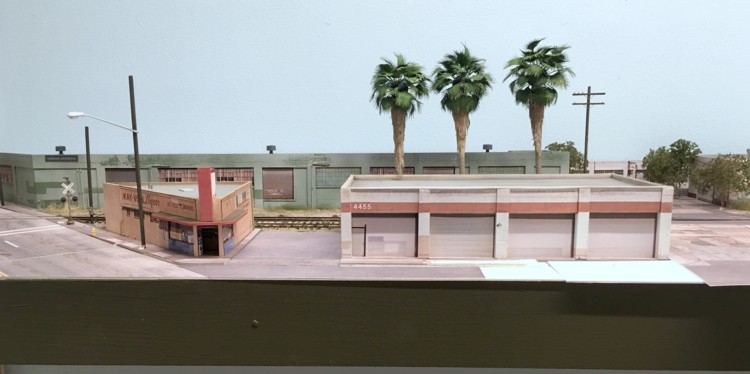
A Day of Photography
I had a lazy Sunday available to me yesterday so I decided to spend it puttering around with some photography on the LAJ. Getting a good shot generally takes me the better part of a day. I prefer low angle photos that give the appearance of late afternoon with its long, clearly defined, shadows.
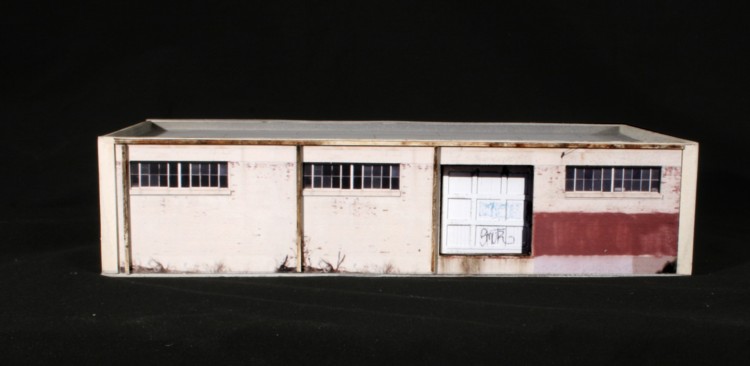
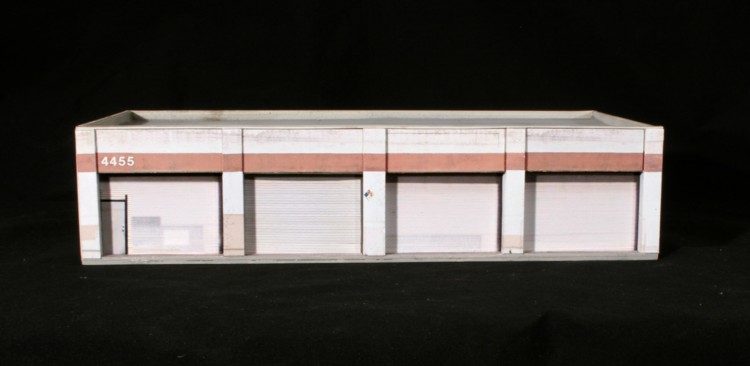
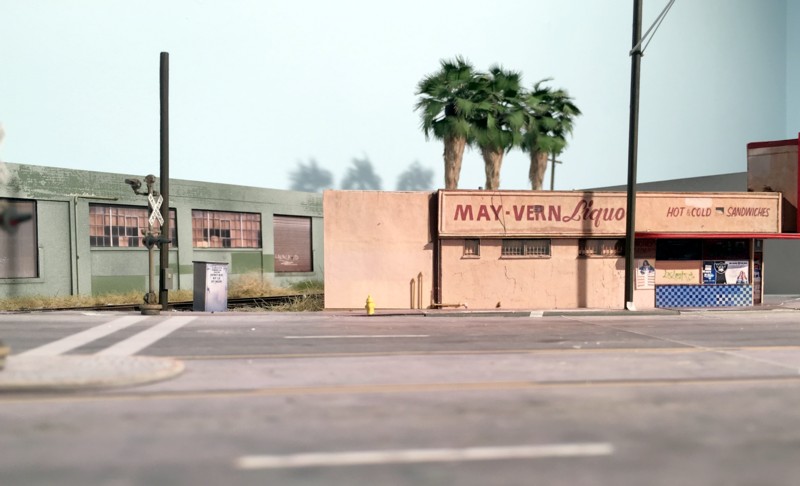
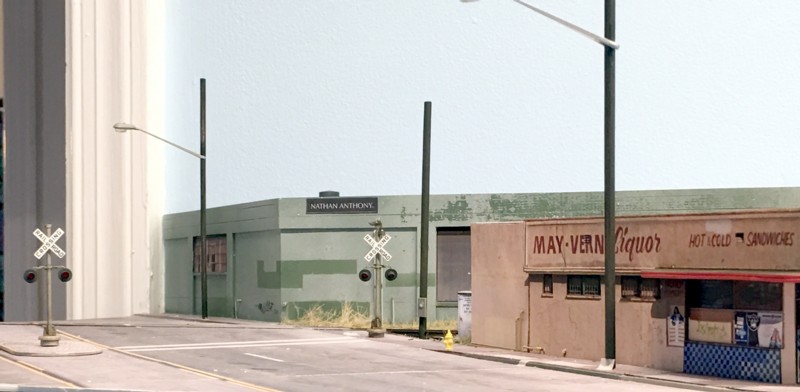
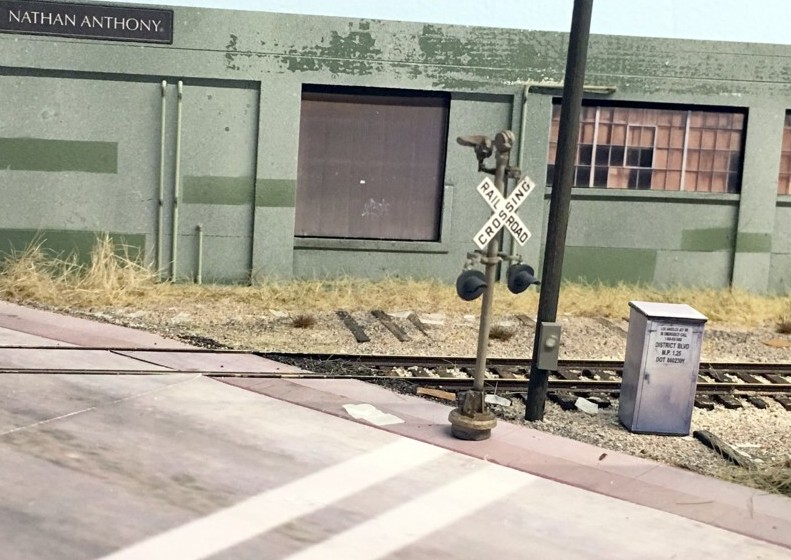
To begin, I took a test shot with my phone and blew it up so I could check for blemishes on the layout. Things that aren’t obvious to the naked eye can be glaring in a photo. Make sure no ballast is stuck to the rails, you have no derailed rolling stock, oddly leaning poles or trees, or sloppy scenery. In my case, the utility pole behind the cross bucks was overly thick so I replaced it with something thinner.
Position your camera on a tripod so it’s at a height that you’d expect for a person standing on the street. I use the timer on my camera as opposed to triggering manually. Canon Rebels tend to shoot dark so you usually need to bump the exposure compensation (Av button) up a notch or two. I generally bracket at a few exposure settings anyway.
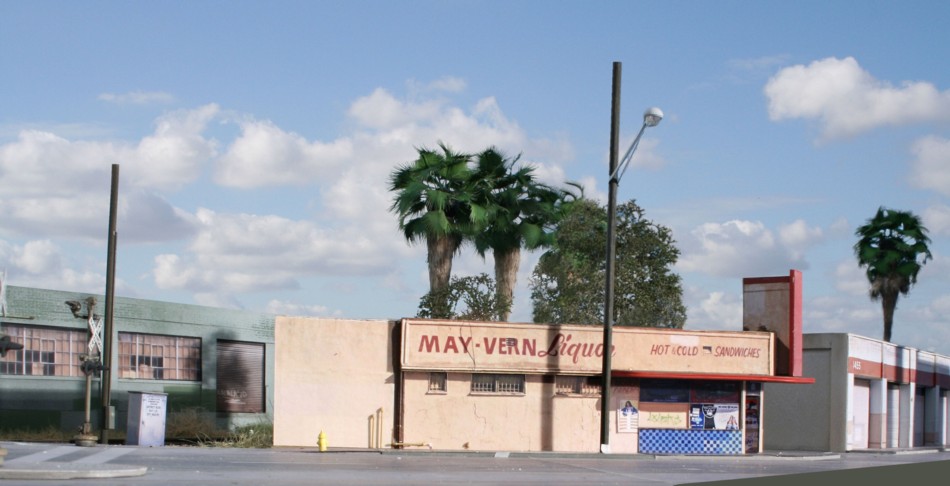
Photography is largely about getting the lighting right. If you decide to rely on room lighting, as opposed to photo floods, there is simply no way you’ll get decent results. You’re simply wasting your time if you try to go that route. Photo floods are only a few bucks. Clamp them to a broomstick, set your camera’s light balance to match the bulb you are using (Tungsten in my case), and you’re good to go. After a lot of experimenting, I got the best look by using just one bulb positioned about seven feet from the scene. All of the room lights were turned off and the blinds pulled. I clamped some cardboard to the fascia to create the shadows on the face of the structure to the right.
After a few hours of trial and error, I finally settled on the shot above as the best candidate. Previous efforts either had lights spots in the wrong area, dark spots in the wrong area or both. Even when I got things close something seemed to be missing. There was just a blah “flatness” I couldn’t put my finger on. I studied some railfan photos taken in the late afternoon and came to the conclusion I didn’t have enough shadows in the image. Placing pieces of cardboard in front of the layout to create the necessary shadows solved the problem. Ideally, I would have liked to been able to get one more dark long shadow in the foreground street but couldn’t get it to work out without blocking the image.
On to photo editing (I use Adobe Elements), which in this case didn’t need much, just a little nipping at the margins to improve things a per cent or two. The first step in photo editing is to crop out the areas you don’t want. Next, I used the levels tool to lightly adjust the entire photo, tapped up the contrast a bit as well as the sharpness. I went back with the selection tool and made another pass with the levels tool in select areas. I darkened the shadows slightly with the burn tool.
Next, I shifted over to Paint Shop Pro X which has my Corel Knockout background removal tool (a plug in). I removed the wall background and experimented with various sky images in my library. Generally I’m not one for white puffy clouds but, in this case, that was the background that looked best. Finally, I went back to Photoshop Elements and the clone tool to clean up a few blemishes from the background removal process.
For those that want to dig deeper into the photography side of our hobby, Bob Sobel has written an excellent tutorial on model photography HERE.