I wrote a blog on my business site, “The Fear of Making Mistakes”. You can read it HERE.
Model Railroad Blog
Quick Fixes for N Scale Rolling Stock
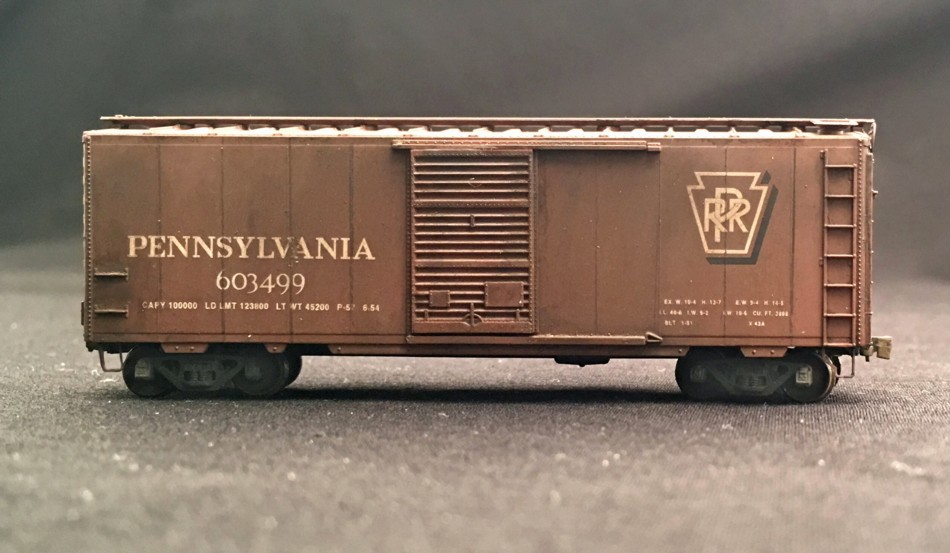
Work on the Brooklyn N scale layout begins with a step back to refresh my N scale skills and get back up to speed. High on the list is improving the appearance of rolling stock without making each project a months long effort. Challenges with N scale rolling stock include: excess height to accommodate truck mounted couplers, oversize couplers, cast on ladders and grabs, overly thick rivets and piping, and overly thick parts in general. Essentially we have two weapons at our disposal, the use of color to downplay deficiencies and actually replacing parts. Carving off ladders and grabs and replacing them is DOA in my decision department. Not gonna happen.
Taking a look at the state of the scale, Micro Trains appears to still be the leader of the pack in terms of fine weld seams and rivet heads. For now it seems the fastest approach to get something photo worthy is:
-Stick with Micro Trains for most pieces
-Use black washes around the ladders and brake staff to downplay the fact that they are cast on
-Replace the brake wheel with the excellent Gold Medal Models etching (a quick ten second fix)
-Replace the trucks with the exceptionally well thought out BLMA parts which effectively lower the car back to the correct car height.
-Replace the couplers with body mount Z scale ones. Trim the trip pin off and paint them a dirty brown rust color. I had high hopes for the new scale couplers but, alas the coupler pocket is so large it impinges truck swivel.
Cuba Tropical Produce – Finished!
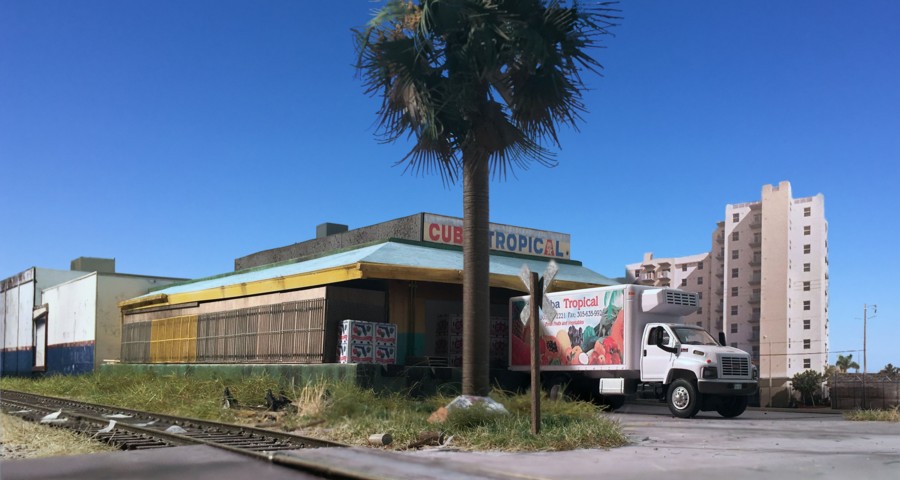
Just under the wire! I finished up the Cuba Tropical Produce scene at 13th Avenue by years end….barely! This structure, modeled as it appeared prior to 2008, has always been one of my favorites so it’s nice to finally have it wrapped up and on the layout. The box truck signage was made by taking a photo of one of their actual trucks, printing it on an Avery mailing label, and sticking it to the side of a Boley model. The image was taken with my iPhone (and heavily edited) as I like the lower shooting angle it gives, noticeable lower than a standard SLR.
The Spur, December 24th
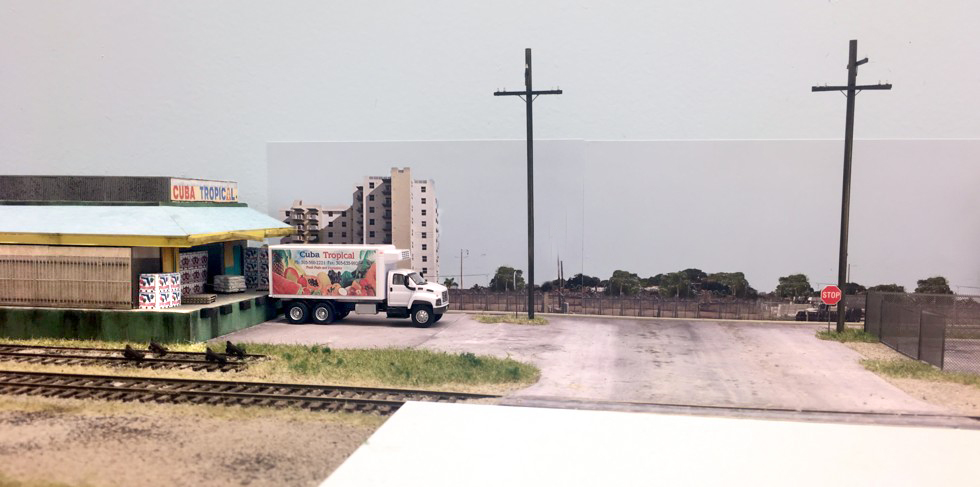
Street to backdrop transitions are always a problem. My idea for a forced perspective structure backdrop flat at the end of 13th Avenue didn’t really work visually. The high rise apartment building was too much of a landmark to omit. I re-traced my steps and went to a more traditional photo backdrop. The edge of the photos against the backdrop is apparent but the lessor of two evils. To help with the 3D to 2D transition I kept the horizon low, the height of the high rise relatively low, and added a sidewalk between the layout and backdrop. Since the last posting the chain link fencing for the Bond Plumbing Supply storage lot was finished, a few utility poles were added, static grass applied, and I worked up a Cuba Tropical box truck.
The Spur, December 17
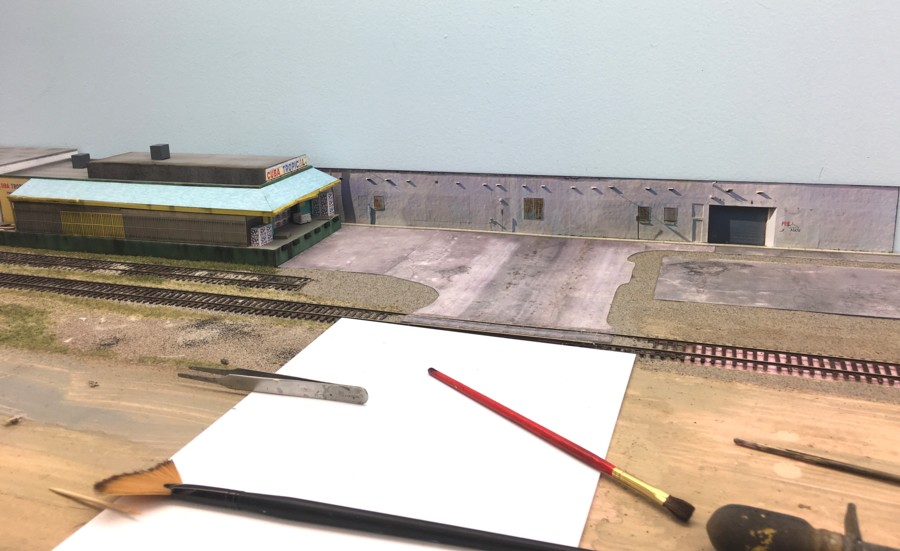
Urban scenery is much more time consuming to construct than its counterpart in mother nature. Streets, sidewalks, lots, and utility poles generally are more time consuming to construct than the actual structures. Shown above is the intersection of 13th Avenue and 23rd Street. The recently completed Cuba Tropical Produce structure has been “planted” on the left. The grade crossing was made using CustomTraxx street rail with photo laminated pavement between the rails.
I’ve never been totally satisfied with the street transitions from 3D layout to 2D backdrop. To get around that, I’ve resorted more and more to “T” intersections. Not as common as a through intersection, they aren’t an oddity either. In the scene above 13th Ave. tees into 23rd Street which is represented by a narrow, one inch wide roadway running right to left in front of the building flat. The structure is photo laminated building flat glued to styrene for a hint of depth. I built it about a third under-size for forced perspective. You can see a thin sidewalk in front of it. Note that with building flats I: a) keep the height low and b) hide the edges where it meets the backdrop.
The paved pad to the right will be a pipe storage yard for Bond Plumbing.
It’s hard to believe it took two weekends to get just this much done and it’s likely it will take at least another three more weeks to wrap it up.