How do you learn how to compose a scene? It’s a very pertinent question and one that was asked by a visitor that dropped by today. It was also a hard one to answer because it’s more art than science, more of “I know it’s right when I see it” sort of thing. Scene composition has to do with the elements we select for our scenes, their size, and of critical importance, the space between them. Get it right and you have a model of a railroad. Get it wrong and it looks like a 1960’s “model railroad”. I felt bad that I really couldn’t give my guest as many specifics as I would have liked. What I did say was make very heavy use of mock ups to give things the eyeball test before committing.
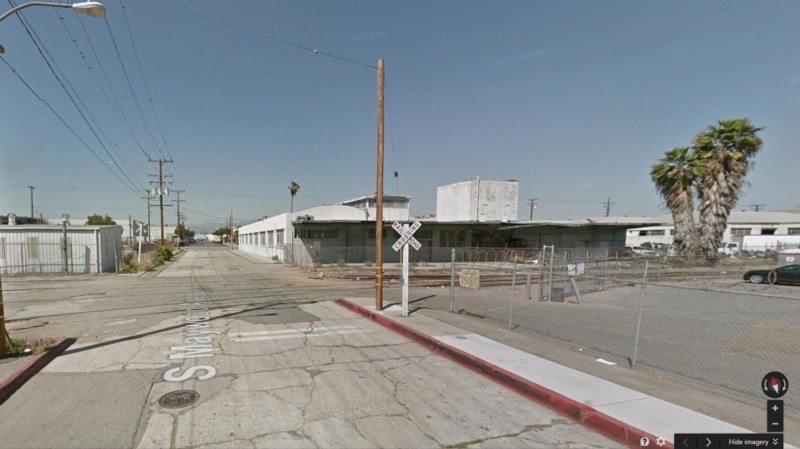
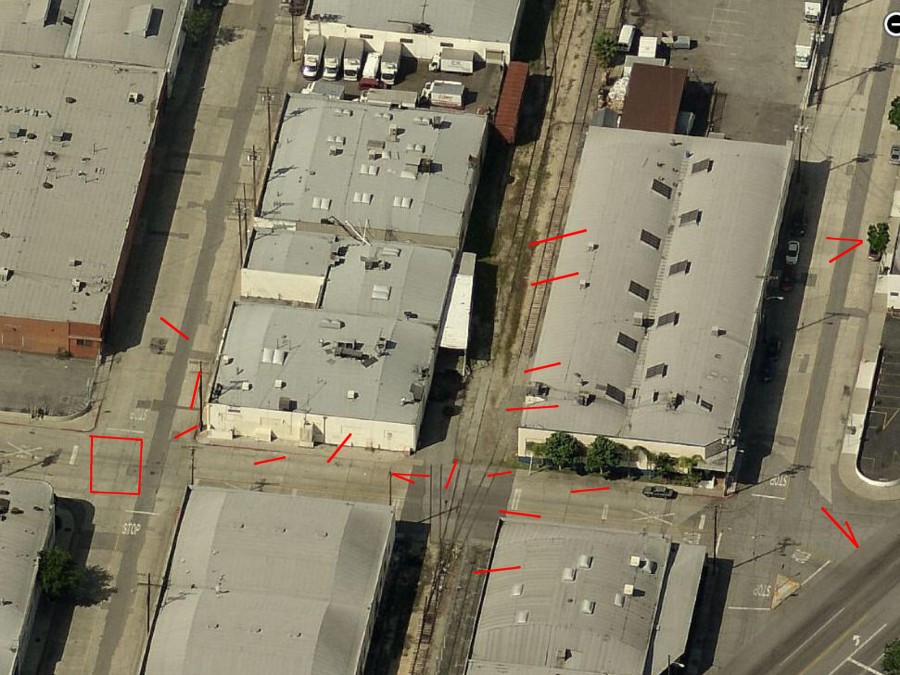
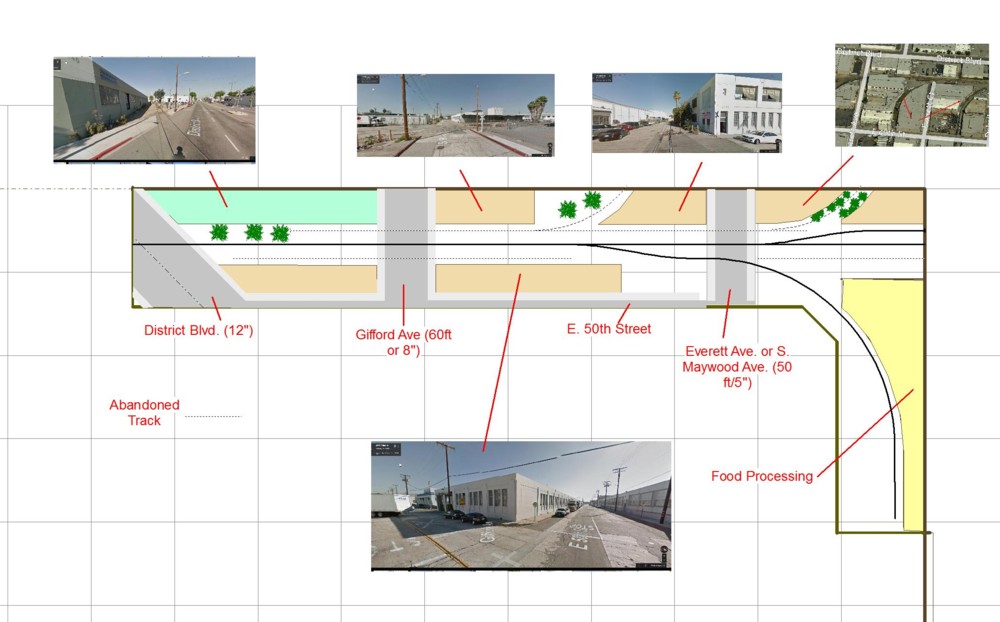
For a proto freelance layout element selection becomes dicey as we can’t simply copy what is there. We have the multiple goals of picking elements that tell the viewer where they are but do so without cherry picking. Cherry picking is defined as avoiding the natural inclination to just choose the coolest elements and ignoring the ordinary ones that put a stamp on a place. For the LAJ layout (Note I decided to go with LAJ for the name as opposed to UP 38th Street). I’m emphasizing the one story art deco structures, the ragged pavement, lot’s of abandoned track, and abandoned curved spurs. I also wanted to incorporate a diagonal street for visual interest.
Spacing between elements also becomes very tricky given the very limited space we have. All too often pushing the envelope of packing things too close together quickly pushes us over the edge toward the toy look. Again, you need to let your eye be your guide. I do suggest though that you keep your pavement lane widths and structure set backs at prototypical distances. That alone will help.
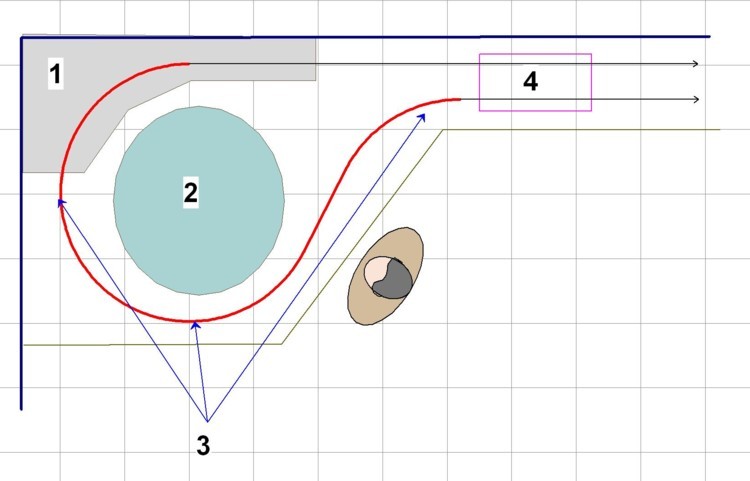
The sketch above is where things stand now with the LAJ layout. The most difficult problem yet to be solved is the exact depths of the structures. How much depth do I allocate to the background structures vs. those in the foreground. It will take a lot of trial and error with mock ups. I also need to be aware of viewing angles and photography angles, being particular careful that foreground structures don’t block the view of signature scenes on the back side of the track. Also, how to handle the transition from streets to backdrop is a very thorny issue to be resolved. Progress but much planning still to be done.
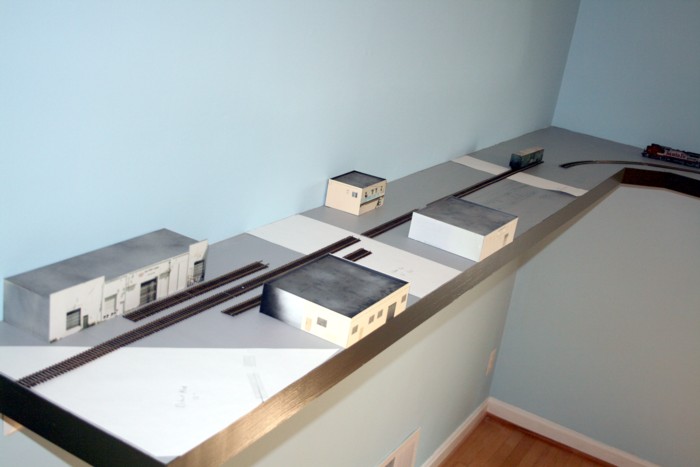
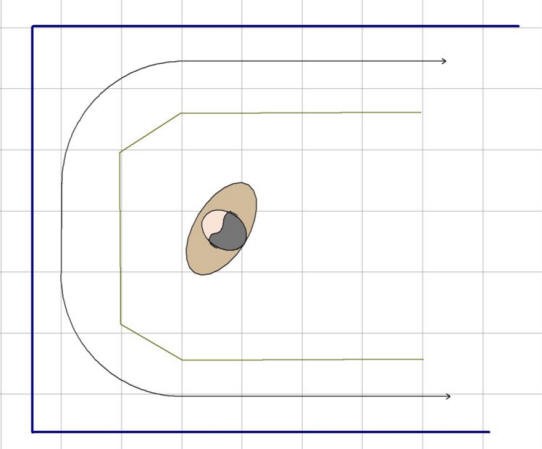
Here’s the mock up as it stands today. The only thing set in stone at this point is the prototypical road widths.