From time to time I get emails from active duty military along the lines of “Can’t wait to get back stateside so I can start model railroading”. Variations on this theme are, I can’t wait until: I’m out of college, have a house, don’t travel so much etc. Been there, done that.
Such a mindset, while understandable, is limiting, unnecessary, and wastes a tremendous amount of time that could be devoted to both developing necessary skills and producing smaller, more portable items, that you’ll need when you eventually do have a layout. Why wait two, three, four years when you can start now? Pushing the day you start seriously immersing yourself in the hobby puts you in the position where, when you do have the space, you won’t be in a position to utilize it effectively. You won’t have the skills. Starting a skills building program NOW is energizing, creates momentum, and puts you in a position for a quick launch when you do have room for a layout.
“But I don’t have any space and am constantly on the move, how can I accomplish anything with my mobile lifestyle?”
Some of the most important skills can be developed with extremely inexpensive materials that would fit in a shoebox. Some ideas:
Weathering: Nothing makes a larger contribution to the overall look of a model than effective weathering. It’s an art, but one that can be learned if you are dedicated. Set a two year goal of being able to create the necessary subtleties, color effects, and color edges to make your models stand out. All of the tutorials you need are available on The Rustbucket Forum. Materials you’ll need: one tube each of burnt umber and black artist oils, a can of Dullcote, a brush, black and brown weathering powders. The guys on the TRB don’t use airbrushes. It appears their preferred medium is acrylic craft paint. Set a goal of having ten mind blowing cars ready by the time you return stateside.
Utilities: Vertical elements, particularly utility and light poles, make a tremendous visual impact if well executed . Accurate representations involve a fair amount of scratch building and will take a considerable amount of time to build. It’s time well spent. The parts are cheap and readily available. The finished poles take up very little room. Parts needed: bamboo skewers, scale lumber, insulators, spring wire, stain, and transformers.
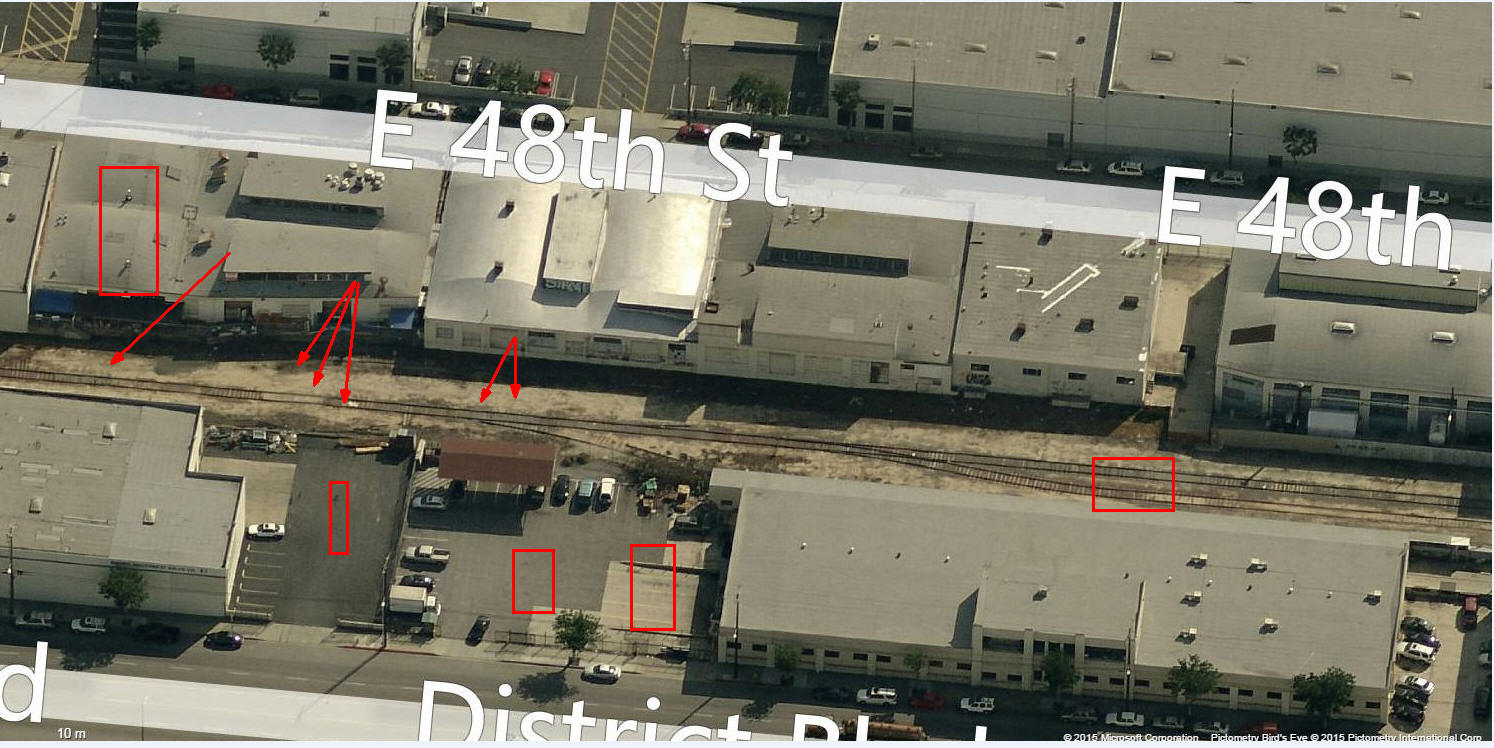
Line side details: Details such detailed cross bucks, signage, electrical cabinets, switch stands, etc. add to the overall scene and can be built in a hotel room and stored in the smallest of boxes.
Track: While highly detailed track isn’t practical for even modest layouts, learning to hand lay and detail track and make your own turnouts is a skill that will pay off in numerous ways in the decades to come. Why not teach yourself to scratch build a hand laid turnout. The cost is nominal and individual turnouts are easy to store (or even mail back home). You’ll need: wood ties, stain, rail, tie plates (from Proto 87 Stores), a file, glue, and small drill.
Look a head two years and imagine finally walking into a usable model railroad space and having a small fleet of exquisitely weathered rolling stock, a few stunning hand laid switches, and boxes of necessary line side details and utility poles. Of far more importance imagine being well into the learning curve and ready to launch when the opportunity presents itself.