I added a chapter in the How To section on upgrading and enhancing Micro Engineering turnouts.
Model Railroad Blog
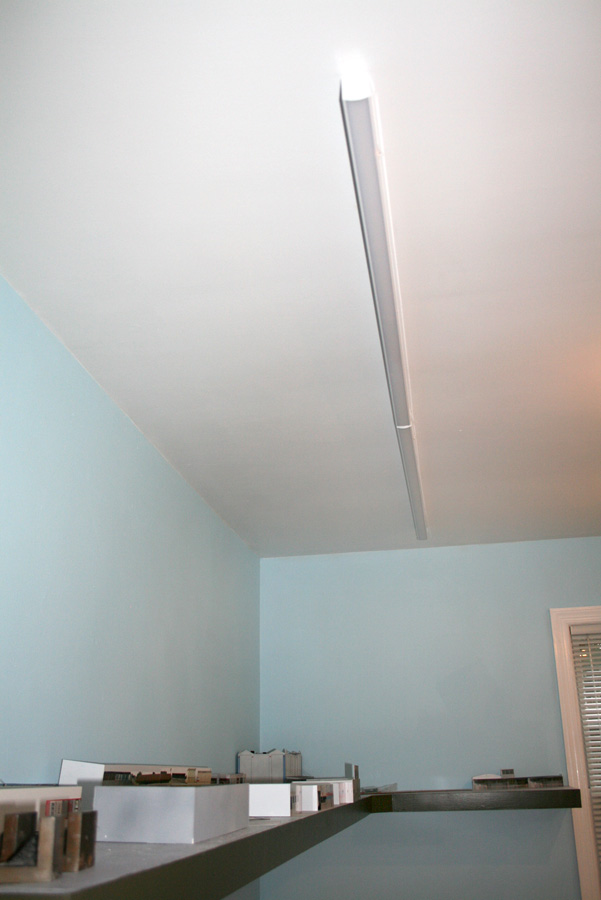
LAJ Lighting
“You can never be too rich, too thin,…….or have too many lumens” Wallis Simpson.
Coming up with a method of lighting the LAJ proved to be more challenging than expected. Since this was in a finished room, with decorative track lighting already in place, the biggest obstacle was coming up with something that would bath the layout in light and yet be unobtrusive enough as to not compete with the other fixture The way my home was built, installing recessed can lights wasn’t an option due to the difficulty in running the power feeds. After literally months of head scratching, a trip to The Home Depot turned up the solution; high quality, ultra thin, high power, LED strips by Lithonia. I bet they sell these lights everywhere but because I didn’t know exactly what I was looking for, I kept missing it! It’s amazing what they’re coming out with these days as far as lighting options go. Although light in weight, it’s an awkward size, so if you’re thinking of putting one of these in, I would recommend having help. The specs. of these units are also pretty impressive:
- They put out a whopping 3200 lumens per fixture!
- Color temperature is a warm 3,000 degrees
- Power consumption is a low 36 watts
- They are “linkable” meaning you can string them end to end.
- The design is very thin and clean making them suitable for living areas
- They are surface mount and power is fed in via a plug in chord. Each unit also has an on/off switch
What You Don’t See
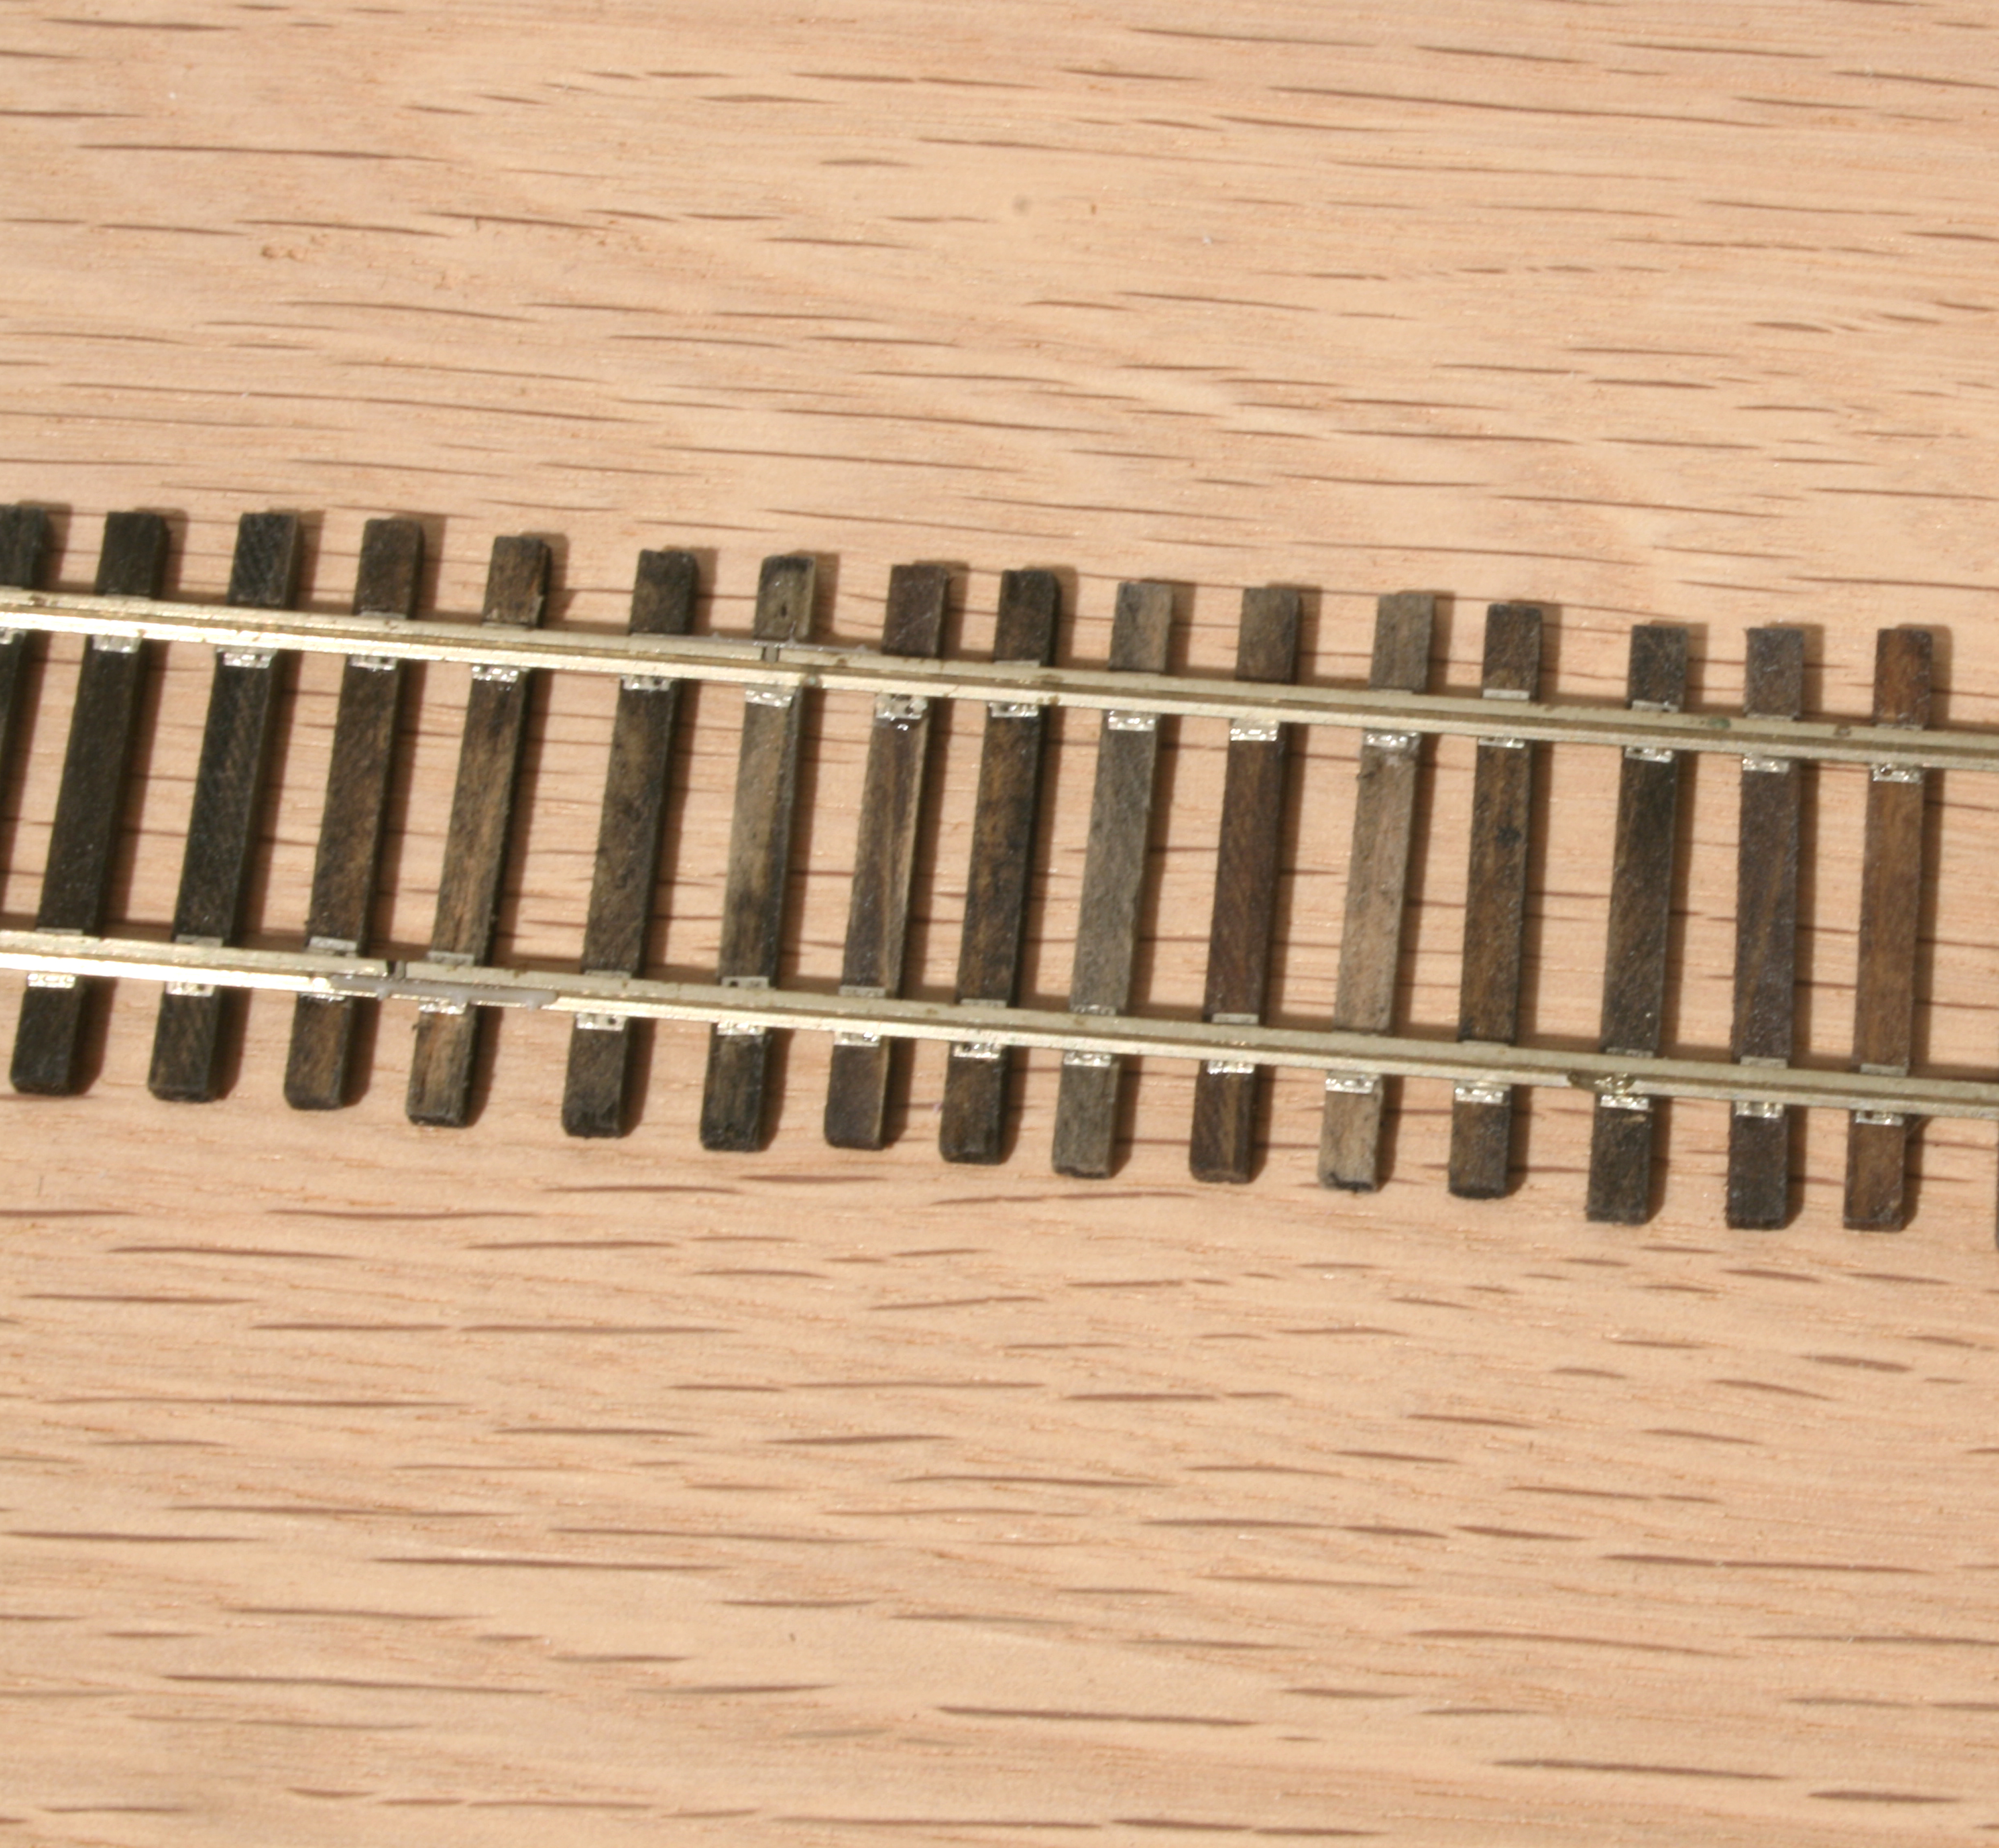
After my most recent hand laid track project using P:87 tie plates I was struck by the fineness of the plates themselves. Others have asked me about this as well. Rightly so. I had two choices, paint the rail a lighter color to highlight the tie detail or paint it the darker color it actually is. I decided to go with accuracy and went with a darker color. As I feared the darker color essentially causes the details of the plates to be lost in the shadows.
Even so, I do view this approach as a success. It’s successful from the standpoint of what you DON’T see. You don’t see the oversize spikes and the total absence of tie plates that is the problem with typical hand laid track. As much as I like Micro Engineering track and it’s finer detail, even those spikes appear a bit large in photos.
Cheap Ass Bastards and DCC
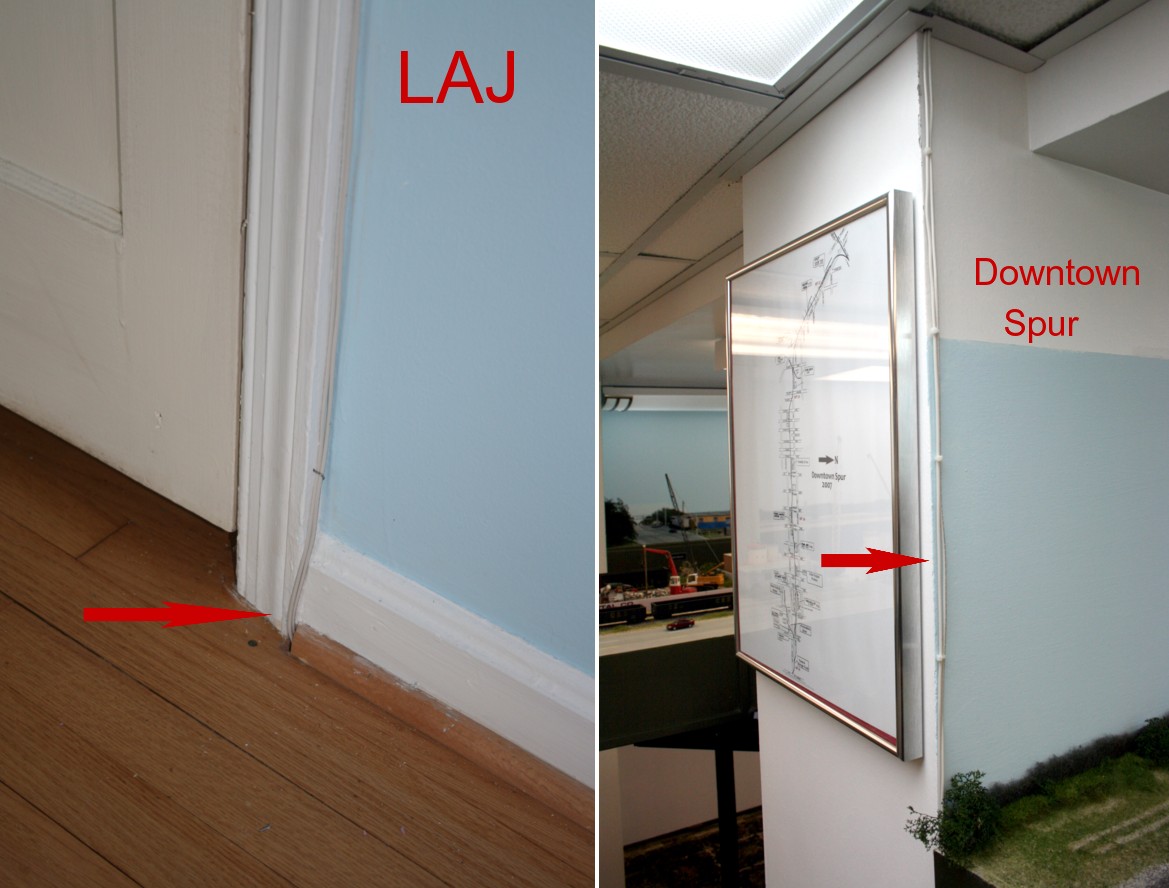
The LAJ layout is powered by running a tap downward through the floor to the Downtown Spur in the basement below.
I seem to recall an event in my son’s hormone laden teen years that resulted in him branding me a “cheap ass bastard”. It probably centered around a differing point of view as to what constituted an “essential” item. The latest edition of Call of Duty wasn’t an essential in my mind, apparently it was in his. I wasn’t offended. I mean, it is true. Self acceptance is the path to inner peace. It’s sort of like being a modern era modeler, N scaler, or Dallas Cowboys fan, We are who we are.
As it came time to belly up to the bar and buy a control system for the Los Angeles Junction project, the cheap ass bastard in me began to raise its ugly head. I was having a hard time getting motivated to plunk down six hundred bucks and I’m not ready to launch on the battery issue yet. In addition, the shelving to house the system components would break up the clean lines of the room.
One afternoon as I was experimenting with some mock ups it occurred to me that not six feet below the floor lay the Downtown Spur layout in the basement beneath me. Had the subject been of more life importance I would say I had an epiphany. All I had to do was drop a feed from the LAJ bench work, through the floor, and tap into the Downtown Spur grid. Wireless goes through walls so why not floors? I dropped the feed, connected the taps, and….success! The LAJ runs like a charm (o.k. it’s only three feet of track but still) using the other layout’s control system.
Hand Laid Track
Inconvenient truths. These are things that we’d rather not be the case but are. Philly cheese steaks with fried onion ring toppings aren’t good for you (don’t have to even look that one up) but we’d rather not know that. Fortunately our evolutionary development has granted us coping mechanisms such as rationalization and denial.
One of the many inconvenient truths of model railroading is that stained, natural wood, ties look light years better than their painted flex track counterparts. No matter how polished the technique of painting plastic ties, it’s virtually impossible to get the subtle tones and textures of stained natural wood. Staining the ties and doing the traditional “spike every fifth tie”, while more time consuming than laying flex, doesn’t take that long. There’s a catch though. The problem is the tie plates. You lose almost as much as you gain visually because the lack of tie plates is very apparent and the over size spikes more than a little distracting. That leaves you with two options, flex track with the limitations of painting plastic vs. hand laid with the limitations of no tie plates and over size spikes.
There is a third option but it’s no silver bullet, hand laid with scale tie plates from Proto:87 Stores. This solves several problems but at the expense of a new one, it is exceptionally time consuming. I’ve tried a few manufacturing methods, including the tie plate jig, and have yet to settle into a method that moves quickly for me. This means the hand laid with scale tie plate method is viable but only for the smallest of layouts. You may hear people say they “plan” on this approach for their forty by forty foot empire but if they are truly seriously considering it there is the possibility they are a meth addict or one step from being cast in “A Beautiful Mind, Part II.” With this method you need to: stain the ties, cut TWO tie plates from the fret for EACH INDIVIDUAL tie, center them, and then attach them to the rail. The tie plates are such that they need to be aligned perfectly on the tie or being slightly off center will be pretty apparent.
When I build a new layout, such as the case with the LAJ, my goal is to make each one slightly better than the previous one in terms of modeling execution. In keeping with that goal I’m forging ahead with the hand laid/individual plate approach. The only thing keeping me from losing my mind is that the layout is so small and there isn’t that much track.
Here’s the finished result of the first section. The ties were dipped in a bath of black and brown Tarrago leather dye, highly diluted with rubbing alcohol. I poured the alcohol in a small container, sloshed some of the dye in, and then dumped the ties in to the mix. How’s that for a scientific description? The next morning I dumped them on a paper towel and wiped the excess off each tie. The tie plates were centered on the ties and glued with thick viscosity CA. To attach the ties to the track I took a section of Micro Engineering Flex track, removed a block of five or six ties, and then glued the wood ties in there place. This method kept everything in gauge as I worked. When done, I added joint parts to the outside of the rails.
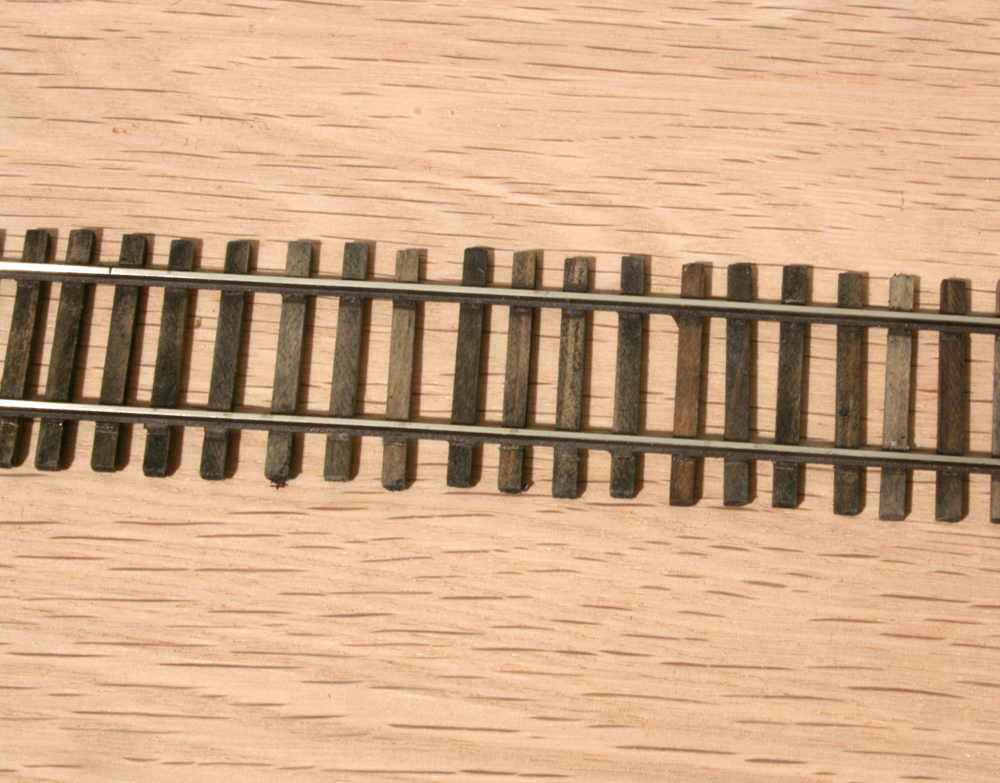
I painted the rail a prototypically dark color which has the downside of hiding some of the details. First you have to mask off the ties (see I told you this was time consuming). I airbrushed on a base layer of Model Master Schokoladenbraun ’43 (number 2096). This is a pretty close match to the old Floquil Roof Brown. After that dried I dusted on Rustoleum Earth Brown camo. paint from a rattle can. That’s it, all done.
All of this ties into one of my central themes and that is that model railroading is NOT an expensive hobby. Looking at the glass half full side of things this method creates exceptional results at a very low cost and spins out to a lot of hobby time. As such it’s a prime project for students, military personnel, and those with limited budgets.