Inconvenient truths. These are things that we’d rather not be the case but are. Philly cheese steaks with fried onion ring toppings aren’t good for you (don’t have to even look that one up) but we’d rather not know that. Fortunately our evolutionary development has granted us coping mechanisms such as rationalization and denial.
One of the many inconvenient truths of model railroading is that stained, natural wood, ties look light years better than their painted flex track counterparts. No matter how polished the technique of painting plastic ties, it’s virtually impossible to get the subtle tones and textures of stained natural wood. Staining the ties and doing the traditional “spike every fifth tie”, while more time consuming than laying flex, doesn’t take that long. There’s a catch though. The problem is the tie plates. You lose almost as much as you gain visually because the lack of tie plates is very apparent and the over size spikes more than a little distracting. That leaves you with two options, flex track with the limitations of painting plastic vs. hand laid with the limitations of no tie plates and over size spikes.
There is a third option but it’s no silver bullet, hand laid with scale tie plates from Proto:87 Stores. This solves several problems but at the expense of a new one, it is exceptionally time consuming. I’ve tried a few manufacturing methods, including the tie plate jig, and have yet to settle into a method that moves quickly for me. This means the hand laid with scale tie plate method is viable but only for the smallest of layouts. You may hear people say they “plan” on this approach for their forty by forty foot empire but if they are truly seriously considering it there is the possibility they are a meth addict or one step from being cast in “A Beautiful Mind, Part II.” With this method you need to: stain the ties, cut TWO tie plates from the fret for EACH INDIVIDUAL tie, center them, and then attach them to the rail. The tie plates are such that they need to be aligned perfectly on the tie or being slightly off center will be pretty apparent.
When I build a new layout, such as the case with the LAJ, my goal is to make each one slightly better than the previous one in terms of modeling execution. In keeping with that goal I’m forging ahead with the hand laid/individual plate approach. The only thing keeping me from losing my mind is that the layout is so small and there isn’t that much track.
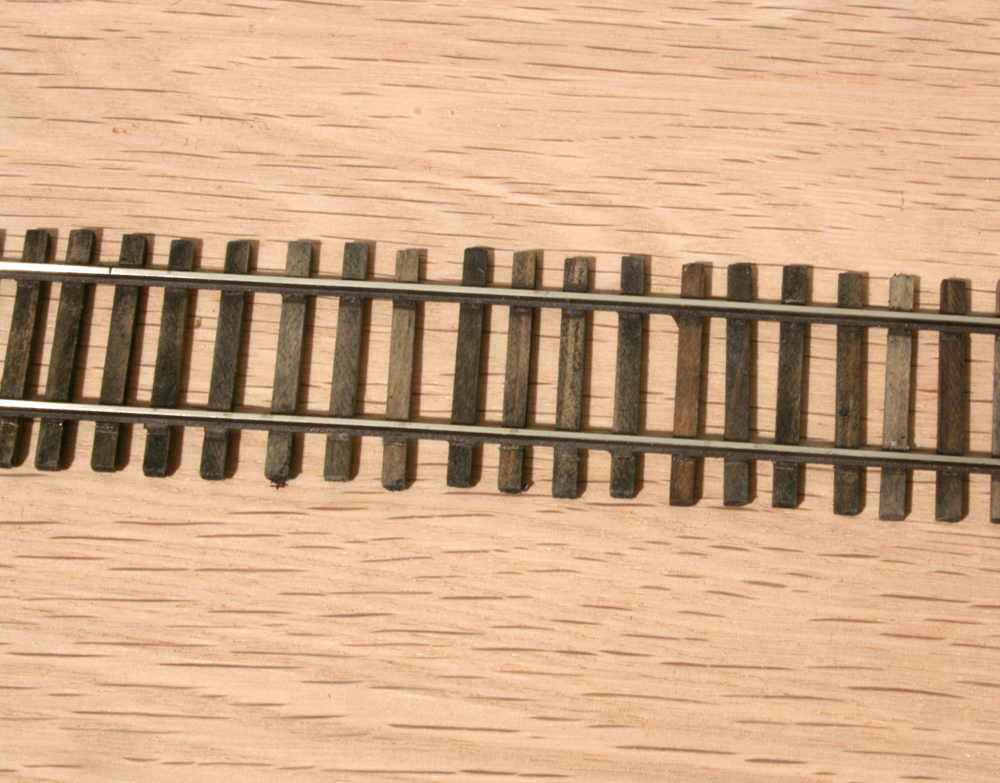
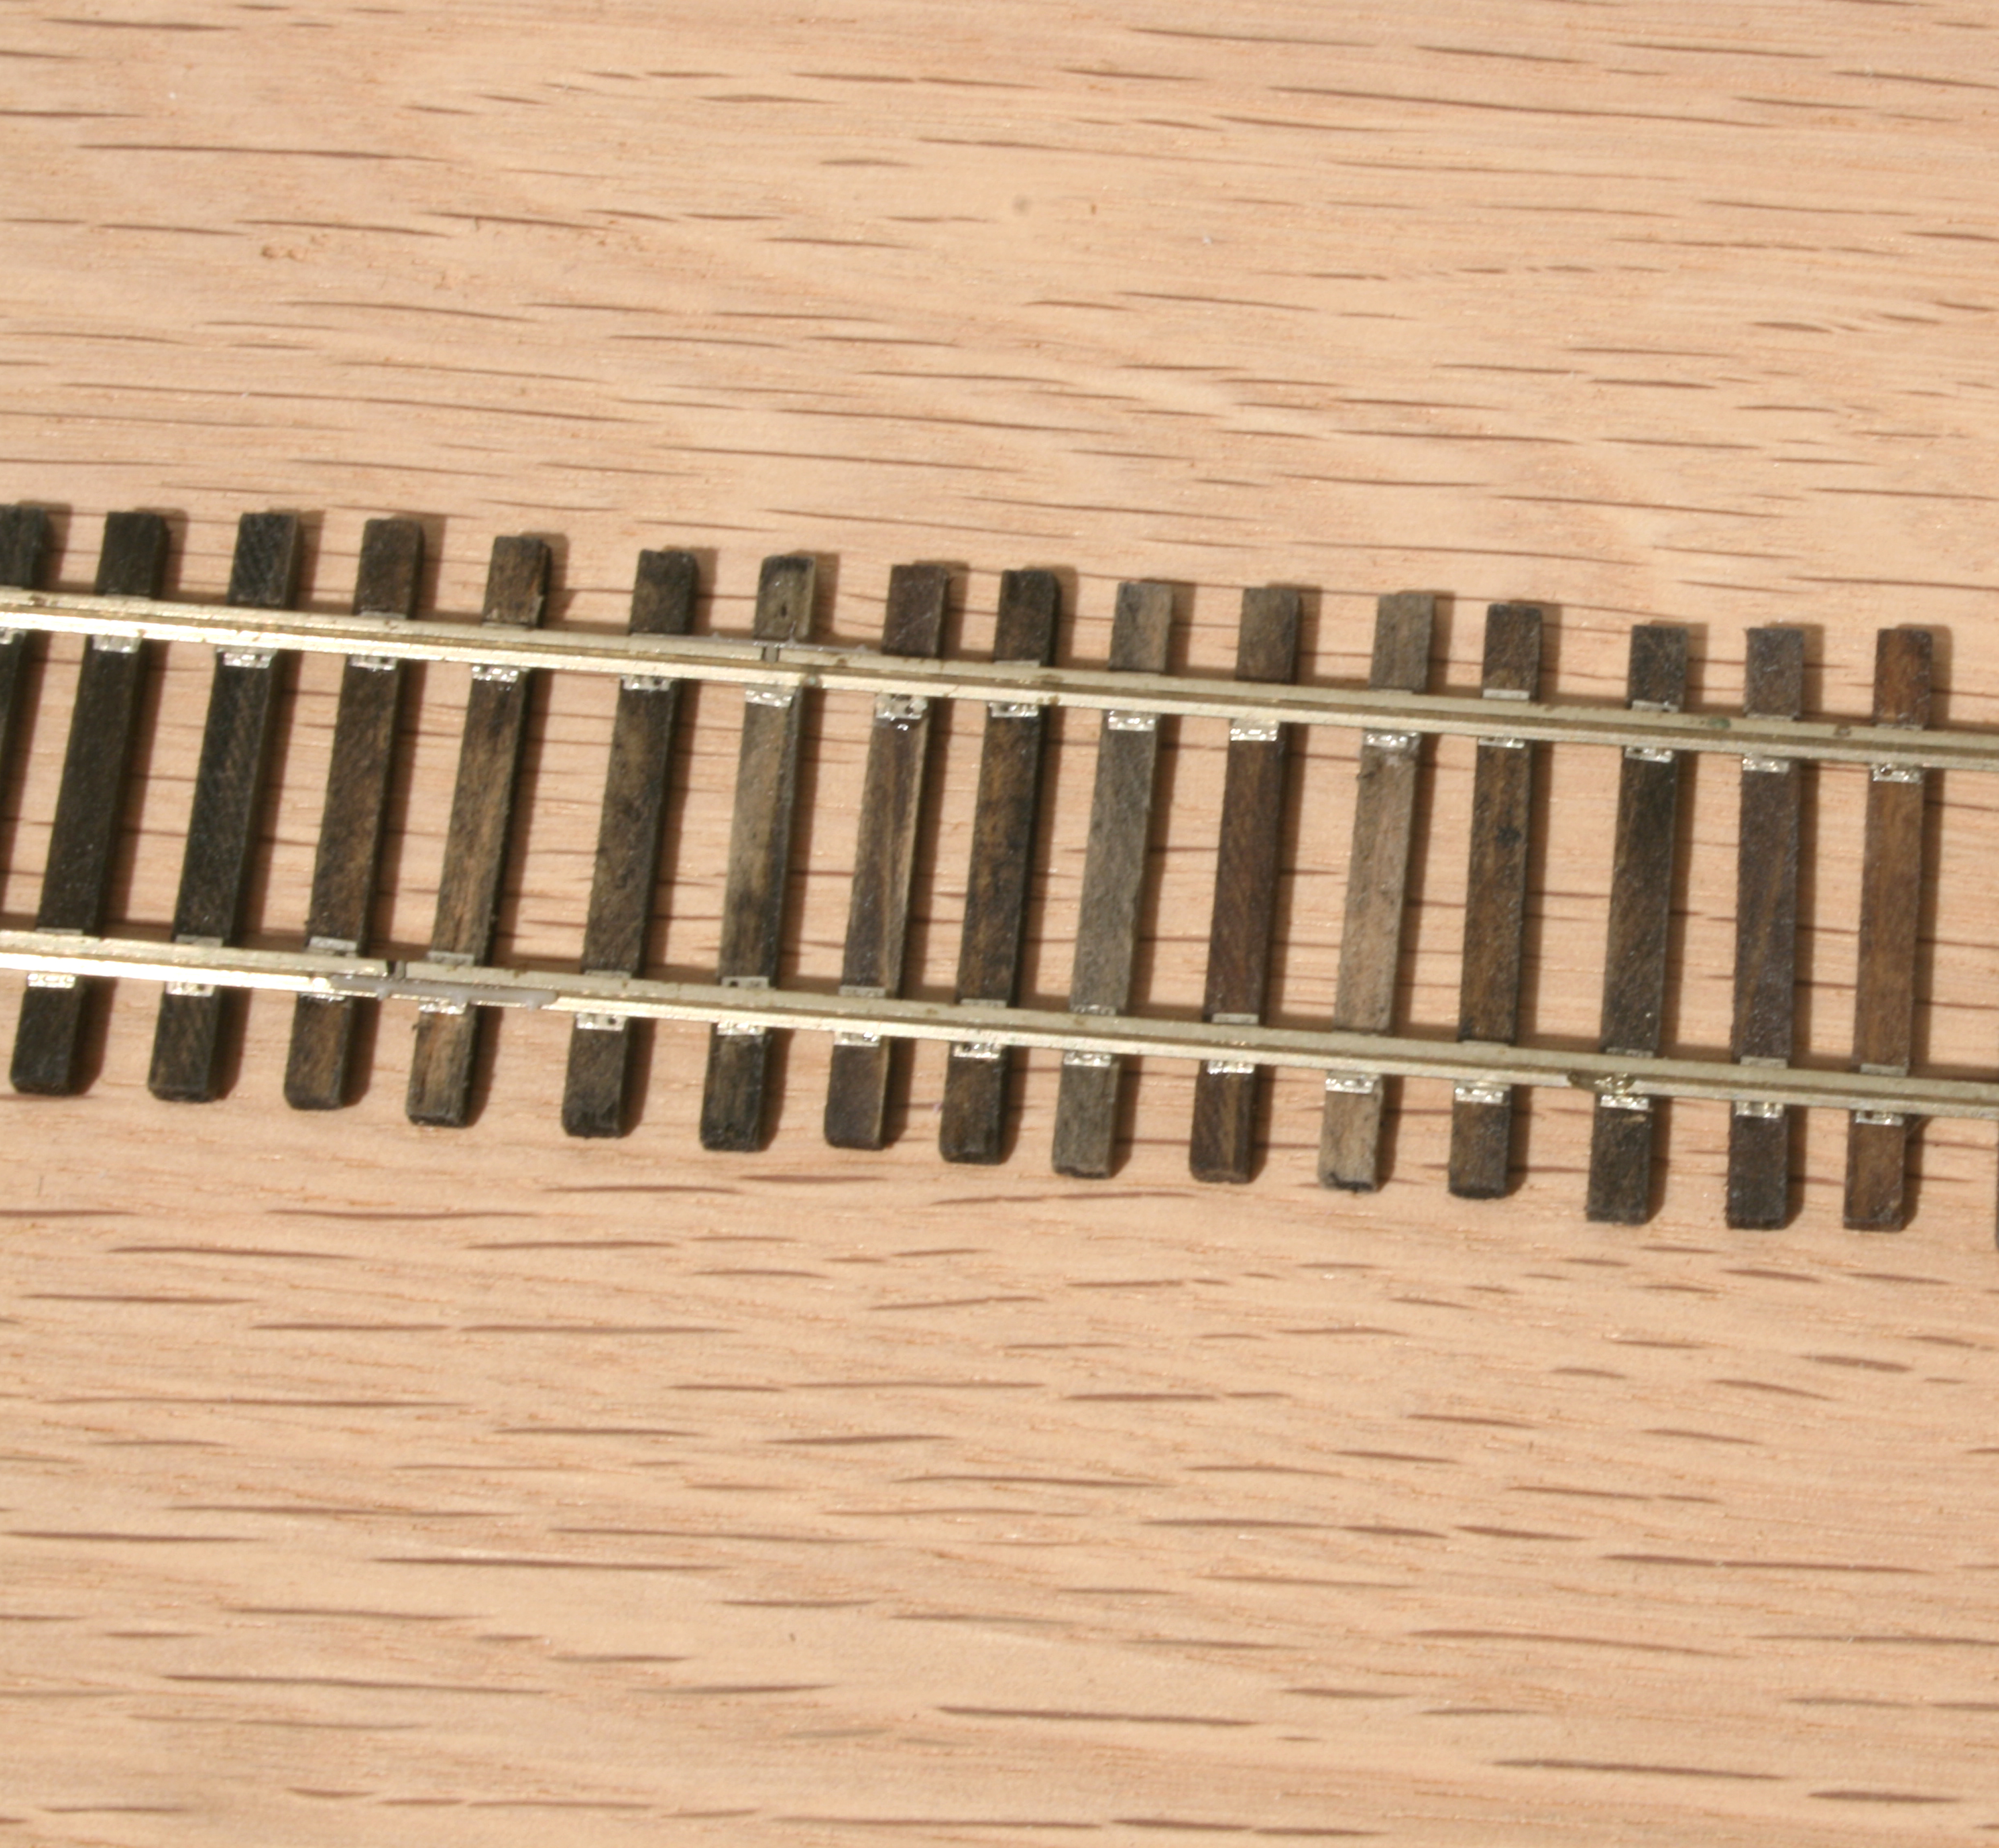
Here’s the finished result of the first section. The ties were dipped in a bath of black and brown Tarrago leather dye, highly diluted with rubbing alcohol. I poured the alcohol in a small container, sloshed some of the dye in, and then dumped the ties in to the mix. How’s that for a scientific description? The next morning I dumped them on a paper towel and wiped the excess off each tie. The tie plates were centered on the ties and glued with thick viscosity CA. To attach the ties to the track I took a section of Micro Engineering Flex track, removed a block of five or six ties, and then glued the wood ties in there place. This method kept everything in gauge as I worked. When done, I added joint parts to the outside of the rails.
I painted the rail a prototypically dark color which has the downside of hiding some of the details. First you have to mask off the ties (see I told you this was time consuming). I airbrushed on a base layer of Model Master Schokoladenbraun ’43 (number 2096). This is a pretty close match to the old Floquil Roof Brown. After that dried I dusted on Rustoleum Earth Brown camo. paint from a rattle can. That’s it, all done.
All of this ties into one of my central themes and that is that model railroading is NOT an expensive hobby. Looking at the glass half full side of things this method creates exceptional results at a very low cost and spins out to a lot of hobby time. As such it’s a prime project for students, military personnel, and those with limited budgets.