Model Railroad Blog

Track Planning Based on Op. Session Length

Certainly, there are many reasons to feature rail served industries on a layout beyond the operational aspect.  If you’re modeling a section of a specific prototype, and the industry is there, you’d probably want to include it on your layout just to be accurate.  You’d do so whether you care about operations or not.  If your primary interest is structure building, you may want to include a structure whether you care about operations or not.  You’d do so simply for the enjoyment that building it provides.  That’s all fine.  However, if you are adding structures and track primarily for the operational play value, then it’s important to be conscious of how little it takes to spin out an op. session or you run the risk of building in a lot more capacity than you’ll ever use.

Case in point is the mini session shown below.  I’ve written many times that I enjoy running a lot of short, thirty minute sessions on my own in the evening as opposed to longer formal sessions.  With that in mind, when I plan a layout for myself, once I know I have enough track/industries to run a few half hour sessions, I stop adding capacity.

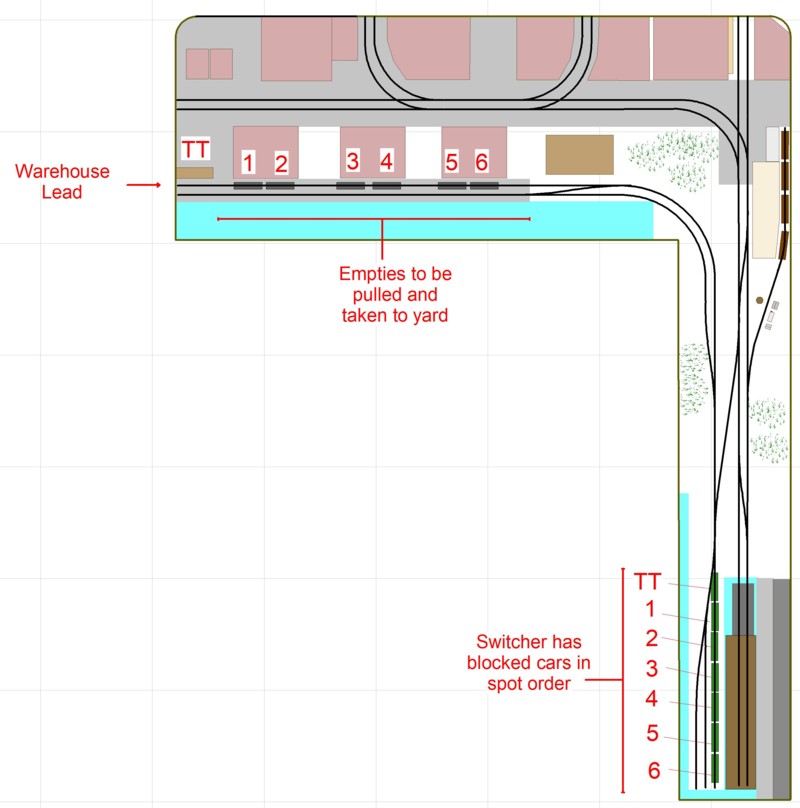
Shown below is a simple sequence involving classifying cars in the yard and spotting them at the BT warehouse complex.  I intentionally made the movements relatively easy but even so it timed out to a half an hour op. session length.

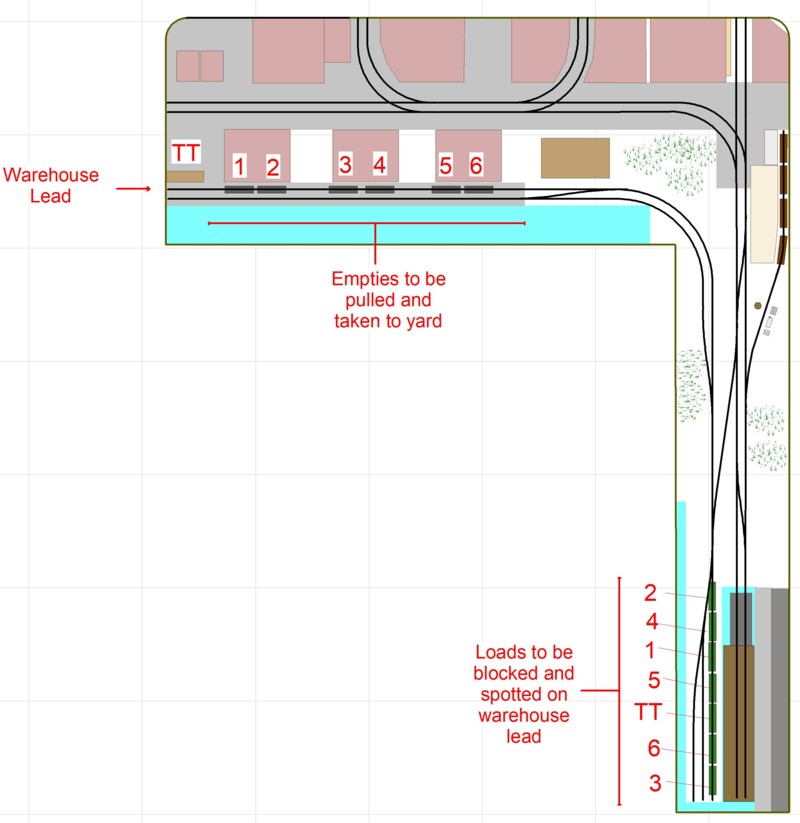
Here’s how things look at the beginning of the mini session. All of the cars on the warehouse lead are empty and get pulled. If you wanted to add length to the session you could set it up so a few cars were still being unloaded and needed to stay in place. The cars in the yard need to be classified by spot but the fact that the yard is otherwise empty makes sorting easy. Again, you could add length to the op. session if you filled up the yard with other cars you needed to work around.


Begin by classifying the cars in the yard by spot order. Again, since the yard is empty this involves a simple sequence of pull/push moves.


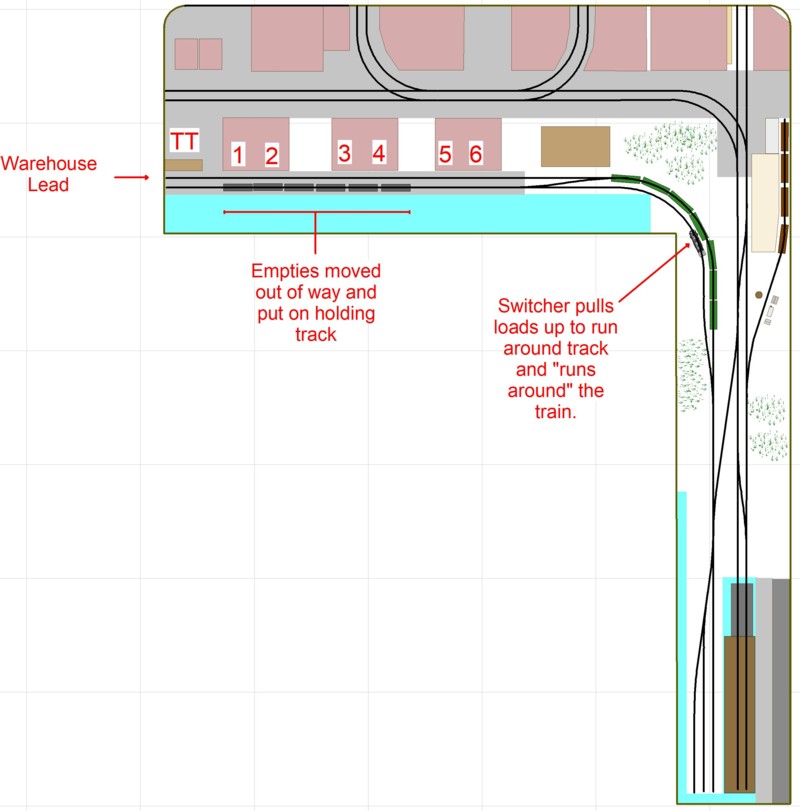
Pull the empties on the warehouse lead and spot them on the parallel holding track to get them out of the way. Pull the inbound cars up to the run around track and run the switcher to the other end of the cut.
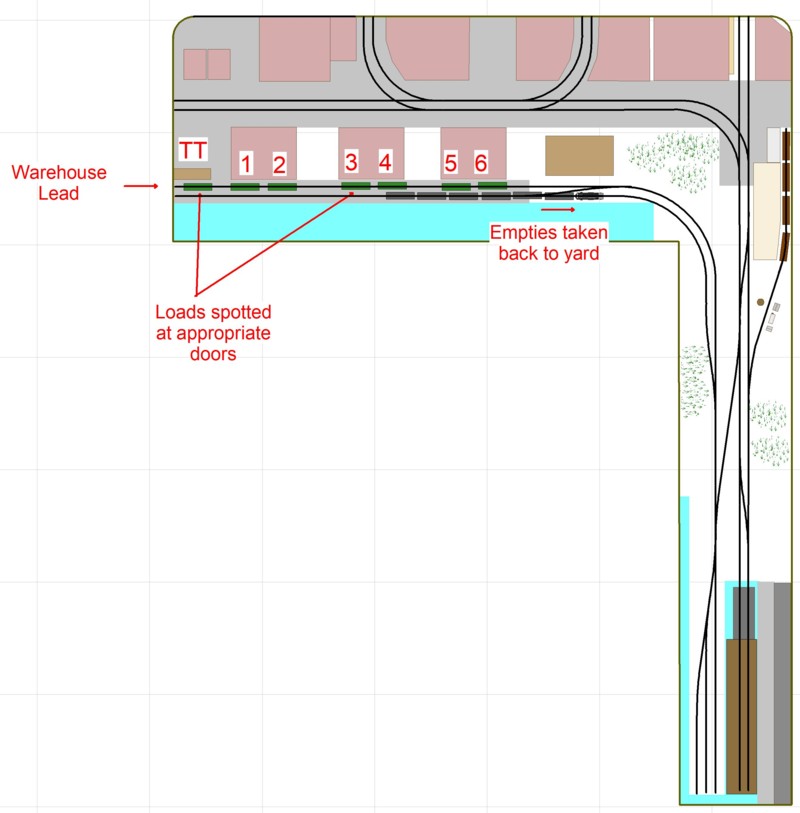
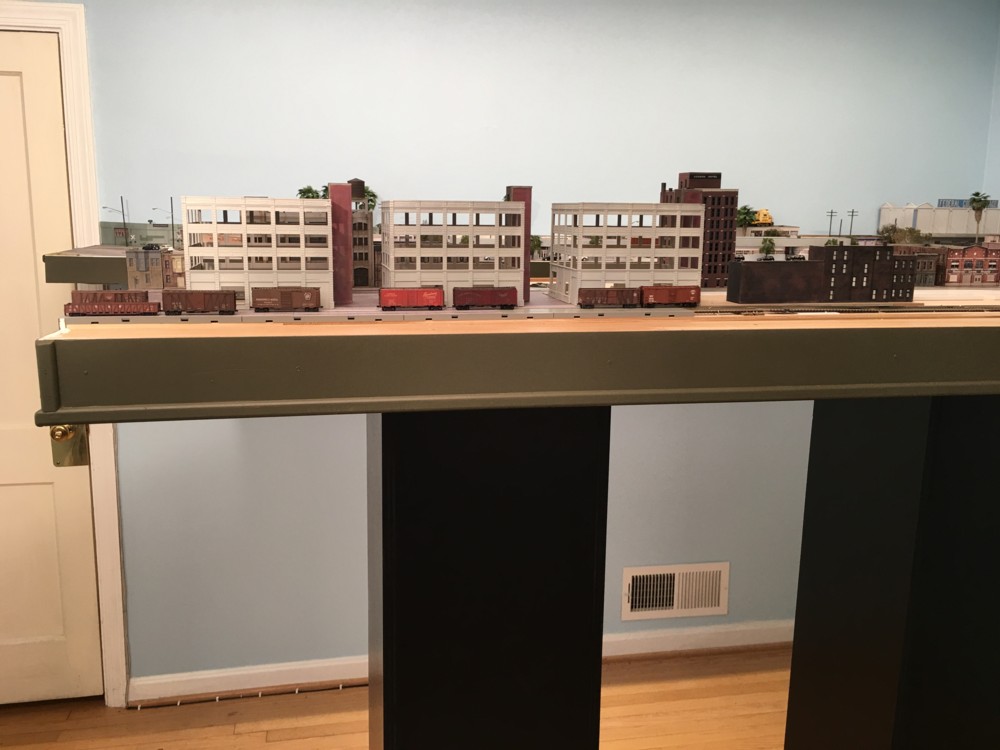
Shove the cut of inbound cars into position in front of the respective doors and then take the empties back to the yard. (see lead photo at beginning of blog)


So, there you have it.  We only used five of the layout’s turnouts for this sequence.  There were no operational obstacles built in and what we end up with was a relaxing half hour running trains.

Brooklyn Terminal Nov. 2


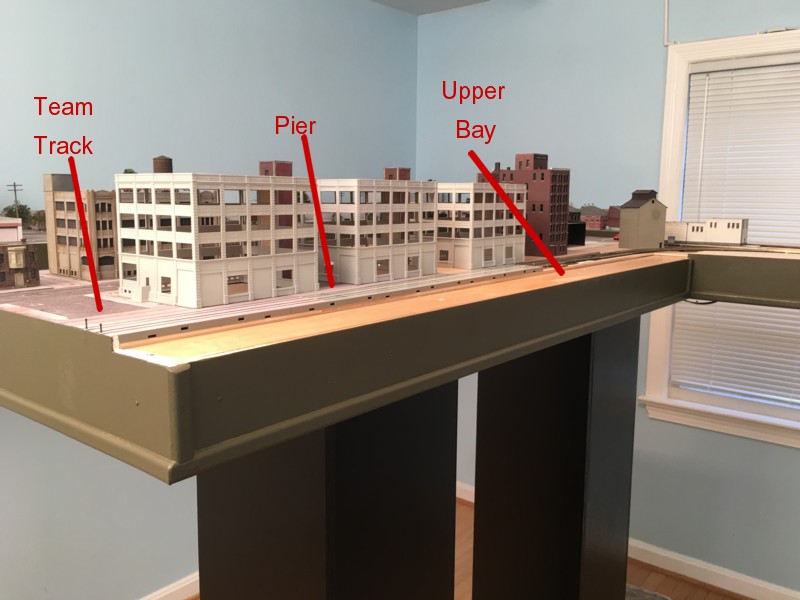
With the warehouses taking shape, I decided to see how things played out with a mini op. session involving moving cars over from the yard and spotting them in the warehouse district.  I didn’t time it but it sure seemed to “take quite awhile”.  A reader recently asked me how many cars were on the layout.  At this point, only thirteen.  The float holds twelve.  That car count can be misleading as it doesn’t take many to keep you pretty busy.  My guess is that anything more than twenty cars on the layout and things are going to start getting too crowded.  Studying the scene composition I decided to move the warehouses down a bit and add a team track at the end of the layout.

View of the warehouses and new team track showing what they look like when they are actually being rail served.
A view of the new team track.
Looking at the warehouses from the bay showing cars spotted at the respective doors.


Brooklyn Terminal October 29

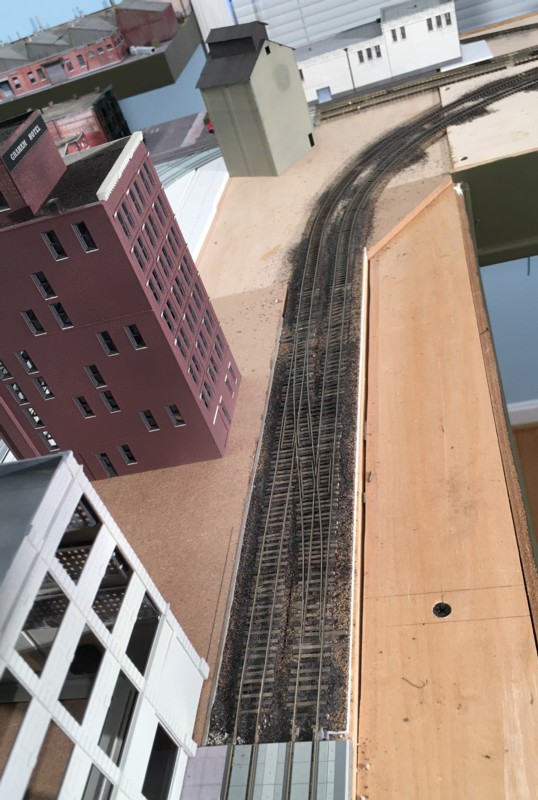
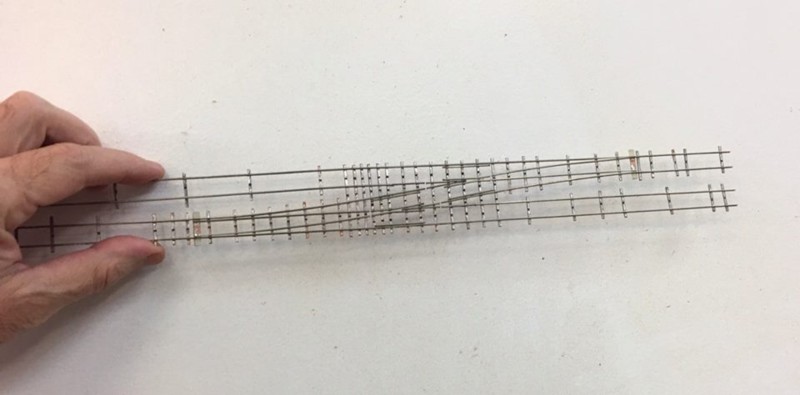
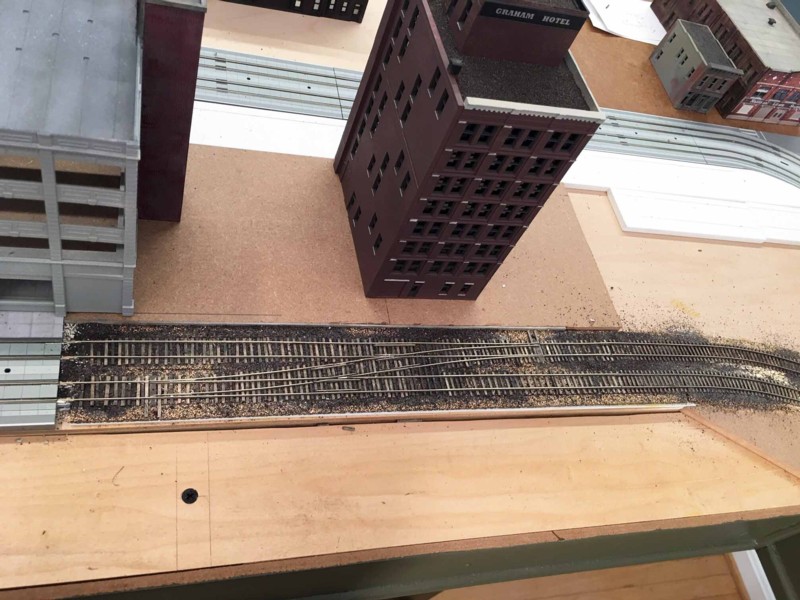
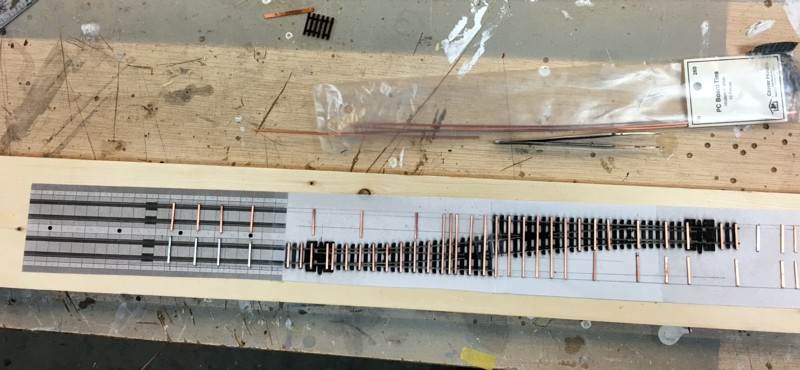
Time to start replacing the temporary Peco flex track with the permanent hand laid code 40.  Once you get the hang of it, scratch built turnouts aren’t that hard to do.  They also give you more flexibility in terms of shape, cost less, and are ultimately more reliable.  I started by photo copying some Peco turnouts and the adjoining Unitrak and glued the sheets to a board.  Using that as a guide, I then cut the PC ties to length and glued them to the paper with white glue.  I’ll build the crossover as one piece on my work bench and then transfer it to the layout.  By going with metal frogs, tapped to a Frog Juicer I’ll get some much needed electrical continuity.


Brooklyn Terminal Oct. 27

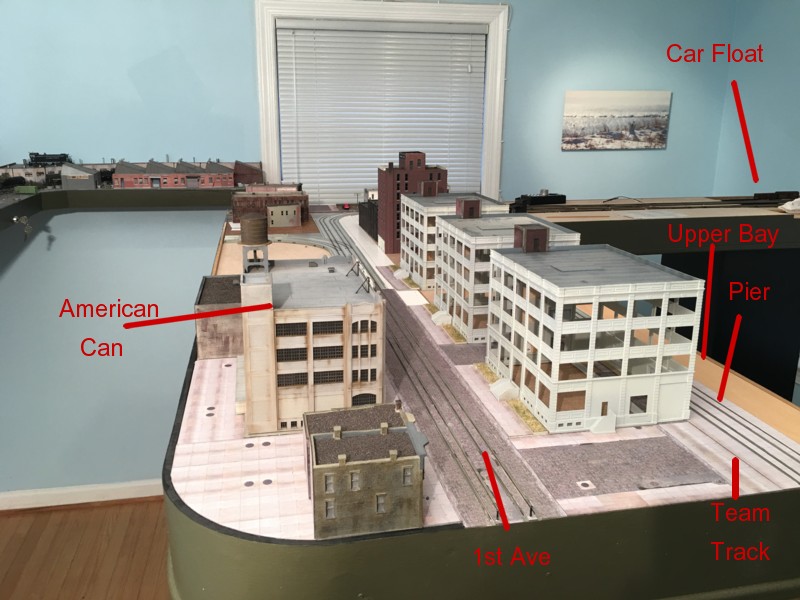
As work progresses on the Brooklyn Terminal Warehouses the overall look of the layout begins to take shape.  For the most part the layout represents the old Bush Terminal’s 1st Avenue corridor in Brooklyn.


Standing in the Upper Bay facing the shore with 1st Avenue running down the middle of the bench work.


Looking southwesterly down 1st Avenue.


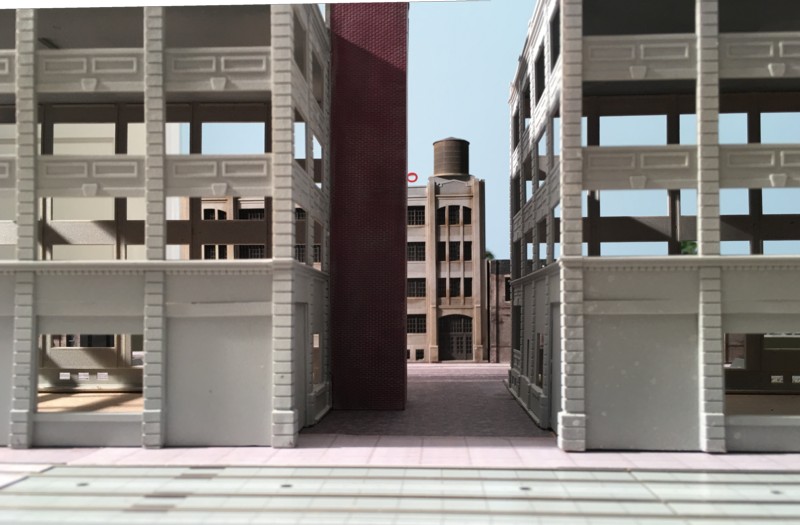
The gap between two of the warehouses gives a nice viewing window towards American Can in the distance.


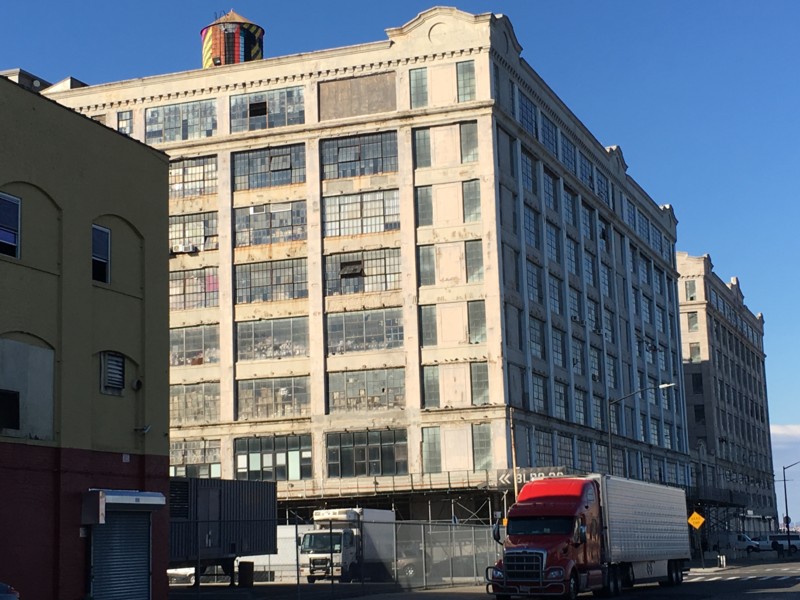
I used this warehouse on 1st Avenue as a color guide. I began by using an airbrush to apply a 50/50 mix of Model Master flat white and sand. I then fogged on Model Master camo. gray from their rattle can line.

BT Warehouses October 21, 2018


One of the signature features of the Brooklyn warehouses is their prominent exterior elevator shafts.


I picked up some 1 x 1 dowels at the Home Depot, made a slight notch in the side of the kit, and glued the wood to the side with CA. I then wrapped the dowel in .060″ styrene.


Finally, I trimmed the sides of the shafts with styrene strip and laminated on sheets of brick sheets. Since the sheets are so thin, I didn’t want to use an aggressive, solvent based adhesive. Instead, I sprayed the backs with Super77, added a few specks of thin CA for good measure, and then pressed them in place on top of the .060″ styrene. Since the warehouses themselves will be painted a light gray I wanted to use brick for the shaft sides to add color contrast.