When adopting standards that are going to be fairly time intensive to implement, it’s always good to think through your motivation before investing significant amounts of time. There should be at least a rough correlation between the agony behind adopting said standards and the payoff. Ego or a manhood measuring stick doesn’t constitute a good reason because, well, nobody else is going to really care one way or the other. If a standard is going to a rough road to implement you have to be darn sure you want the end result and want it badly.
Deciding to go with code 40 rail and the associated scratch built turnouts was one such decision. Let’s face it, hand laying and scratch building N scale code 40 isn’t something that goes quickly so if you go that route there damn well had better be a payoff. In my case I’d gladly go with code 55 if it weren’t for one aspect of the hobby I particularly enjoy, close up photography. Viewed with the naked eye code 55 is more than just fine, it’s totally workable. Unfortunately, when viewed in a close up photograph it’s oversize dimensions really stand out. That put me in a position of biting the bullet and going through the grind to end up with rail that is more photogenic, the code 40. Since no commercially made turnouts are available in code 40 you’ll have to make them yourself.
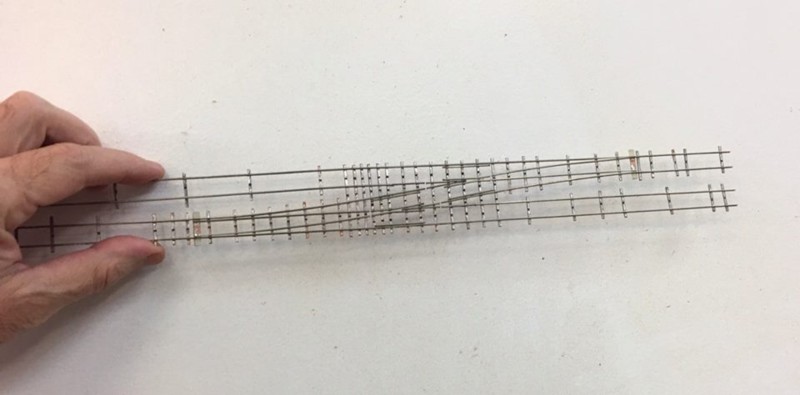
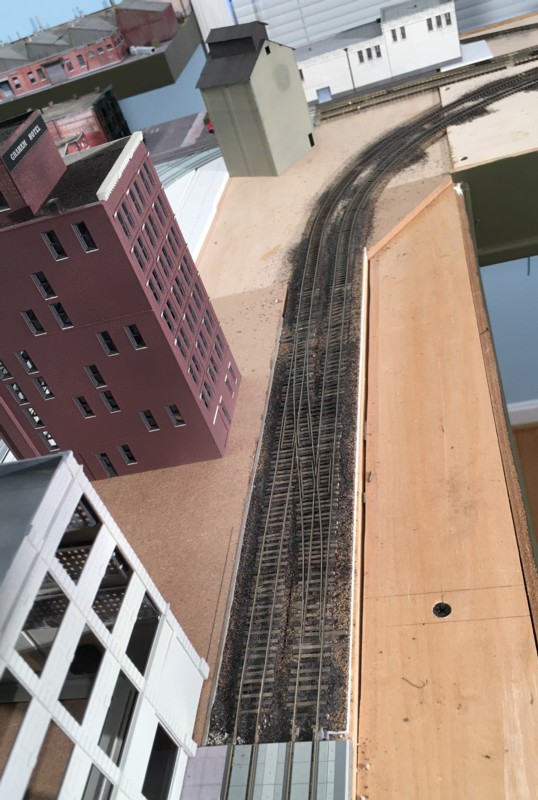
My current project is detailing the waterfront scene adjacent to the three warehouses. Between the warehouses and waterfront is a crossover and siding so that’s where I started with the code 40. Since I had some Peco code 80 track in place temporarily, I decided to remove the Peco crossover, run it through a photocopier, and use that as a dimensional guide. I then scratch built the crossover on top of the photo copy using the traditional method of soldering the rail to PC ties from Clover House.
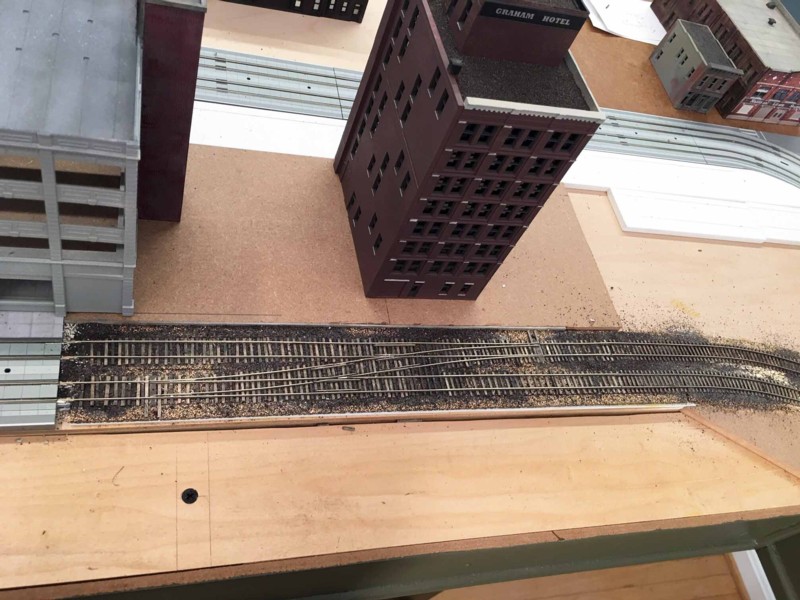
Once the crossover was completed, I took it off the workbench and placed it on the layout. Note the nice look you get by using wood ties (stained with India Ink/alcohol).
The track bending around the curve to the right is ME code 40. Large flange locos, such as my steam switcher, will ride up on the spikes of the code 40 track so that had to be modified as well. I removed a flex track tie every two inches or so and soldered a PC tie in it’s place. Then, I took a number 11 blade ran it along the inside rail flange cutting off the inside spikes. If you don’t put the PC ties in first, the rail will essentially fall apart with the spikes holding it in place.