It’s been a busy few years on the modeling front. As I wrote previously, with the Brooklyn Terminal layout now fully complete, I do find myself feeling a bit of “what now”? There are really no other themes or scales that are pulling me towards them at this point.
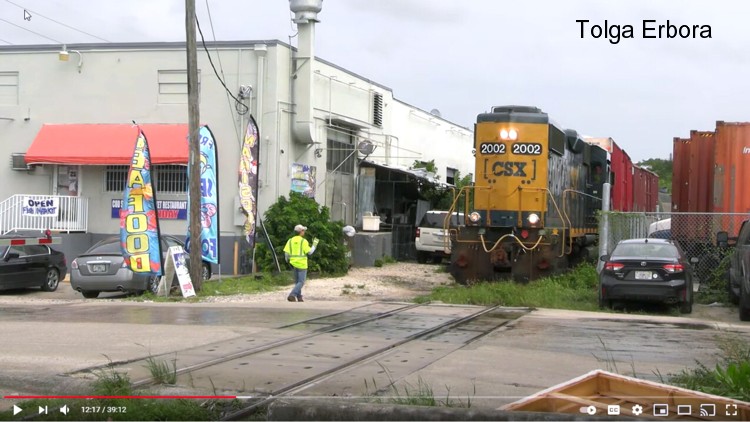
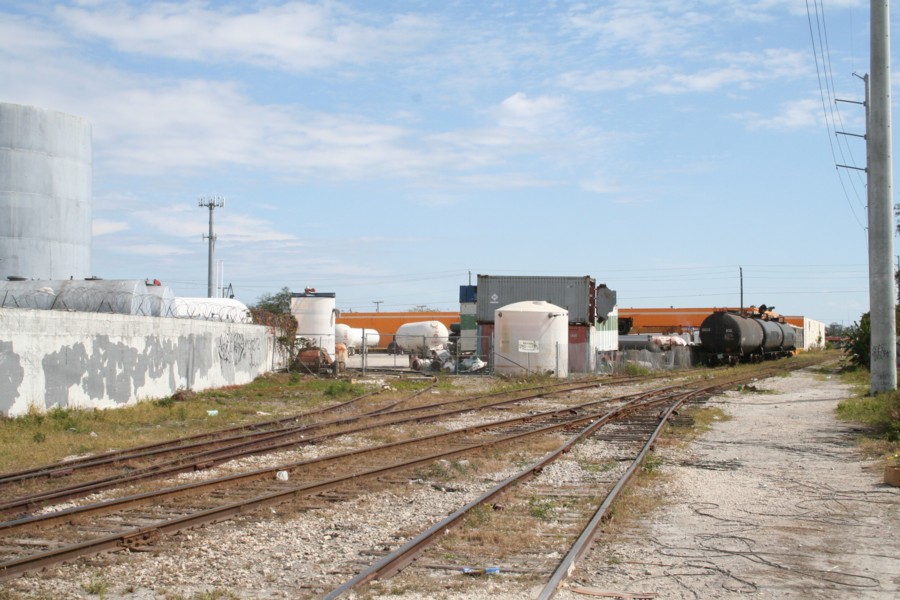
If anything has arisen lately it’s been the increasing and excellent documentation of the Miami rail scene I model by Tolga Erbora, both on Flickr and YouTube. Tolga has recently created a separate playlist tab on his YouTube site focusing on East Rail and The Downtown Spur. The imagery has reminded me of how fascinated I still am with the area and, despite the cutbacks all lines are facing, how vibrant it continues to be.
For the near future at least, I’m going to forget about new horizons and resume my Miami modeling. An East Rail reboot has much appeal and is something I am strongly considering. However, the Downtown Spur layout isn’t done so, for the short term at least, I’m going to go back to puttering with that.
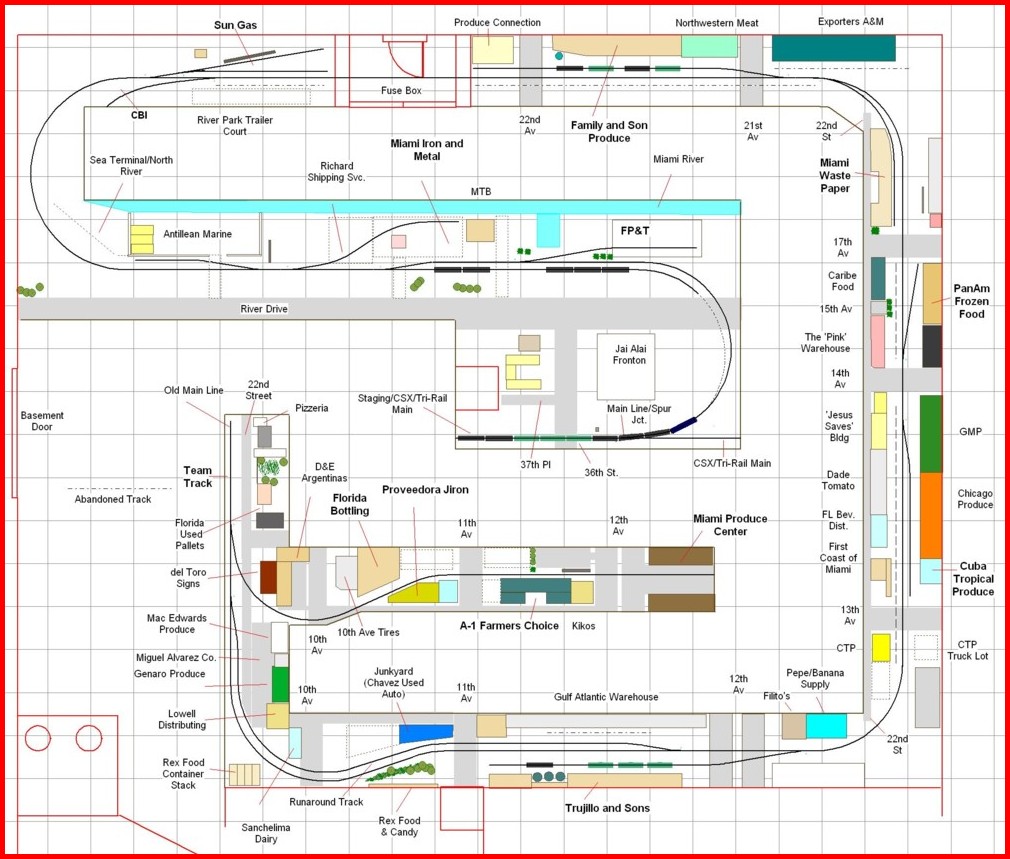
First up will be finishing the Sun Gas/CBI area as this is one of the largest customers on the line.
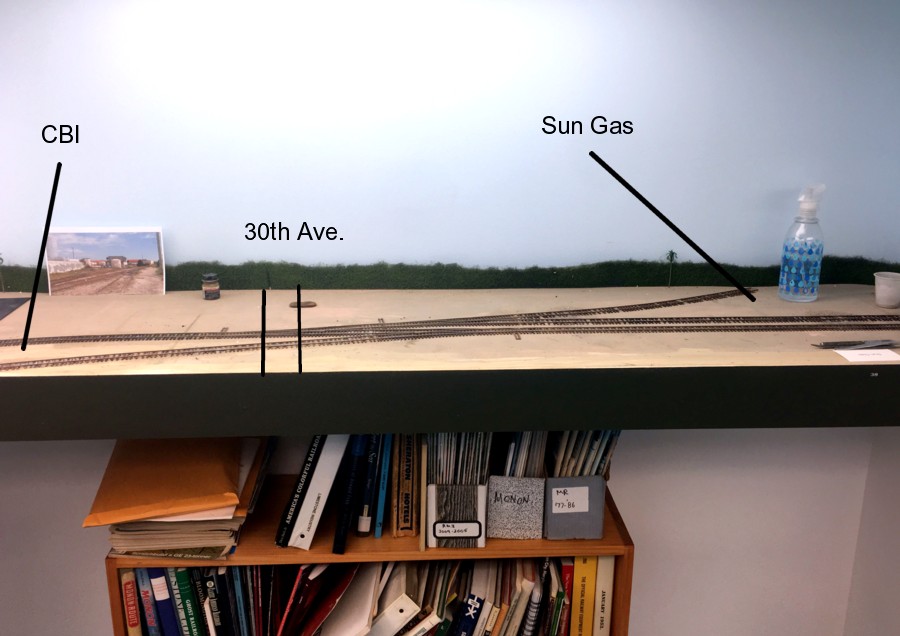
In the past week I went back and removed all of the temporary Atlas rail I originally placed in the area and replaced it with permanent, painted and detailed, Micro Engineering code 70 track. I also added frog juicers to all three turnouts. Next up will be the 30th Avenue street itself, a tricky project in that it runs right over a turnout.
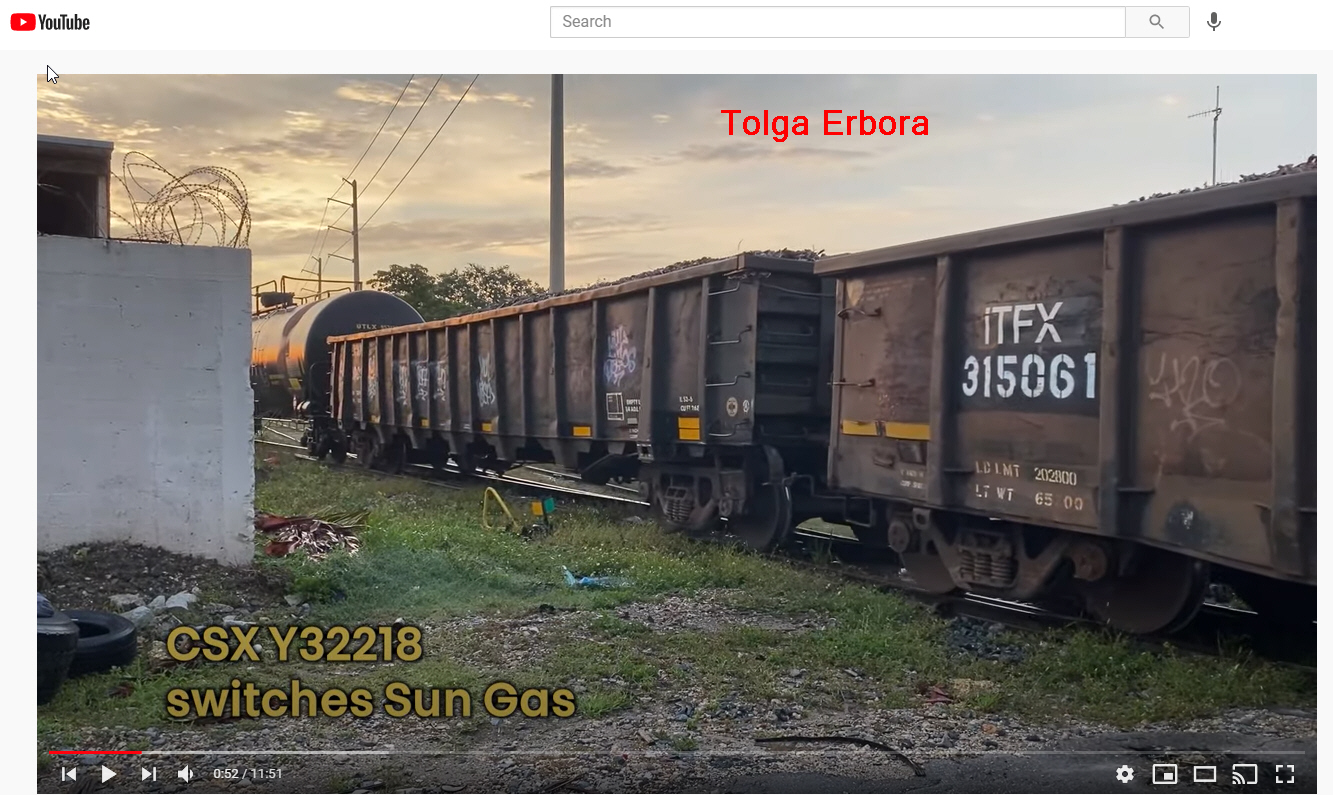
Tolga recent produced the video above showing the local working Sun Gas (starting at the :24 mark).
Trying to put myself in my readers shoes I couldn’t blame them for thinking, “This guy is all over the place. What’s he up to? Where do things stand?” In summary we have:
-Los Angeles Junction: 100 per cent complete.
-Brooklyn Terminal: 100 per cent complete.
-Downtown Spur: 70 per cent complete. Working on now.
-East Rail Reboot: Seriously considering building but haven’t started
I’ve been trying to think of a way to organize this site to improve clarity for the reader but no decisions as of yet as to how to do that. I’m open to ideas.