Model Railroad Blog

Better Pavement

Model-Railroad-Streets1

The intersection of District Blvd. and South Everett Avenue.


When I start a new layout I pick out a few modeling skills I’d like to improve upon.  Since pavement is such a dominant player in urban modeling, it was at the top of my list for the LAJ project.  While the painted roads in my tutorial were passable, I’ve become increasingly less satisfied with them.  Concrete and asphalt coloring is very complex, particularly when you add in the effects of weathering and the pounding they take.  To truly capture the look I was after I decided the photo wallpaper technique was my best bet.  The challenge is getting the images because you are limited to what you can get from overpasses and parking garages.  It takes some fiddling but if you play around with the camera tilt, the images from Google Streetview are usable once you correct for perspective. After more than a little photoshop work I was able to capture pavement images from Everett and Maywood Avenues (plus adjacent sidewalks) and make them work.  I used .060″ styrene as the base for the streets and then glued additional .060″ strips on for the sidewalks. The photos were then glued to the styrene with Super77.   A little good fortune came my way when I found that the inks in my HP 7612 printer can be coated with Dullcoat without issue.

For those that want to try this on your own I’m including a few of the base images below:

SidewalkComp2

Maywood4

Pacific Forest, The Model

IMG_6047

I love building models of nondescript structures.  Once you get into them, you invariably pick up on features you hadn’t noticed at first glance.  With Pacific Forest (4803 S. Everett Avenue, Vernon, CA) I loved the yellow brick, door framing, logo above the door, and blue banding.

Although I shot the prototype photos myself on my trip last month, I found the Google Streetview images to be more workable.  In the past when editing the images to be used for photo wallpaper, I’d go to great pains to crop out the shadows of trees, guy wires, etc.  I now leave the shadows in as I think it creates more depth, contrast, and interest.

As far building the model, each face is a stack of three photos (photos made available for download in a previous blog).  The bottom layer is an unaltered base.  Next I cut the windows and doors out of the second photo and glue it on the base.  Finally, I cut out the trim features such as door frames, columns, sills, etc. and glued those on top as the third layer.  Once I’m done with stacking the photos I add the stand off details.  Most were just loose ends from my rather large “junk box”.

  • Security bars: BLMA
  • Steps: Walthers
  • Downspouts: Rix
  • Light over the door: Blair Line
  • Fire hose tap: Walthers

Scene Composition

  Sc1

A southbound local passes bridge E8, south of Bloomington, IN on my old N scale layout.  I devoted a full thirteen feet to this ‘boring’ scene.   There were no industries, no turnouts, nothing but the field and stream modeled as they actually appeared.


Of all of the factors that contribute to realism, at the top of the list is scene composition, the size, shape, location and distance between elements we put on our layouts.  It also refers to which elements we chose to place in a scene.  Have you ever been riveted by a cleanly executed architectural model?  Even if the model is all white or gray, you are drawn in because it is perfectly composed.   Such models drive home the impact of getting it right.  If you don’t get it right, it can be hard to compensate regardless of how well you perform the rest of your efforts.

SceneComp2


Element Spacing –  Crop, don’t compress

At the top of the list is the spacing we place between elements.   This is where modelers typically put themselves behind the eight ball right out of the box.  Given our limited space, obviously there will have to be some compression.  However, if you take compression too far and place your elements too close together, your scene suffers.  Such overly compressed scenes are probably the single largest error model railroaders make.   There are so many interesting things to include on our layouts it’s only natural to try to include as many as possible.  It takes self-discipline and a leap of faith but, if you can accept the fact that you can’t have it all, incorporate fewer elements, and space them further apart you’ll be amply rewarded.   A few things done well are much more powerful than a lot of things done not so well.

Pictured above is a typical agricultural scene found throughout the country.  Diagram 1 shows the scene drawn to scale.  Note the ample space between elements.  Given our real world of limited modeling room, the natural tendency is to eliminate the open spaces between elements (diagram 2).  The typical model railroad mindset is to preserve and incorporate all elements at any visual cost necessary.  Unfortunately these open spaces are what defined the scene and we’ve just eliminated them.  With the open spaces eliminated, the modeler then compresses everything into the space available.  The results is a typical, overly compressed, model railroad scene and not a “model of a railroad”.


SceneComp3


If in fact realism is the key, if you do indeed want to have the real world in your basement, difficult choices need to be made.  Cool stuff needs to be scratched from the docket.  Realism is achieved by cropping away items you don’t have room for and maintaining space between those that do remain.  Crop, don’t compress.  You can’t have it all, it’s just a fact of modeling life.   However, if you don’t try to ‘have it all’,  you’ll ultimately be richly rewarded with doing justice to the items you do decide to incorporate.


Element Selection – Document, don’t judge

Another aspect of scene composition centers around the elements we chose to place in our scenes.  Are you a ‘cherry picker’ or a journalist?  Do you pick and chose which elements to include based upon how interesting you think they are or do you document what is actually there without judgment?   If realism is your goal, simply copying what is actually there is the ticket.  It’s also much easier.  The moment we start having a beauty contest is the moment the scene starts looking like a typical model railroad.  Model the mundane.  Model what’s there.  There is also a hidden payoff here.  In many cases, elements that at first glance you had written off as boring, upon closer examination turn out to be understated gems .

Scenecomp4

The diagram above illustrates a typical rail side scene.  Some buildings are interesting, some not so much.   A ragged field and empty lot are front and center.  The houses aren’t particularly dramatic, probably one or two story white clapboard with their backs facing the right of way.  There is a rail side structure that, horror of horrors, doesn’t receive rail service.  In other words it’s a typical scene.  The modeling path is extremely simple.  Just copy it, as it is, without judgment.  Unfortunately, doing so make many modelers break out in hives.  Anything that approaches the mundane is eliminated.  Empty space is considered wasted space (figure 2).  Boring elements and open space are eliminated. All industries must be served by rail.   The Walthers catalog is pulled out and every nook and cranny is filled with caricatures.  The end result again is a model railroad and not a “model of a railroad”.

Slow down, take a breath, take in your surroundings and train yourself to appreciate the ordinary, understated beauty that comprises the ACTUAL rail scene we love so much.


Pacific Forest Inc.

PacificForest

On the southwest corner of Everett Avenue and The Horn Lead is an interesting brick structure housing Pacific Forest Inc.  I’ve photo edited, enhanced, and cleaned up the images so they can be used for photo wallpaper.  I’m including the images for anybody else that wants to use them.

PF1

PF4

Using the brick courses for scaling, the structure measures out to fifteen feet tall.  That means you would want to print it out a height of 2.125″.  I suggest printing out three copies of each so that you can cut out the windows and trim and laminate the various pieces to build some depth.  Use glossy photo paper, set your printer on “best”, print it out and then dull the images with Krylon matte preservative.  Attach the laminate sheets to your styrene core with 3M Super 77.

Federal Storage Right of Way

Los Angeles-Junction-Railway-5Dec

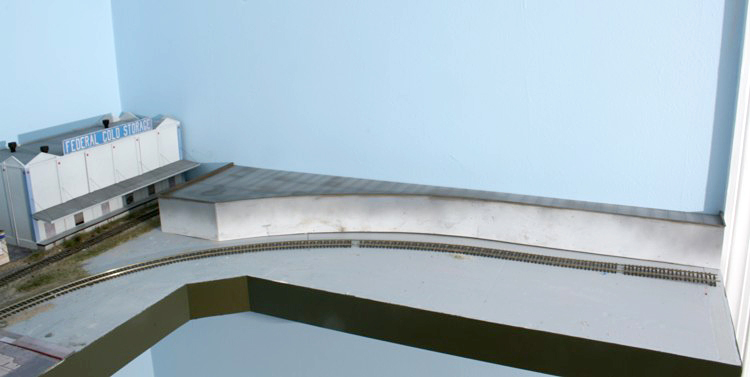
I’ve finished ballasting and scenicing the right of way along the Federal Cold Storage Spur.  As a few others have mentioned, I find hand laying track to be very relaxing, particularly (or especially!) when you don’t have that much of it to do.  Because they’re painted a darker color, the Proto:87 etched tie plates aren’t really visible.  Of more importance is what you don’t see; oversized spikes and/or the absence of tie plates. I also used a new technique with the grass.  Rather than mixing the green in with the beige prairie grass, I laid the prairie grass first.  I then masked off a few short sections here and there with paper towels and dusted on the green so you have more distinct borders between the green and beige.  Here’s the overall sequence.

  1. Ballast track
  2. Mask off track with thin strips of paper towels damped with a mister bottle
  3. Lay down a base layer of Heki Prairie Grass (pn 3363) using a static grass applicator
  4. Follow up with a layer of 6mm Silflor “Autumn” grass
  5. Mask off short sections of the prairie grass here and there and dust on a green blend
  6. Work in tufts of green and brown poly fiber pushed into the foam scenery base with tweezers
  7. I added a few stalks of natural materials from the moss in my backyard.  You have to use natural materials judiciously and sparingly as most are often oversize.
  8. Seal with dilute matte medium applied with a mister bottle.
  9. Remove paper towel masks.

 Taking photos of your work and blowing it up can be a great aid in pointing out things that need to be fixed.  The original base rail paint consisting of rail brown dusted with camo. paint was way too uniform in color.  I went back and mixed up a blend of brown and rust color (10 brown to 1 rust) weathering powders and worked them into the rail web and tie plates with an old brush. The final chalk application made a big difference.