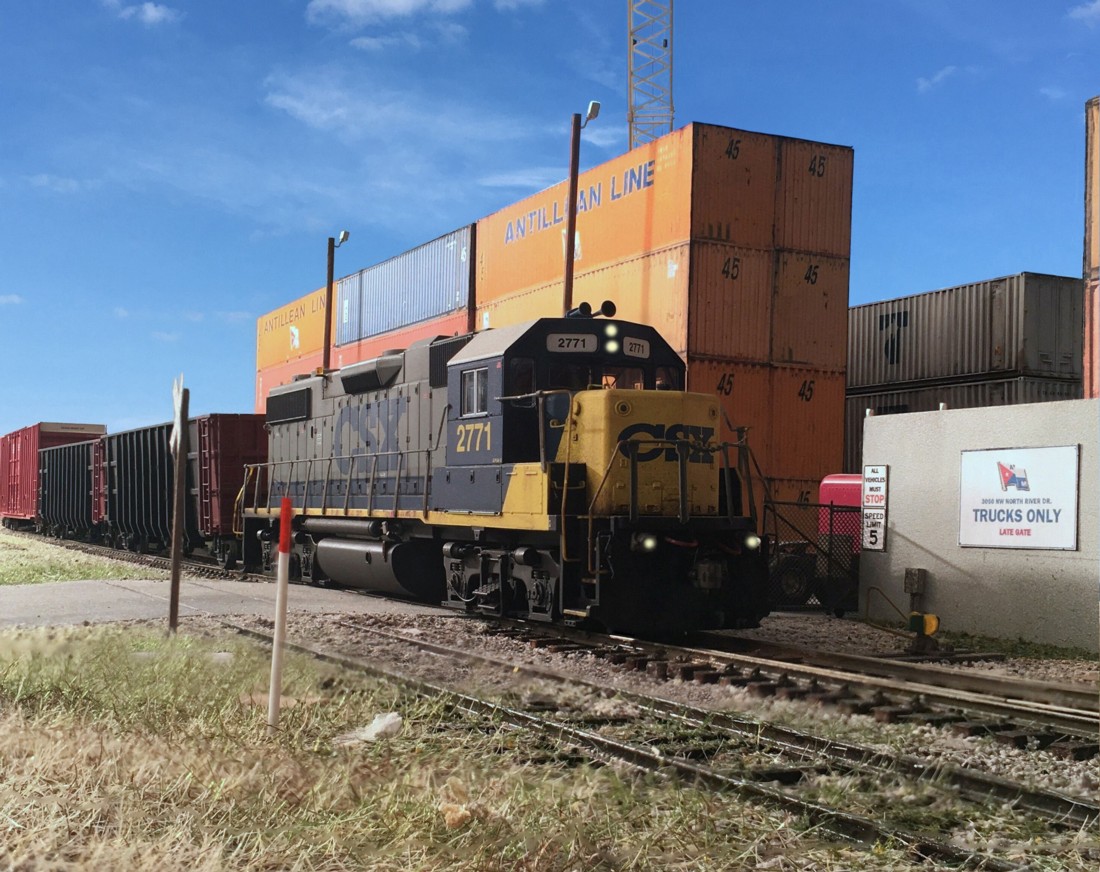
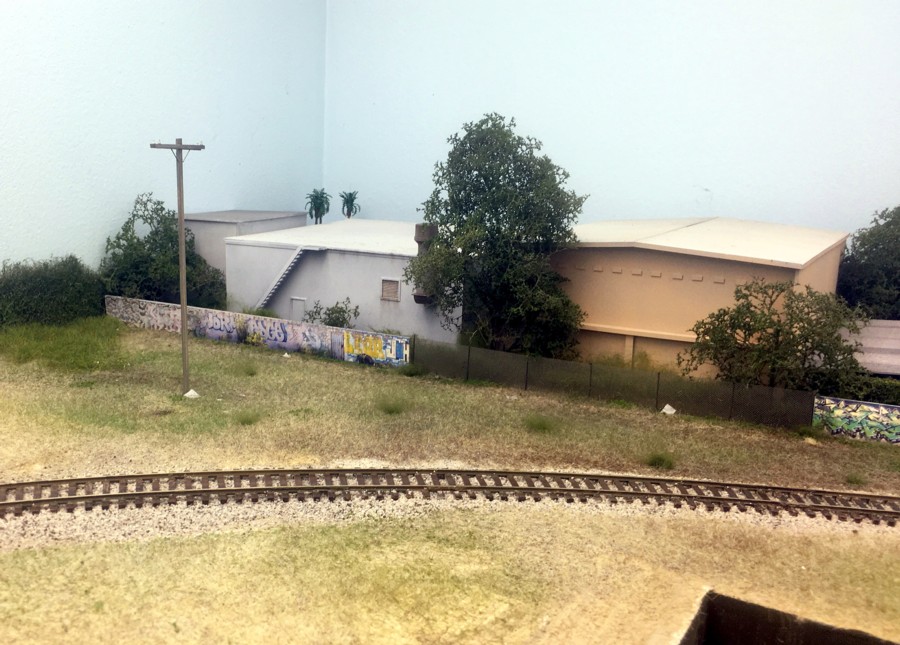
Having just crossed over North River Drive the local passes Antillean Marine.
Having completed the Sungas scene, I’m going to take a break from major construction projects for awhile and double back and spend some time photographing the layout. I’m finding each shot is different in terms of whether my Canon Rebel SLR or the iPhone works best. The Antillean shot above was shot with the iPhone, the Sungas images yesterday were taken with my Canon.
Having spent the bulk of the year building out the Sungas Services scene, it’s now complete. On my laundry list for the second half of the year is going back and photographing or re-photographing some of the other scenes on the layout.
Controlling what portions of a layout a visitor sees at any given time, and from any given location, enhances the viewing experience. I can’t think of any layout I’ve been to where this is even an issue….except mine. In most cases the shape of the layout, walls, backdrop locations, or geography frame the layout in a natural way.
The actual Downtown Spur runs straight as an arrow for three and half miles, east to west, through flat urban scenery comprised of low lying one story warehouses. I didn’t have the luxury of a hundred foot long by eight foot wide room in my house so I had to bend the design into a G shape to make the straight route fit in the square twenty by twenty space. There are no interior walls in the layout room to block sight lines nor are there any hills or mountains to do the same. Most of the peninsula areas are set up to be viewed and operated from both sides. Operationally this works fine. Individual scenes look fine.
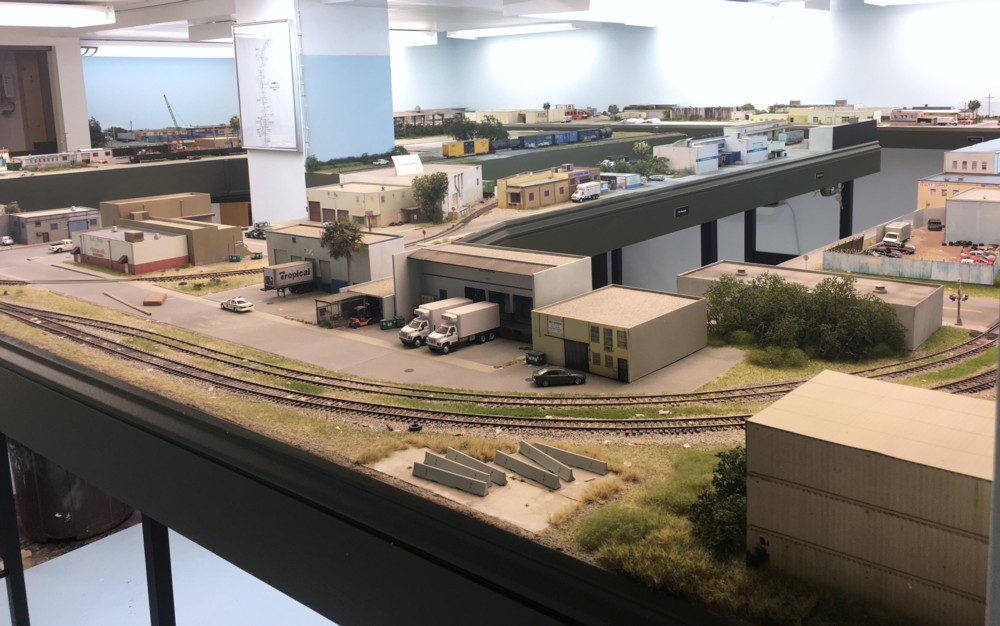
However…..as you enter the room the entire layout unfolds before you in what I could best describe as “visual splat”. The entire thing is there in front of you in one heaping portion. When newcomers visit I can sense the confusion as they to try to organize in their minds what they’re seeing. If I had an extra ten eight feet of room width and length (don’t we wish!) I could run walls down the aisles as view blocks. I don’t though.
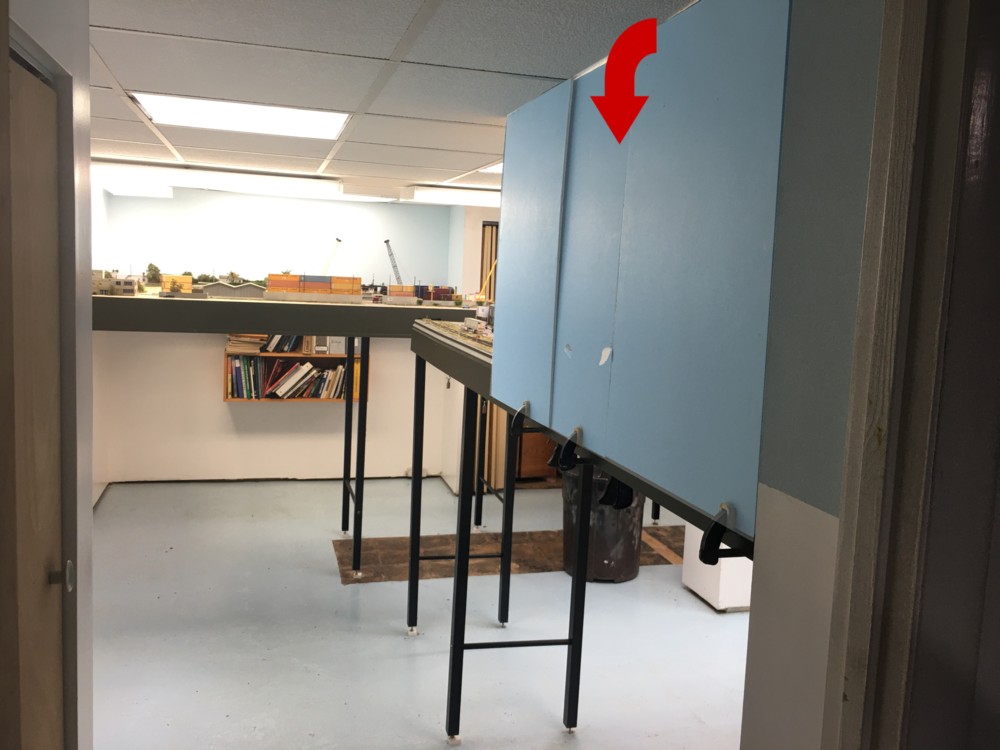
That leaves me considering adding some view blocks. Locating them gets tricky in a hurry. It’s not something you can work out on paper. You need to use mock ups. Located the screens isn’t as simple as I thought it would be and for each problem solved new ones arise in terms of blocking off lighting and access to track.
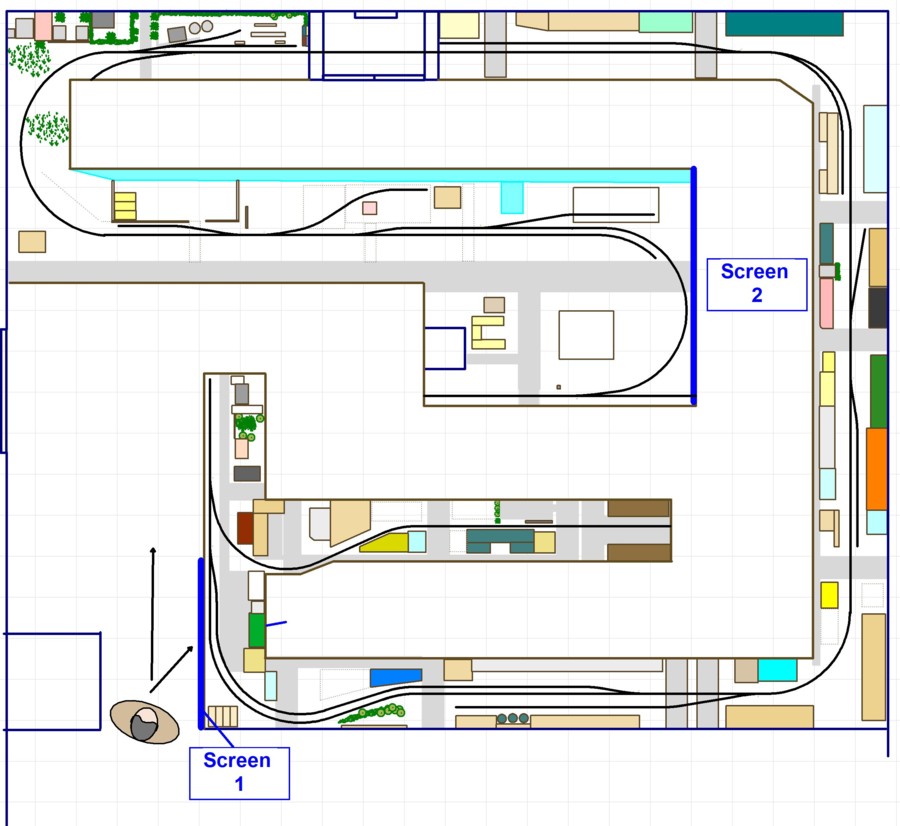
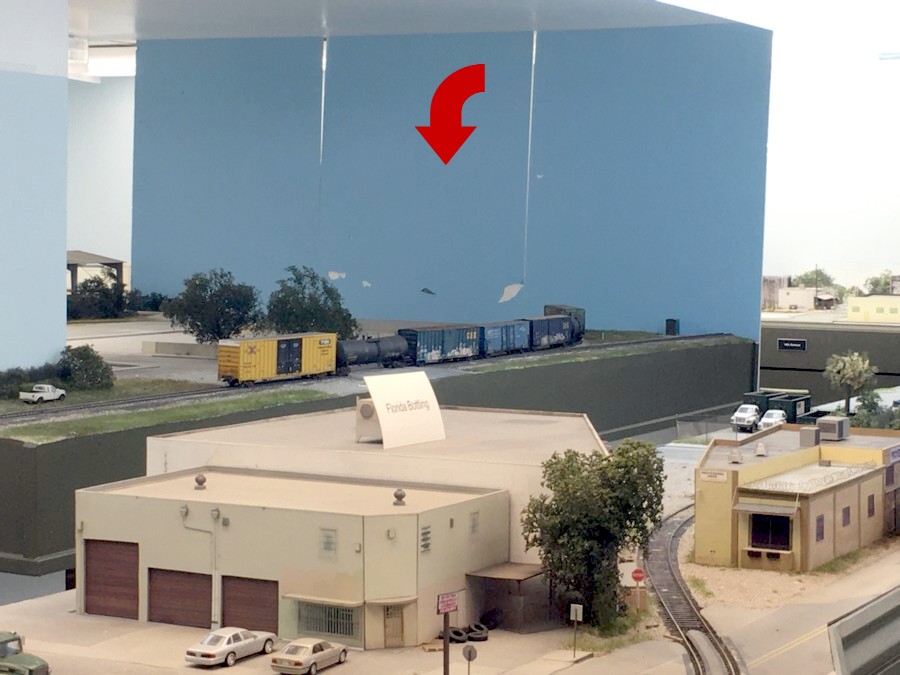
After spending a few hours experimenting with clamping poster board to the fascia the two locations shown above appear to be the most viable. Screen 1 helps quite a bit and isn’t in an area where access is crucial. Screen two is more of a “maybe”. In both cases I’d need to add more lights because the screens block the existing lighting.
Screen 1, mocked up above, would be the easiest to add and would give the biggest payoff. I’d need to add another room light though.
I’d have to think about screen two. It helps but, while it blocks off the views that are distracting, it also blocks viewing angles from the other side I’d like to keep.
The other thing I need to consider is how few visitors I have over. The regulars understand what I’m trying to accomplish and don’t seem to be bothered. Open houses are only every year and a half or so and I don’t have regular operating sessions with guests. Is it even worth dealing with? Something to ponder.
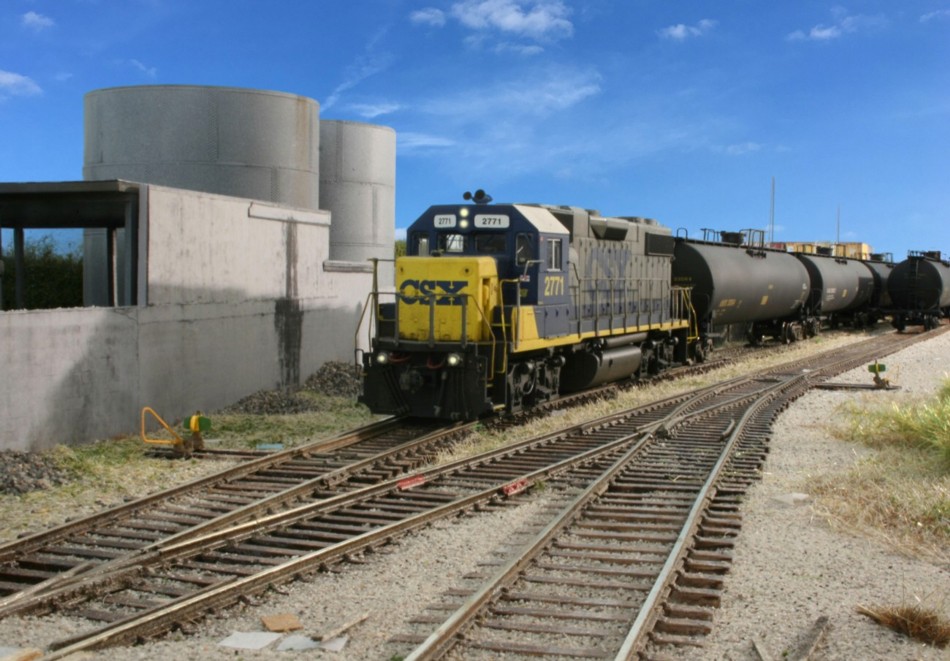
Having reached the siding at the end of the branch on The Downtown Spur, the local has just performed a runaround move to prepare for the return trip in this June 2008 photo. This move is still required today to work the line.
When it comes to layout design it’s so easy, as much as we try to fight it, to subconsciously follow the same approaches. There is an across the board similarity to their look as a result. Same approach, same general appearance. There are only so many ways to skin a cat right? In addition, our hobby tends to have a turnout driven approach to design. By that I mean, our efforts are typically focused on how we can maximize the number of turnouts, industries, and elements that will fit into our space.
In my case I wanted to model Miami’s Downtown Spur and it became an exercise in “how do I bend this sucker around so I can fit the entire thing into my space without it looking overly contrived”. With some careful selective compression and judiciously (and sometimes painfully) sending a few prototype elements to the cutting room floor I was able to make it fit.
It’s almost impossible not to be blind to other ways of doing things. Occasionally though, odd circumstances unfold that reveal an entirely new approach that, while unconventional, accomplishes our goals and also does so with a much needed breath of freshness to it. It leaves me wondering why I couldn’t see doing things that way from the outset.
For example, assume you had a twenty by twenty foot room that lent itself to an around the walls shelf with a center G peninsula. The total run length is about 100 feet. Would you on your wildest day ever design it as follows:
All of the industries are located in the first 20 feet of the 100 foot run.
The only thing at the other end of the run is a siding.
You run for a good sixty feet, passing dozens of structures, and don’t run a spur into a single one?
Devote 20 square feet of bench work surface to an area with no track?
It sounds insane and it would never cross my mind.
Designs shouldn’t be a rubik’s cube exercise in finding a way to shoehorn as many elements and track into a space that is never big enough to reasonably do so in the first place. Designs should be a servant to your goals.
What do you enjoy doing most and would like to spend the bulk of your time doing? Running trains or building the background elements that they’ll be running through? What will those background elements be and how will you compose them?
How long will your running sessions be? Wild guess, probably not three hours…or even two.
Who will be running the trains? You? (most likely). Or, will you have frequent guest operators?
What will be happening during the running session? Rail fanning? Main line running involving orchestrating meets between opposing trains? Switching?
A good design addresses the answers to these questions as opposed to the traditional approach of sledgehammering too much stuff into too little space. If your plan meets all of these goals does it matter if it only has a few turnouts?
Where am I going with all of this? If I updated my Downtown Spur track arrangement to match the prototype as it is now in modern times an odd arrangement would play out. (I’m not going to rip up track to keep things modern but it does provide a great lesson in how design can be approached.)
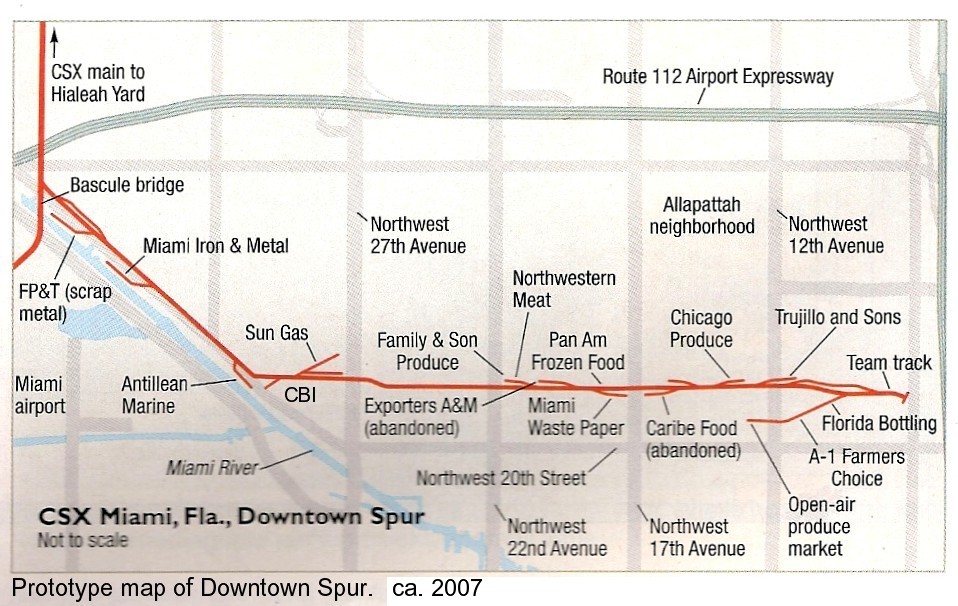
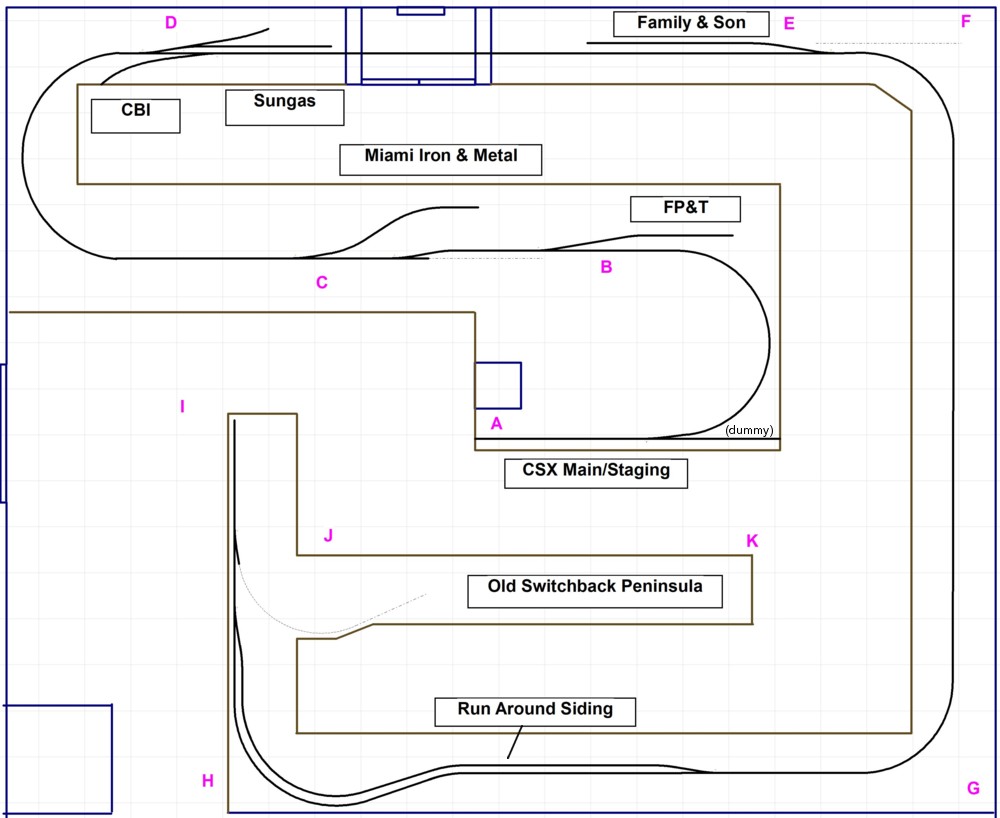
Shown above is a map of The Downtown Spur track arrangement as it appeared in 2007 (Kalmbach Publishing). It was a theme that seemed too good to be true, a throwback to the 1950’s. There was a mix of a few large, frequently switched industries, and a lot of charming small ones that got the occasional car. There was also a really cool switchback at the end of the line (Well cool for us, not so much for the crews that had deal work it without impaling local vehicle traffic on the pilot). The local would run down the line working the trailing point switches along the way, work the switchback, run around the train at the siding, and then head back working the return trailing point switches.
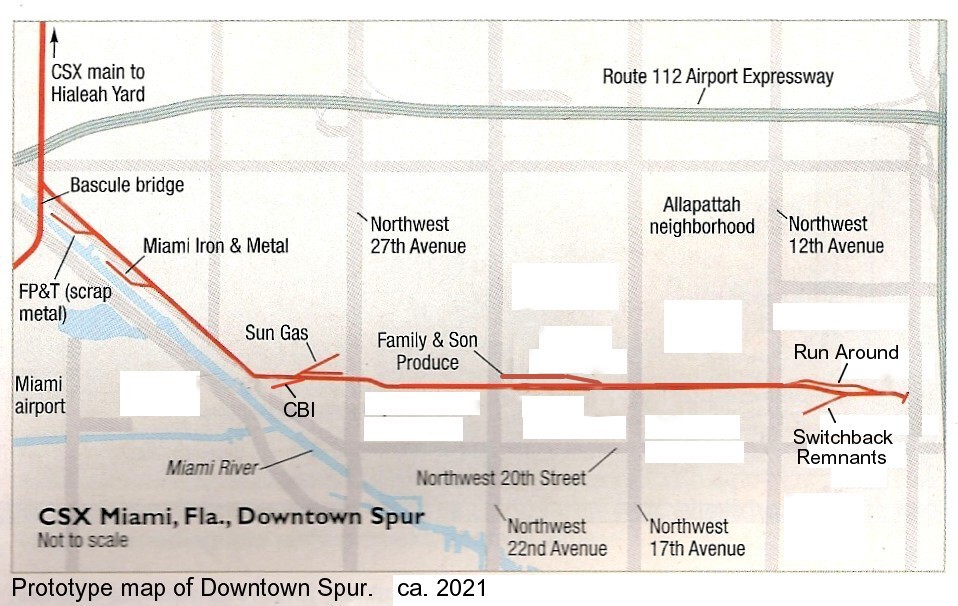
Fast forward to present times and the railroad industry’s need to streamline operations and focus on those larger industries that are most profitable. All of the tiny businesses on the branch are gone now as is one major shipper. A small portion of the switchback track sits there in the weeds but, for all intents and purposes, is abandoned. It’s not all doom and gloom though. Not at all. The remaining industries are shipping as much or perhaps more than they were in 2007. Videos show trains that are about the same length as they were decades ago. The line is still very, very active. The odd quirk, and this plays into the notes on unconventional design, is the local still needs to run the two and half miles through town to get to the siding at the end of the line to perform the necessary runaround. As it makes the trip, it passes numerous industries that it used to switch out in days gone by. This gives a lot of operational variety during an op. session. Starting the run, you spend a lot of time switching four of the five industries, all located on the west end. Then, the train has to take a pretty long trip to the end of the line, run around the cars, and make another fairly long run back to work the last large industry.
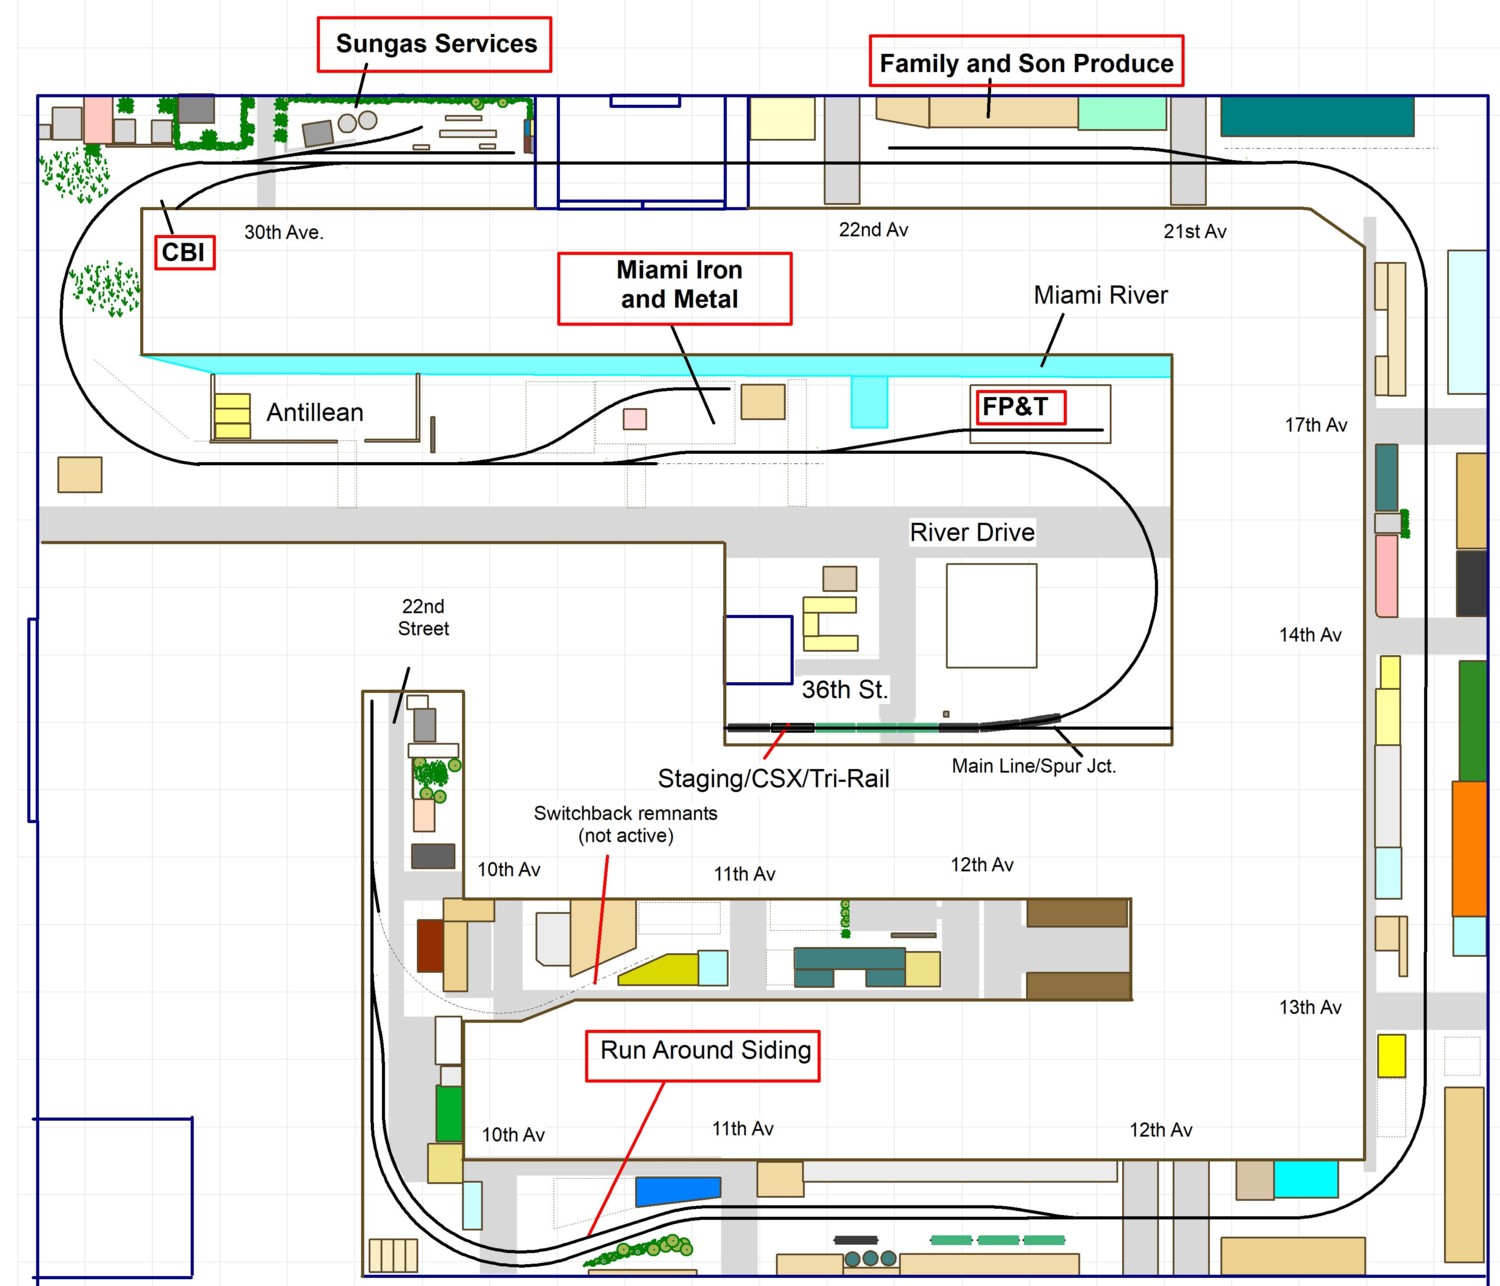
Here’s how my plan would look if I removed track as the prototype has to keep it up to date with modern times. Note how all of the industries are clustered at the beginning of the run between reference points B and E. Notice the really long run from point F all of the way to the end of the line at point “I” with not a single industry along the way. Note the peninsula at J-K with no track whatsoever. There are only eight operating turnouts. What an odd looking plan. However, the design would meet all of my goals. It would easily spin off a ninety minute op. session. The long run time through urban scenery would interesting and unique. Since it runs right through town it would provide years of structure building fun.
If I were starting out today would I design it this way? I’m not sure I would have had the creativity to see the opportunity. That said, it’s opened up my eyes to a new way things could be approached.
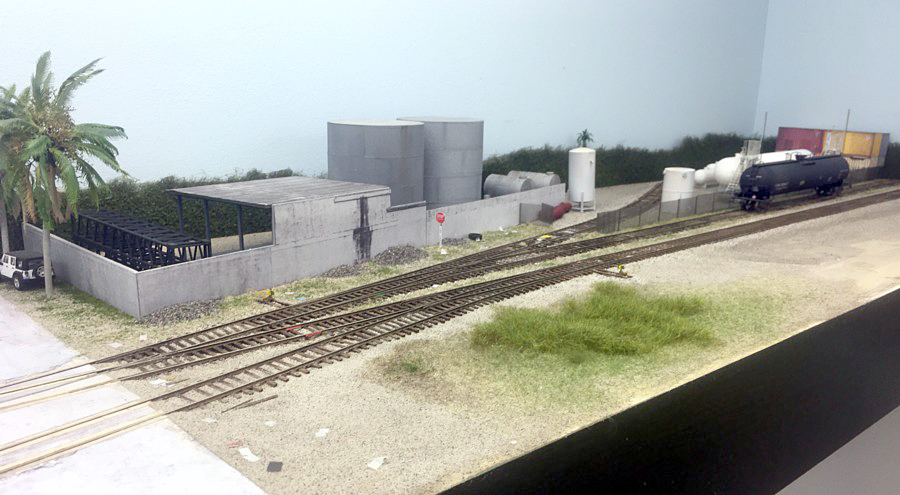
I was able to finish the bulk of the Sungas Services scene this month. All that remains are the crossing flashers and it’ll be done. This was the last of the remaining industries on the layout to be built out. There are still a lot of non-rail structures to be built though.
With the industry build out essentially finished, I needed to bolster my fleet of lpg cars. The Walthers cars are passable given that the flat black color hides any oversize details. The trucks and couplers on these cars are trash though and needed to be replaced with their Kadee counterparts. I’ve found that scale shelf couplers, while prototypical, are almost too prototypical in serving their intended purpose which is uncoupling cars. I packed a way the shelf style couplers and replaced them with standard long shanks.
High on the “to do” list this year is re-photographing the layout. I may start that as early as July.