Model Railroad Blog

Powdered Ballast Glue

IMG_5541

Effectively applying ballast glue is a challenge at best.  The more powdery soils and small gauge products even more so.  The problem comes with application of the adhesive, specifically the surface tension of the liquid.  Agents such as alcohol and dish soap help slightly but there is always an ongoing battle to minimize craters and channels created by applying the glue with an eye dropper or bottle. Ballast “float” is also a pain in the butt.  I’ve always wondered if the problem could be solved if a powdered glue was mixed with the ballast before application.  I picked up some Dap Plastic Resin Glue from The Home Depot to run a test.  I mixed the powder into some N scale ballast at a rough ratio of 1:5 and spread it some N scale track.  Next, I took a fine mister bottle, filled it with water and rubbing alcohol, and misted it onto the ballast/glue blend.  I let it dry and, voila, it worked!  It seems very solid and I haven’t noticed any major discoloration, shrinkage, or cracks.  The bond is VERY strong.   I haven’t experimented with the best glue/soil ratio although if 1:5 works I’m not sure it warrants a lot of testing time.  This adhesive method would be particular helpful for large surface areas of fine blends such as soil patches and gravel roads.

Eight Foot “Rulers”

IMG_5524

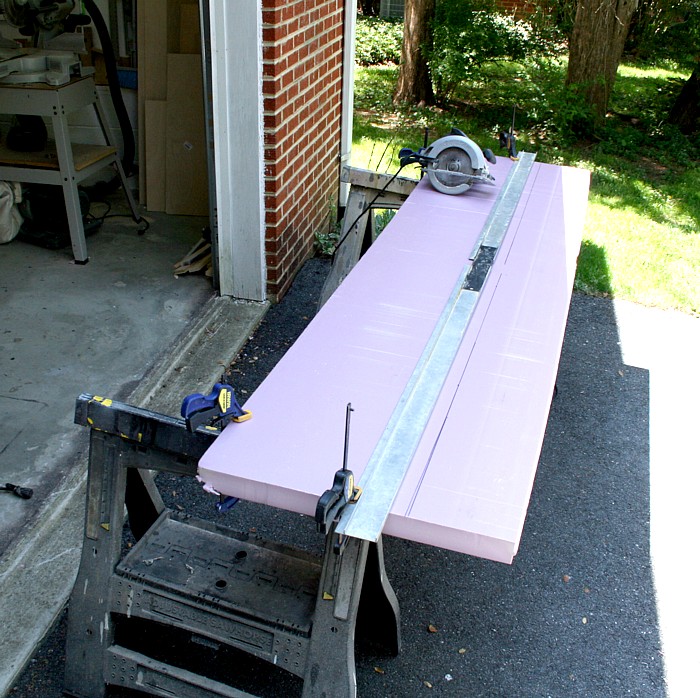
One of the more useful tools I’ve picked up along the way is a 98 inch aluminum cutting guide.  I originally picked it up for it’s intended purpose, as a guide for a circular saw to ensure you get a straight edge on longer cuts.  It’s also extremely handy, however, for laying out longer track center lines ( in a yard for instance).  It breaks down into two halves for easy storage.  Most hardware chains care it.  The Home Depot version can be found here.

Floating Bench Work

IMG_5525

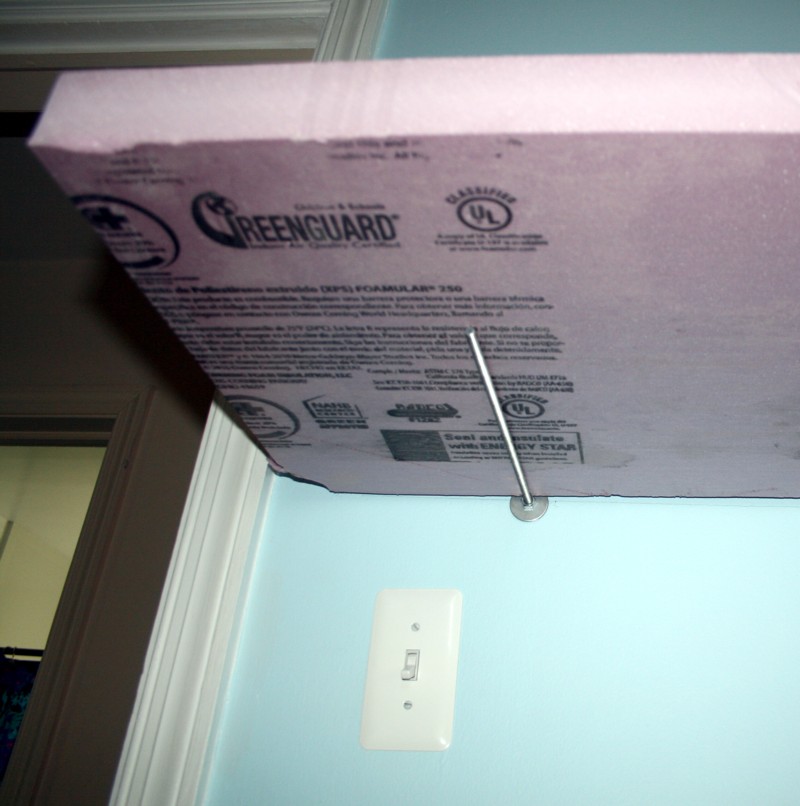
Following my last post on floating bench work, I received a number of emails wondering if the torque imparted on the hollow wall anchor would rip it out of the wall.  The design of the Hillman anchor takes this into account.  That, in combination with a large washer screwed tightly against the front face of the wall, produces a very solid connection that won’t rip out of the drywall.  Another problem has surfaced though that I hadn’t accounted for, the “springiness” of the all thread.  Although it is tight and solid where it meets the wall, at the end it is really “bouncey”.  Envision a swimming pool diving board.  It won’t pull out of its mount and won’t break but it bounces all over the place.  I’m not ready to give up on the idea but I’m going to have to try something different.  A 1/2″ square structural member that would screw into the anchor might work “if” I could find such a thing.  Also, right now I’m only using one anchor every thirty two inches.  By going to sixteen inch spacing that might help a little.

Floating Bench Work

IMG_5510comp

For the layout of East 38th Street’s junction railway I want a cleaner, sleeker design when it comes to the benchwork. Traditional shelf brackets work fine but they’ve always struck me as a little clunky, especially when the layout is in a living area or den. It’s a little hard to move them around or fully appreciate them, at least in some people’s opinions. The one thing we have going for the traditional shelf bracket layout for the model rails is that our models are extremely light, certainly much lighter than a shelf full of even a few books.

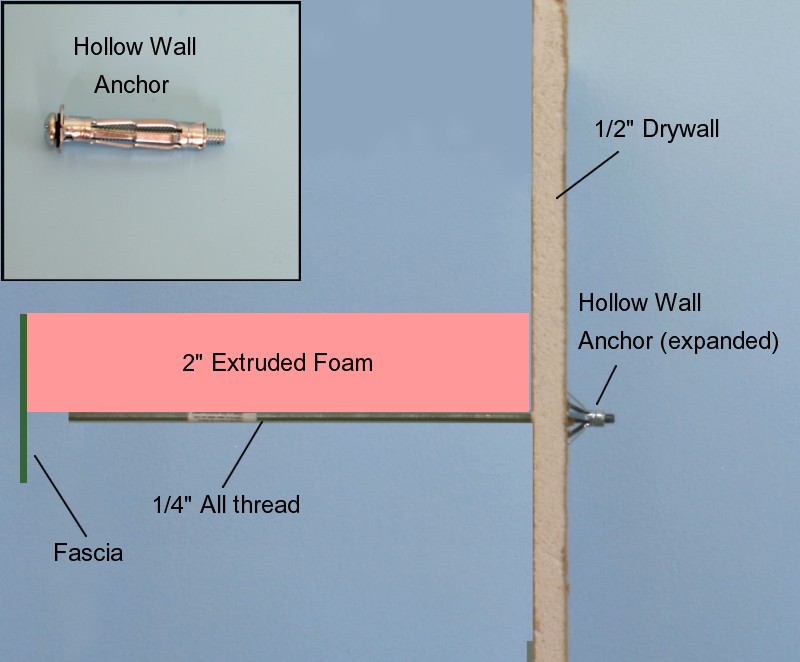
But we can take advantage of this relatively lightweight property of our model rails and utilize a floating benchwork system. The ace in the hole to make this happen is the appropriate choice of wall fixings to mount the shelving setup with. With my go-to choice being hollow wall anchors. The reason being is that these anchors can be removed and reused at another location quite easily, making it less clunky than the standard design. For this shelving project, I chose a product from The Hillman Group designed for half-inch thick drywall.

IMG_5510comp

This design is ingenious. You start by drilling a 7/16″ hole in the drywall. Next, insert the sleeve and push the cleats into the drywall. Finally, and this is the cool part, drive the threaded screw and the anchor expands tightly against the back of the drywall. Remove the screw and replace it with all-thread and you are good to go. I’ve found that the all-thread can be a tad wobbly in the sleeve, a situation easily remedied simply by running a nut down the all-thread and tightening it against the face of the anchor. Each individual anchor is rated at 80 pounds which is more than enough. After the all-thread has been inserted into each anchor, your supports are in place. Put some adhesive caulk on the top of the rods, place your extruded foam slab on top and you are good to go. The supports are virtually invisible.

If you’ve found traditional shelf brackets to be as unwieldy as I have, why not try out this floating benchwork system for your model rail setups.

The 80/20 Rule

I can’t remember if it was Al Gore, Mark Cuban, or Leonardo  Da Vinci that “invented” the 80/20 rule.  Either way, it is one of the more universally applicable concepts to roll out of a R&D department in years.  It even applies to our leisure time pursuit.  At least eighty per cent of the visual impact is obtained from twenty per cent of our modeling efforts.  It should be a source of encouragement to modelers of all skill levels that some of the most effective modeling techniques are relatively simple to apply.

Are you a middle school student, high school student, or recent retiree jumping into the fray for the first time?  My consistent drum beat has been one of starting with a simple plan that guarantees success, develop skills and confidence, and then progress to more complex layouts over time.   What’s one formula for success?

  • A one foot by eight foot shelf style layout with no more than three or four turnouts
  • Micro Engineering code 70 turnouts painted with Rustoleum “Earth Brown” camo paint
  • Arizona Rock and Mineral Ballast
  • Heki 1576 Wild Grass Fiber for your grass surface
  • A pale blue, cloudless, backdrop with a low horizon
  • Obsessive neatness
  • Knock the shine off your rolling stock with dullcote and accent the panel lines with the Tamiya Panel Line paint I mentioned a few posts ago
  • Apply an India Ink wash to all of your structures (1 teaspoon of ink per pint of alcohol).

If anybody goes this route, I’d love to see some photos of how things turned out for you.