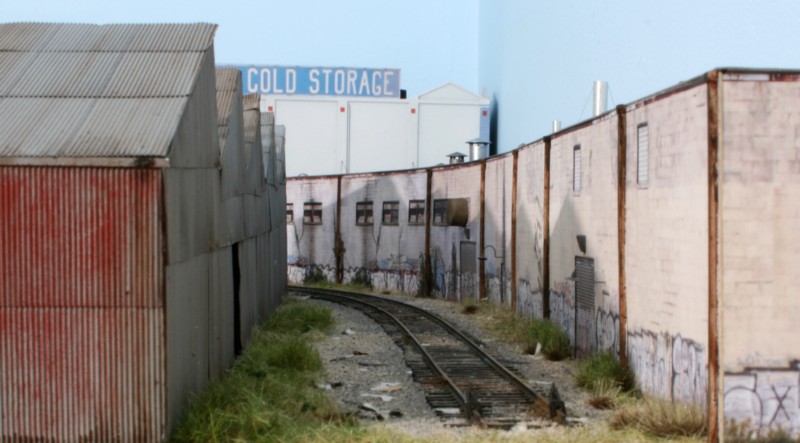
Made some progress over the weekend with the completion of the final track, ballast, and right of way detailing on the spur to Sweetener Products. Modern Pattern and Foundry is to the left, Federal Cold Storage in the distance.
Made some progress over the weekend with the completion of the final track, ballast, and right of way detailing on the spur to Sweetener Products. Modern Pattern and Foundry is to the left, Federal Cold Storage in the distance.
Posted a blog on layout planning on my business site HERE.
Or if you prefer the URL: http://shelflayouts.com/2016/04/layout-planning/
When it comes to leisure pursuits, it’s not necessary to be particularly good at the activity in order for it to serve its purpose of being relaxing and enjoyable. For example, I enjoy running, playing basketball, fishing, and surfing but have no delusions of being particularly competent at any of them. Not only am I not “good” at those pastimes, I don’t care to be. I enjoy them for what they are and get out of them what I want to. Model railroading is recreation and most of its participants view it the way I would fishing. It’s a break from the pressures of the week and is entirely fulfilling without the need for the modeler to be a master on any level. If the layout provides a foundation for running the latest motive power acquisitions through pleasant scenes the owner is happy. This is as it should be.
However, for some of us, some of the time, we want an activity outside of work that we can dig into. We want to be “good” at it. We want a deeper level of satisfaction that goes beyond merely having some casual fun. Attaining this deeper level of satisfaction doesn’t need to be unpleasant but it does take a different mindset.
First, it takes the desire to be really good at it. Second, there has to be a real understanding as to what it takes to reach that level.
For those that truly want to dig into model railroading, to be really “good” at it, it’s the latter that trips them up. The disconnect stems from a lack of awareness as to the difference between being a master assembler versus being an artist. Much of what is held out as great modeling is really just clean assembly. It’s not the top rung of mastery. Analogies abound in other walks of life abound. Illustrator vs. Renoir, technical writer vs. Ernest Hemingway, a fast food franchise holder vs. Steve Jobs.
Being a great assembler, while worthy of self-satisfaction, isn’t the top rung of the ladder.
In order to create truly breathtaking models, one master color treatment, scene composition, and scenery textures and composition. You can’t master those skills if there isn’t an awareness of both their existence and importance.
So, if going beyond mere recreation is your objective, how do you get there? We’ve just discussed the critical skills that must be mastered, how do you attain them? The good news is that costs nothing. There is absolutely nothing that you need to buy, (or even could if you wanted to) that will get your there.
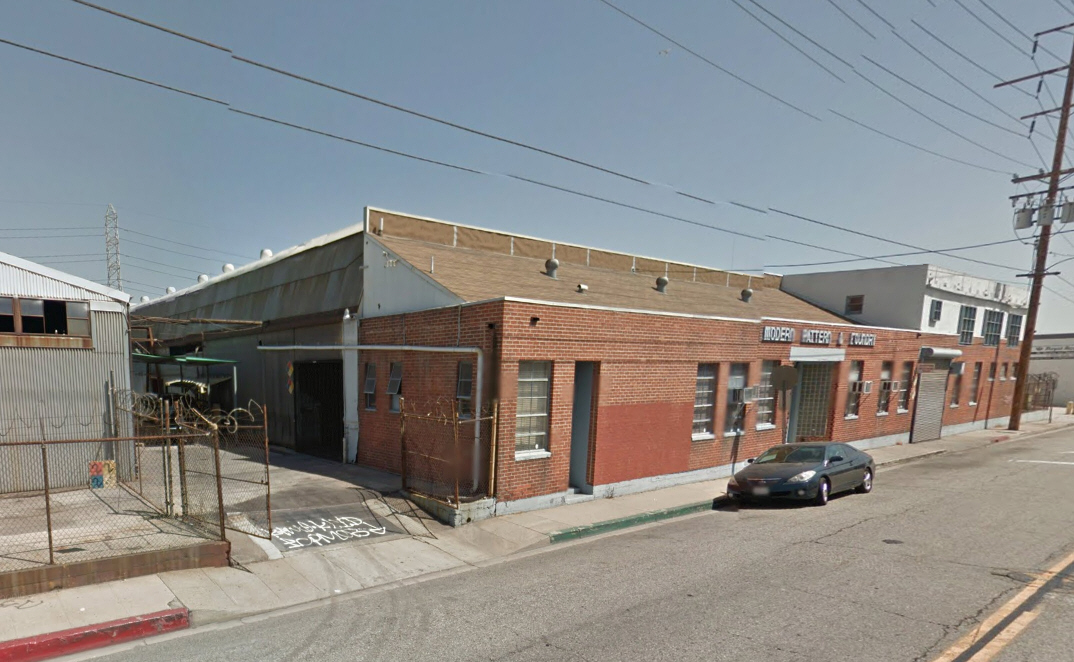
It comes down to studying photographs carefully and really gaining a feel for what you’re looking at. What color is that? How many colors are there? How do the colors transition from one to the next? How far apart are things spaced? What elements are in a scene that make it what it is? (Hint, it’s usually a heavy dose of the ordinary and an absence of ‘cute’). What’s going on with the scenery, particularly the grass and underbrush?
Understanding the problem and knowing your goals is the first step, the next is to move to the layout and take a stab at it. Photograph your work. With an objective, totally dispassionate eye, compare your work against the photo. Success isn’t achieved by immediate perfection but rather a commitment to stay the course and continually trying to make each modeling effort incrementally better than the last. You won’t get there on your first effort or your first years of effort but, if you stay at it, you’ll be amazed at far you can take things. The resulting feeling is the difference between fun and deep satisfaction.
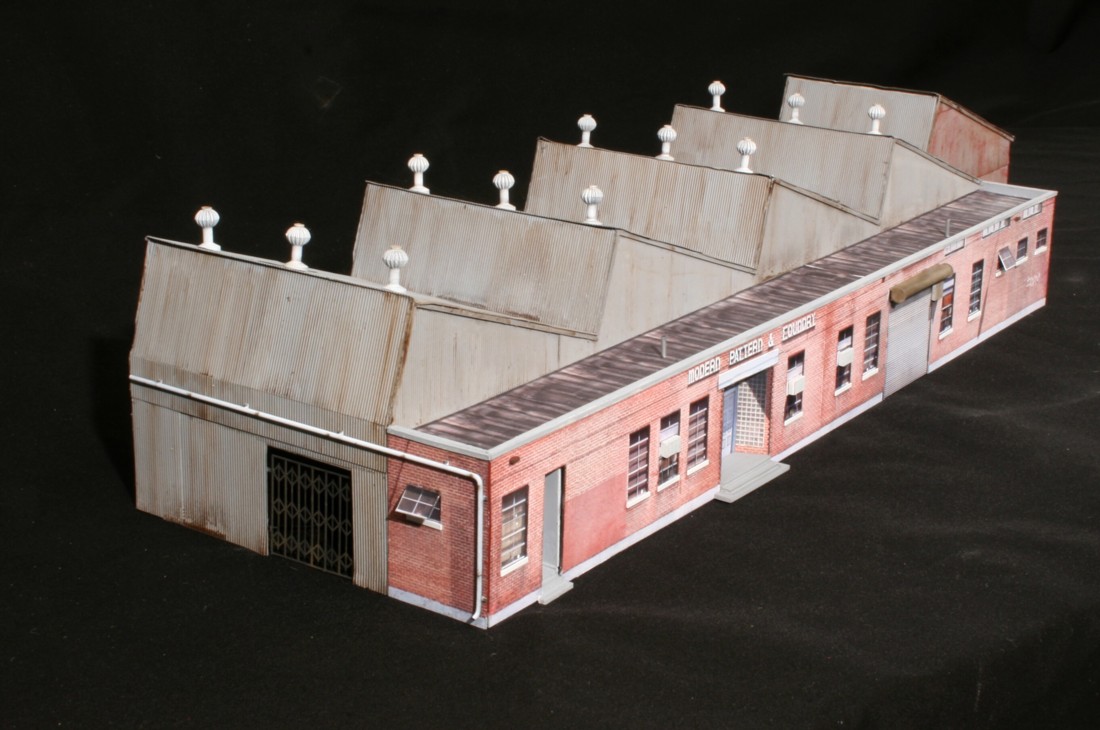
Finally! Finally, I’m done with the MP&F structure. The sawtooth roof and trapezoidal entrance doors were challenging to say the least. I’m happy though. Although it’s not rail served, it is very representative of the industrial architecture of LA without appearing to be over the top or cherry picked as far as subject matter is concerned. I’ve uploaded the photo wallpaper artwork to the how to section.
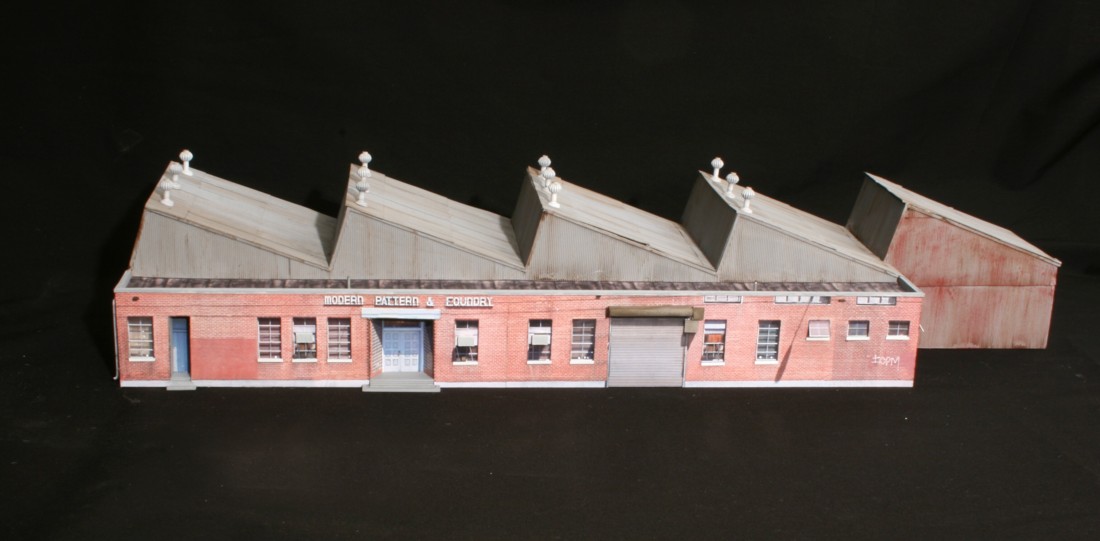
Construction details:
Core: Illustration board picked up from Michaels. I was liberal with the stiffeners inside. Adhesive for the core was a combination of wood glue and thick CA. For added moisture resistance I sprayed it with shellac
Corrugated siding: Builders In Scale siding adhered with Super 77 and thick CA. The base coat is Rustoleum light gray primer followed up with a wash of India Ink/alcohol. I followed up with a thin wash of burnt umber artist oils thinned in mineral spirits. The back segment received a dry brushing of boxcar red.
Brick facade: Two layer photo wallpaper printed on gloss photo paper. Prior to sealing with Dullcote, I masked off the windows so they maintained their glossy appearance. Doors are inset per the prototype. A few photo windows are in the swung open position.
Roof: Photo wallpaper with aluminum tube vents.
Standoff details: air conditioners, roll up door and door mechanism, drains, burglar bars, cyclone vents.
Added blog on double deck layout design considerations at my business site. Click HERE.
Or, if that doesn’t work, cut and paste: http://shelflayouts.com/2016/03/should-you-double-deck/