For those planning a steam to diesel era layout, I wrote a blog on my business site on two industries that should appear in almost every instance.
You can read it HERE.
For those planning a steam to diesel era layout, I wrote a blog on my business site on two industries that should appear in almost every instance.
You can read it HERE.
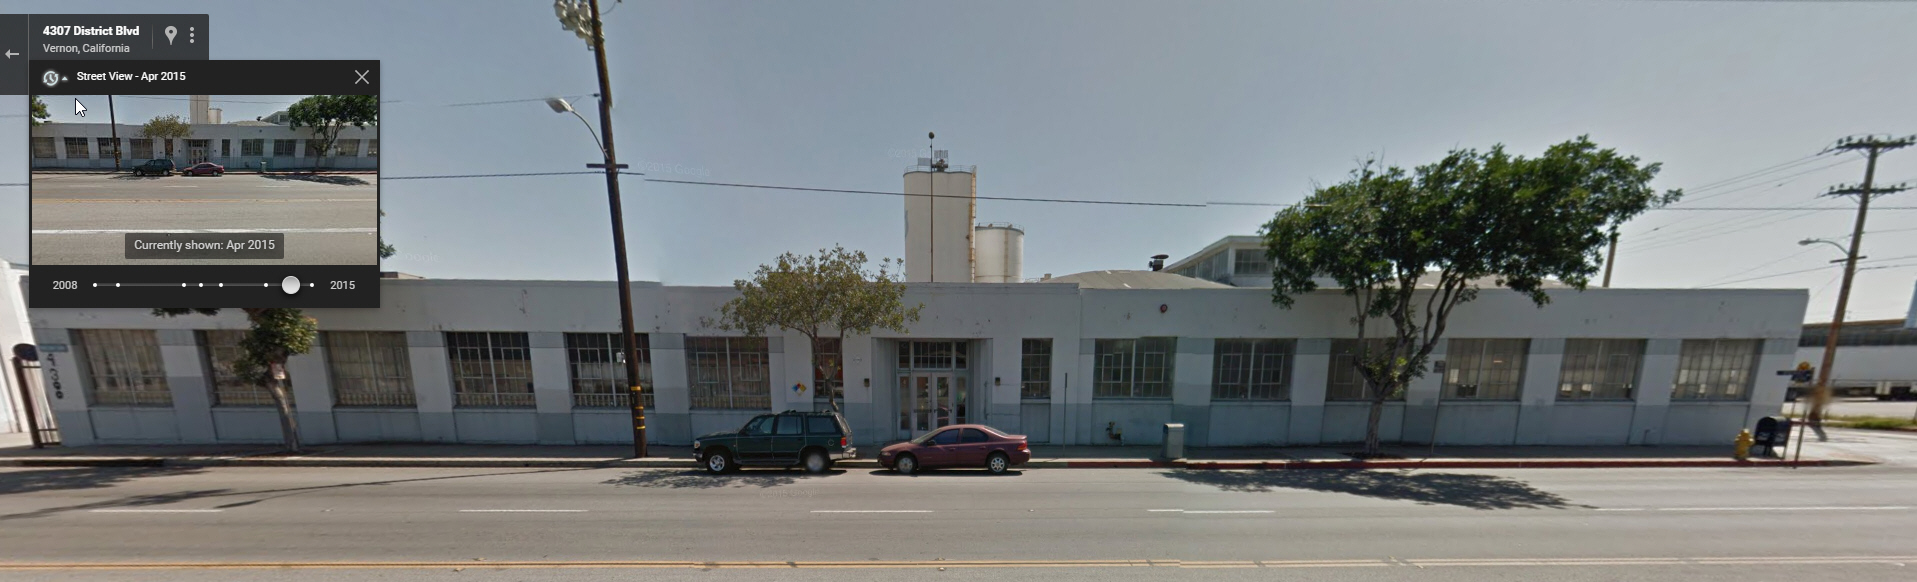
Work begins on what will, in all likelihood, be the final structure on the LAJ. In this case, it’s this art deco beauty at 4300 District Blvd. Since all photographs are facing north (and therefore taken looking into the sun) the lack of photo contrast makes the photo laminate method a no go. Other than windows and doors, where I can still use photos, the model will be fabricated using traditional styrene.
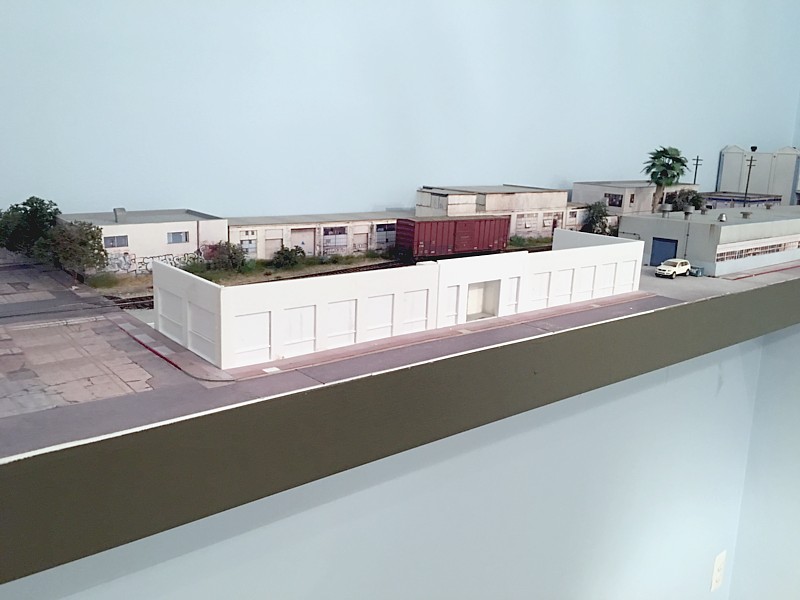
Here’s how things look after last weekend.
Problem solved! Thanks so much to my blog readers. You guys are great!
The pub. in question was the December 1976 issue of “Railroad Modeler” magazine. Never in a million years would I have found that on my own.
_________________________________
In the late 1970’s an excellent article on the Los Angeles Junction Ry. appeared in one of the rail magazines. I’m pulling my hair out trying to track down the magazine and date. Memory can play tricks on you, certainly after forty years. However, I don’t think I’m losing my mind because the article inspired me to build a loco. based on the article, and I still have the unit.
DOES ANYBODY KNOW WHAT MAGAZINE THIS APPEARED IN AND WHAT MONTH?
My guess is that it was probably 1977 or 1978 but could have been 1976. My hunch is that it was in one of the Carstens mags from that time period. Going through the Trains.com magazine site I was able to look at every issue of RMC and Trains during that period and didn’t see it. I spent many (way too many) hours tracking down about half of the Railfan & Railfan mags from that period. Nothing. Otto Vondrak is checking his issues but so far nothing. If I had to guess it was in fact Railfan & Railroad but there are no directories going that far back.
Was there another popular railfan mag. on the racks during that time period? I don’t recall one. Any help would be appreciated. The winner will get a one-month free subscription to this blog….
In his must-read piece, “11 Lessons Learned” in the April issue of MR, Tony Koester writes “One huge lesson gleaned from even a cursory review of the V&O was to model the ordinary. It’s all too easy to compile a list of eye-catching prototypes to model, and the inevitable result is that everything competes to be the star of the show”. In that one phrase he’s summed up the essence of composing an effective model. Easier said than done, however. If we select our elements solely by individual interest then we do run into something that isn’t plausible and the visual competition Tony cautions about. Swing the pendulum too far the other way and we end up with something that has no visual traction whatsoever.
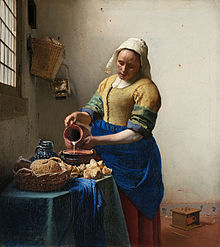
If you struggle with this issue, don’t feel bad, Johannes Vermeer and Edward Hopper made their living painting “the ordinary” and have gone down in history to be what many consider to be the greatest painters of all time. Having read the biographies of both, I was struck by how obsessed each was in their quest for subjects to paint, often spending weeks or even months in their search. A written description of one of their works gives no hint of the total mastery that is apparent when you view them.
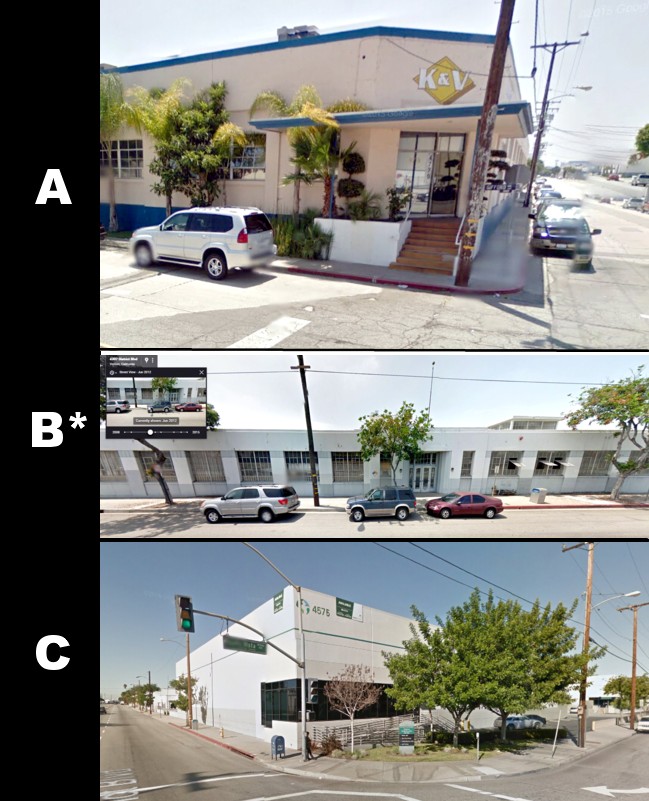
On my desk now is the last structure for the LAJ layout, one that will be relatively large and located front and center. Given the prominent location and size, selecting the best subject truly was a case of threading the eye of the needle. Shown in the image above are three candidates, all within a block of District Blvd. I took a long, hard, look at K&V Metals (structure A). Such an interesting candidate…but too interesting. Structure C is certainly representative but would leave anybody un-moved. Ultimately, I selected structure B, in the center. Its art deco architecture and curved glass blocks at the entrance are interesting and yet the subdued colors and low height keep it from coming across like a neon sign for South of the Border. Time will tell but this is how I go about striking that delicate balance between interest and over saturation.
I just posted a new blog entry on my business site, “The Three Functions of Track on a Model Railroad“. Something to consider for those wrestling with the design of their next layout.