Painting the structure gives a better sense for what it will look like. First, the roof was painted, weathered, and masked off. Next up was a base coat of Rustoleum Light Gray primer. Finally, I dusted on a very pale gray.
Next on the list is creating the artwork for the distinctive cigar band banner and printing out my own decals.
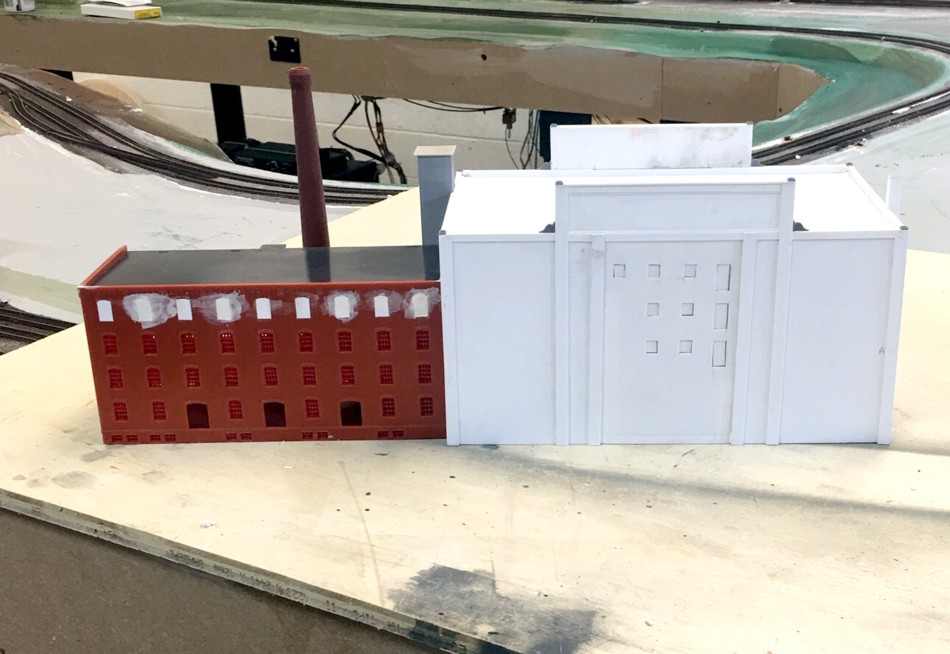
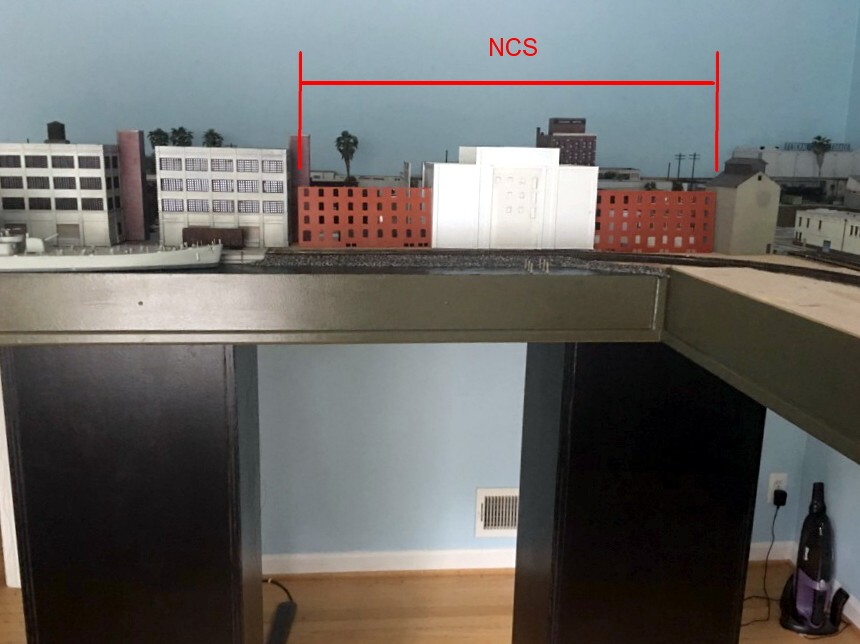
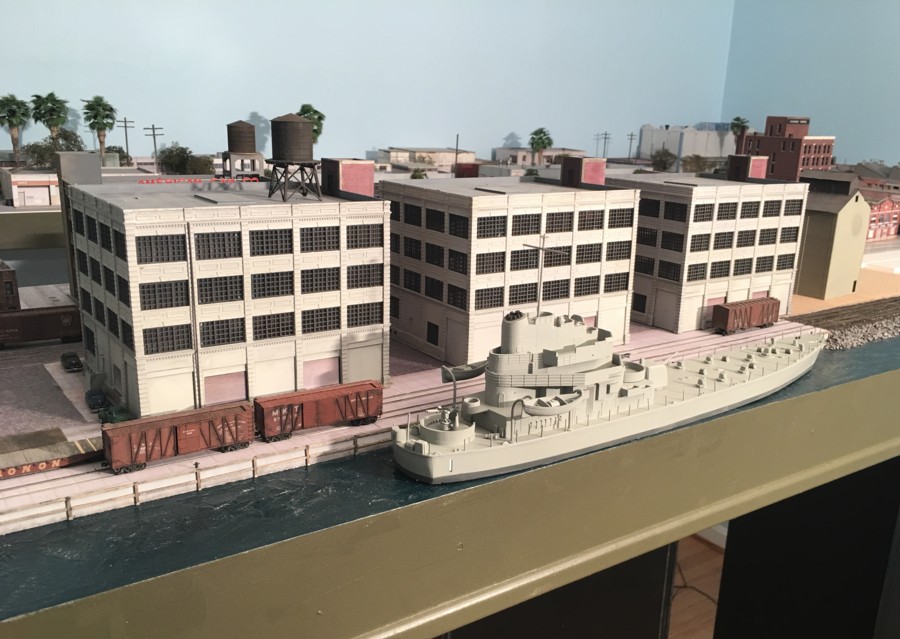
More work this weekend on NCS. Finished roughing out the Atlas Middlesex structure on the right. Added an elevator shaft and smokestack. Added Tichy architectural details.
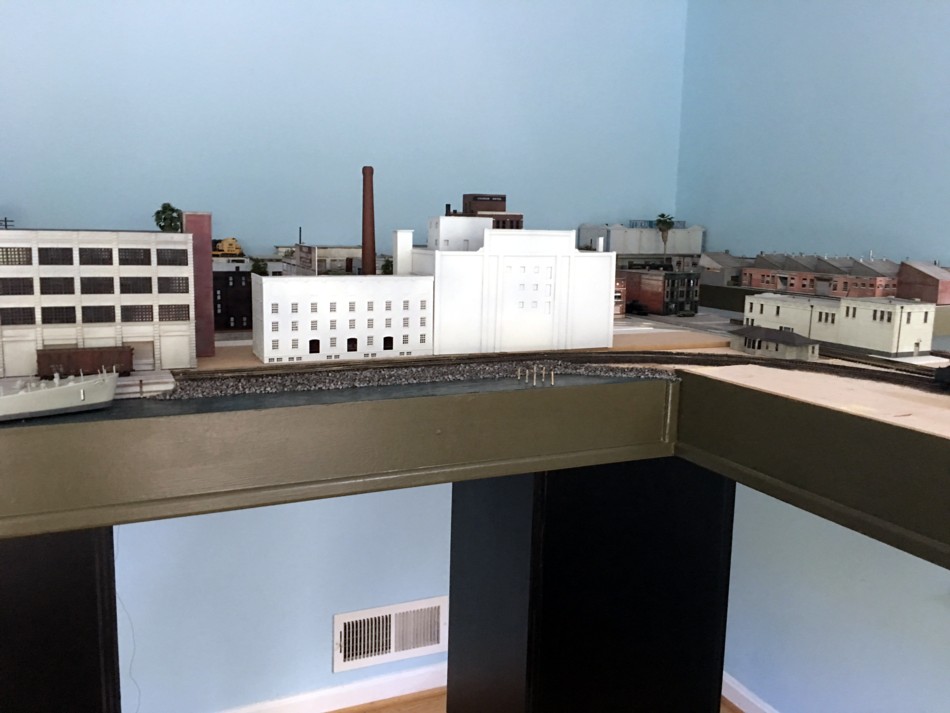
The primary center structure of National Cold Storage is fairly straightforward to build being essentially an exercise in creating a sheet and strip styrene cube. I have to give some more thought to what I want to do with the shorter brick structures that flank it on each side. In the mock up it’s taking on a larger footprint than I might want.
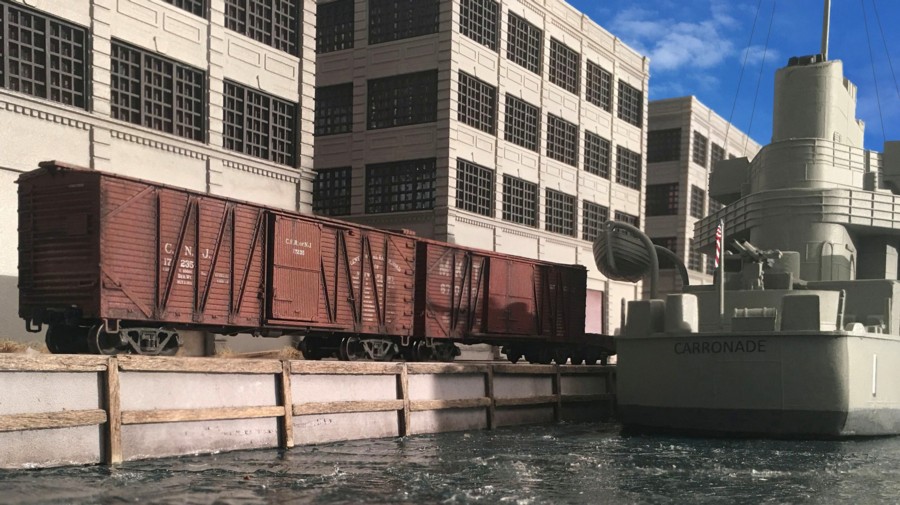
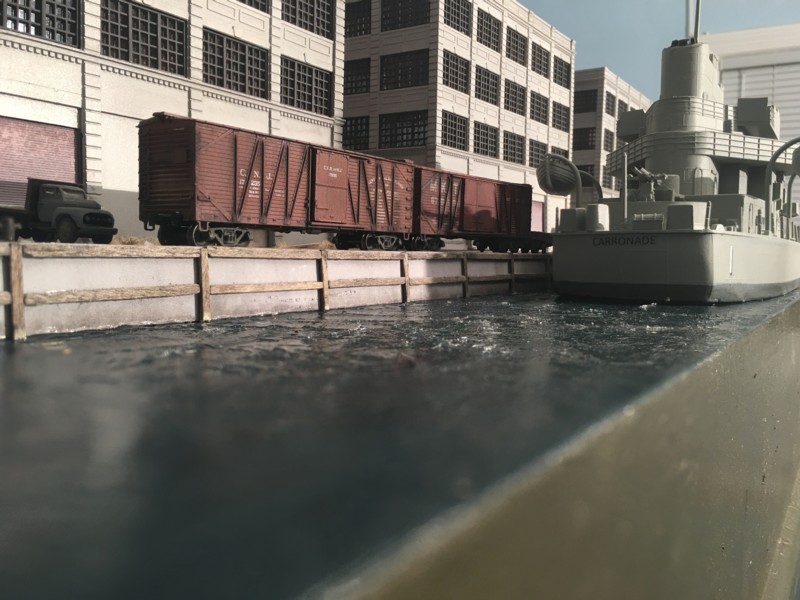
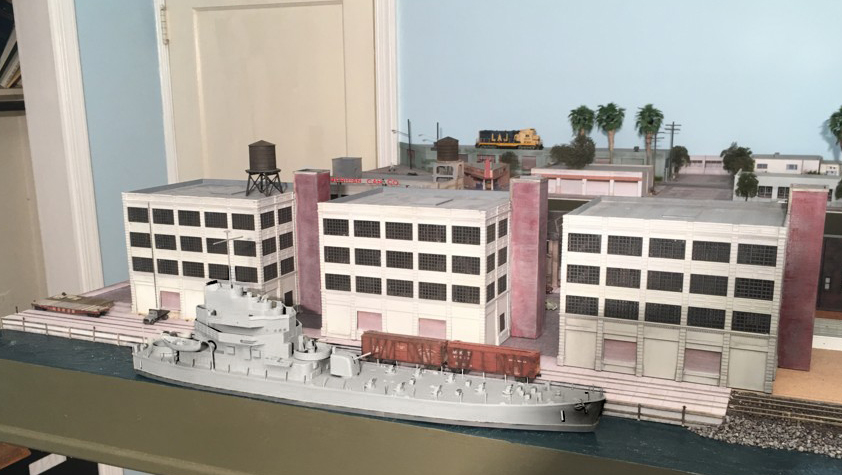
A naval warship temporarily berths on the Brooklyn waterfront at the height of World War 2. The image was shot using an iPhone and edited with Helicon Focus, Adobe Elements, and Corel Knockout 2.
Our hobby is a visual one. It’s hard to overemphasize the power the camera lens gives us in terms of allowing us to experience our work in a way that is simply impossible with the naked eye. The only limits are our own imagination. When we are lucky enough to hit the mark photographically, the payoff is that of being transported to the time and place we’ve worked so hard to create in miniature.
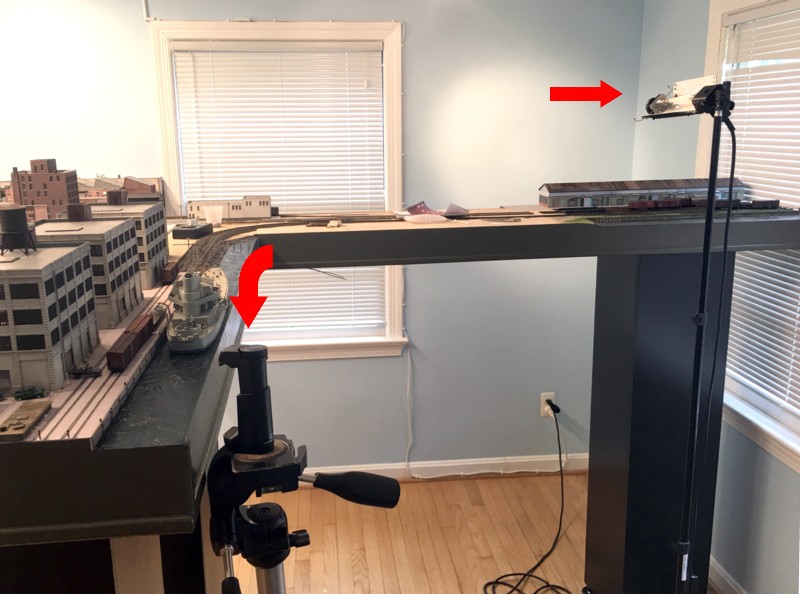
To create a shot like the one above we need to have a strategy going in. There are two pillars that make up the foundation of what you see above. First, the camera angle needs to be low in order to create the sense of mass that is so captivating about our subjects. Trains and ships are huge, our models are not. (The N scale boxcars in the photo above are only three inches long). The advent of exceptional smartphone cameras opens up an entirely new world from the standpoint that you can get the lens so much lower than with the a traditional SLR. Strategy 1, use a smartphone. Second, it’s all about the lighting. In order for a shot to “snap” you need contrast. That means using photo floods NOT diffuse flourescents or room lighting. For most shots I use just one photo flood.
Here’s the equipment set up. The iPhone is mounted to a tripod using a dedicated phone holding clamp. One photo flood was used and pointed slightly towards the ceiling and in front of the camera at about 45 degrees to the right. Note how low the phone is. The lens itself is only about a half inch above the water level.In order to get depth of field, you’ll need to use a “photo stacking” program such as Helicon Focus. These programs are cheap and simple to use. I took six shots, each focused on a different plane, dumped the images into Helicon, and hit the “green” button. That’s it.Here’s what Helicon spit out. Note that we have more image than we need. The foreground water is blurry and we have too much fascia.A wise mentor stated that the most important photo editing step is that of cropping. It’s an art in and of itself and takes some self discipline to cut away interesting aspects of an image we sort of like. In addition to the fascia and water, the truck and side of the ship got sent to the cutting room floor.Notice that in the un-edited image the wall and window are visible in the back. Cropping in a photo of an actual sky shot makes an enormous difference. I create a library of various sky shots and then crop them in using a plug in called Corel Knockout 2 (which piggybacks onto my Paint Shop Pro X program). I’ll generally try three or four different sky shots to see which one gives the best look given the color of the model subjects. Remember not to go too crazy with the sky, you don’t want it to dominate the photo.
The final step of creating the image is some touch up. Blemishes, dust specks, minor modeling errors, etc. were lightly cleaned up with the clone tool. I bumped the saturation up just a hair (10 on the slider bar).
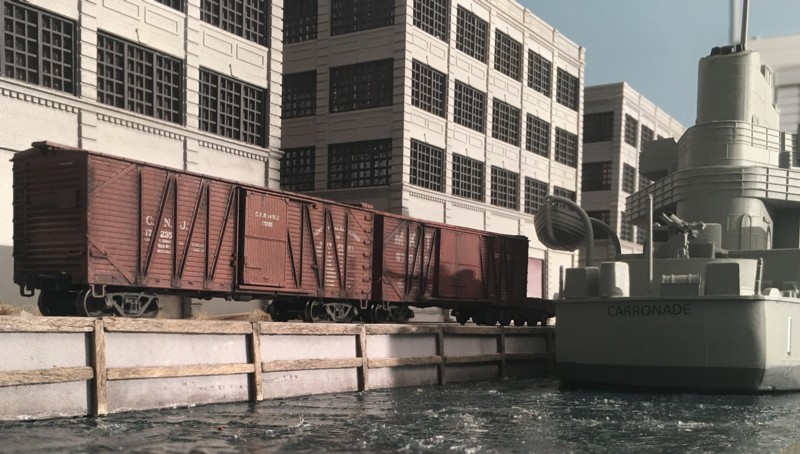
With experience we all learn that certain details just aren’t practical to model so be liberal in applying the old adage, “no detail is better than a crude or bad detail”. Guy wires and flags are no goes. If you try to model them, the eye will immediately key in on the fact that your subject is a model. To get around this, I photoshopped both in. The guy wires on the mast were edited in using the lines tool (medium gray not black). The drooping flag on the back was found on the net, sized appropriately, and cropped in.
This one image took about a half day to create but to me it’s worth it to have something you can enjoy looking at for many years into the future.
Built in 1953 the USS Carronade is a little too new for a WW2 era layout but it’s the perfect size and is at least plausible. At 1:170 Lindberg’s kit is pretty darn close to N scale. The most challenging part of the project was “waterlining” the hull so it would sit flat.
The light gray of a naval warship doesn’t really contrast very well against light gray warehouses. It is what it is.