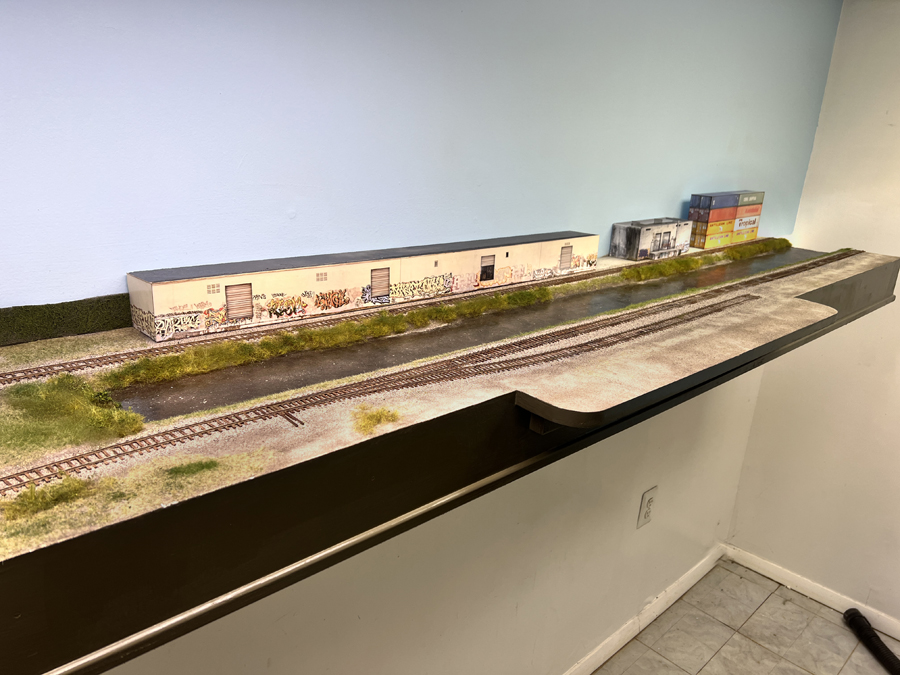
Momentum is building on the East Rail 2 project. Short term, my focus will be on the canal side. There are still a lot of layers to be added but it’s starting to become recognizable.
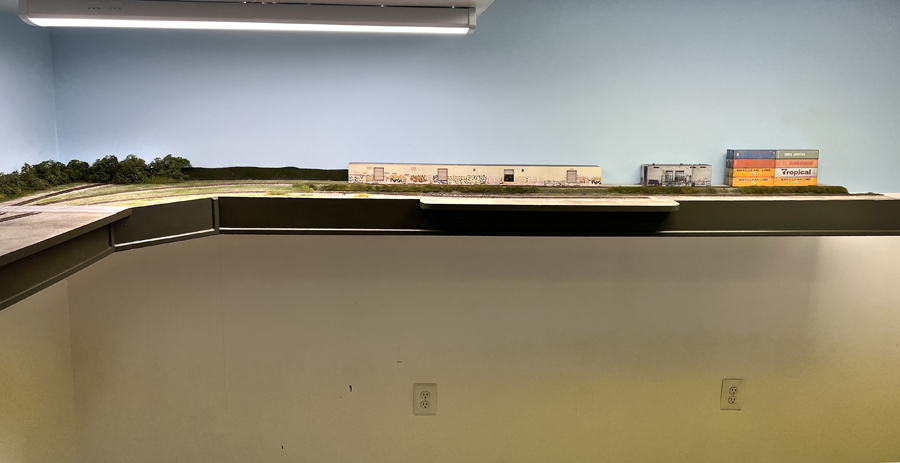
Ninety degree side view of the canal leg.
The canal has been poured and the first layer of scenery to the banks has been applied. The large logistics warehouse is a mockup. The spur in the foreground is for the team track.
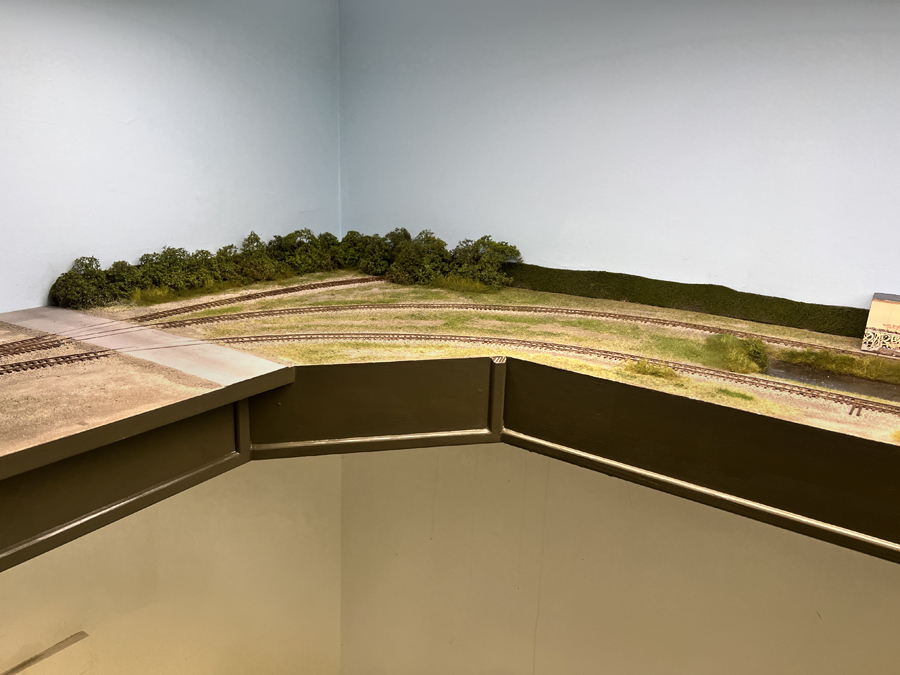
View of the corner. The empty space between the trees and warehouse will be the trailer park.
Here’s the track plan. Although there are some refinements, it stays pretty true to the original version.
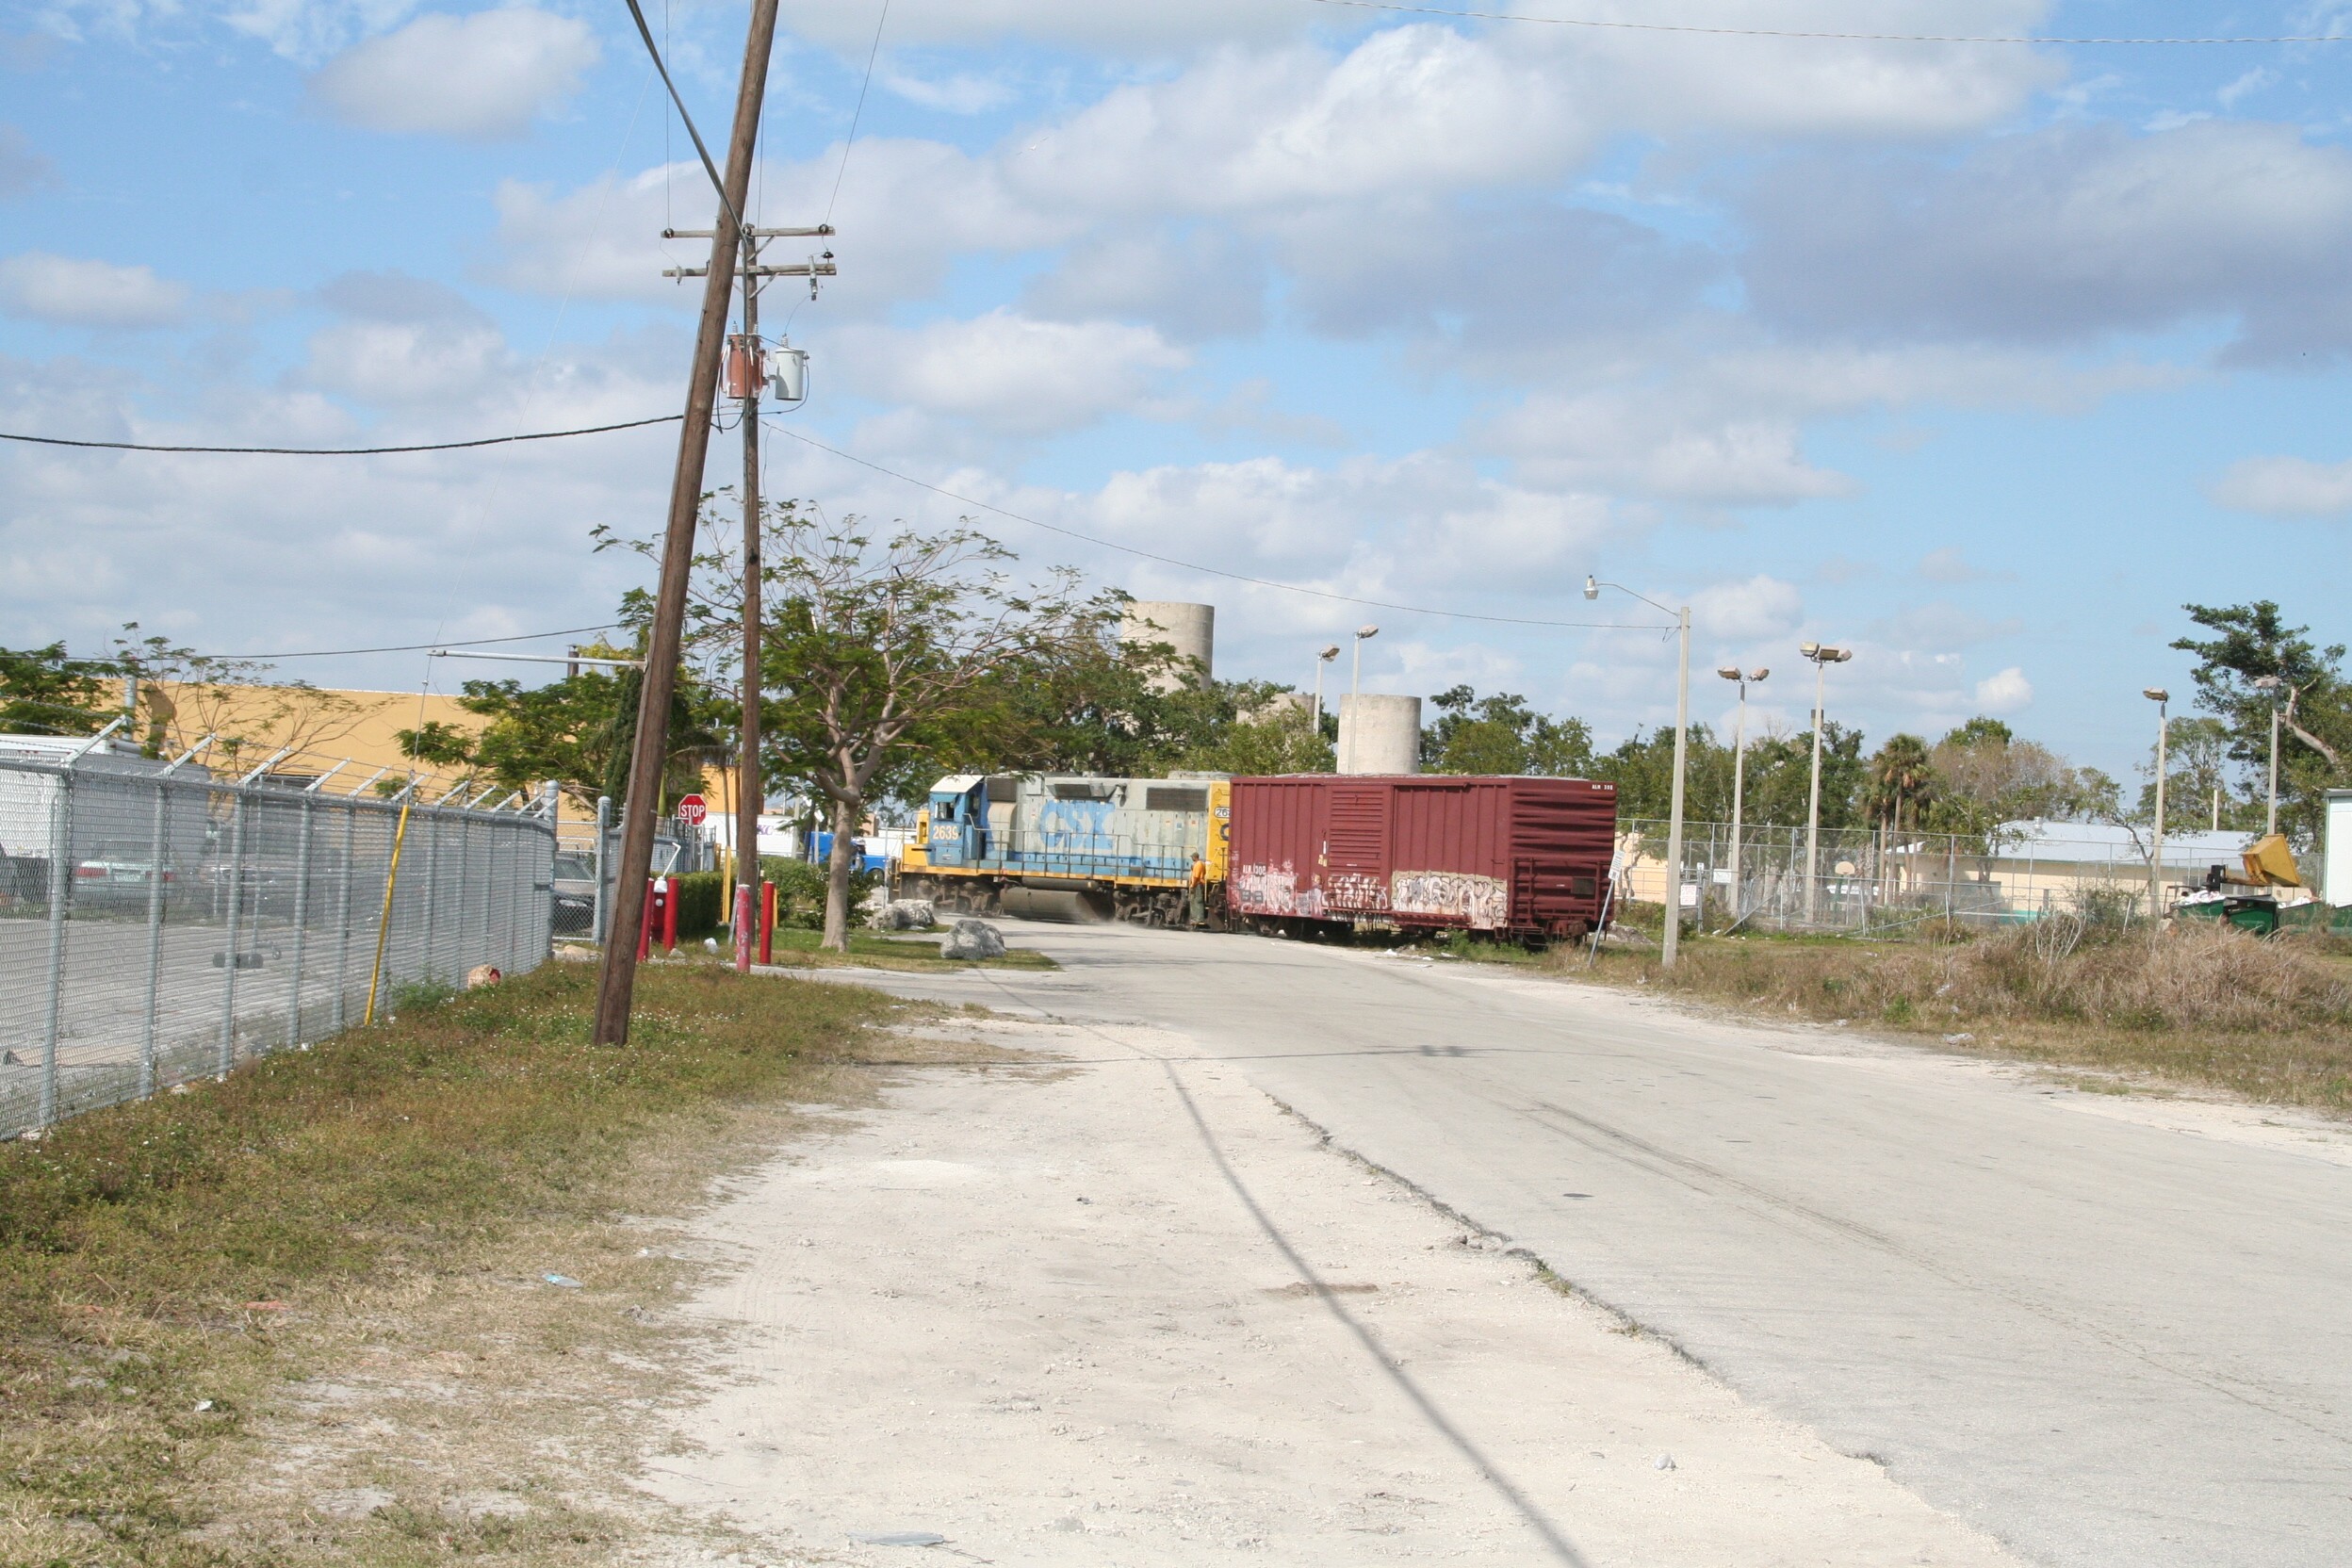
Looks can be deceiving. The above scene is far from simple and modeling it effectively would involve studying and truly seeing what is going on, understanding the challenges, and coming up with methods to re-create it in miniature. Note the subtle color blends on the shoulder. Note the way the grass feathers into the shoulders. Note the complexity of the pavement tones. The mesh on the fence is so fine you can barely see it (meaning it can’t be represented with window screen).
“Good enough”? Is the approach you’re taking in fact “good enough”? It may very well be. It may very well have to be. But, it’s worth thinking about. Is it a conscious, pragmatic, decision or did you arrive there by default?
Modeling railroading has an embedded culture which, for the most part, really hasn’t changed much in the last half century. It works and serves the largest percentage of hobbyists, the casual recreationalists, well. It comes from a time when layouts were much larger and, if you wanted to get anything done, you couldn’t spend two weeks weathering a manhole cover! In a nutshell it’s the “good enough” approach of “let’s get a decent representation of the prototype down, move on to the next section, and run some trains”. Nothing wrong with that. A slippery slope comes into play though when people move from thinking, “hey, not bad” to “Wow that looks amazing!”. It does the job, it serves its purpose, it may be a fit for your available time and commitment level but to think it’s “amazing” is a reach.
Let’s break down the “good enough” approach. At the execution level you are dealing with a relatively small range of color tones, (usually just a single color), hard line transitions between colors, and generally more vibrant and saturated hues. To reach the objective of more speedy, “get ‘er done” modeling, it emphasizes very few textures. It emphasizes a “check the box” aka “placeholder approach”. For example, scene ABC has a fence in it. Drop a 1/87 fence in the scene, check the box, and call it job done. The fact that the fence posts are twice scale size and the mesh is five times oversize is considered irrelevant because the placeholder box has been checked. We are also strongly oriented towards a caricature philosophy that feels any scene needs to be amped up. It’s a salt your food before tasting it, dump hot sauce on everything, culture. “I can’t have a quiet street. Too boring. I’ll put a cop chasing a robber in there to liven things up.” There is also a fair amount of inbreeding as far as information sources and techniques go. We operate in a bubble where the same methods and materials are used over and over and generally only taken from within the model railroading hobby community. On a good day we may steal something from our more skilled cousins in the military modeling aisle. Again, that approach works pretty well overall but not at the upper levels of execution.
Getting back to my “Audience of One” mantra, if you’re happy, that’s all that matters. If you have a larger railroad, you realistically need to stay on that path. Although this is our culture, it’s important to understand that it comes nowhere close to approaching what can be achieved, even by the typical modeler. Achieving those far better results has to matter to you though. There is zero shame in not wanting to move to the next skill level. For example, I’m a runner. I’m content with the status quo (i.e. pretty damn slow) and have no interest whatsoever in getting any better or faster. I still enjoy it though.
But what if achieving exceptional visual results does matter to you? How do you move the needle? Skill does matter….to an extent. However, what’s lost in the shuffle is the big first step, the skill that is generally skipped. It’s understanding what the critical visual issues are in the first place. You can’t focus on something if you don’t even know it exists. Without this understanding as a starting point, there is no way to move to the next level. For example, being skillful at detailing the interior of a structure isn’t going to change the outward appearance of the layout that much. Being able to skillfully model underbrush, or color a street, will have a major impact.
Beyond “Good Enough” means:
Attention to Color Selection: Selecting the correct hue and saturation level is not easy. There is a tendency to go too dark and overly saturated. What color is that road? Think you know? Guess again. It’s probably much lighter than you think.
Increasing Color Count: In any given scene it’s exceedingly rare to be looking at only one color. There are numerous hues all very close to on another on the color spectrum. The model railroad approach is one or two colors. The artistic approach will probably entail a half dozen or more.
Focusing on Color Transitions: This is a hard one. Particularly with scenery and weathering, transitions from one hue to the next are very, very subtle. The blends are feathered in. Learning how to do that takes both awareness and practice. In model railroading the tendency leans towards hard, sharply defined, borders and transitions. It’s a skill worth learning.
More Textures. As with color, in the real world (scenery specifically), we are dealing with not one texture, which is the model railroad approach, but many subtle textures. Many of those textures are very fine.
Avoiding Caricature: Our subject is enchanting enough without turning the volume up on every scene. It worked for Hopper, Vermeer, and Da Vinci and they made out o.k.
Being Wary of “Placeholders”: It’s not enough to check the box. The element has to be the right size, shape, and color. If achieving that isn’t possible (utility lines for example). Just leave the element out.
Focus on Overall Scene Composition: This deals with the elements you select, their relative size, and the space between them. It makes or breaks a scene. Our model railroading culture is one of way too many elements packed too closely together. The skills needed to master composition come from the art world, not the hobby world.
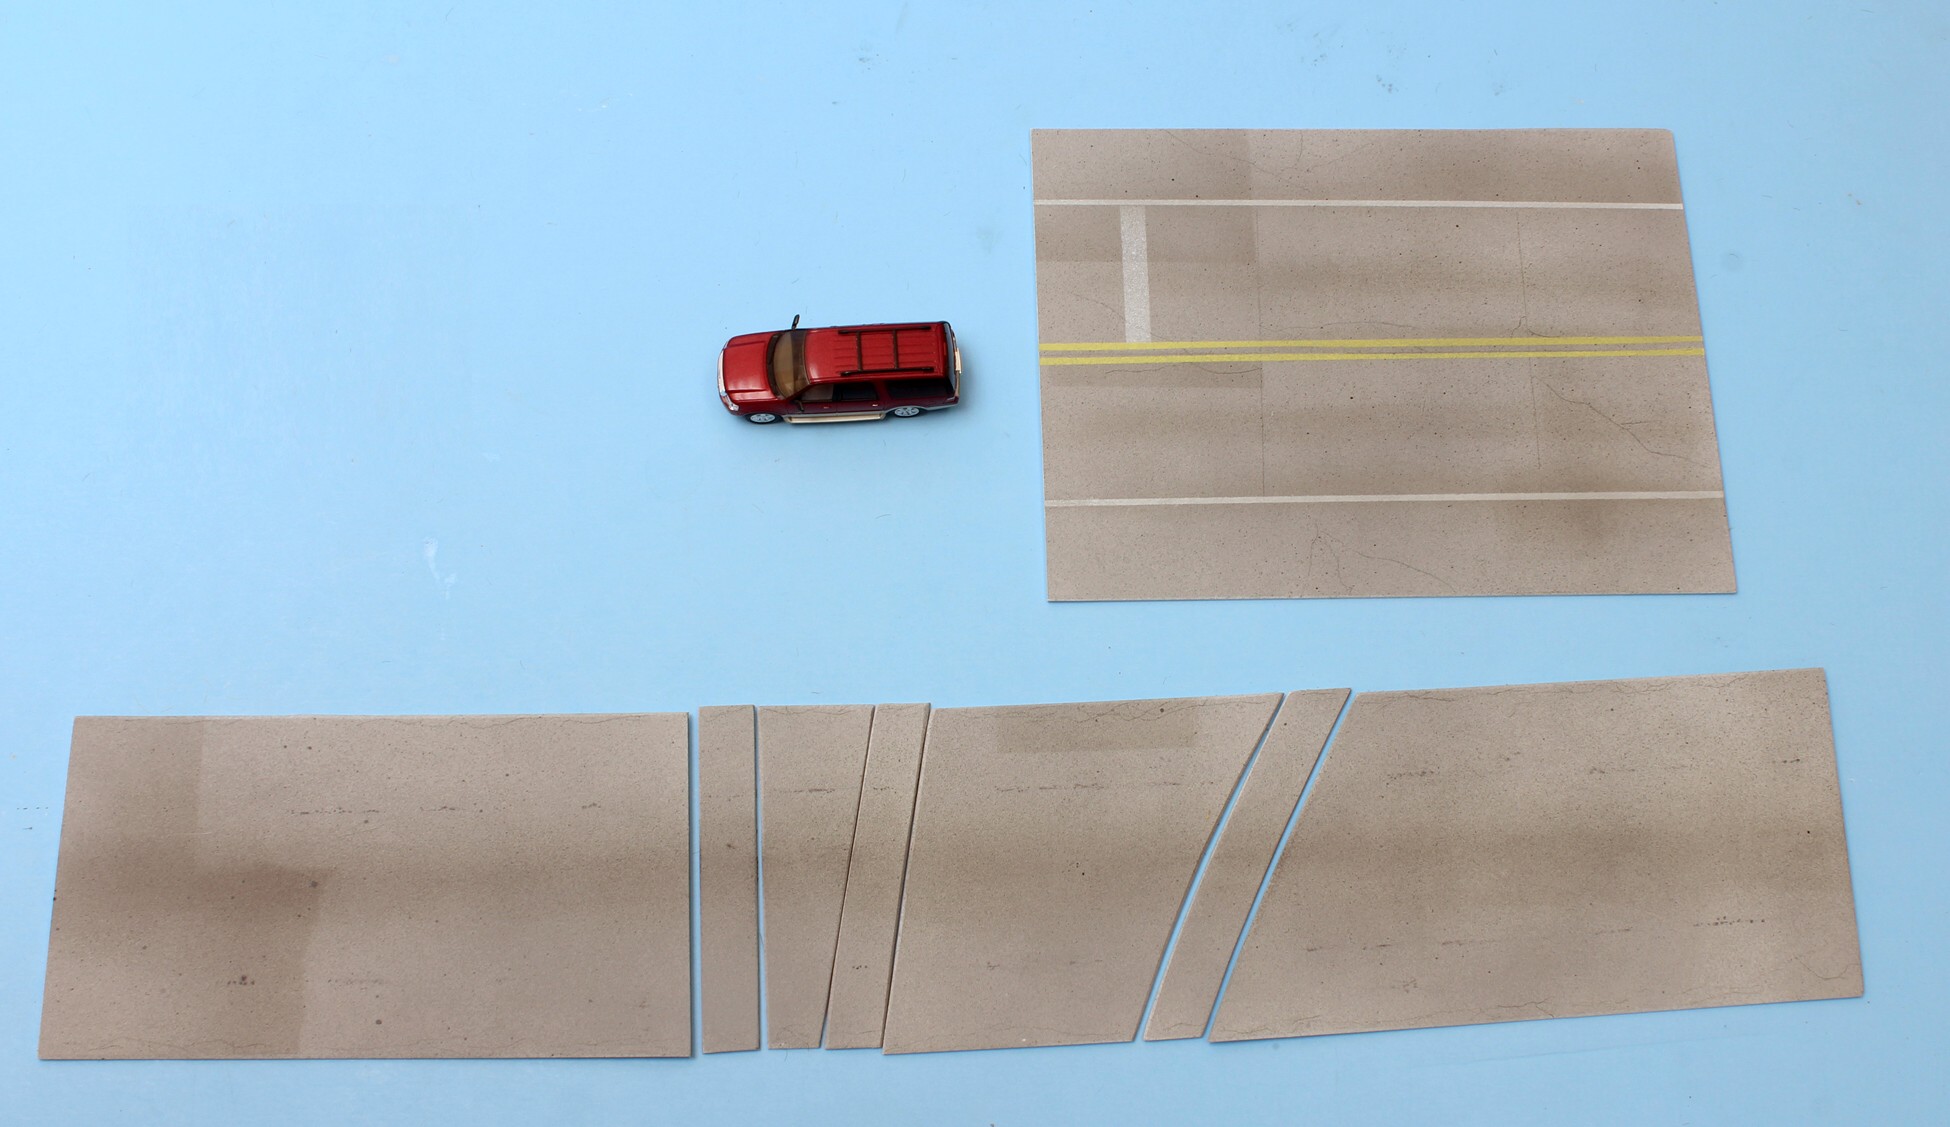
Shown above are some pavement samples for a section in my upcoming book, “Scenery For Switching Layouts”. The top piece is for a higher traffic street. The bottom would be more representative of a street weaving through an industrial park. There are around a half dozen shades of gray and emphasis was put on subtle transitions and blending. Although there are a half dozens steps, they go quickly and could be achieved by a motivated high school student just entering the hobby.
Finally, the subject of information “inbreeding”, limiting your information sources solely to the model railroad orbit. I can see the eye rolls already, but if you are a “one per center”, somebody that is driven to get the absolute best results, that won’t work. You need to move to the art world where the quality of the practitioners, and teachers, is light years ahead of anything you’ll see in a hobby environment. Last month I went to a lecture on Vermeer. A large portion of the discussion was on brush strokes and color transitions. The application to what we’re trying to achieve is 1:1. When looking for information consider the source, trained professional or skilled (or maybe not so skilled) amateur. For many hobby topics you will need to stay in our world. For issues related to color and composition you need to spread your wings.
That’s enough for today. Can somebody help me load my soap box in the car.
CSX has shaken up their service plan in Hialeah, particularly for the Gardens Lead. Previously split between jobs Y220 and Y322, Y220 was abolished some time ago in favor of a remote control job, Y190. Also heard from time to time is an evening Y290.
I was out and about and from listening to the scanner audio, heard Y19003 get permission to occupy the Amtrak Lead. CSX yard jobs typically use the Amtrak Lead to either shove to the handful of customers on the east side of Hialeah Yard, or work the Gardens Lead.
The Gardens Lead continues to be a hive of activity, with at least a dozen customers sprinkled throughout seven leads and a main track. The congestion around Hialeah Yard and demands of the Gardens Lead perhaps make remote control operations a viable answer, for now. Due to traffic conditions, and a full Hialeah Yard, cars continue to be sprinkled wherever they can, even on unused leads.
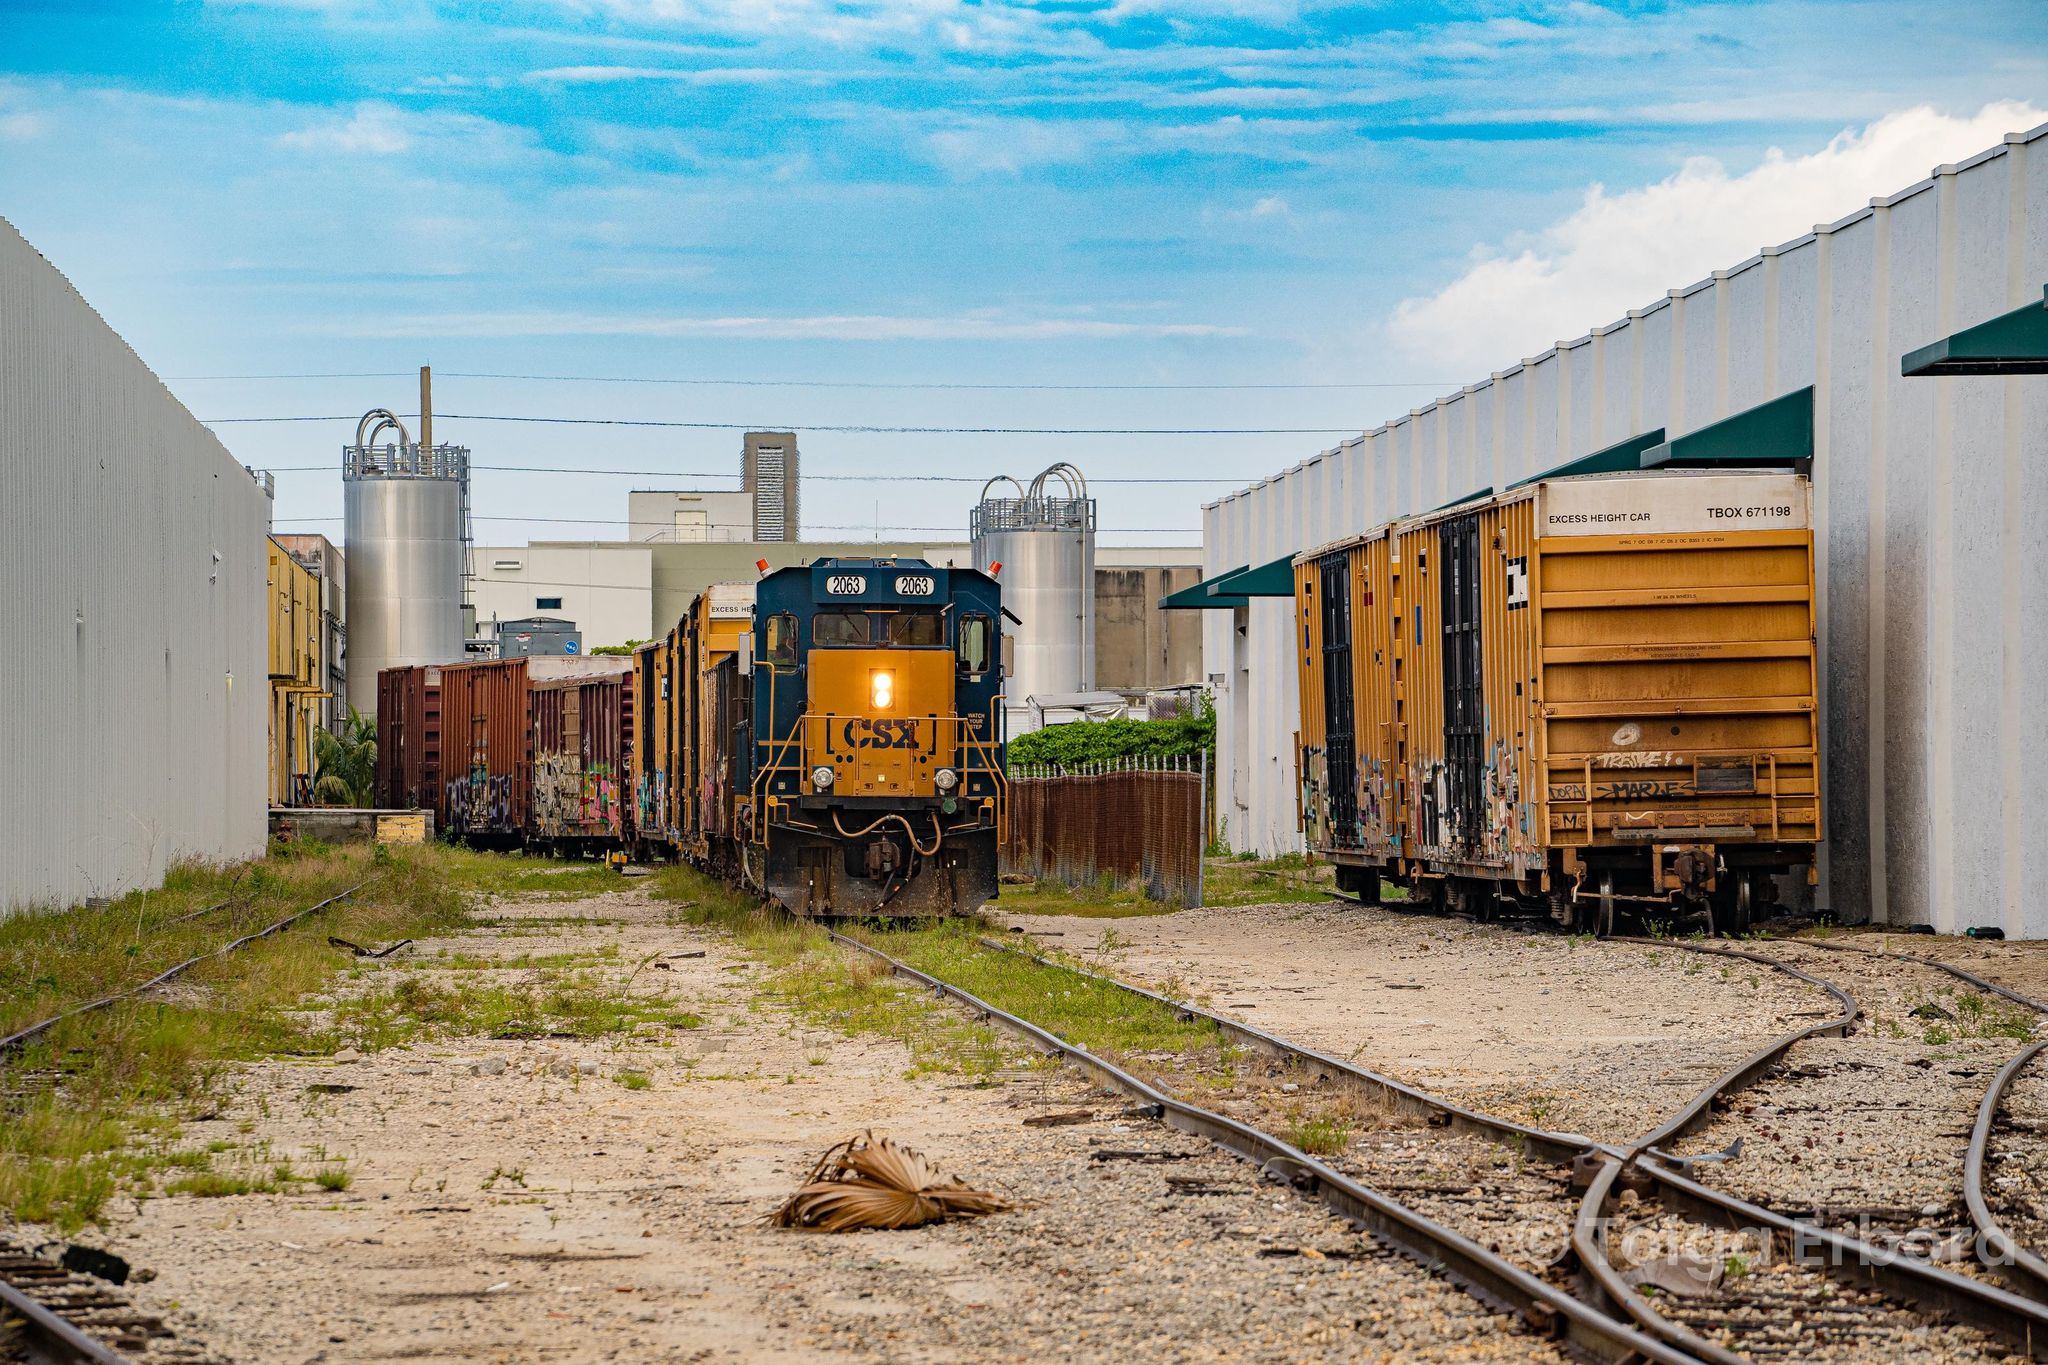
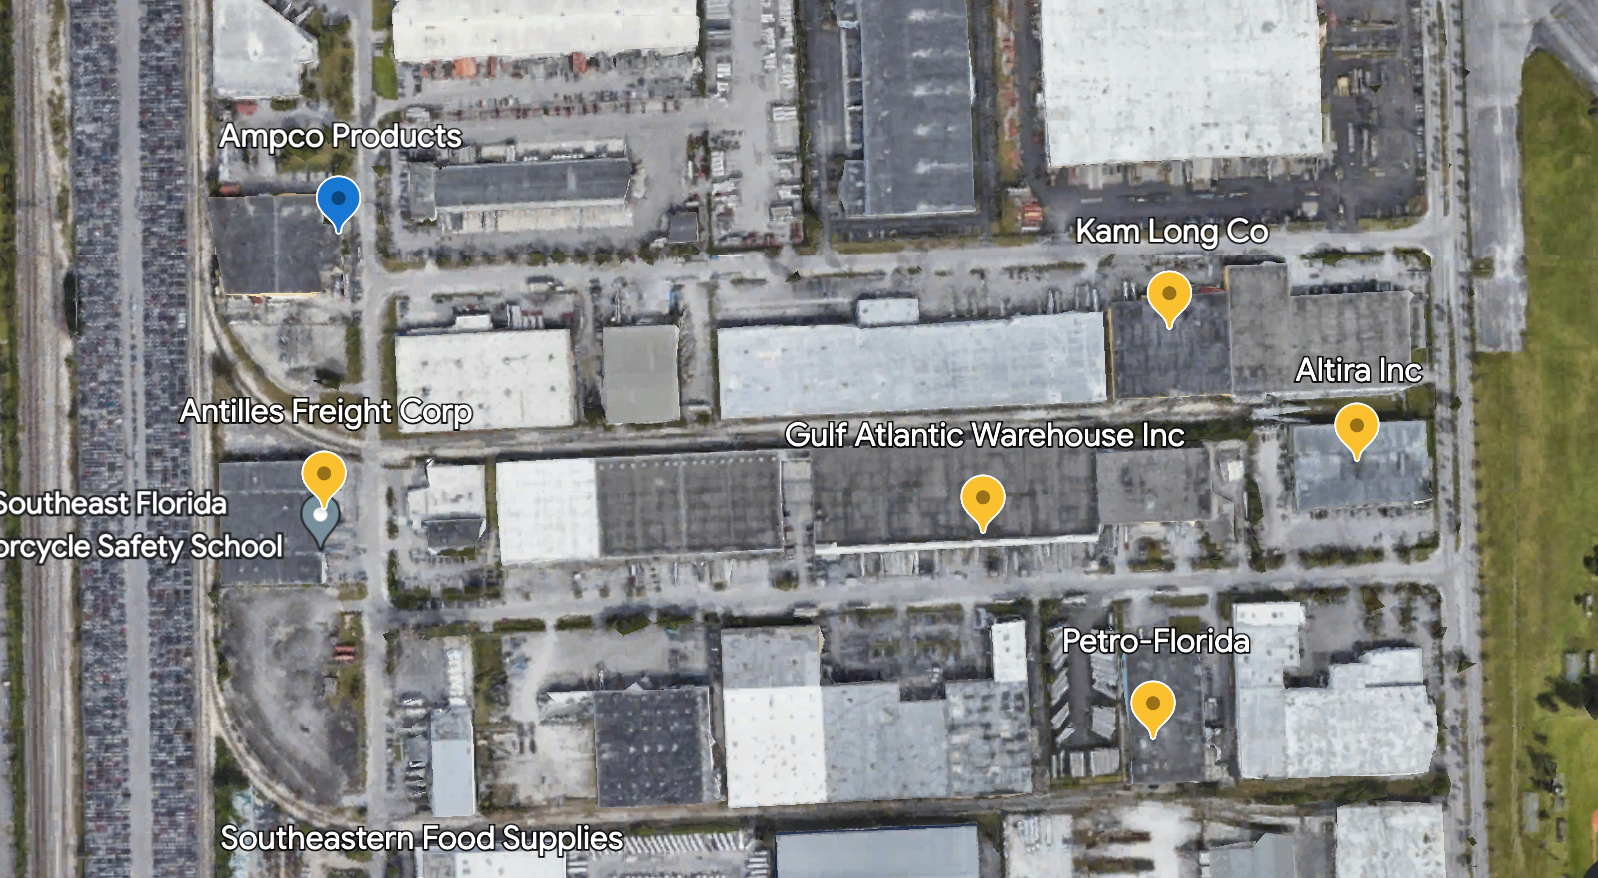
CSX Y19003, the first RCO symbol in quite a while in the Miami terminal, spots a boxcar at Kam Long on track GL3 within yard limits. Boxcars with various foodstuffs go here to be distributed by Kam Long through wholesale.
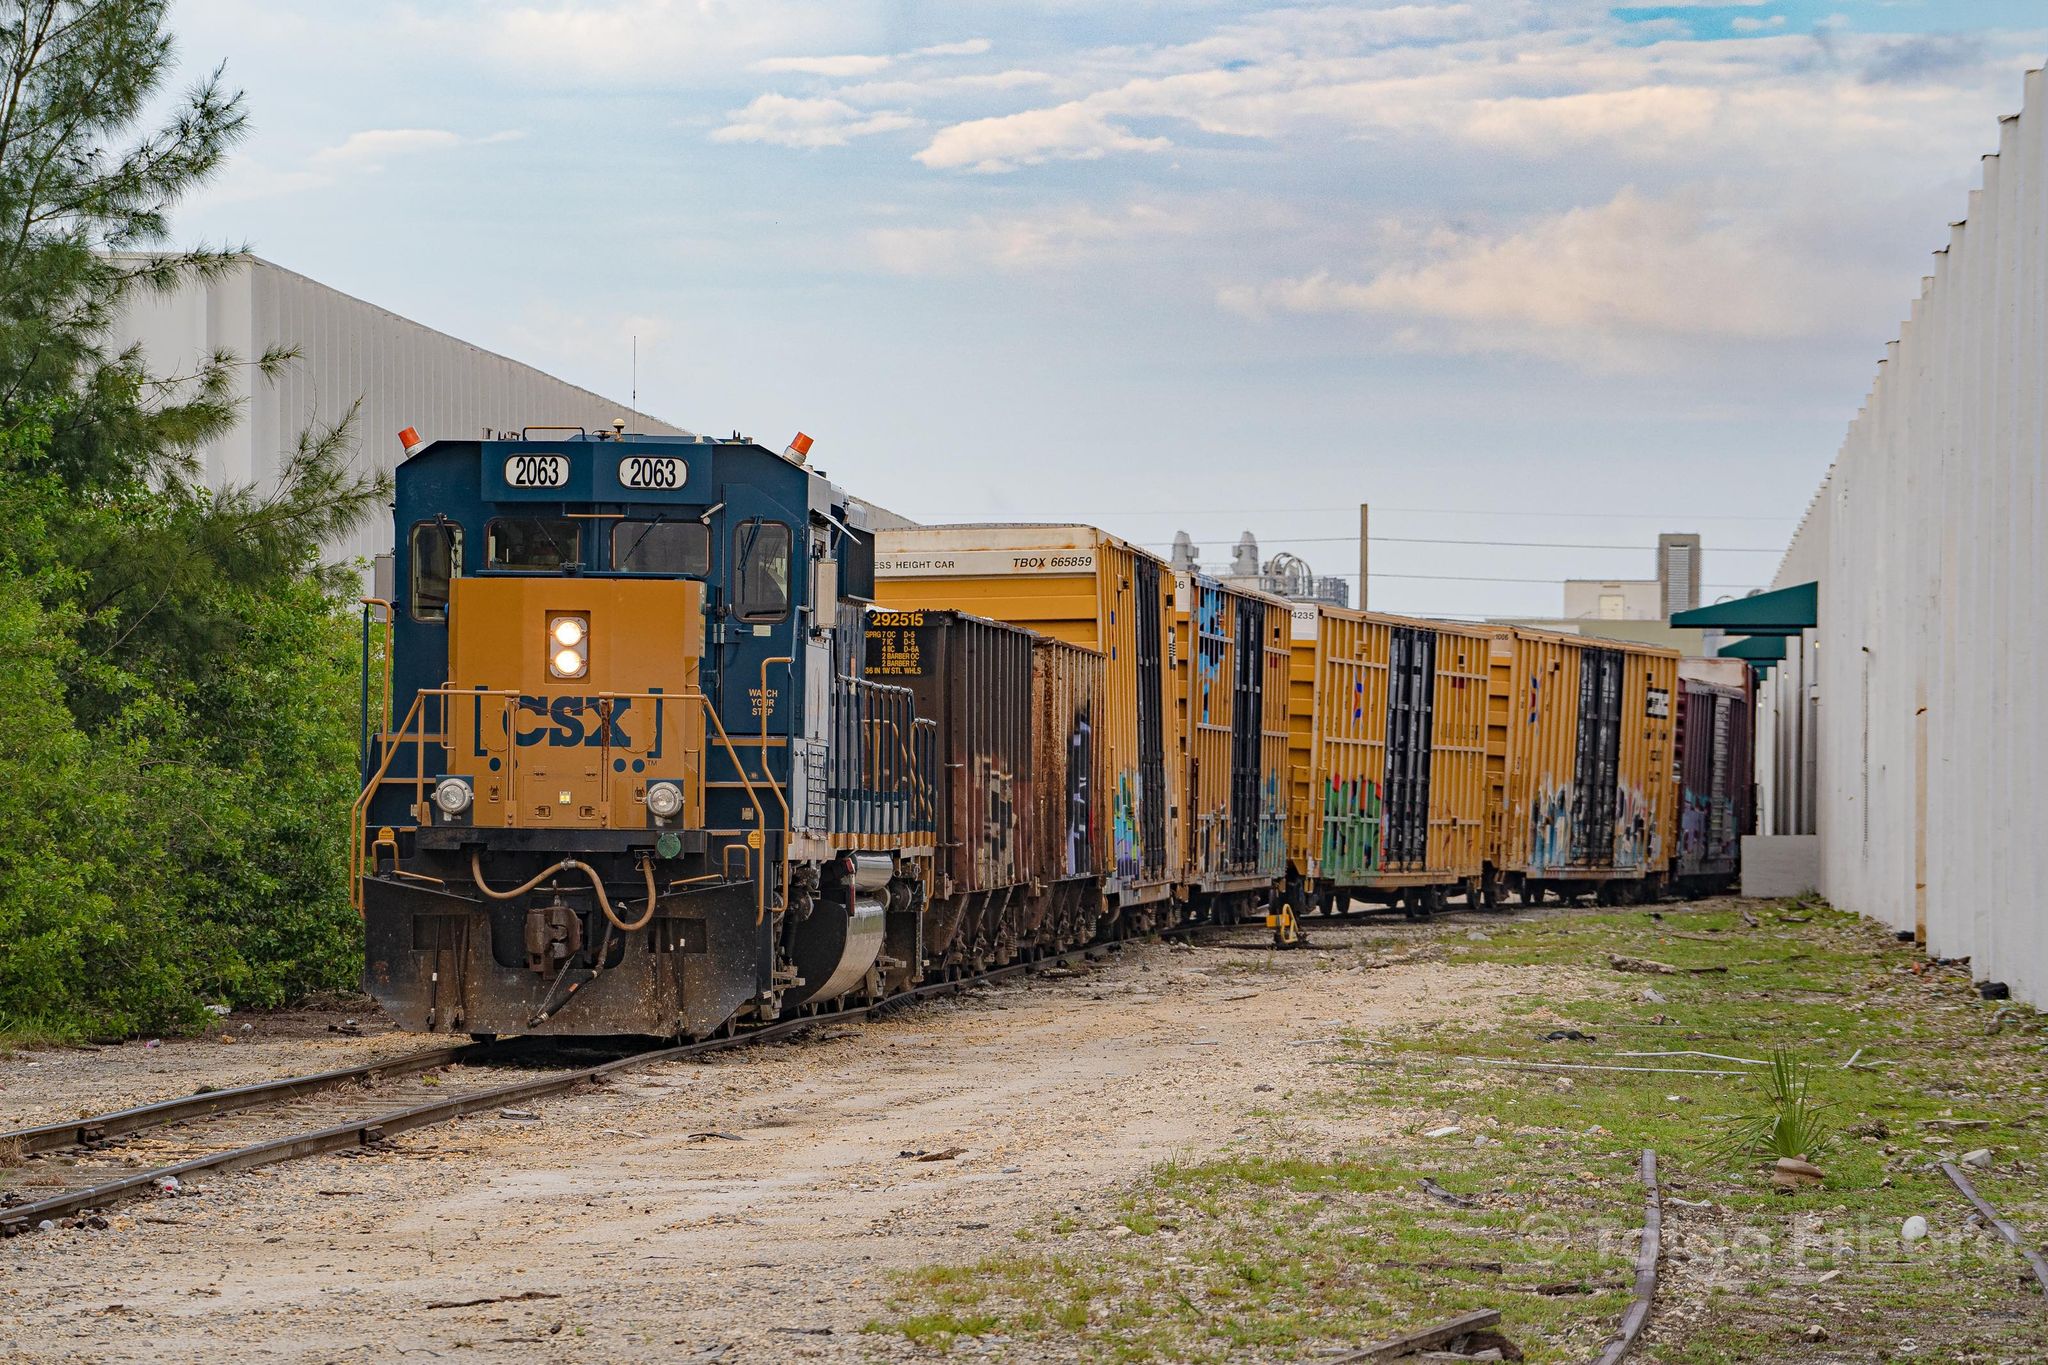
We also see it spotting one of the largest customers, Gulf Atlantic Warehouse. It may be your typical box with doors, but takes in and warehouses a whole variety of dry food products. The track leading in isn’t in the best of shape, evident with the cars leaning one way. I was anticipating seeing the TBOX scrape the wall of the building, but it was not close enough for that.
The switching action took about 40 minutes in total. A lot of details can be implemented to make the switch more exciting.
If these two customers don’t make the GL appear convincingly busy enough, Altira takes in pellets behind Kam Long over two leads.
The door spacing and spotting at GAW requires a lot of little nudges. I’ve seen the 2063 nudge back and forth to spot the boxcars no fewer than three times. This takes about 20 minutes for about four cars.
The track layout on GL3 alone makes for a 1.5-2 hour long operating session, especially if you have to spot and pull all customers, or rearrange cars.
You can see more of Tolga’s work on his Flickr page HERE.
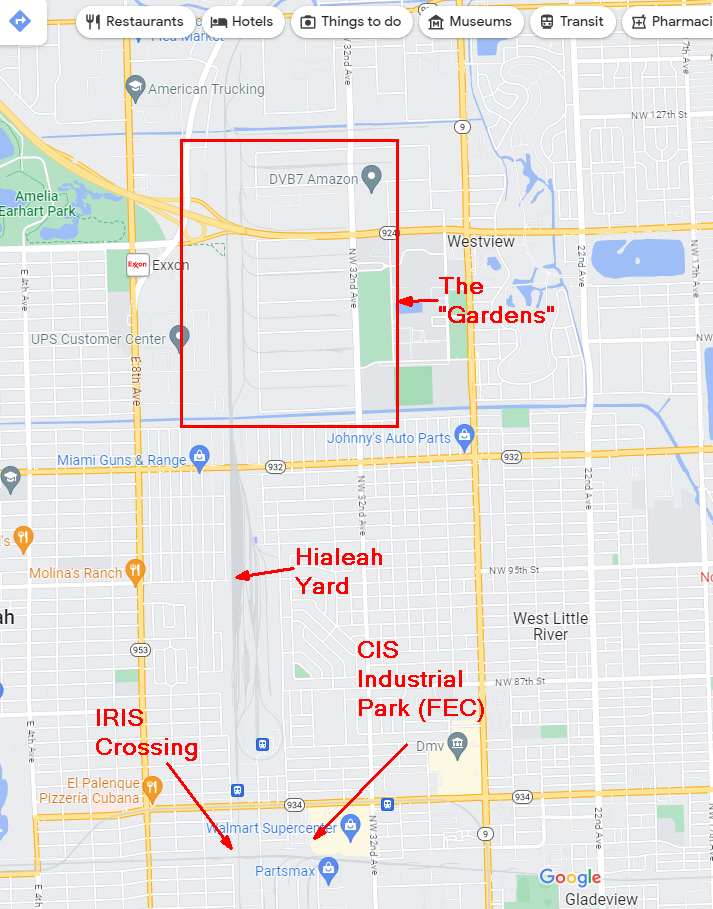
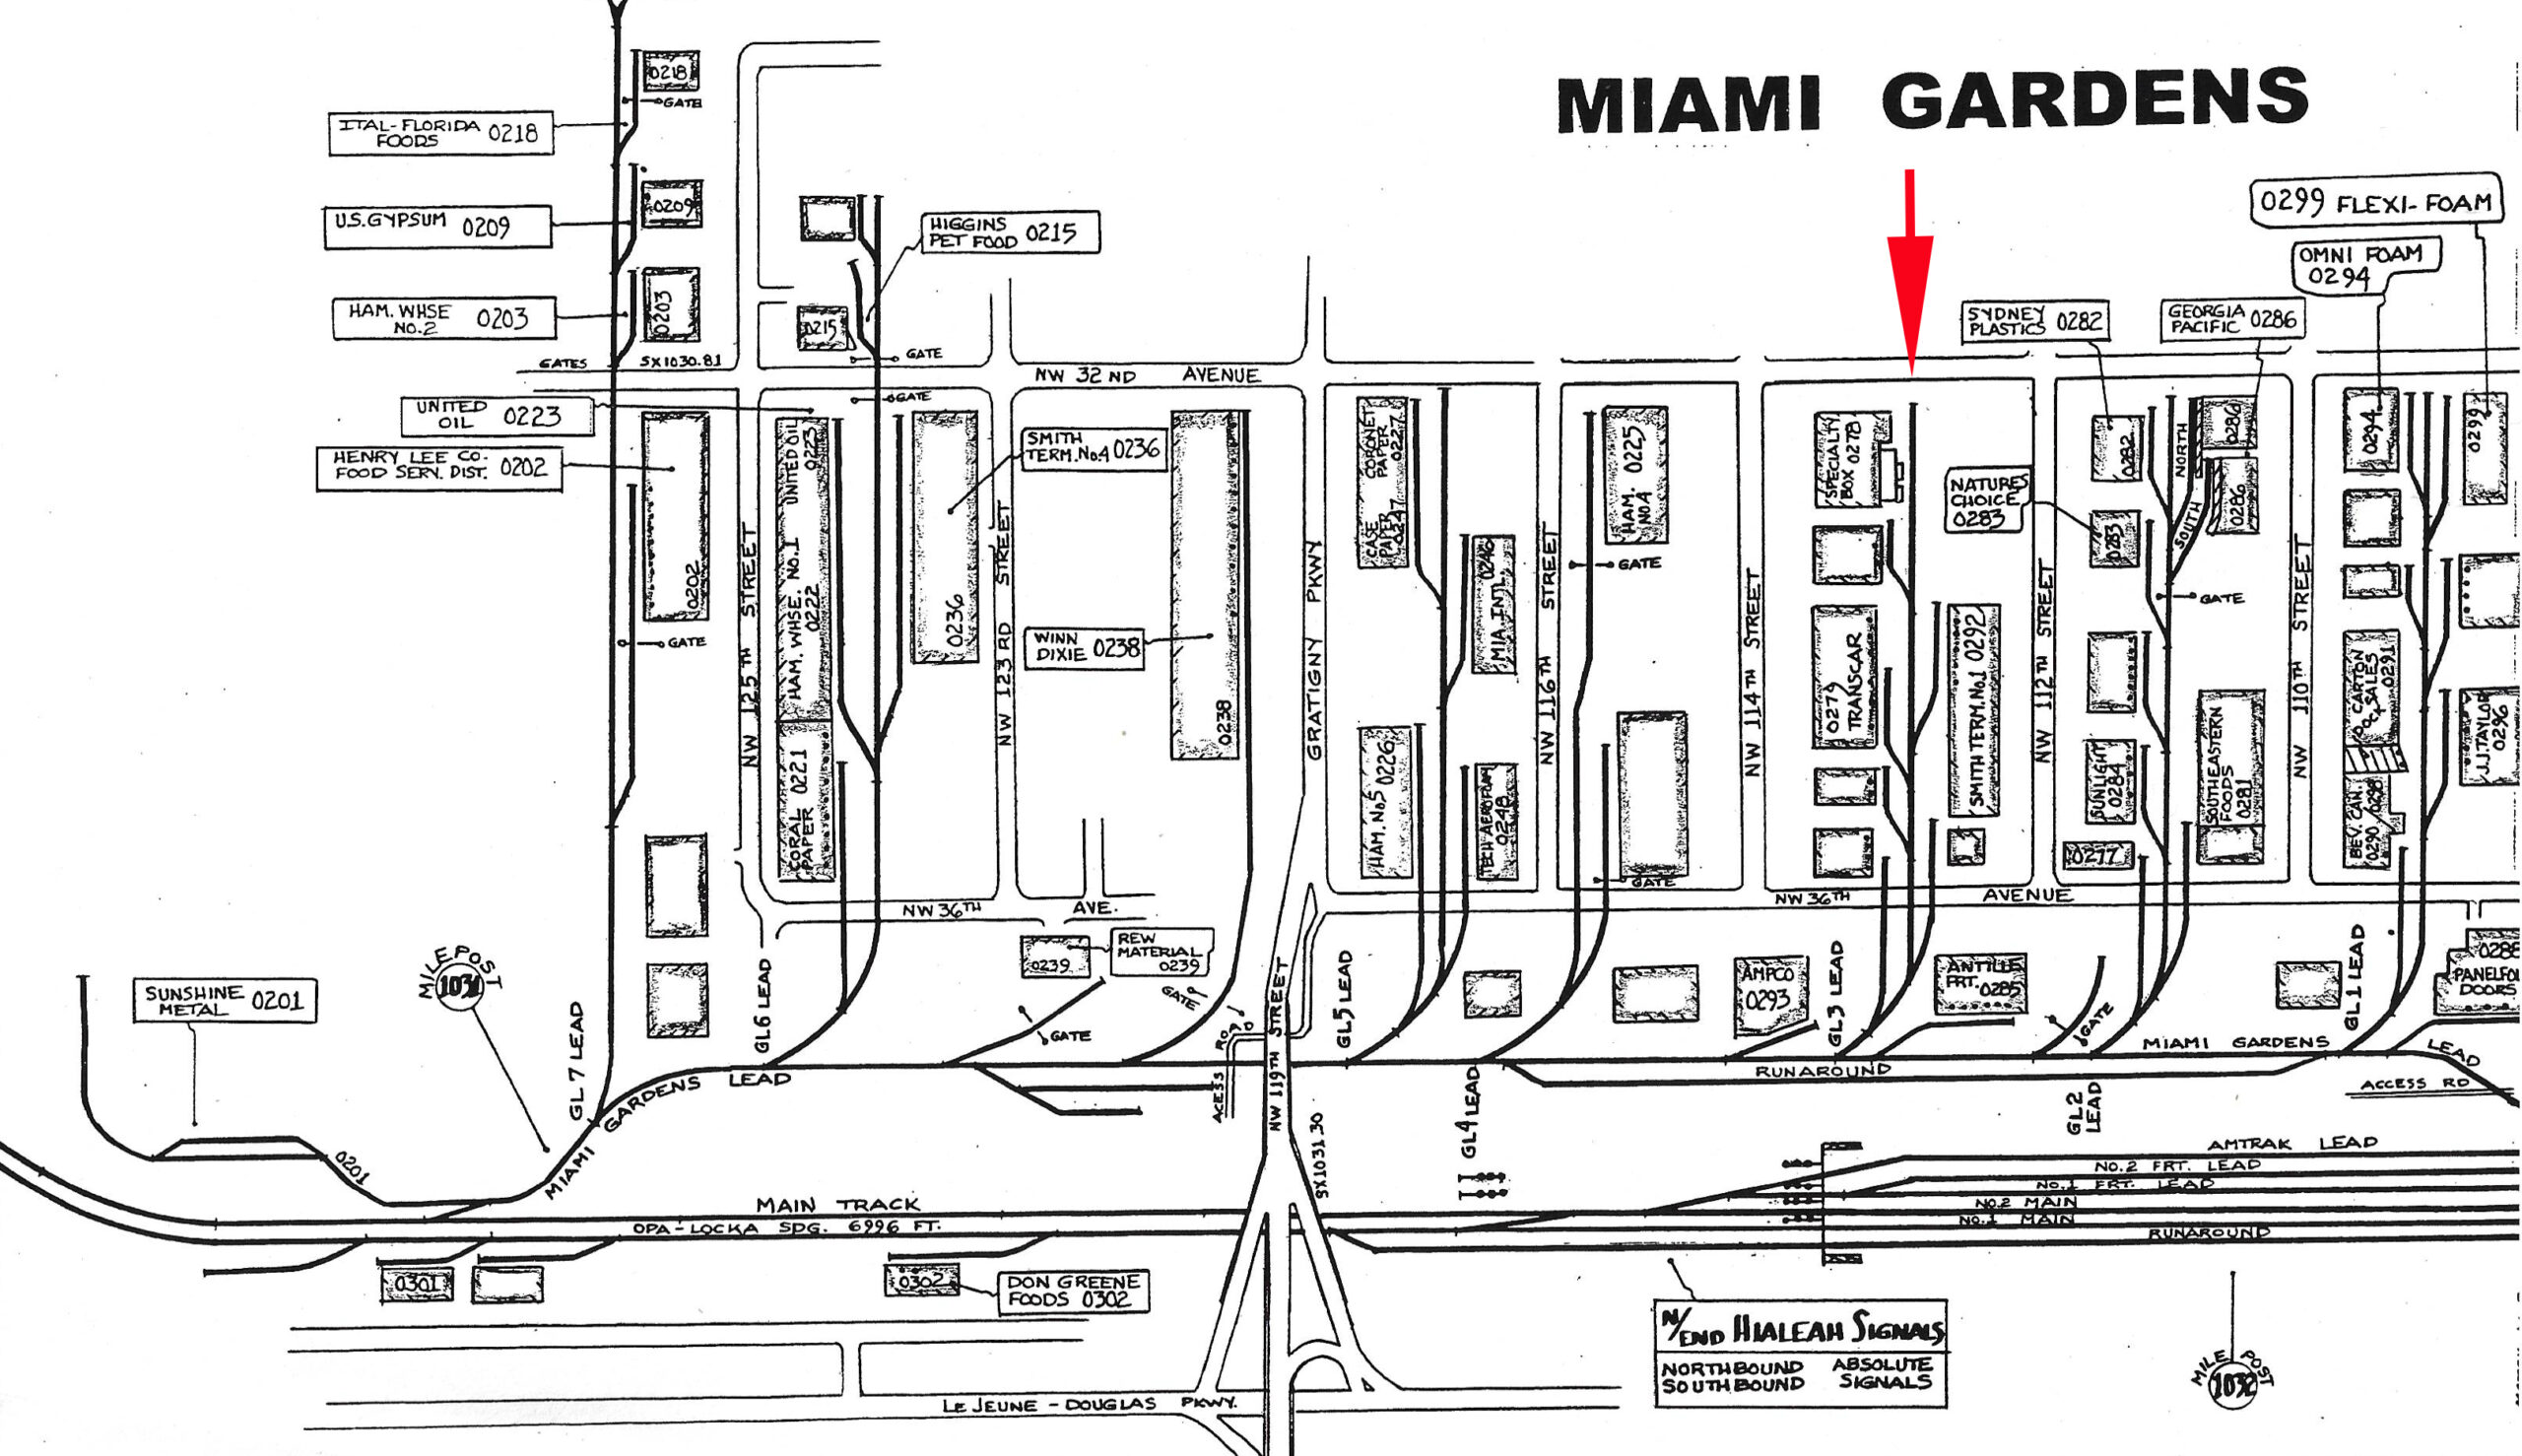
Map showing location of The “Gardens” just north of Hialeah Yard
Close up aerial showing the lead with Kam Long and Gulf Atlantic.
The number of my books in print has reached the point where I felt it was time to set up a separate website just for them. Hopefully this adds some clarity. You can visit it at modelrrbooks.com. I’ve set up a separate page for each category (design, track plans, etc.). There is some overlap. The last page has all of the books listed.
I’m fairly far along on the next book which will be “Scenery For Switching Layouts” with a target release date of late summer/early fall. More details on that as we get closer.
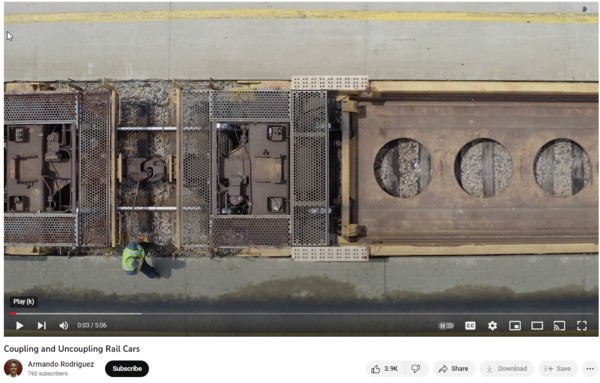
No, not THAT type of couple! I’m talking about coupling and uncoupling during operations. It’s the most fundamental of tasks. Even so, there are some things we can do to enhance the experience of operating our layouts.
To start, here’s an excellent video explaining how the big boys do it. After watching it, here some takeaways.
-After making a couple, especially if the next move will be a shove, the prototype always pulls back slightly to make sure they actually did lock the couplers. It’s called “stretching” (00:50 mark in the video). If you listen to scanner traffic carefully, from time to time you’ll here the conductor say “Give me a stretch”. Not doing so in real life has resulted in some pretty serious accidents. They “think” they have the car and begin the shove. They get to the end and stop but….the car keeps rolling. Not good. I always incorporate this practice when operating solo.
-Note the red zone procedures in the video. When I operate solo I don’t “talk to myself” but I do pause a second to visualize them doing this.
-In the real world when a loco. couples to a car, it’s like hitting a brick wall. The car being grabbed barely moves, if at all. Capturing that dynamic with our much lighter models can be hard to replicate. Having a car skate an inch or two after the locomotive grabs it is like nails on a chalkboard for me but it’s hard to control. The solution? Just hit your throttle’s brake key the instant you make the couple. Doing so gives you the hard stop you’re looking for. Remember to release the brake.
-The section on coupler alignment in the video is interesting. I’ve actually seen crews do that. Now I don’t feel so guilty about my less than perfect Kadee maintenance. Just align them like they do in the field.
-Shelf couplers? Most tank cars have them these days and Kadee makes some nice ones. The problem? The Kadee’s are too prototypical and can be a real bear to unhook. I gave up and went back to standards on all of my cars.
-Trip pins. Unless you use uncoupling magnets, the trip pins on your couplers serve no purpose whatsoever. They don’t look so great and can snag things. If you don’t need them, snip them off.