My third attempt at a layout….1985 give or take. What a mess. Gotta love those photographic skills!
(Note: I actually do get to the point after the long initial rambling so stick with me)
We know we shouldn’t do it. It’s shameful, but we’re all guilty of rubber necking those horriffic three car pile ups we come across from time to time. On one hand you hope nobody is hurt, on the other you are left wondering what series of poor decision making could lead to such an utter mess. With that image in mind, let’s take a trip down memory lane, my very loooong learning curve, and entry into this hobby. The journey is best described as a series of three car pile ups spanning more than two decades, hence the title of the blog.
It’s human nature to look at somebody’s work on the cover of magazines and assume they rolled out of the womb with that skillset. That’s generally not the case. It’s more likely getting there took awhile…maybe “more than awhile”. In some cases, take myself for example, not only was the path much longer than “awhile”, it was rocky, it was ugly, it was utterly devoid of ‘style points’. I have no way of knowing but I’m fairly certain my learning curve was longer than anybody reading this blog. The path was a series of three multi-car pileups and a fender bender before I finally learned how to keep things between the proverbial lines and build a decent model.
I’ll be 63 this summer. I entered the hobby at age 16. It was almost twenty years before getting my first article published, and almost 25 years before I finally figured out how to build a decent model railroad and get a cover shot. 25 years is more than “awhile”.
Car wreck number 1: We were living overseas when I was a teen and I distinctly remember walking into a pretty nice hobby shop. There it was, the magazine rack. I picked up a copy of MR and by the end of the weekend I was hooked. I went back to the store, loaded up on more mags, and read them until the pages were threadbare. Our living situtation was such that I wouldn’t be able to build anything until we returned stateside. My parent’s civil service tour ended, we returned home, and I was given a land grant to a fairly massive, forty foot long, basement. Two years of reading the magazines left me with a lot of pent-up and unbridled enthusiasm. Every aspect of the hobby, every theme, was fascinating to me. Having absolutely no self control, I whipped up a terrible design to span the forty foot space, got the bench work up, and started laying track……of course I wanted it to be hand laid. I never even got the wiring in before the entire venture collapsed due to the utter lack of planning and focus. The layout went into the dumpster, I shifted my focus to rail fanning, and that was the end of my first attempt at model railroading. Ugly. Score? 0-1
Car wreck number 2: I don’t remember the exact year, but I think it was 1985 or so which would have made me age 25. I was out of college and working. For no reason that I can recall, I picked up some more magazines on a lark and decided to whip up a smaller layout in the office of my apartment. I learned ABSOLUTELY NOTHING from my first car wreck a decade earlier. Venture two had no plan whatsoever and, once again, never even got wired up. I was transferred out of state and into the dumpster attempt number two went. Are we seeing a trend here? Score? 0-2.
Car wreck number 3: I think it was 1987 which would have made me age 27. Eleven years after my first aborted launch. I built the layout you see in the lead photo above in a large closet in my apartment. The design? What the…? The plan??? Who knows what I was trying to accomplish. Well, at least I got it running….sort of. Score? 0-3
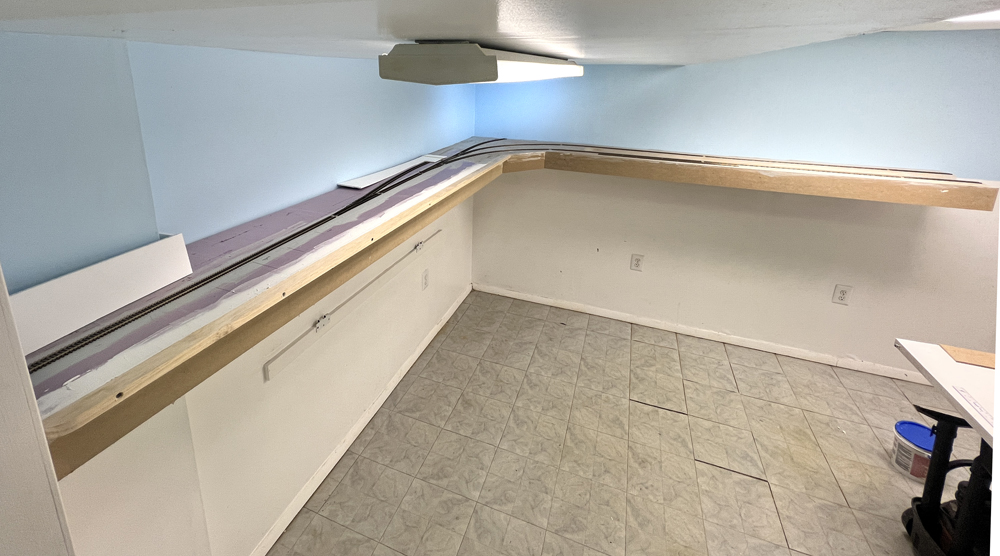
The “fender bender” (photo below).
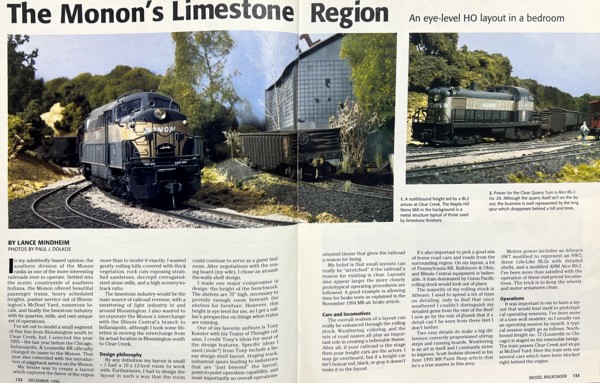
1994. I’m age 34….which means 18 years in the hobby at this point. Wow, this guy is remedial! I’m married, living in an apartment. It had a spare bedroom but it needed to serve double duty as a guest room and office. I had the “brilliant” (spoiler alert it was NOT “brilliant”) to mount a Monon themed layout at eye level so the room could serve other functions. It was fairly decent looking, it ran, and a big improvement over previous ventures, but the ergonomics sucked. The lesson learned was that “Rube Goldberg” solutions are generally not workable in the real world.
Despite its flaws, the bedroom Monon layout was the turning point for me. I dropped a note to MR asking if they were interested in featuring it. In short order I heard back from Jeff Wilson, who would turn out to be my “editor for life”. They were interested but there was a barrier. Using very diplomatic phrasing, Jeff stated that my photographs were totally unusable and (tactifully implied) any hope of me figuring out how to push a shutter button was looking extremely unlikely. No worries, they had a guy in town named Paul Dolkos that they’d send over. Score 0-3-1
Finally….after 25 years…..connecting the dots.
After the photo shoot Paul, who would go on to my most influential mentor, invited me over to see his layout. I remember it like it was yesterday. He gave me a tour, explaining his techniques along the way. It was the oddest thing. The light went off. Holy crap, finally, after decades of thrashing around, I FINALLY understood, really understood, how to to build a well executed model railroad. Paul introduced me to the other great modelers in the area and that was my launch. Prior to that I had been a bad modeler, a really bad modeler, for a very long time.

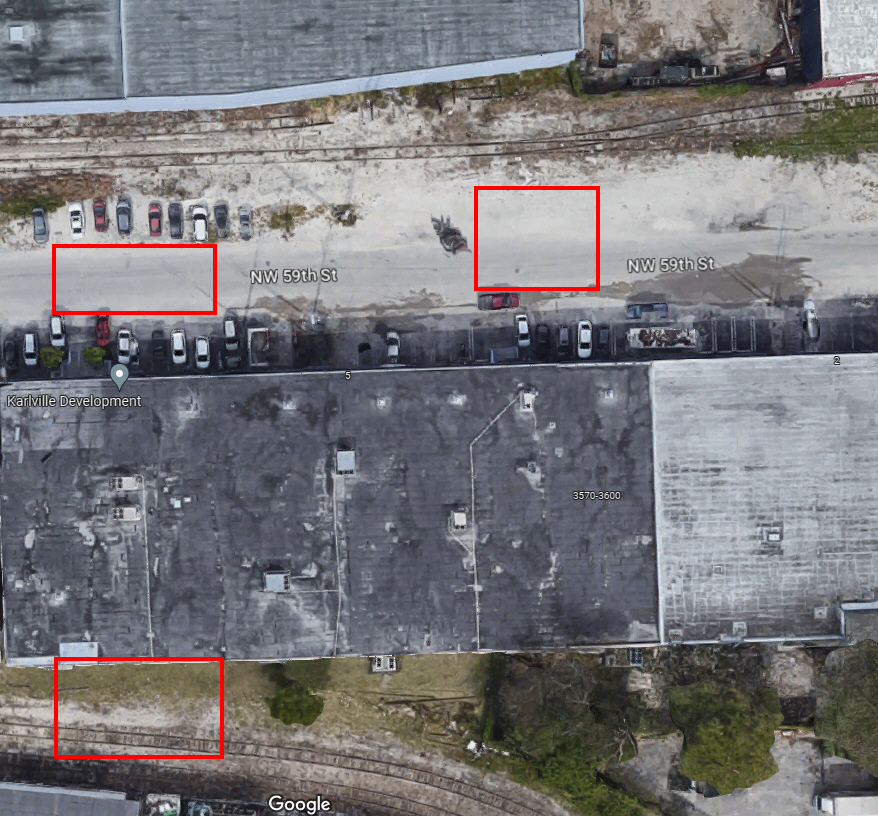
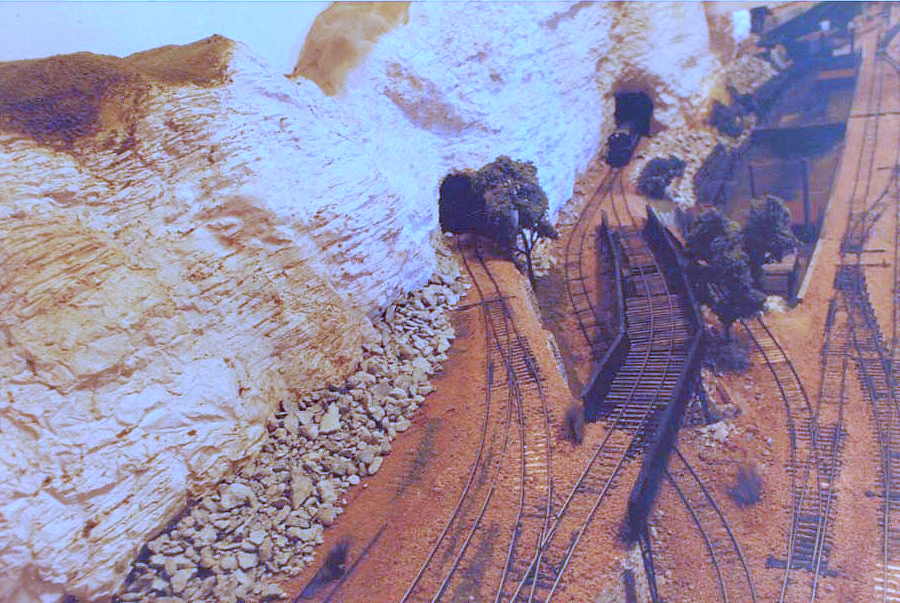
Overnight (seemingly) I went from three car pile ups to being a decent modeler……except it wasn’t overnight. The foundation had been in the making all of those years. I just didn’t realize it. We moved into a house and I built my N scale Monon layout (above). It was featured on the cover of the 2001 issue of MR. I was age 41 at that point. Let’s do the math. That’s 25 years since I entered the hobby. It took me three, multi-car pile ups, and a fender bender to figure things out. Score 1-3-1.
It’s been quite a ride. If you’re a young person, the odds are that your learning curve will be much shorter. Some things to consider:
-Be action oriented. Jump in. Make your mistakess. You learn by doing. Don’t join the legions of “Someday Central” types as Tony Koester wrote about in his April Trains of Thought column. Get off of Facebook. Turn off your phone. Go to your work bench.
-Read. Read MR, RMC, MRH, and the annuals. Study them. Wear the pages out. Occasionally, I’ll hear comments along the lines of “I don’t subscribe to xyz any longer. There’s just nothing in there that applies to me”. What? Total nonsense. Sorry. If you look at the top one per centers of the hobby, one thing they all have in common is that they read everything. I’m not saying that the forums, groups, and YouTube aren’t valuable. They are, but as a supplement.
-Pick great mentors and avoid the trolls. This involves two steps. Not only do you need to identify and surround yourself with positive people, you need to implement their advice.
-Never give up. Pat yourself on the back for your efforts thus far and try to get marginally better with each new project.