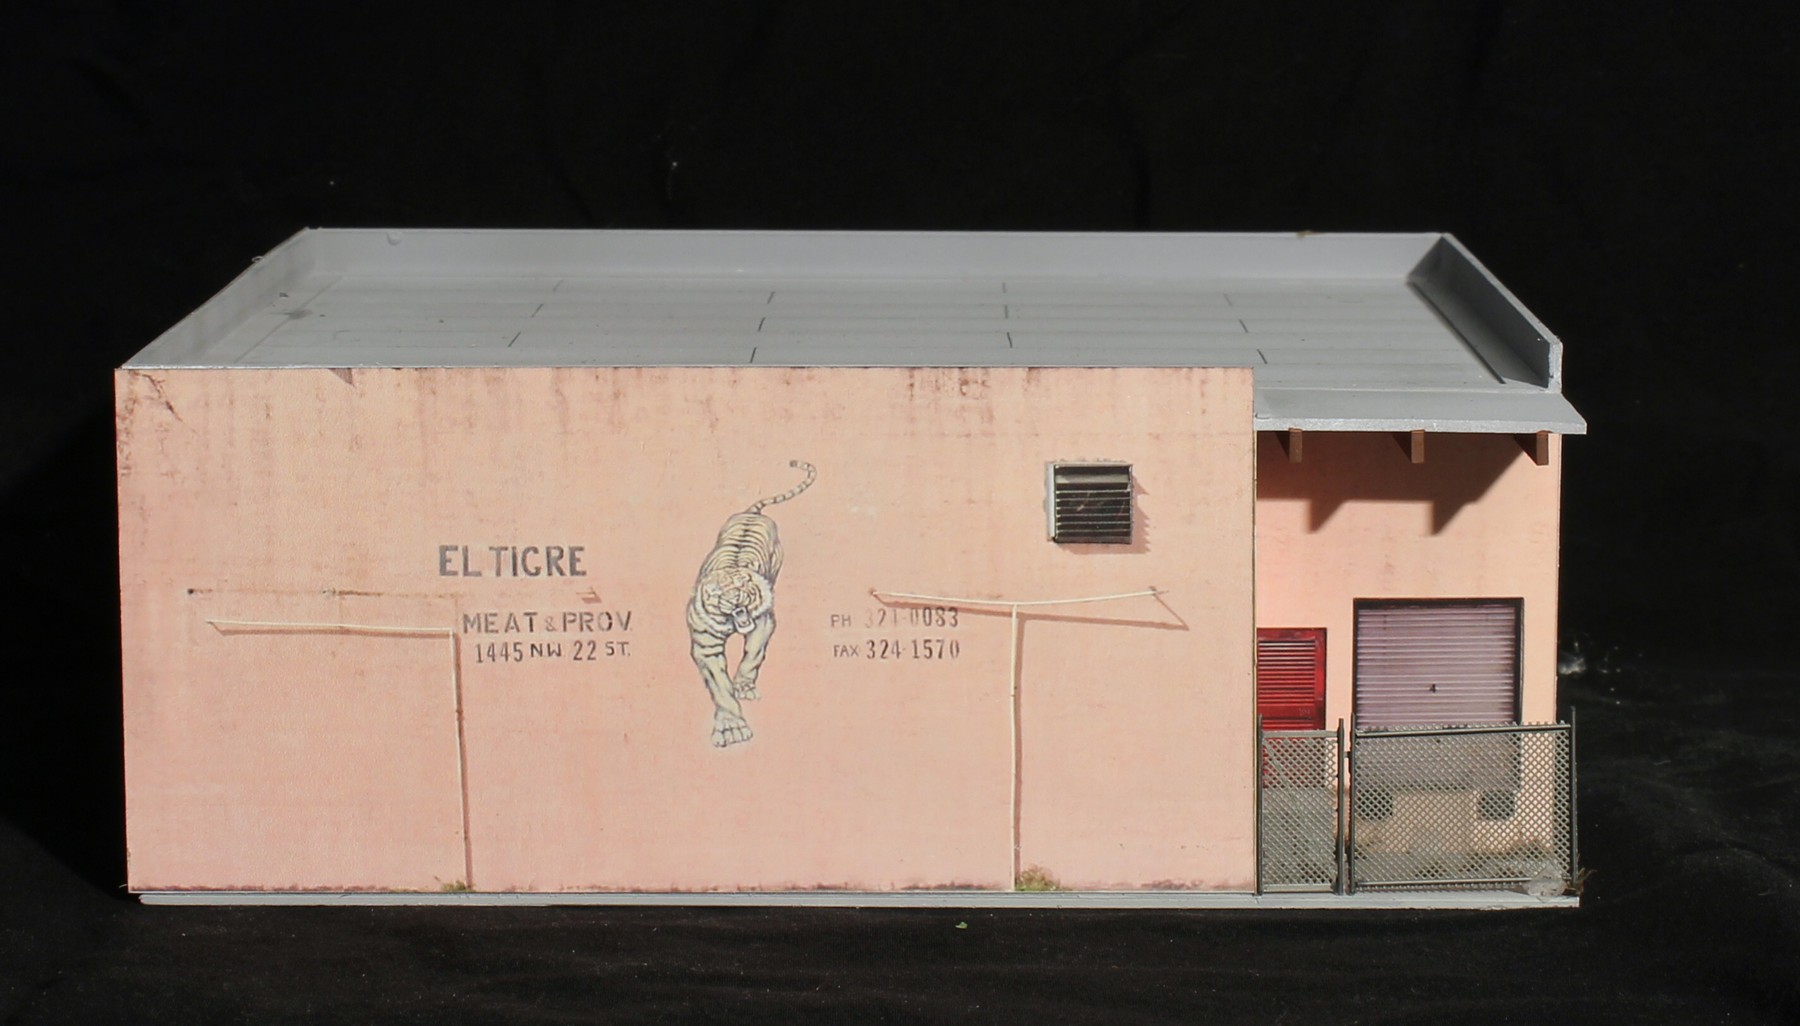
This summer’s focus for The Downtown Spur is working on the structures along the 1400 block of 22nd Street (which parallels the railroad). The latest project is El Tigre Meat and Provisions as it looked around 2007. It was necessary to selectively compress the length. The main goal was to capture the hand-painted logo.
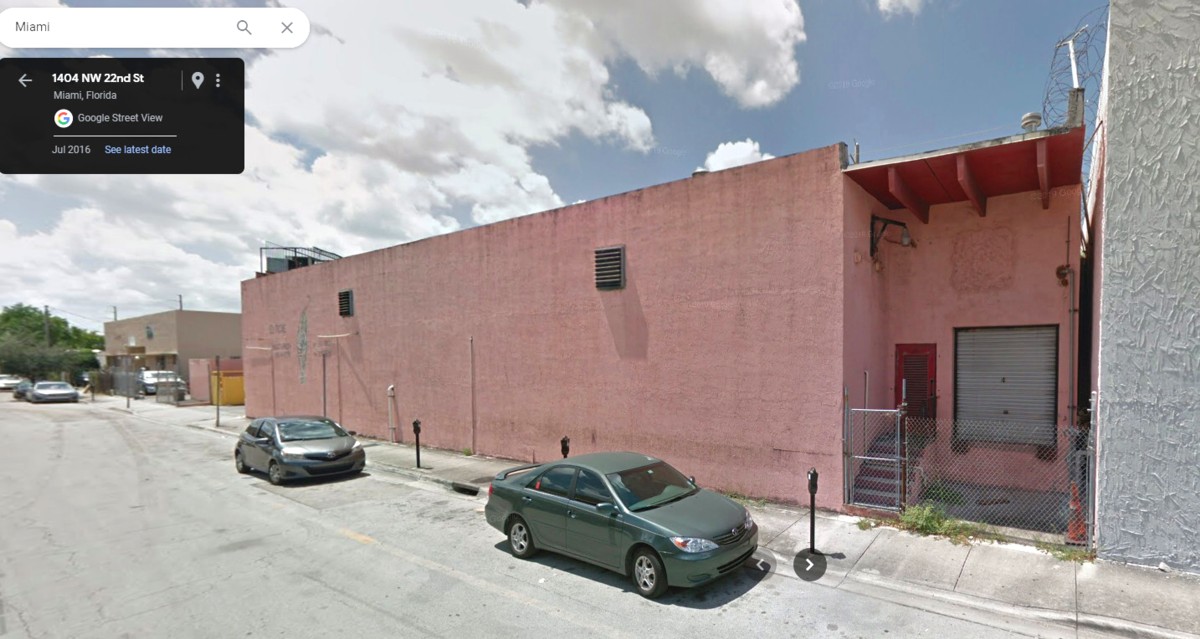
Here’s the actual structure facing west down 22nd Street.
As a re-cap on this whole “playing with your trains” theme:
-Running your layout is a solo endeavor. Nobody really cares how you do it. The FRA or the model railroad rules police won’t be showing up at your door. That being the case, be selfish in your approach. Do what is fun for you not because you read this blog and think you have to do it a certain way.
-As Tom said, look on procedures as a menu. Gain a basic understanding of rail switching operations and pick and choose which steps you want to implement and how you want to do so. Obviously, skip the ones you want to skip.
-Having this understanding not only enhances your enjoyment of the hobby but also “stretches” your layout since it takes longer to go through things.
-For me, personally, I rely primarily on the “pause and visualize” approach and rely less on props. Slow down, take a breath and pause, and visualize what would be actually happening in the field. It’s a hobby. It’s supposed to be relaxing. There isn’t any point in racing through everything as quickly as you can.
Here are a few of the switching operations basics. Let’s look at the simple act of picking up an empty from an industry.
-Loco running speeds are slow, often 10mph max but usually closer to a fast walking pace.
-Upon reaching the industry, the switch/turnout must be unlocked. The conductor must then make a quick visual inspection of the points to make sure there is no debris mucking up the works. He then aligns the switch. Tom Holly sent me this excellent video illustrating this step at the 2:35 mark. As you watch the video make note of the overall pace of things in general.
-The loco. approaches the car with the conductor calling out distances. Some roads require that the loco. stop a half car length short and then creep in. Others just allow the loco. to slowly approach. As the loco. approaches the car he is truly at a very slow creep.
-Once the couple is made, the conductor radios the engineer for three step protection.
-After the engineer acknowledges that Three Step is in place, the conductor moves between the cars.
-The conductor releases the car’s hand brake only AFTER the loco has coupled onto it.
-The conductor then radios “I’m clear” or “clear the three” and the loco. pulls away with the car.
-After clearing the turnout, the conductor aligns it for the “main” and locks it.
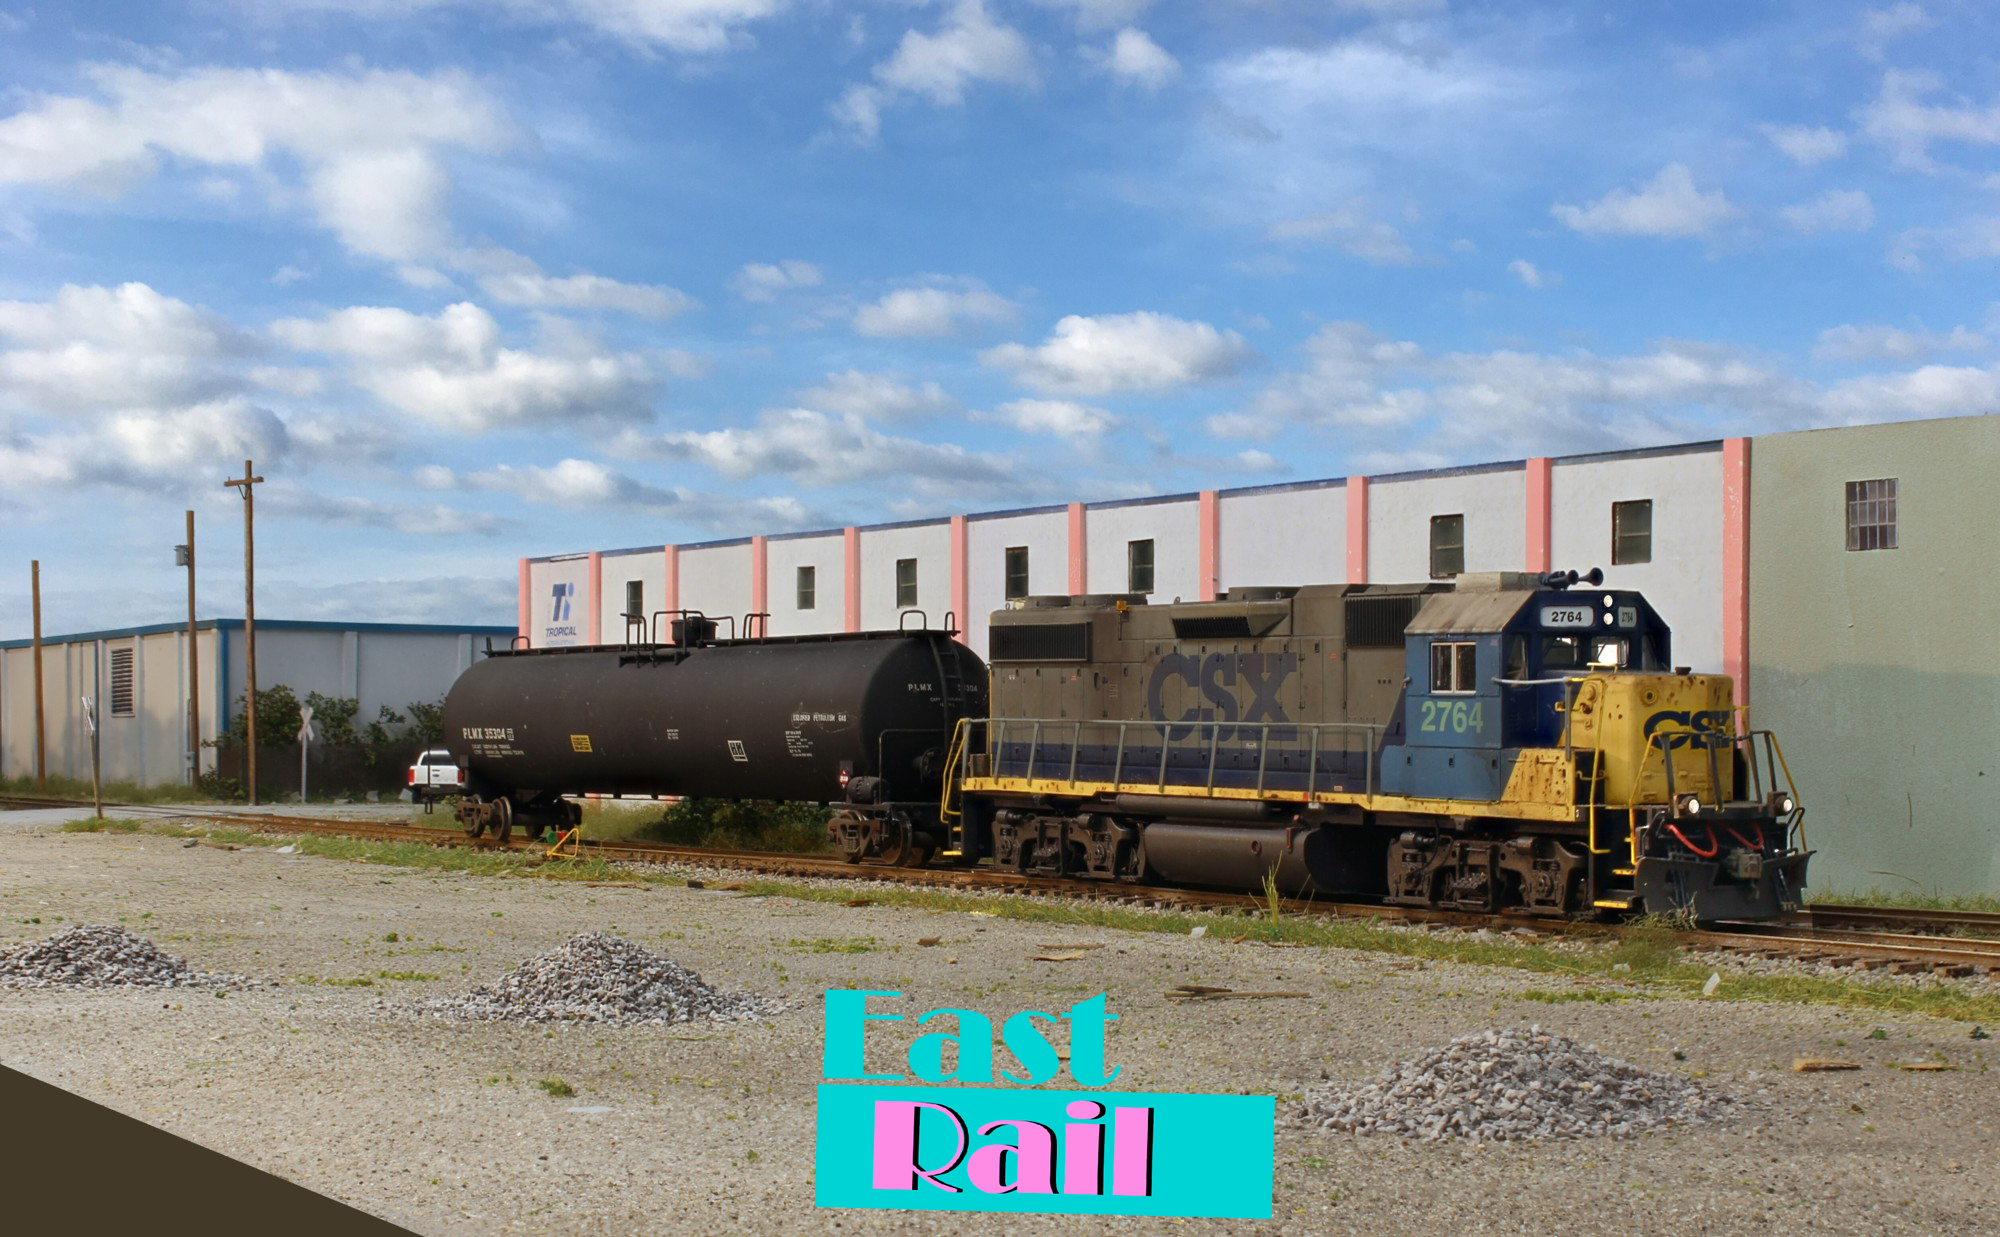
I’ve just uploaded Episode 5 of my Switching Operations 101 video series. In this segment I take a look at switching an LPG dealer and touch on how buffer cars are handled for an industry like this.
My friend Tom Klimoski made a great analogy when it comes to operational practices. View them as a dinner menu. You don’t have to implement every practice. Gain a basic understanding of how things are done, and then pick and choose what you want to incorporate and what you do not. (Thanks to Tom for recording the brake release audio).
I took an interesting twist with this one. A few years ago Tolga Erbora filmed a great rail fan video of the local on The Downtown Spur. I took this and copied it (somewhat) in model form.
One takeaway from this segment is that running sessions don’t need to be complicated. A simple swap of a load for an empty can spin off thirty or forty minutes of run time.
While I do plan to become more active on YouTube, I’m still mulling over formats. I don’t want to get bogged down with production. These aren’t intended to be tightly produced Emmy award winners. I’m looking more for a conversational tone as if you were in my basement and we were running trains together.
Preparing to shove into Weeks Gas on my East Rail 2 layout.
Weeks Gas is the “problem child” of the East Rail industrial park. With one exception (the problem child), all turnouts in the park are oriented the same way. Doing so, makes switching straightforward in that every industry can be worked with push/pull moves. Every turnout is trailing point.
Weeks is the exception as you can see from the map above. A model railroad operator would likely use the East Rail siding to run around the entire train, jump through hoops, in order to service the industry. So, does CSX do the same? Nope. They don’t have the same inclination to look at things from the point of view of making it entertaining. They would just work Weeks at a different time, or likely on a different day, than the rest of the park.
If the local was heading south, to The Downtown Spur for example, they’d just stop for a bit, pull into East Rail, and work Weeks. Whenever the train was heading north either that shift or another day, they’d work the rest of East Rail.
It’s taken me awhile to grasp what can be accomplished via video but I’m starting to get the hang of it….slowly. I plan to experiment with a variety of topics and formats. Stay tuned and, if you think there’s something there that will help or inspire you, please subscribe!