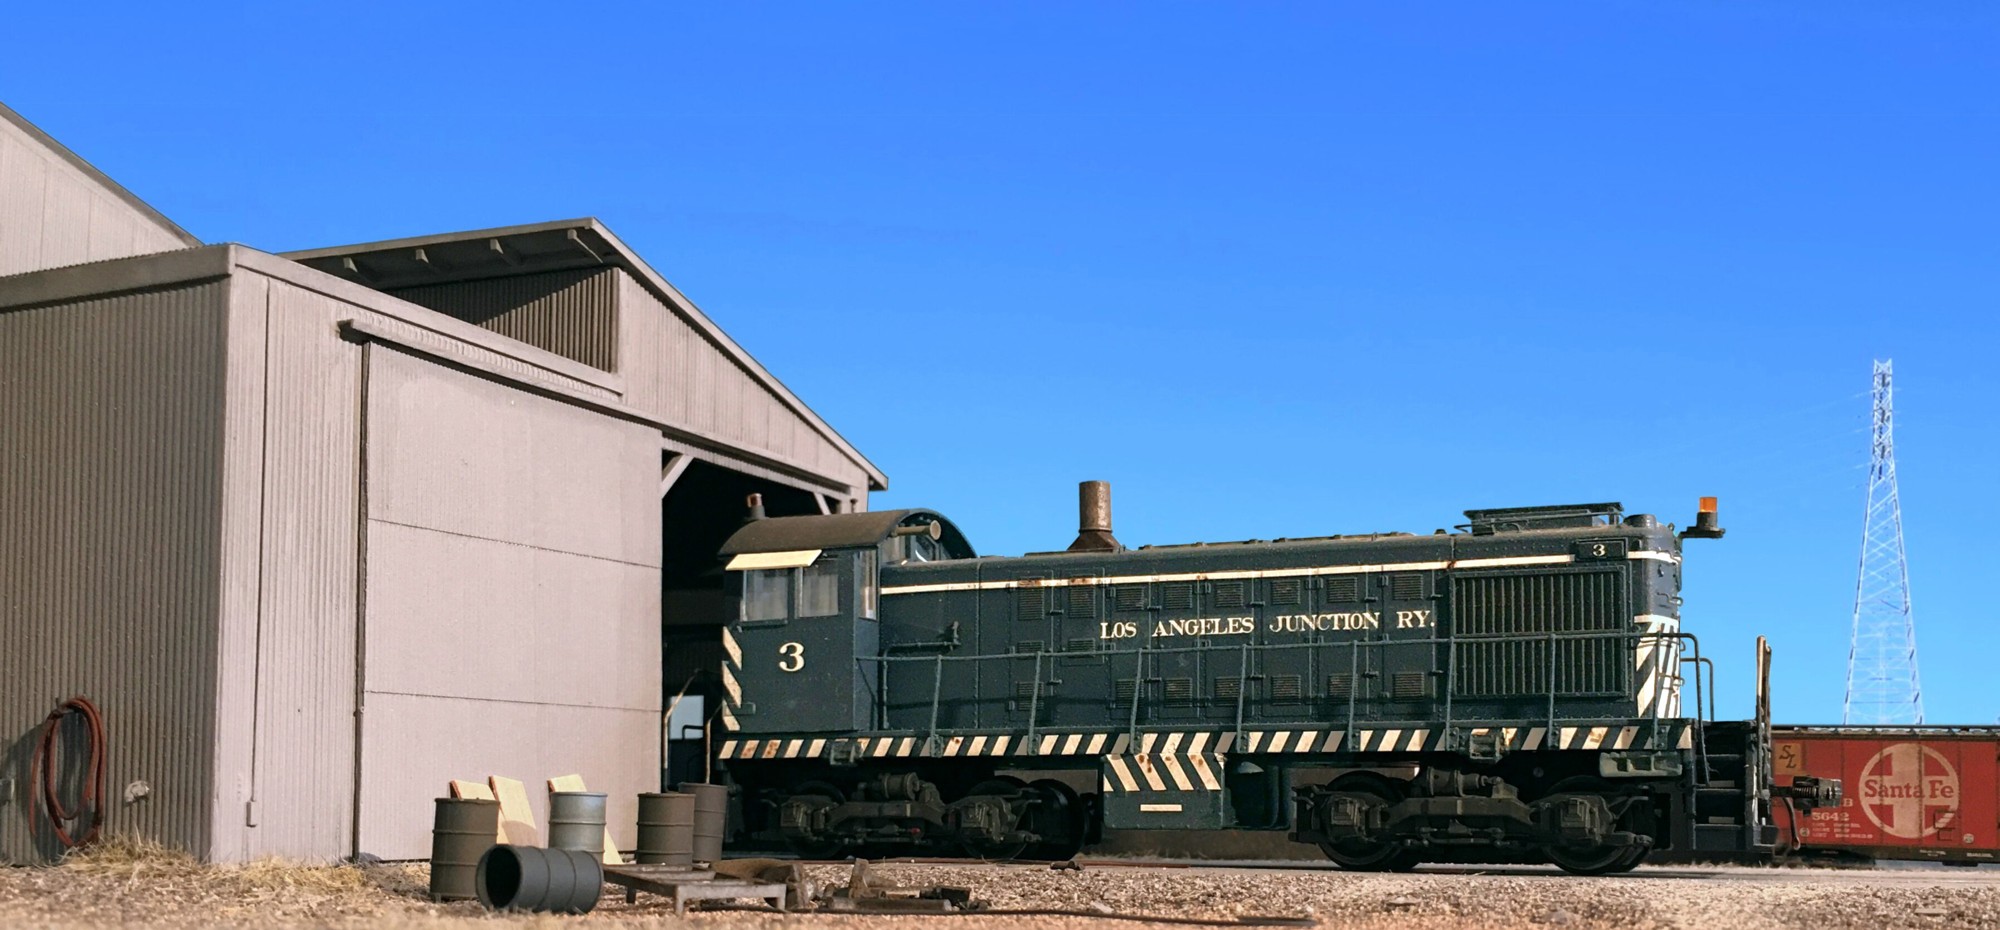
LAJ Alco S2 #3 sits in front of the engine house on this diorama I recently completed for photography.
Working off and on, here and there, over the past few months, I’ve been working on a photo diorama for my LAJ theme. Shown above is the final result. Let’s take a look at how it came together. (I can see it now, the old farts (of which I am one), have hit the escape button…and…are…outa here!) The adage, “you can’t teach an old dog new tricks, came together for a reason!” No shame, go do your thing, I’m not much better!
This is for the young folks age 12 to 40, for which there is still hope for learning a new skill. I hear from many of you throughout the month and am impressed by your efforts to master advanced skills such as scratch building, hand laying track, weathering, etc. You’ll only get better the more you stick with it and these skills will serve you a lifetime. As part of that skills development process, it’s to your benefit to learn how to take a photo of a model. Photographing miniatures is a different skill because of depth of field issues, lighting issues, and the need for background removal. Holding a cell phone at helicopter height and grabbing a quick snapshot under crappy light is not model photography!
You will need a single lens cell phone. One photo flood bulb (ten bucks), and Adobe Photoshop Elements (photo editor) on your computer (twenty bucks. just make sure you’re buying the disk, not a manual, and make sure it will be the right PC or Mac match for your specific machine.) Getting a really expensive, professional photo editor, is not only totally unnecessary, doing so will mire you in complexity. Don’t do it. It won’t give you better results. The analogy is a paint brush. Buying an expensive one won’t make you a better painter.
With your equipment in hand, the steps are: compose your scene, mount your camera at track level NOT helicopter level, light your scene. Take the photos. Edit them. Lighting is crucial and how you handle the shadows and avoid flash spots, will determine how well the photo turns out. Think of the process as “painting with shadows”. It may take you several rounds. The image above took me an entire afternoon to shoot and edit.
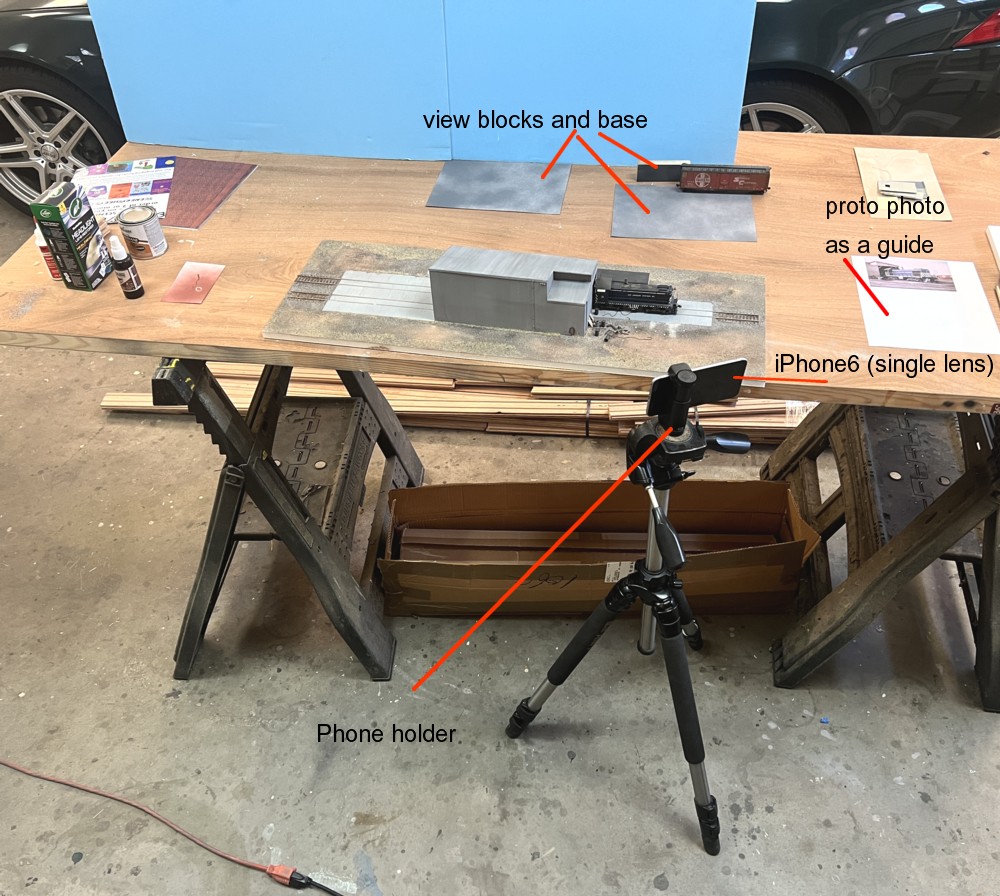
Here’s how the scene was set up. Working off of a prototype photo is a tremendous help as far as composing something that is plausible, so print one out and keep it next to you.
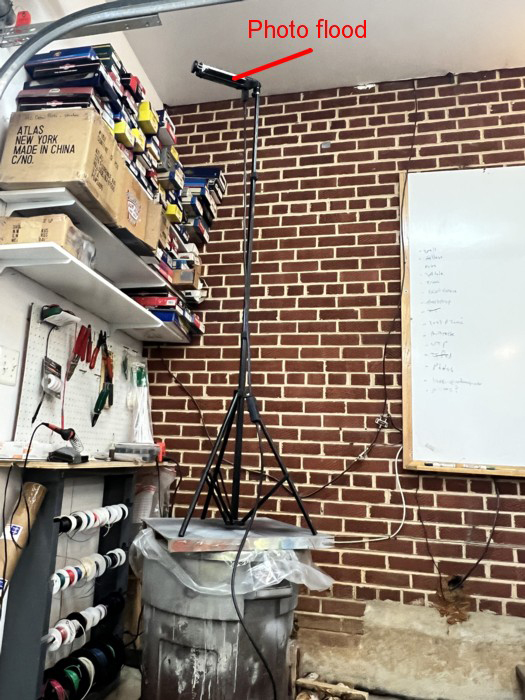
It took me four attempts to get the lighting down. In the end, what worked was putting the light really high, to my right, and about eight feet back. The light is pointed up at the ceiling not at the diorama. Every situation is different. “Usually” having the light four or five feet behind you, slightly elevated (say four of five feet), and pointed into the scene works best.

Getting full depth of field is the real challenge of model photography. (Depth of field means how much of the image is in focus. For us, we need ALL of it to be). I generally take four or five photos at different focal lengths, and them run them through a program called Helicon Focus (25 bucks. very easy to use) which creates a composite with (hopefully) full depth of field. This is called photo stacking. For this photo shoot, that wasn’t necessary. I got lucky and one of the shots had everything in focus except the Santa Fe boxcar (right photo). Keeping the camera in the EXACT same position I took a second photo with the boxcar in focus. I then did a copy/paste of the ‘in focus’ boxcar into the base photo.
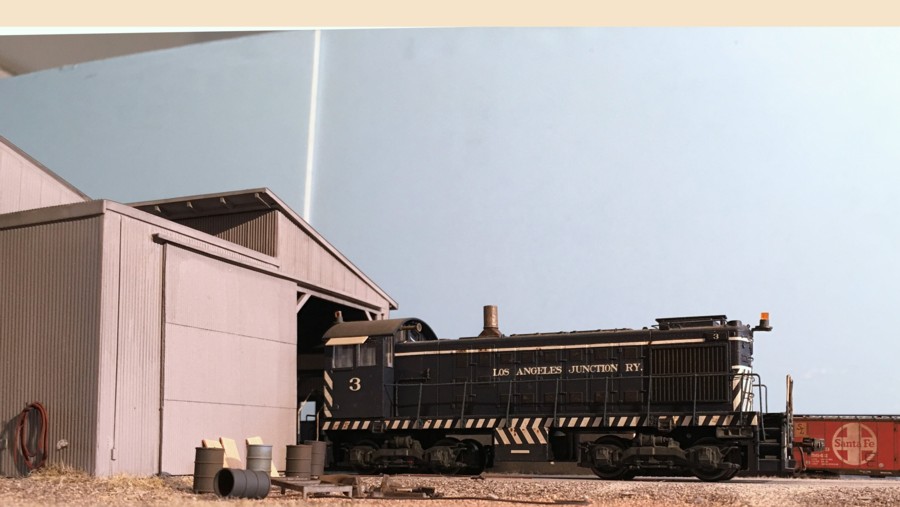
This is what the image looks like after pasting the boxcar into the image and cropping away the bottom portion of the photo. At this point, I know through experience that what I have here will work for the final image once I clean it up. Making progress but much work remains. The next step is to work on it with the photo editor. While the editing process is beyond the scope of this blog, it was fairly simple. I color corrected the tone, lightened the side of the locomotive, and used the clone tool to clean up some defects.
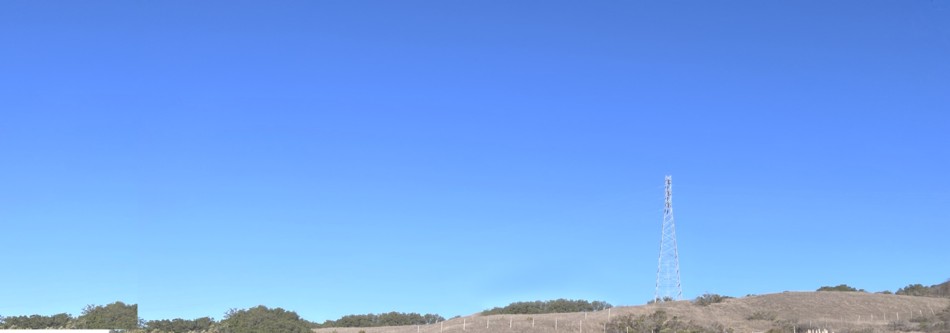
The next step is where the image will come to life. We’re going to select and delete the background and copy/paste the core of the photo onto a photo of an actual sky. A signature element of the LAJ skyline are the power lines. I took some sky/power line photos in the previous month in preparation for the photo shoot. You want both the sky and base image to be about the same size. Once you have the model scene copied onto the sky, slide the sky up and down so that the slightly lighter blue as at the horizon (as opposed to the darker blue). Notice also that I intentionally picked a photo with no clouds. You want the model to be the focal point, not a dramatic sky. All done. Hey, that only took five hours. Not so bad right? The results are worth it. You’ve now brought your hard work to life and have something you can look at and enjoy for many years.

Here’s a partial parts list. The hoses were made from ultra small, solid but insulated, hook up wire (super tiny). I used Northeastern Scale Lumbers 1/64″ plywood for the plywood leaning against the wall. The LAJ Alcos had an extended shack which I got via Shapeways.