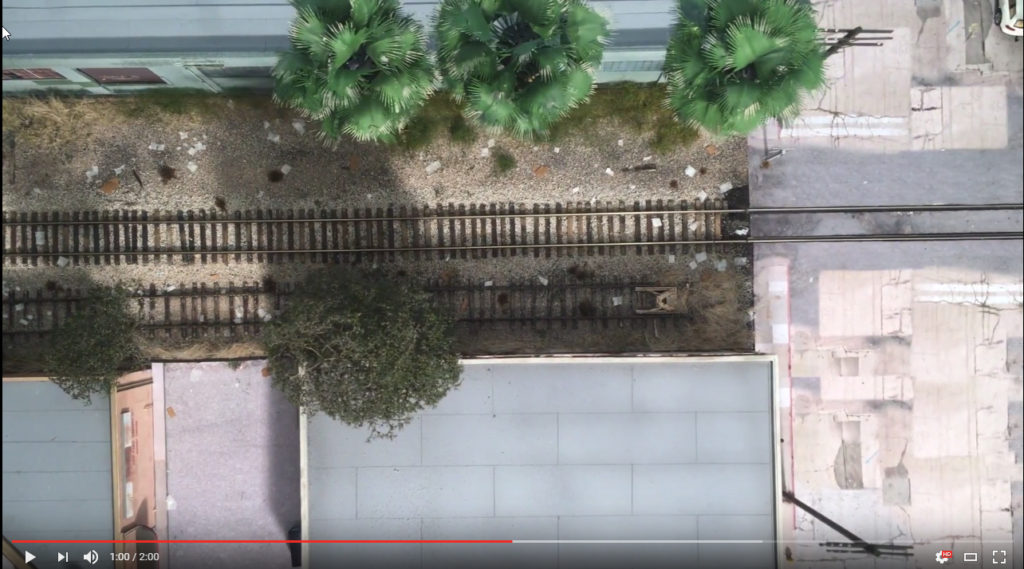
After a few months of ramping up on the learning curve, I finally felt I’d gotten to the point where I could actually produce something. The first “short movie” out of the box is a helicopter flyover of my LAJ layout. You can see the clip HERE.
Somebody that has been following this asked what my end game was with this whole short movie production thing. Why was I doing it and what did I hope to get out of it? Things become very easy when you can answer that question, which I think I can with a fair amount of confidence. I really only do it for one reason, to produce something I personally enjoy watching, something tied solely to my unique tastes, unburdened by the need for broad commercial appeal or entertaining the hobby community at large. As I mentioned previously, when you are targeting an audience of one, things become pretty easy!
When it comes to model railroad “film”, one major advantage is we have the ability to step out of “the model railroad way of doing things” and study what professionals have produced on the screen for t.v. and movies and then copy their ideas, techniques, and creative approaches. All you have to do is turn on your television set or go to the movies and you’ll have a lot of templates and frameworks to look at for ideas. I have no shame in being a copy cat. I’m not sure what t.v. series it is, Law and Order or Blue Bloods I think, where they have a really cool helicopter perspective looking down on Manhattan as the lead into the show. I wanted to do something similar for the layout. This particular viewing angle also has the advantage that you can get away from the curse of model railroad videography, depth of field.
Following the advice of some of the excellent tutorials on line, the first step was to draft a brief “script” of what I wanted to do. I didn’t just want to wing it. Once I had a sense for the composition I was shooting for it was a matter of pulling together the project assets; sound, still photos, personally shot footage, and purchased stock footage. First up was the personally produced video.
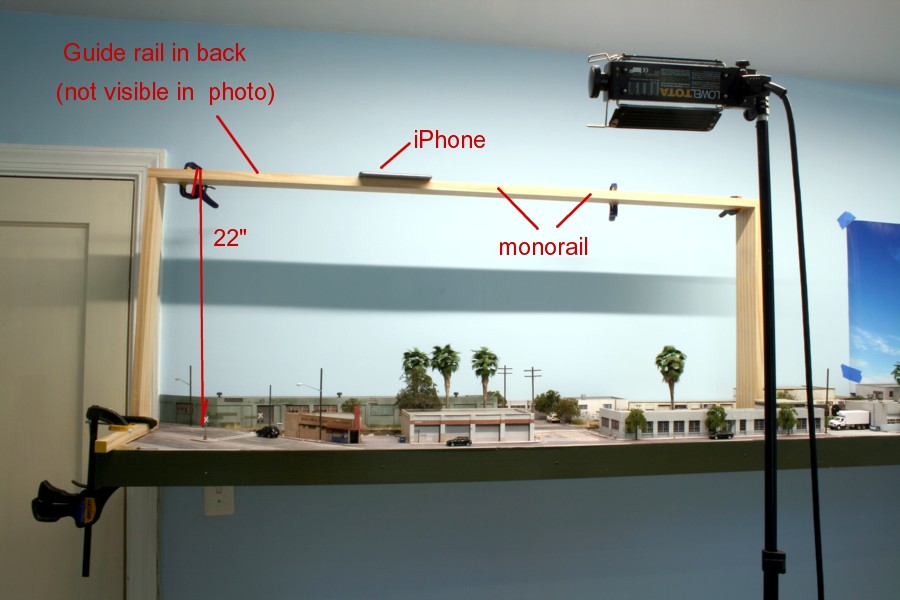
One of the more difficult challenges was finding a way to control the path of the camera both horizontally and vertically. Using a ladder and some trial and error with the camera I found that a height of 22 inches was needed to get the width of the layout in the shot. It’s crucial when shooting video to have high-quality photographic lights, so much so that it’s not even worth bothering if you try to go with room fluorescents. I lit the scene with 3200K photo floods. Things were helped by the fact that I also have overhead 3200K LED strip lights over the layout. With the track height established, I found I also needed a guide rail in back to guide the camera. The clamps in the photo above are holding down an ad hoc rail made from a strip of plastic weatherstripping.
I’ve spent an enormous amount of time researching cameras. What’s best?Video? DSLR? Phones? Model railroads present unique photographic challenges and the end result of that research was that an iPhone was the best fit for what I wanted to do. I’ll spare you the long technical diatribe as to why. Suffice it to say that the cameras on these devices that we carry around all day and use to call our spouses about the grocery list are absolutely astounding in terms of the quality of output they can produce.
With the rail in place, I then turned the camera on and simply slid it down the rail as smoothly as I could (which wasn’t always as smoothly as I would have liked). It’s important when you do this that you briefly hold the iPhone screen until the AE/AF “lock” icon appears. If you don’t, the camera will always be “hunting” for the best focus and exposure creating flashiness and jumpy focus in the output. It took a number of takes but I ended up with four or five usable clips.
I wanted this to be a “movie short” that captured the LA vibe. One of the film making tutorials I read had the excellent idea of searching for “stock footage” to mix into your production. Leaning heavily on internet searches, the sound library of Freesound.org, and the imagery at Shutterstock, I was able to find and purchase clips that really added to the look I was after. The air to air helo footage is from Shutterstock. It was pricey but added so much I ultimately bit the bullet and purchased it. I wanted a hall of fame Los Angeles DJ as the audio lead in which lead me to the Bruce Vidal clip (sadly Bruce is no longer living). The helo blade chop audio was easy to find on Freesound.org.
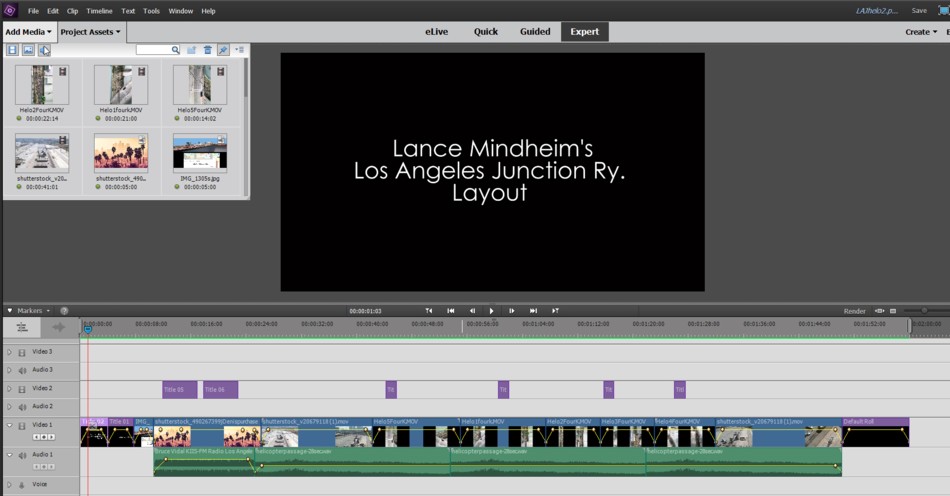
With all of my project assets in hand, I then spent a significant amount of time composing them into the final movie using Adobe Premiere Elements as the editor (screenshot above). As I studied movie trailers it became apparent what a crucial role sound plays. It’s sort of subliminal. For model railroad productions, ambient sound is totally unusable. In any clip I shoot of my layout, the first step is to unlink the audio and dump it. There are plenty of sources for better sound tracks that you can dub in. At that point, it was a matter of doing the post production grunt work to stitch things together.