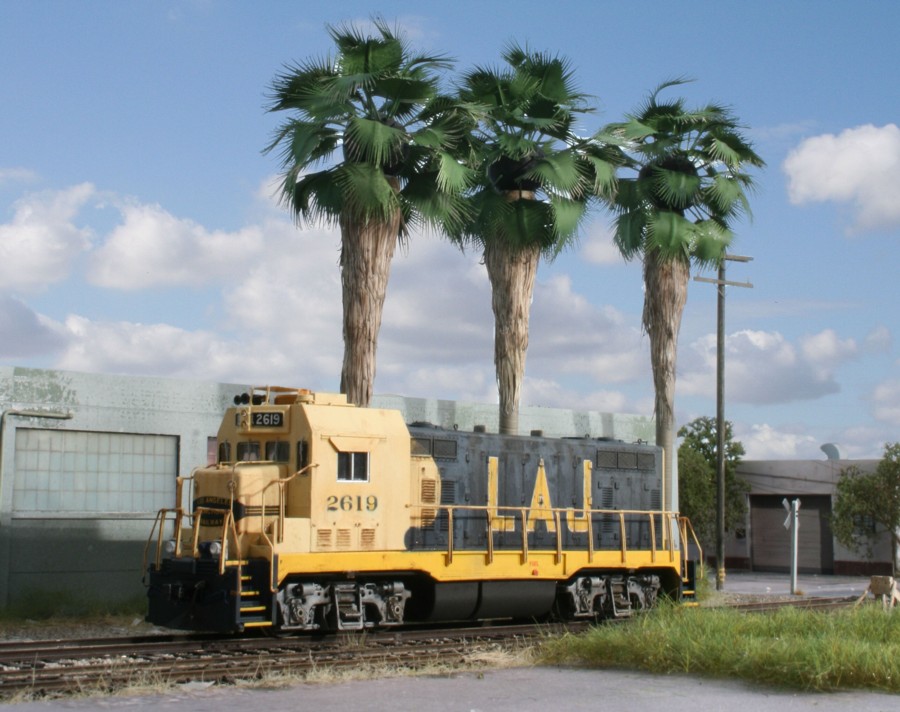
CF-7 #2619 idles in front of the Nathan Anthony furniture factory. The addition of A-Line windshield wipers wraps up the project.
CF-7 #2619 idles in front of the Nathan Anthony furniture factory. The addition of A-Line windshield wipers wraps up the project.
I just posted a new blog on my website, Creating a Model Railroad With a Soul.
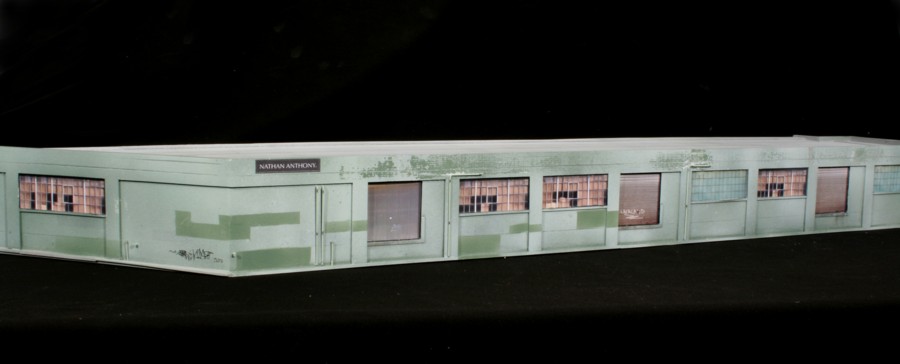
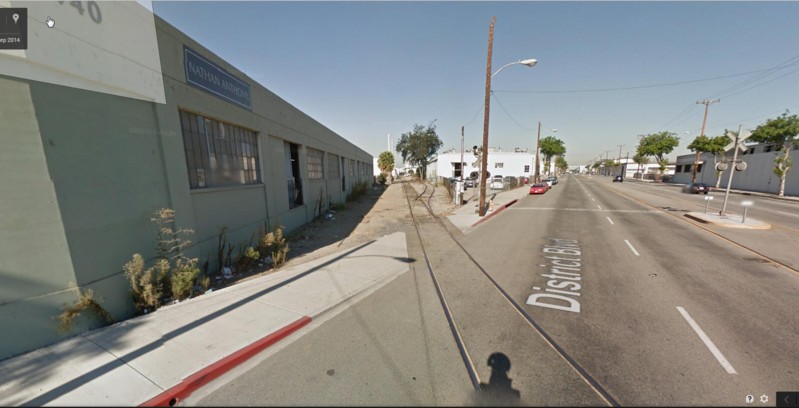
Completion of the Nathan Anthony furniture factory at 4940 District Blvd. is the final structure along the back wall between the tracks and the backdrop. Since the layout is proto-freelanced, I took an interpretive approach as opposed to modeling it exactly. The weathering is slightly more pronounced and I borrowed a few features from the south wall of the facility to incorporate on the north/trackside wall. Construction techniques are more traditional in that the only photos used were for the doors and windows.
I’ve gone back and added ten images to the Downtown Spur photo gallery, including Paul Dolkos’ centerspread image from the 2013 MR article. Added a few more images to the East Rail gallery also.
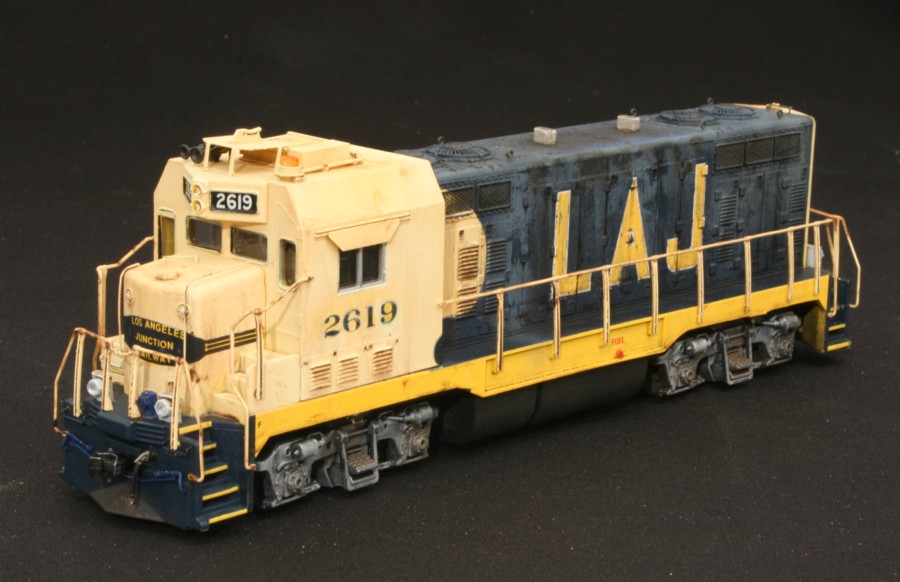
Wrapped up my CF-7 project…..finally!