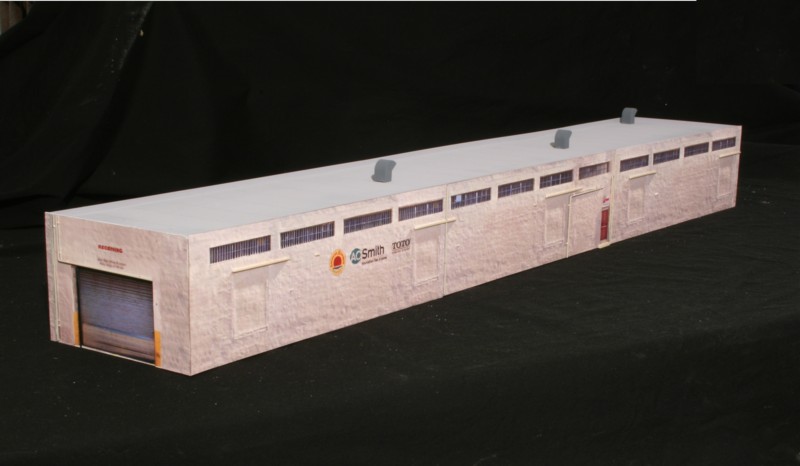
The Bond Plumbing Supply, quasi building flat is complete and “in the bag”. Very nondescript, it tucks into the corner of the Downtown Spur layout hardly drawing notice…..which was the goal. It also served the secondary purpose of kick starting me out of the builders slump we all go through.
We’ve all been there, the inevitable “rut” where you just can’t get motivated and have no momentum. In my case this frequently happens when there seems to be a fairly long laundry list of difficult projects standing in the way of any forward progress. Such is the case with the Brooklyn Terminal layout….hand laid turnouts, steam locomotives that have stopped behaving, you name it, one hurdle after another.
To snap myself out of it I look for something easy, anything that can marked as an achievement even at the smallest level. I put the BT layout aside for now and decided to go back to the Downtown Spur (Yes, it is still there!). An easy project is the nondescript Bond Plumbing Supply warehouse between 12th and 13th Avenues. This will be a quasi building flat….not as thick as a full structure but not wafer thin either.
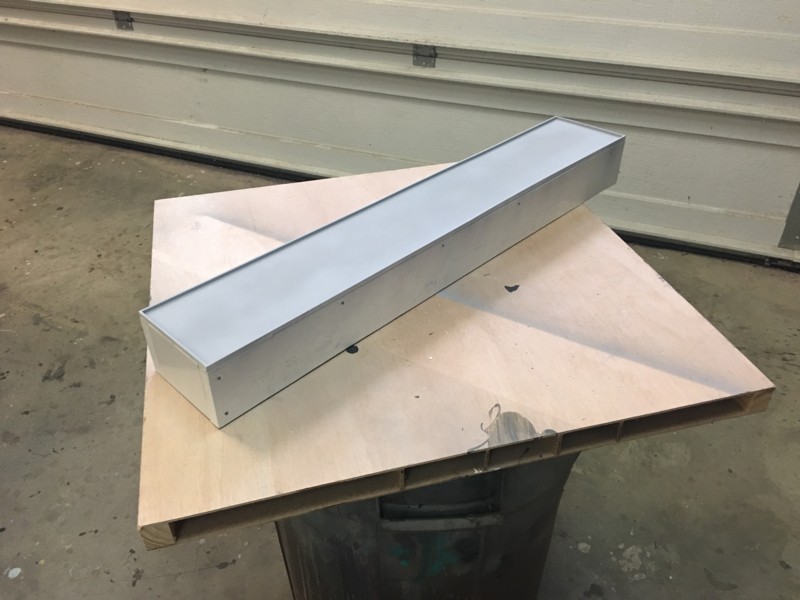
To start, I built a core out of one of my favorite materials, PVC “wood” found in the dimensional lumber section of most big box lumber stores. The PVC is dimensionally stable, easy to cut, and accepts adhesives. I glued the PVC core together with MEK and tapped in a few panel board nails for good measure.
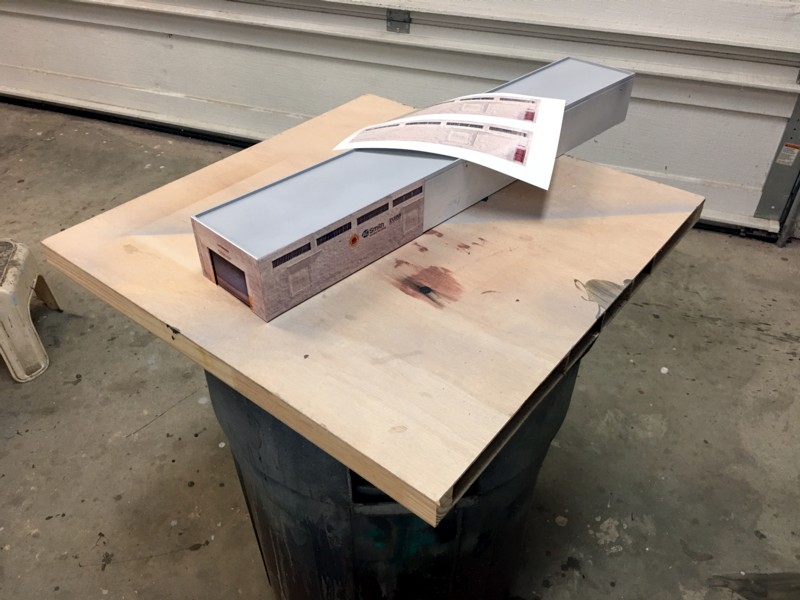
Next up is the photo wallpaper laminates. Since the structure is right next to the street, images were easily captured from Google Streetview and then cleaned up with the photo editors. I’m about half way through at this point. It’s nice to be able to make some progress on….SOMETHING!
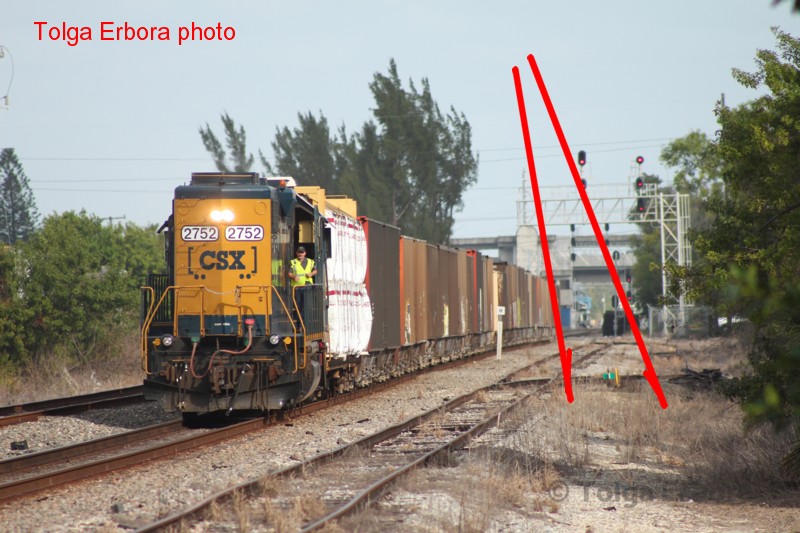
The muddy, brownish gray, dead grass shown in this Tolga Erbora photo is one of the most common scenic features of what we do. Unfortunately, there is no commercially available product to represent it.
The image above illustrates perfectly the brownish/gray tone I’ve been trying to replicate with my do-it-yourself static grass dying project. Finally, I think I have it dialed in.
Before we start, we need to make our own neutral brown powdered dye because the Proceon MX Chocolate brown is way to red. For our purposes we’ll call our concoction “Custom Brown”. Since you’ll need a fair amount of it, make a mid-sized batch and put in a canister or ziplock bag. Mix 3 parts Proceon MX “Bright Green” #097 and 2 parts Proceon MX “Chocolate Brown” #119 and set it aside for future use.
Now that we have our batch of “Custom Brown” mixed up, time to get work. Following the dying instructions from previous blogs, put your 3 cups of water in a pan. Dump in 3/16 teaspoons of our “custom brown” in the water as well as 3/32 teaspoon Warm Black Proceon #128. Dump in some Woodland Scenics FS620 4mm Straw colored static grass and dye as per previous blogs and let dry. It should be a soft nutmeg color.
Once that’s done, take the nutmeg colored static grass, put some in a plastic yogurt cup and pour in an India Ink wash of 1 tsp ink/pint of alcohol. Let dry. That’s it! It should look like what you see in the photo above.
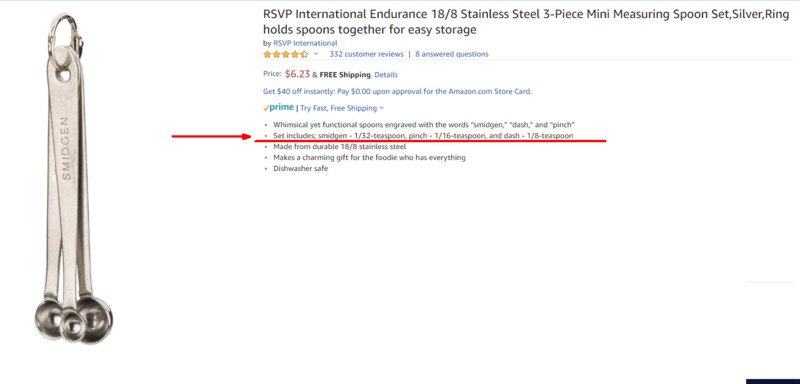
Because powdered dyes are so powerful, you are often working with minute quantities. It became apparent that measuring spoons in very small sizes would be a real help. I found the spoons above on Amazon which come in 1/16 and 1/32 sizes. Click HERE for the page.
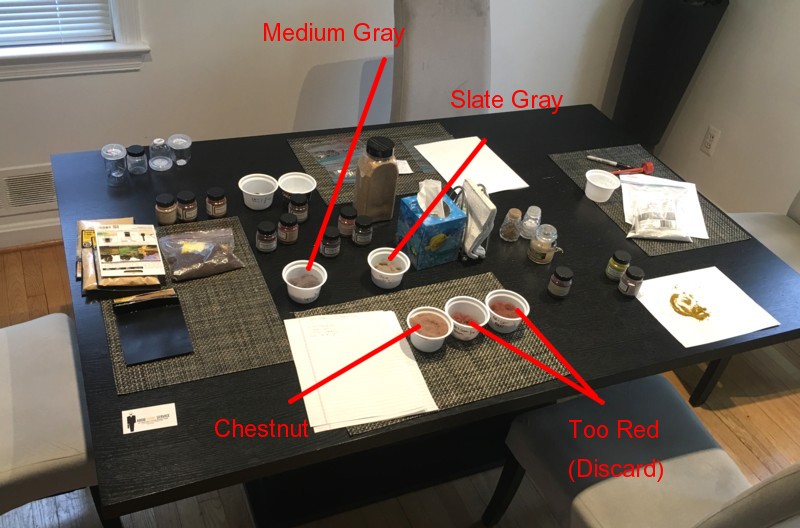
“Edison’s Lab” ! It takes a lot of trial and error experimentation to dial in a color with powdered dyes. The sheet of paper on the right is where I mix the dyes with a knife blade.
There has been a lot of interest in my earth tone static grass experimentation. At this point I have it dialed in enough to pass on the techniques. Before I get started, I want to emphasize that this process is extremely simple and the materials very inexpensive. It will take me longer to write this than it will for you to prepare the bath. Essentially we are putting Woodland Scenics Straw colored static grass in a pot of water with dye in it, waiting an hour, then rinsing it out. Powdered dyes are tricky so I suggest not going “free range” on color mixing at first since I’ve already spared you the agony of that long process. We’ll be using Proceon MX dyes and Woodland Scenics 4mm Straw Static Grass pn FS620. Other lengths and makes of grass will not react the same with the dyes so be careful (The exception being Woodland Scenics 7mmn FS 624 which tested fine).
So far I’ve dialed in two useful colors, a pale slate gray and chestnut brown. You’ll need: A stove pot, non-iodized salt (grocery story), a thermometer, Jacquard Procion MX dyes: Neutral Gray, Chocolate Brown, and Bright Green. These can be found at a good art supply store or obtained from Dick Blick. You’ll also need soda ash and Syntrapol ( a soap). Both are cheap and easily found at Dick Blick.
For the slate gray. Put three cups of water in the pot and dissolve in 3 tablespoons of non-iodized salt. Warm up to 105 degrees. Pour in 1/8 teaspoon of Neutral Gray and mix it into the water. Pour in half a bag (20 grams) of the Woodland Scenics Straw colored static grass and stir it in. Let it sit for 20 minutes. Add 1/2 tablespoon of soda ash, stir it in, let stand another 30 minutes. That’s it. Now we need to rinse it. Pour everything through a strainer and then rinse back and forth between the strainer and pot until the water runs clear. A drop of Synthrapol helps rinse things out. Squeeze the ball of dyed static grass dry in your hand, dump it in old pillow case, knot it, and stick it in the dryer.
Browns are much tougher as the Proceon Chocolate Brown has a red component that….just…..won’t…..give up the fight. Knocking it down was a battle and involved a heavy sledge hammer of green to bring it back to a truer brown. To get a brown that doesn’t have a rose/boxcar red color cast we need to work up a custom dye powder mix. Take out a sheet of paper and, using your measuring spoons, put three mounds of Brown on the paper and two mounds of Bright Green. In other words we want a 3:2 mix very heavy on the green. Mix the powders together with a knife blade. Using a knife fill 3/16 of teaspoon (1/8 tsp then half of 1/8 tsp) with your Brown/Green mix, pour it in your 3 cups of water and follow the procedure just explained for the gray.
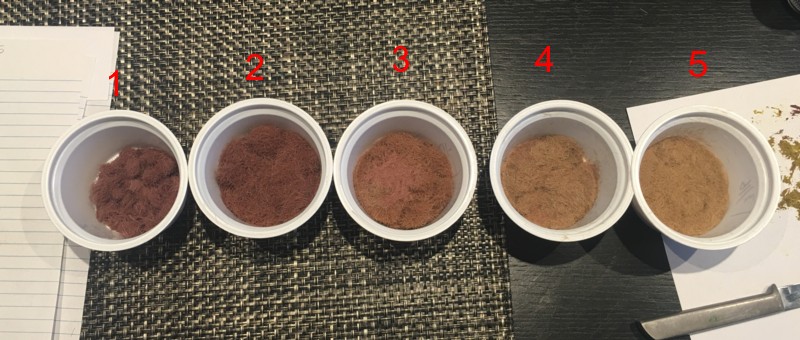
This shows my test samples as I experimented with knocking down the red cast. Sample 3 is close, sample 4 is more what I wanted and is the color explained above.
My next experiment will be an attempt to add some “muddiness” to the color via Proceon’s “Warm Black”. Stay tuned.