I have to say I’m impressed. I thought I’d have everybody running for the hills after my last photography post. A crucial step in getting better photos is becoming comfortable with photo editors. As a review, my suggestion was to steer clear of the expensive, highly advanced programs as they will just overwhelm you with stuff you won’t ever use. Even with Elements you won’t use most of the tools on your screen.
Some bullet points on the subject:
-The biggest step is just getting the program on your machine. Buy a disk on ebay or Amazon and get it on your computer!
-The fastest way to learn is by loading a photo and just “pushing buttons” . Click the tools, move the sliders and you’ll quickly see the results. That will be quicker than reading manuals or watching tutorials.
-To avoid “not seeing the forest for the trees”, there are just a few tools you use over and over, cropping, adjusting brightness, and adjusting color. Their buttons look the same as anything else so I’m going to list them here so you can see them through the fog:
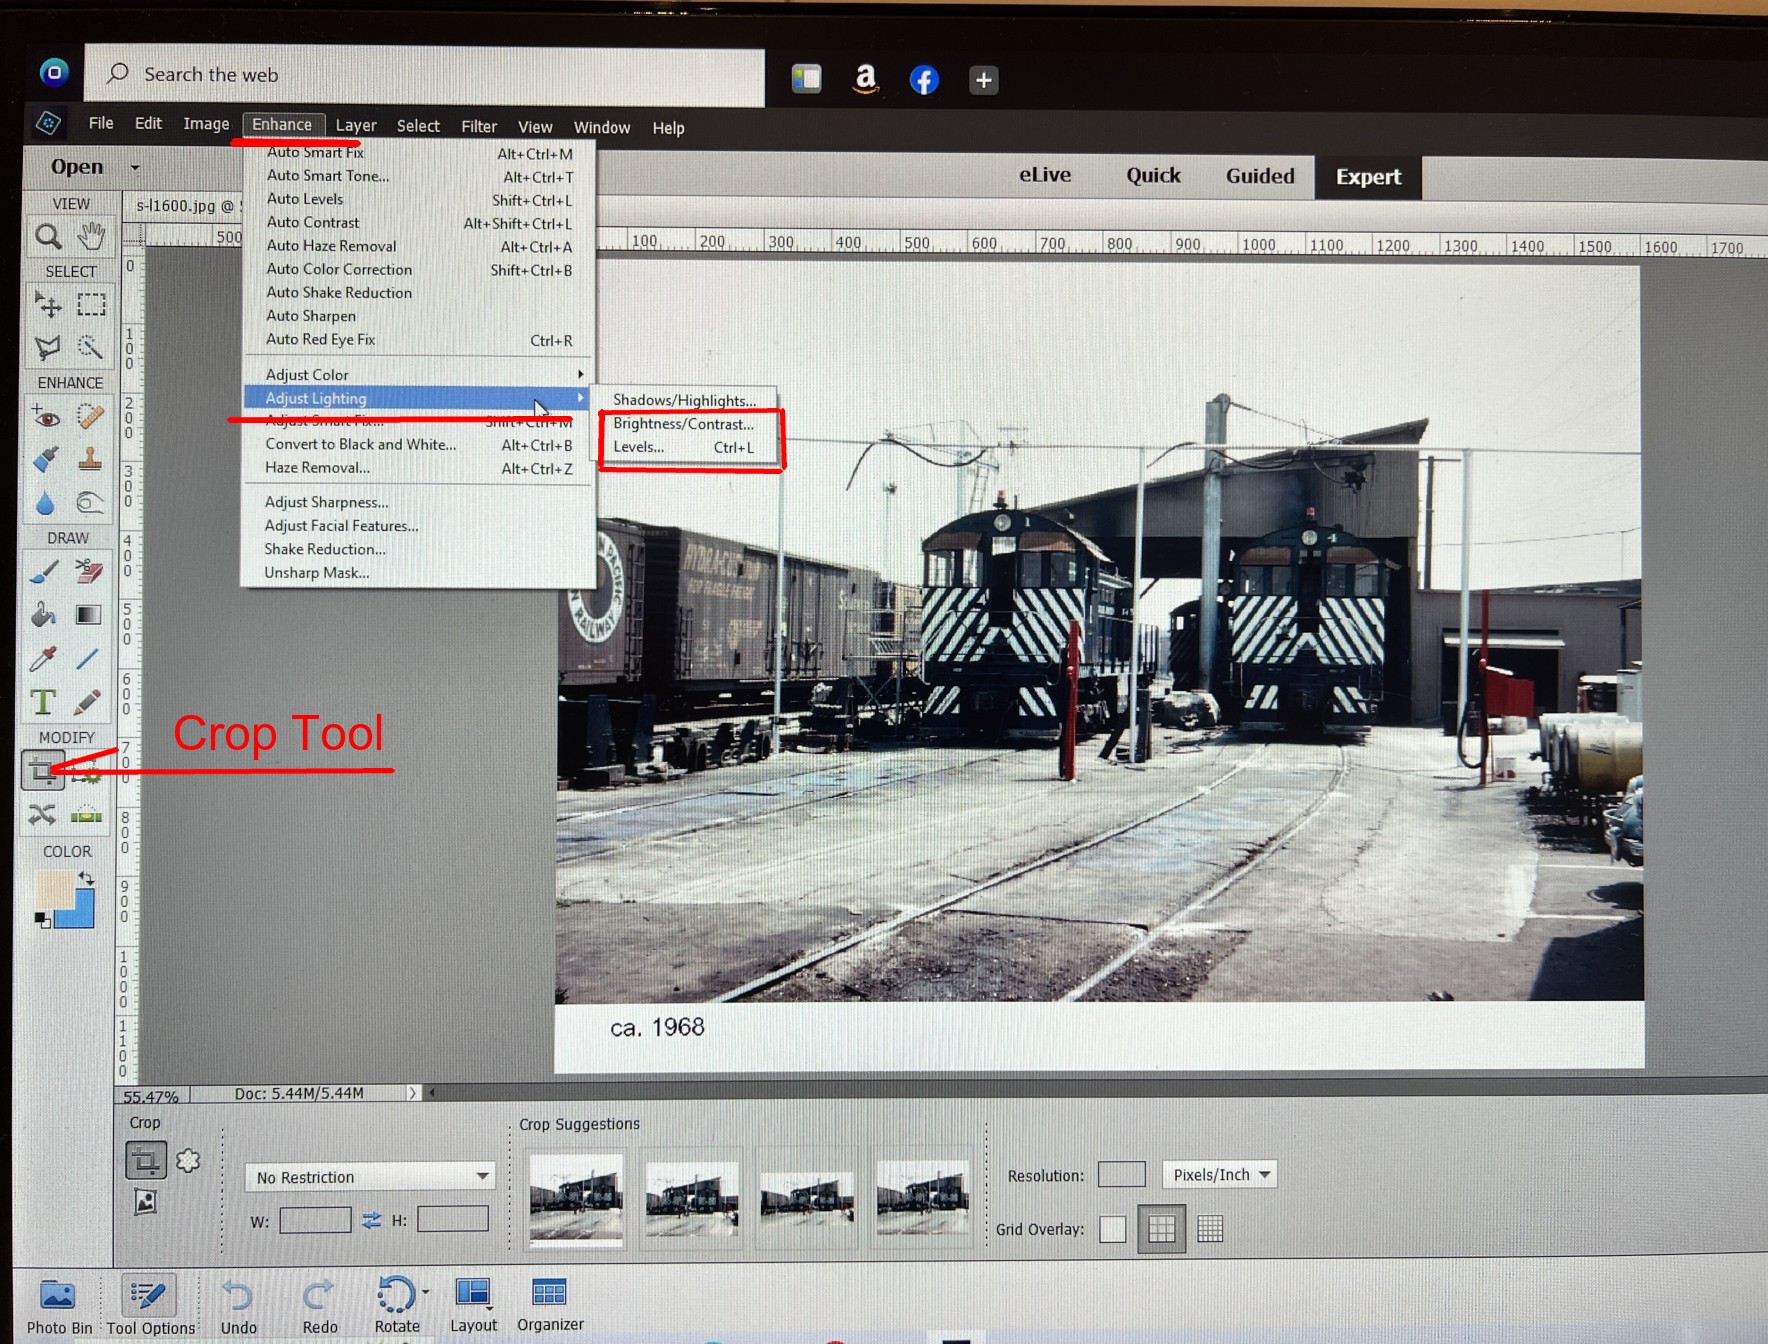
The most used tool is cropping. Click the icon shown, drag the borders to the area of the photo you want to keep and hit the check mark.
The second most common tool is “adjust brightness”. Go the “Enhance” and then scroll down to “adjust lighting”. Just move the brightness slider to get the results you want. The levels tool gives you more control. Just move the triangles to the edge of the histogram to see improvement. Move them around a bit to see how the impact. Experiment with the middle slider.

The next most used tool deals with color. It’s common to end up with a photo that has an odd hue, usually yellow or orange. This is easily fixed. Go to “Enhance” and “adjust color” Click “remove color cast” Use the eyedropper to click on area of the photo that is known to be white, a sign or rolling stock lettering for example. The color will instantly fix. If you want to add a little “pop” you can move the “saturation” slider a little but don’t overdo it.
Once you have those basics down, you can gradually fiddle around and become more comfortable with the other tools over time.
If I get the sense that people are actually taking the steps to move forward with this, actually getting the program, I’ll add a few more tutorials.