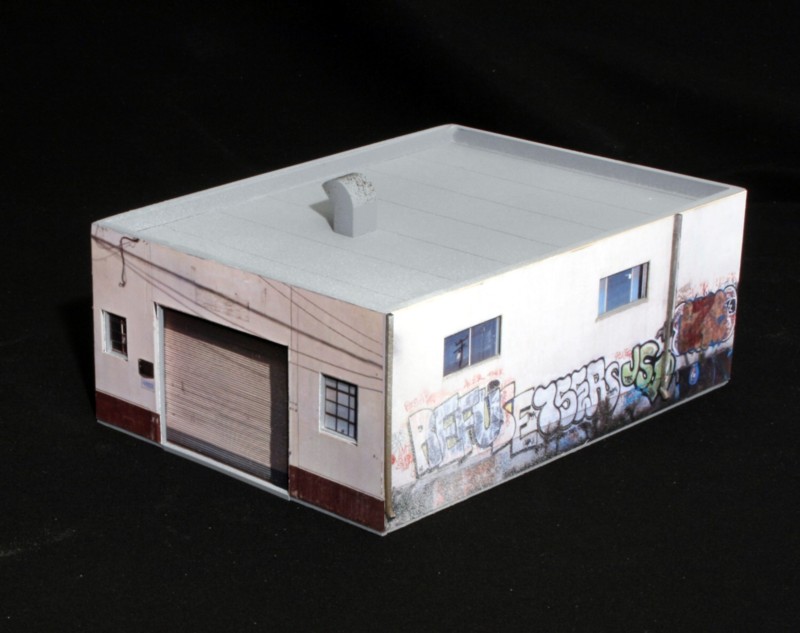
At the corner of Corona Avenue, I had roughly a six-inch gap to fill between the street and the primary industry on that block. I didn’t want anything too over the top and something that blended into the neighboring structure. For the side with the tagging on it, I used an image from my trip to LA. For the side with the door, I snatched a Google Streetview screenshot from a building a block away. The other two sides can’t be seen so were left blank. The core was made from .060″ styrene with openings cut out for the windows and doors in order to provide noticeable depth. It was simple enough to then laminate the two photos onto the core and glue the doors and windows into the relief openings. Downspouts were added for additional standoff relief. I no longer photoshop out the shadows in the door wells or from surrounding guy wires because I’ve found that leaving them in creates added contrast.
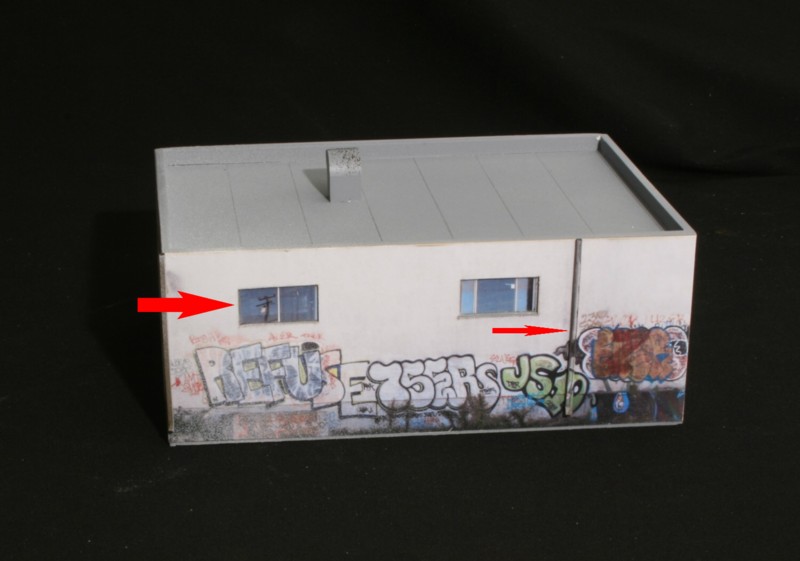
Two details to note in the above shot. The windows were added last. The laminate was printed on glossy photo paper and then dulled with Dullcote. After the Dullcote application, I then took the windows, also printed on glossy photo paper (but with NO Dullcote applied) and inserted them into the window depressions. The glossiness of the window images gives them a very transparent look.
The downspouts are from Micro Engineering. In the real world, the graffiti would have been applied over the downspout. How do you do that, though? It ended up being much simpler than I expected. I just took another photo and cut a thin strip of the photo where the prototype downspout was and glued it onto the Micro Engineering downspout.

