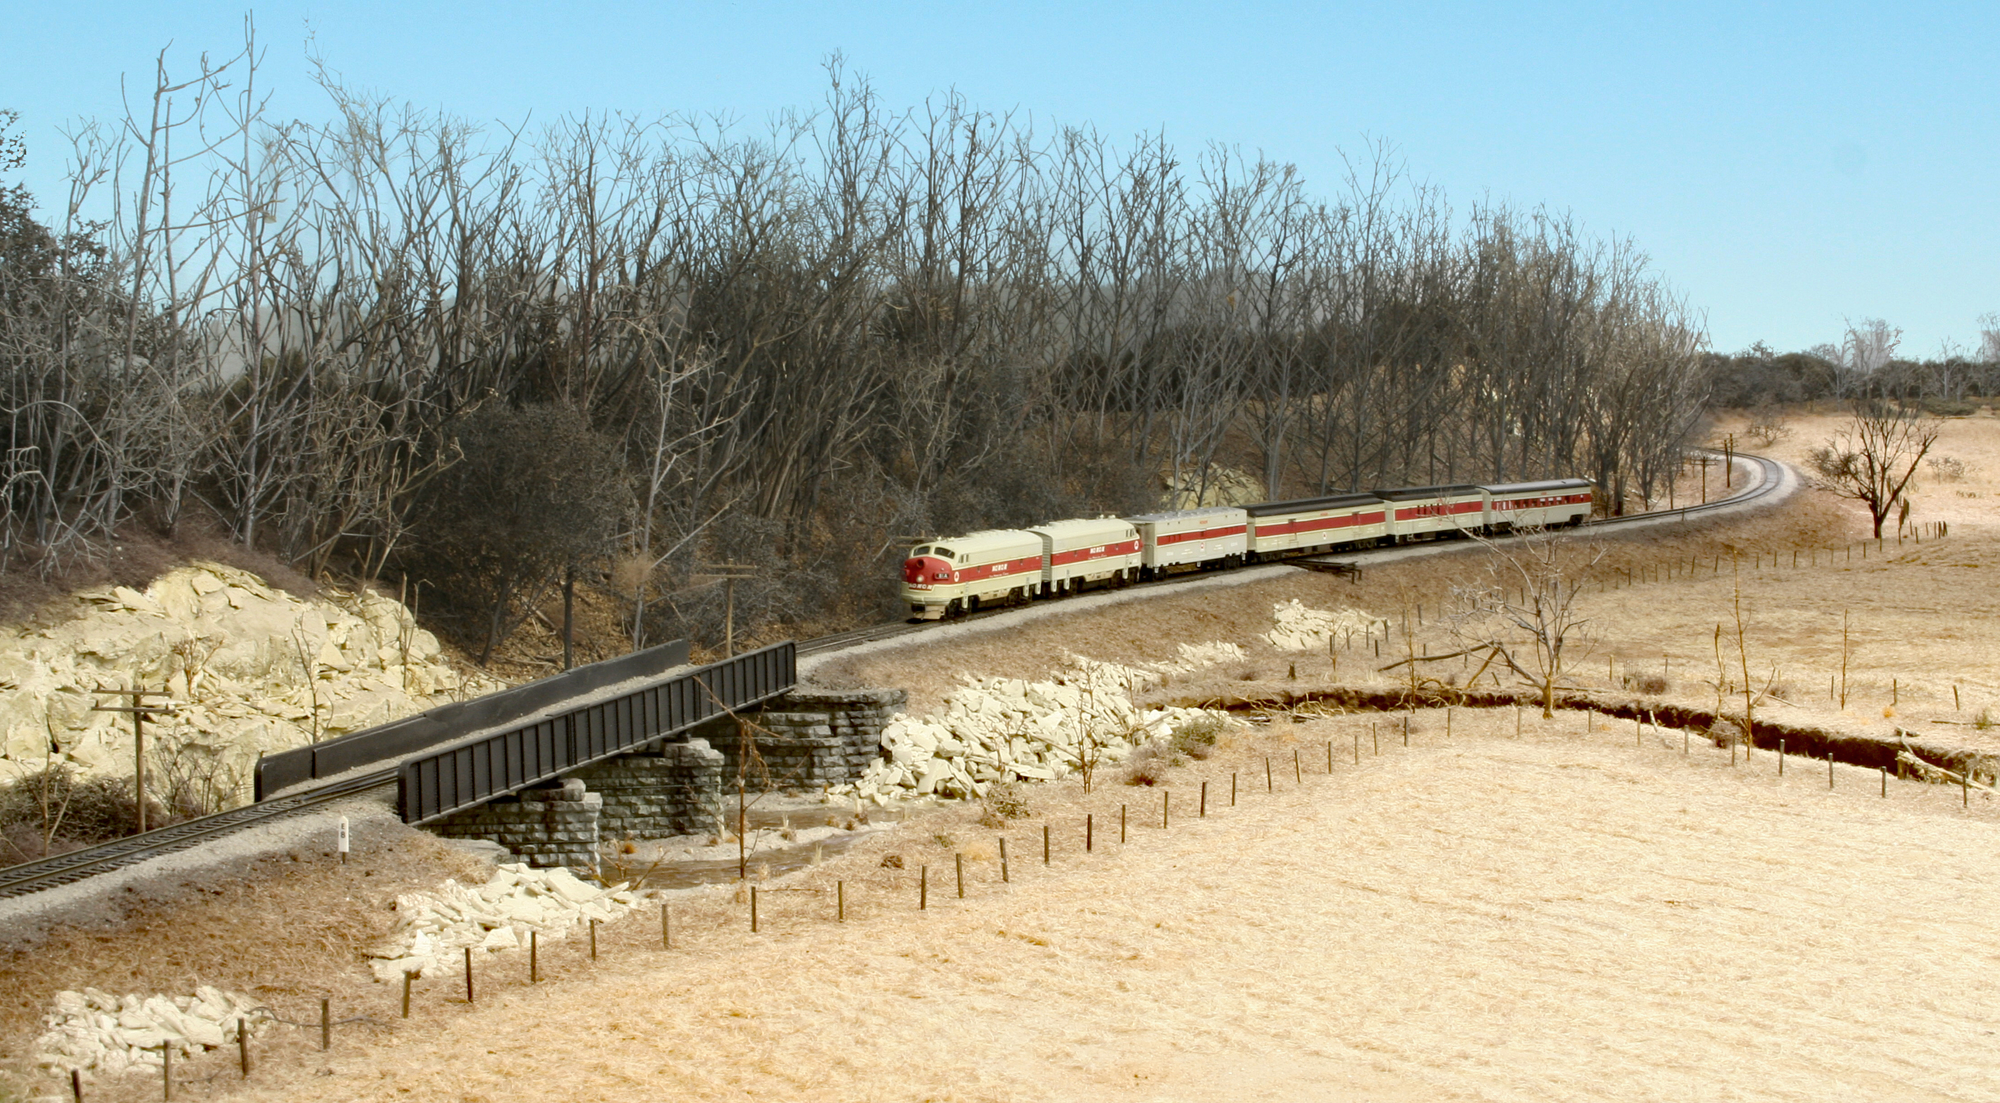
A northbound Thoroughbred approaches the iconic, and rail fan favorite, Bridge E-8 on my old Monon layout. The sky I cropped in was taken across a farm field in Maryland. Note the light blue to dark blue color transition at the horizon. I also experimented with slightly warmer hues.
Photo editing is a lifelong learning process. I know more than I did five years ago and am going back and trying different interpretations of old images and experimenting with new tools and looks.
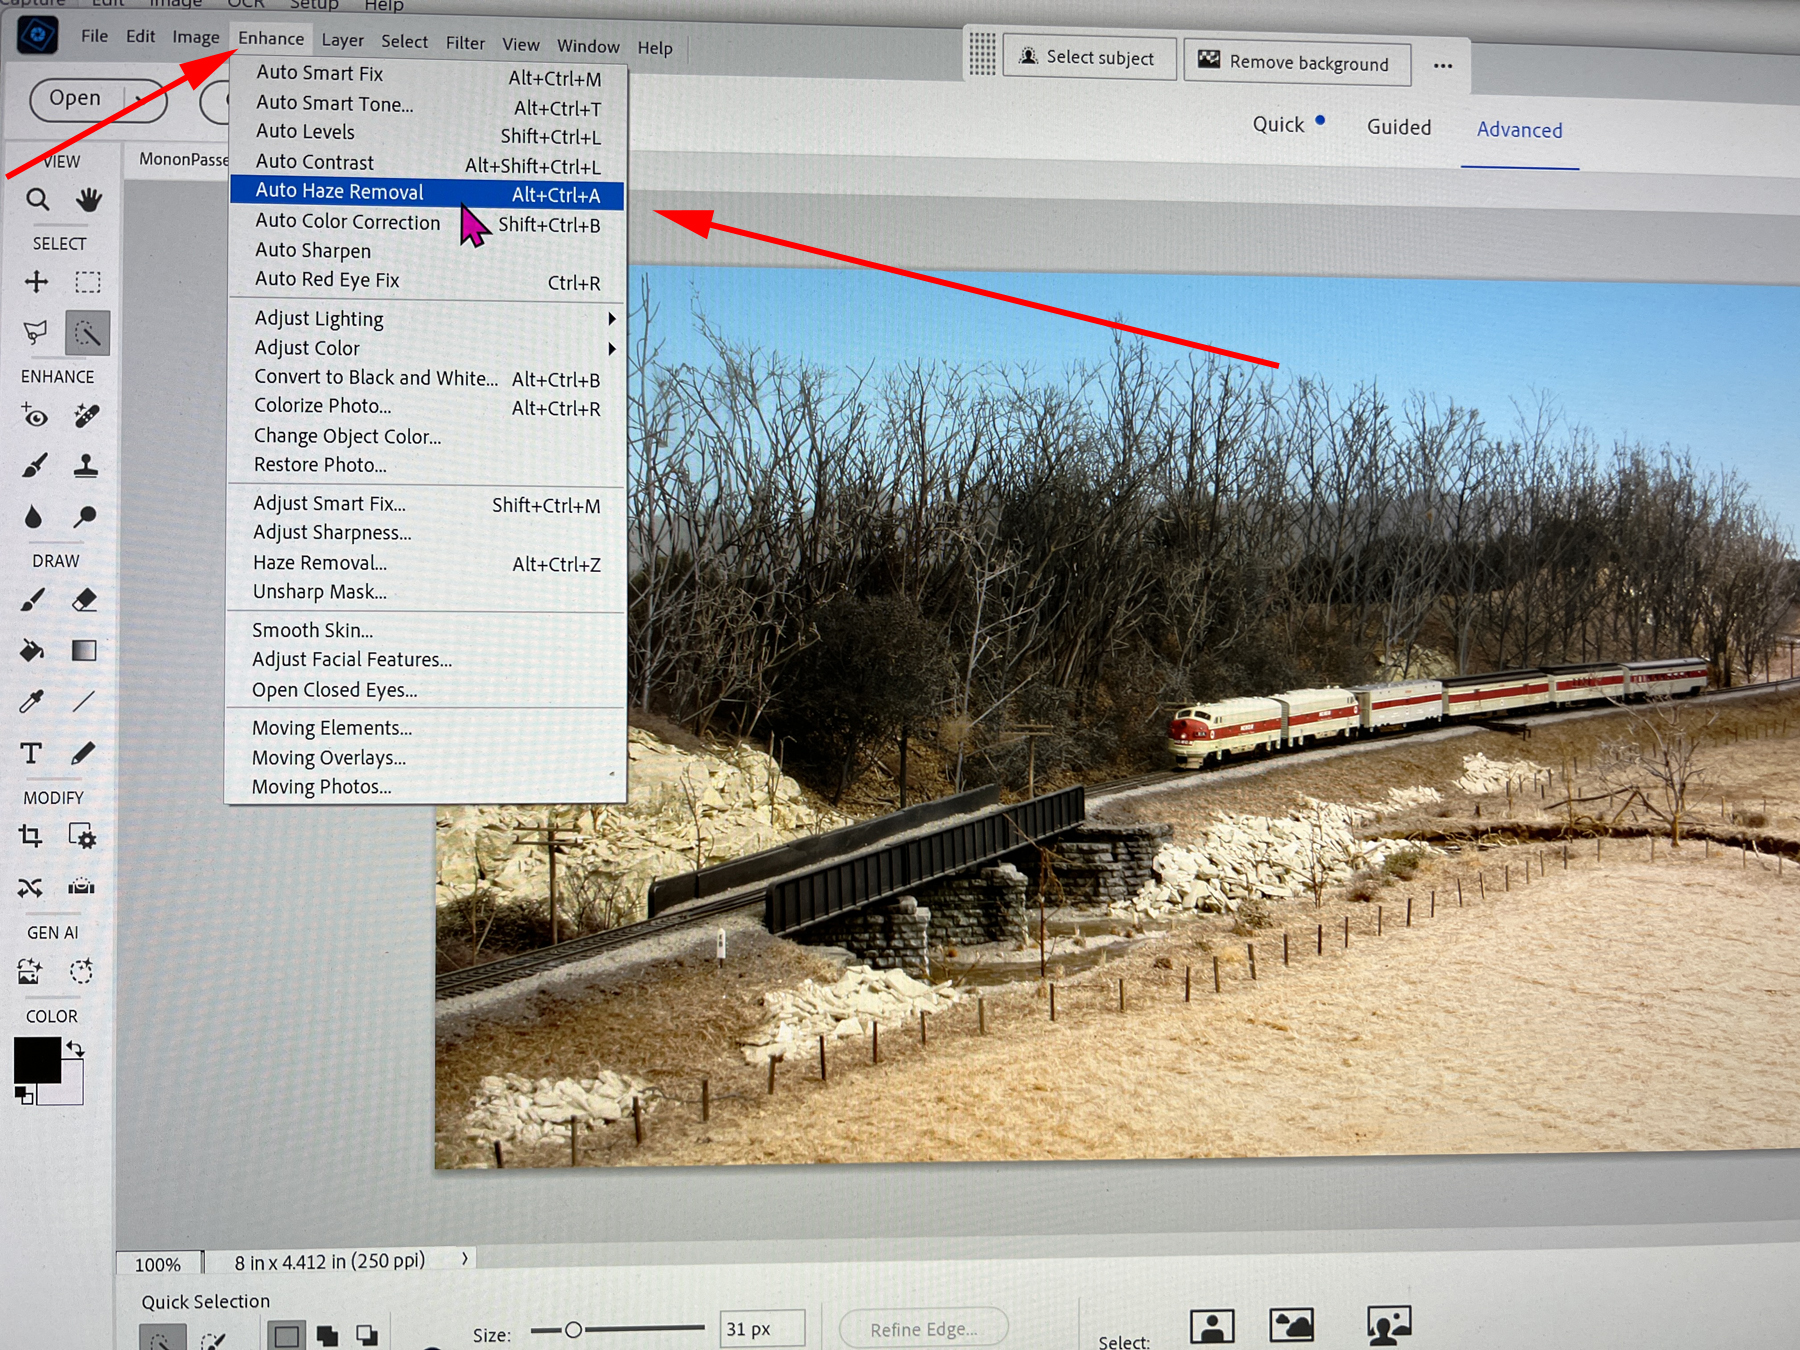
Every image reacts differently to a given tool. I’ve been having luck lately breathing life into many of my photos by using the Auto Haze removal tool (Adobe Elements).
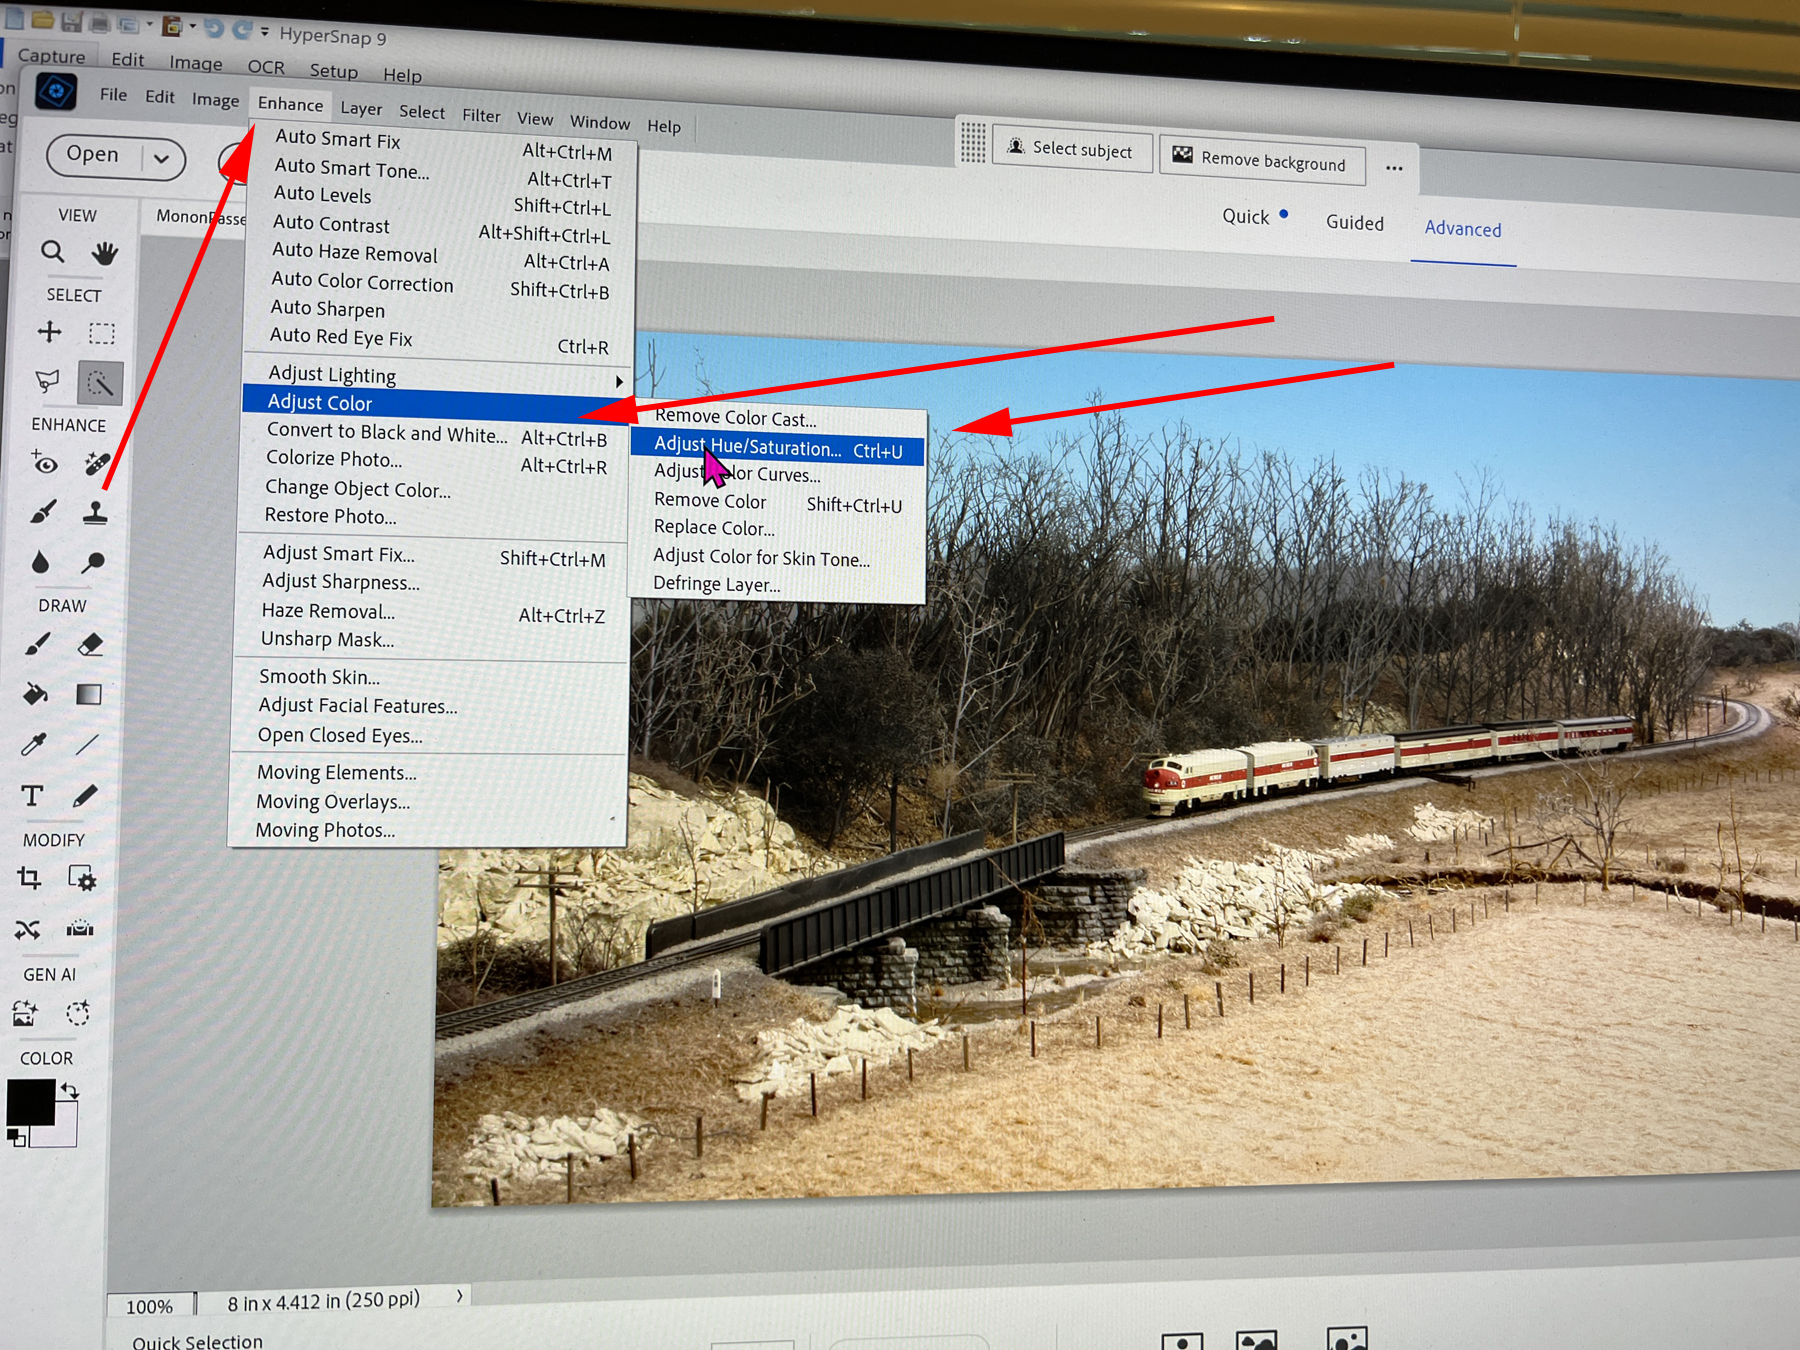
However, the Auto Haze Removal tool does lay the saturation on a little too thickly so as a next step I dial the saturation back. Depending on how a given image turns out “sometimes” I’ll use the color correction tool. At times it’s sorely needed. At other times, it has a tendency to make a photo a little too blue, too sterile. It’s only one button click so give it a try. If it works, use it, if not, hit the undo button.
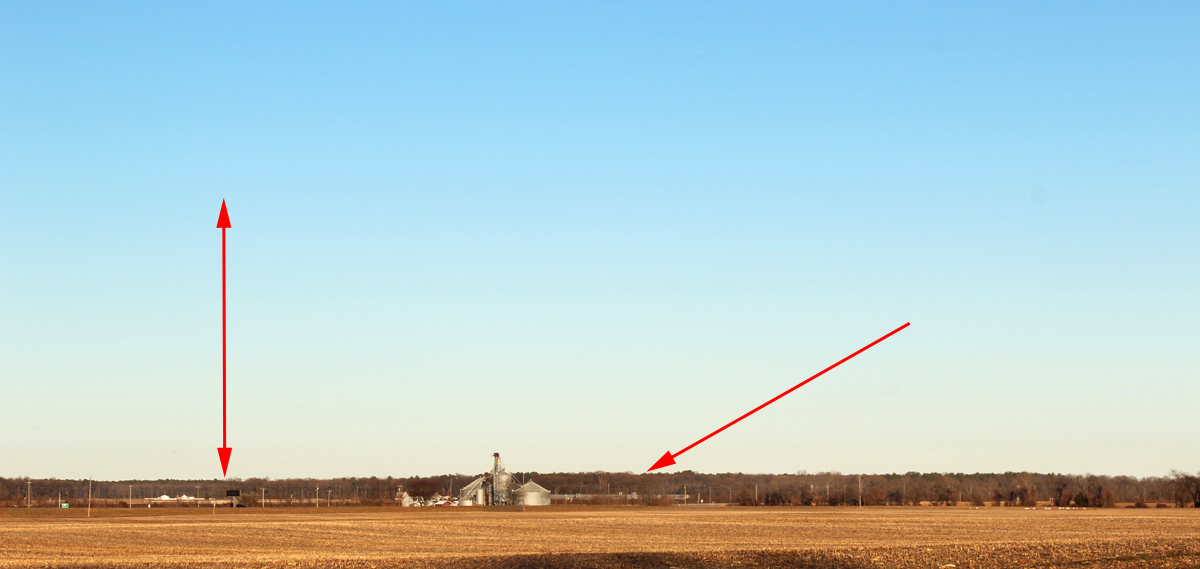
This shot, which I cropped in as the background sky, was taken at the golden hour on the Demarva Peninsula. As you look at the sky, take note of how the color transitions from almost white at the bottom to more blue as you look upwards. If you crop a real sky into the background of a model photo, it’s important to reflect this. I was late to the game doing so, and as a result, have a ton of photos that I’ve grown not to like. Also, note the distant treeline. The distance to trees or buildings will vary from situation to situation, so as you build a library of background photos, work to create a mix of different distances. In some, but not all, cases, having a hint of the distant treeline (or buildings) protruding into your model photo looks better. Finally, with my library of background sky photos, I have a bunch of shots of dramatic sunsets and cloud formations. I use these less and less with each passing year.