Tom Johnson just posted an exceptional weathering tutorial on his FB page. He was kind enough to let me share it here. Thanks Tom! (Tom uses a Paasche model H airbrush. Fifty bucks on Amazon)
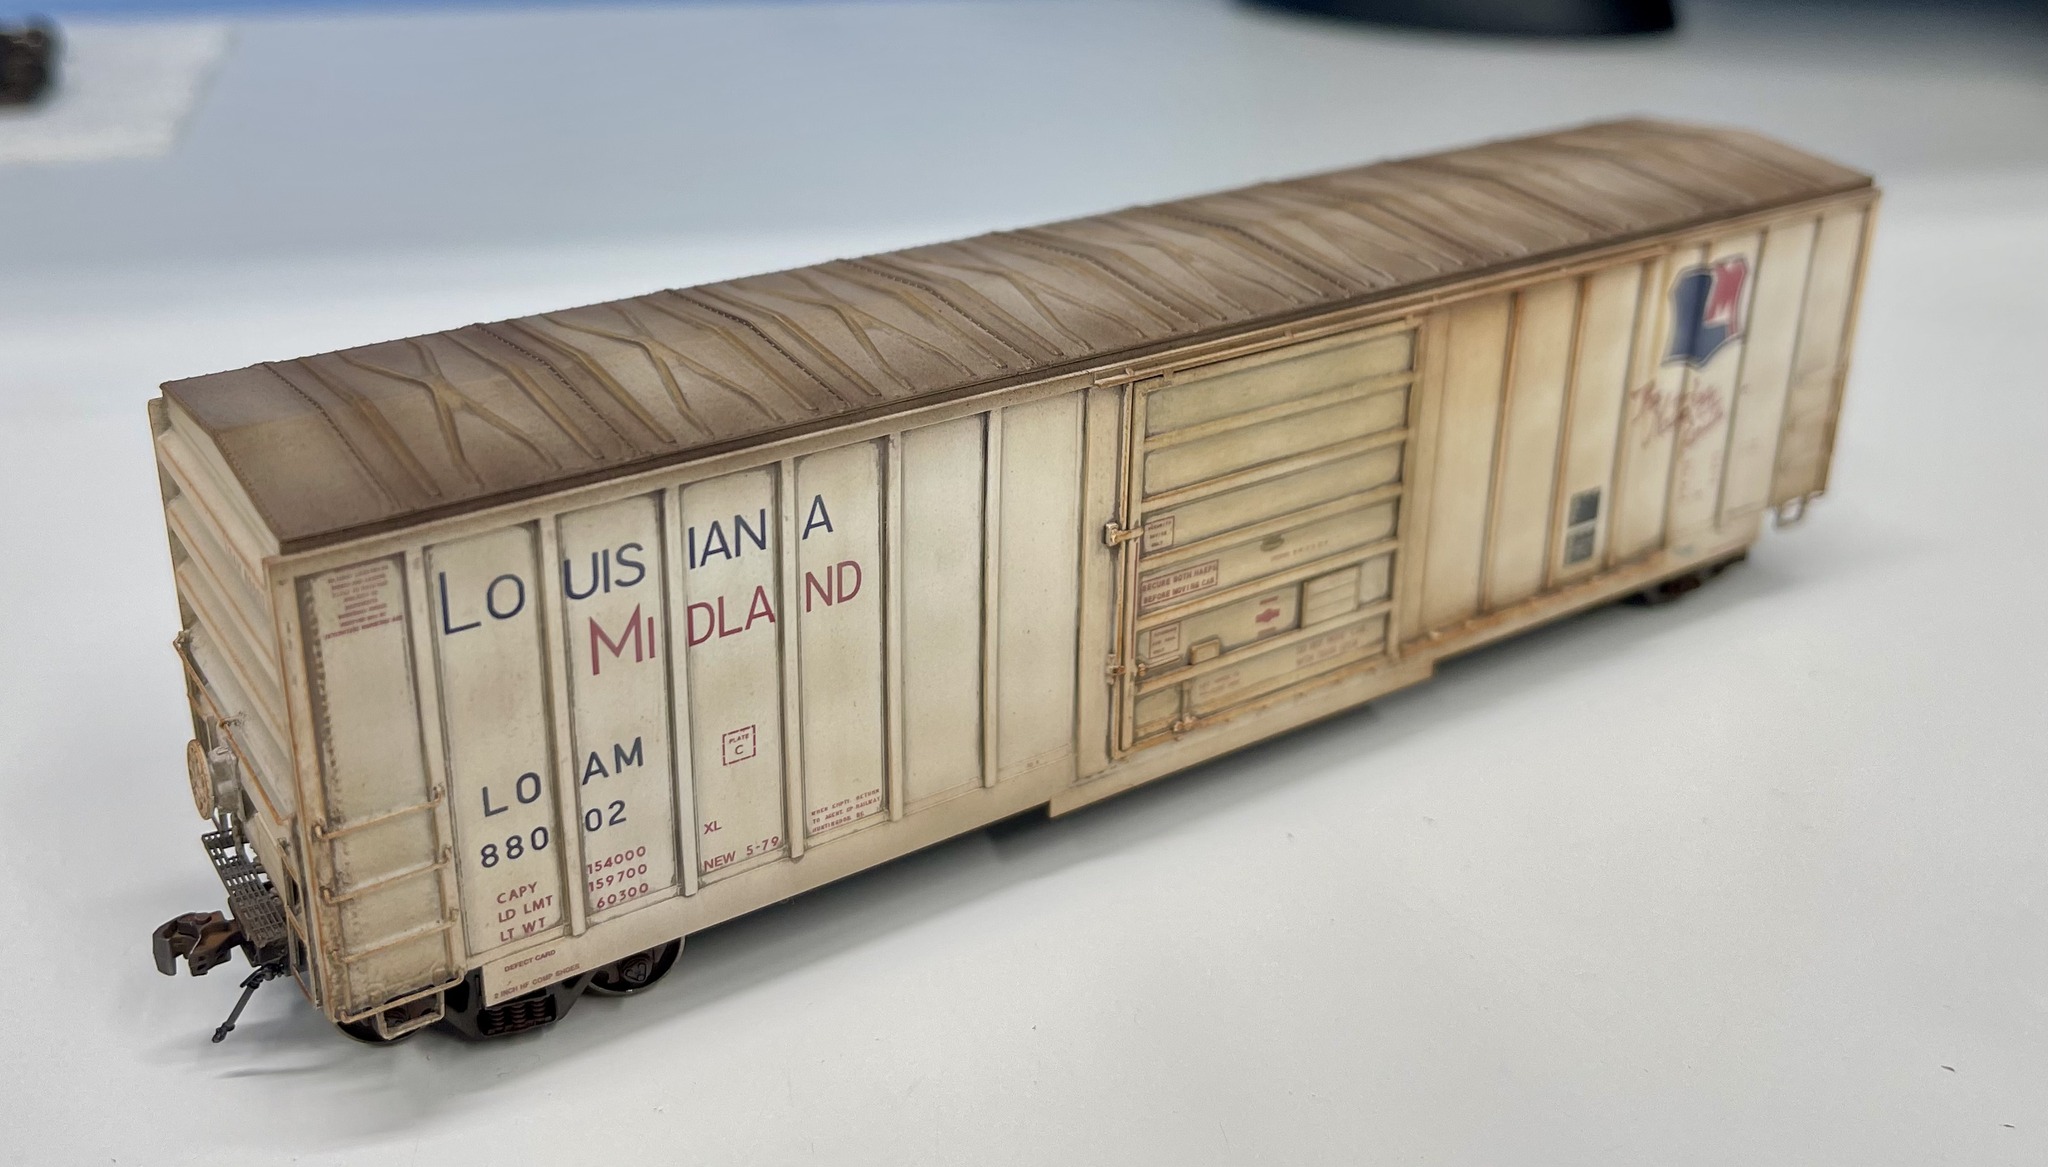
Here are some weathered Incentive Per Diem boxcars for my mid 80’s Cass County and will be spotted often on my new team track. I researched all of the Athearn models I have and they all were found as far as the late 80’s with original reporting marks so all of mine fit. Plus, the weathering would still be fairly medium at most. They are mostly air brushed! This is my standard procedure for a moderately weathered car. I use flat Testor’s enamel paints I find at Hobby Lobby. I still like enamel paint thinned with a 50/50 mix of Testors Dullcote and Lacquer thinner. I fill up a one ounce jar and add just a few drops of the colors I use for weathering. I always build up the air brush layers until I’m happy.
For most colors of cars, I start with a thinned white for fading. I spray the thinned white overall and then spray several spots from top to bottom between ribs that represent the rippled effect in the sheet metal. Keep this very light!
Spray a layer of Dullcote.
Dry brush a grungy oil paint color along both sides of every rib and around the doors and its detail. I use a small brush and this is DRY BRUSHING! Scrub most of the paint out onto a rag or paper towel. I also add this shade along the edges and inside some of the detail on the roof and ends. I follow by cleaning up using a Q-Tip soaked with some Turpenoid. I run the Q-tip up and down on both sides of every rib and around the doors to get rid of excess oil weathering. I want to keep it close to the ribs and door edges and detail.
Add another coat of Dullcote.
Mix another very thin solution of a grungy color using the Testor’s flat paints and the full one ounce jar of 50/50 thinner and Dullcote. I mix flat black, flat rust, and flat gray. That gives me a nice color that is similar to the old Floquil Grimy Black. I lightly spray this shade up along the bottom edges on the sides and feather out moving upward between the ribs. I sometimes like to feather a tiny bit of this color from the top down. I also spray this color across the roof and feathering out from the outside edges inward. The ends are pretty straight from one edge to the other and top to bottom. I’ll finish by doing more very light dry brushing with a bushy brush around the door detail, door runners, and sometimes I’ll scrub them in just a bit between the ribs to bring out even more of a rippled effect. I like using Burnt Sienna for this that gives you a more lively fresh rust look but it will be very subtle. You may not even notice it in my photos.
Another coat of Dullcote to finish. I actually like about a 50/50 mix of Glosscote and Dullcote. It will give the car a sheen and not dead flat. No piece of rolling stock is dead flat.
I mix a thicker version of my grungy color and spray the under frame. I don’t spend a lot of time in this area because you can’t see it on the layout. It’s a waste of time weathering most under frames. I spray my thicker grungy color on the under frame and call it quits.
I use the same thick grungy color for my trucks and wheels. I then highlight with a brighter rusty color of oil paint around the bearings and the springs.
Finish once again with straight Dullcote for the trucks. I do want them dead flat.