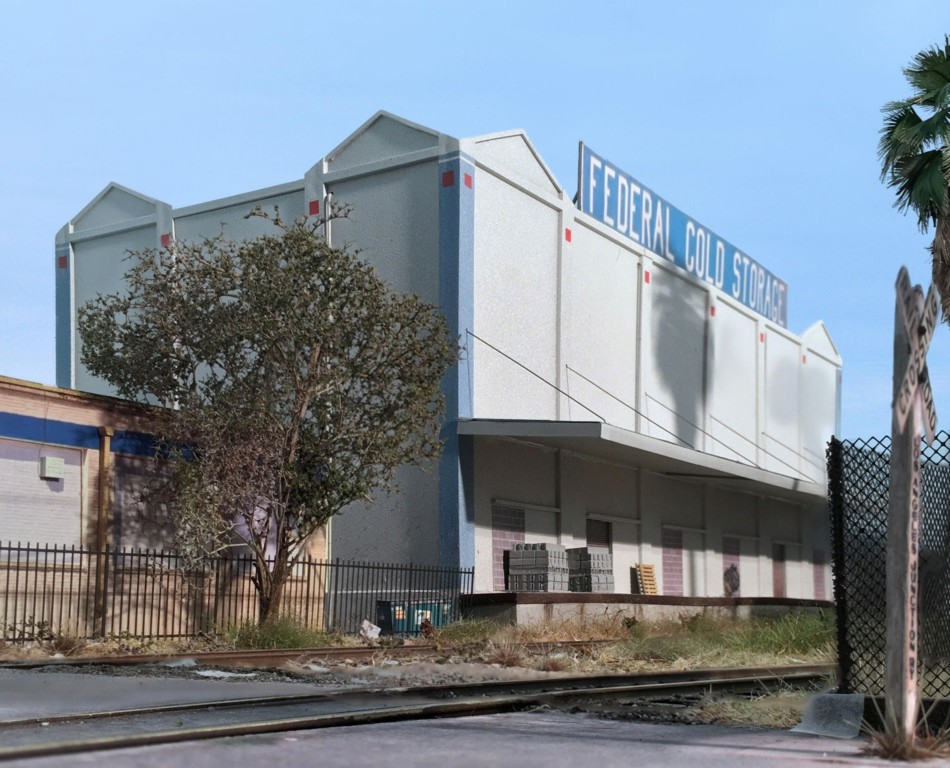
The camera lens allows us to interpret, capture, and experience our models in a way that simply isn’t possible with the naked eye. It takes us to the place we envisioned when we started this whole layout building process. The image above of Federal Cold Storage took most of a weekend to get the end product you see above. Here’s how I went about it.
I start with a quick test shot which reveals all sorts of nasty things we didn’t notice at first. Harder to get a handle on is figuring out what is missing from the scene. After looking at the test shot I decided to add the tree in front of the yellow brick building. The smallest details can make an enormous difference. For example, I added two pieces windblown trash, one against the fence in front of the dumpster, the other just to the left of the cross bucks. I also plucked out a small palm that looked too man made and vacuumed stray ballast off of the street.
Now that the scene was photo ready I tried about half a dozen test shots from slightly different angles. In composing the shot I wanted to frame the structure with the crossbucks on the right and tree on the left. I also wanted just a hint of the palm to put the Socal regional stamp on things. Viewing angle and shadows are critical. The lower you can get the lens, the larger and more imposing the model subjects appear. For this reason, I used an iPhone as it is small enough to allow you to get really low. I set up one Tungsten photo flood and adjusted it’s position until I had the shadows “painted” where I wanted them. Specifically, I was watching the location of the shadows from the crossbucks and awning.
With everything in place, I shot five images, keeping the camera perfectly still, at different focal points near to far. I focused on the crossbucks and grade crossing rail first and then focused on subjects further back in the shot. The five images were then loaded into HeliconFocus and combined into one shot with continuous depth of field. The actual background is drywall painted sky blue. I removed the wall background with Corel Knockout 2 and replaced it with an actual sky image from my photo library.
The last step was to do some touch up with the photo editors. Helicon Focus can leave some funky artifacts and blurs which I cleaned up as best as I could. A few surfaces had a bit of red or green hue which needed to be fixed. A tap with the levels tool and it was mission accomplished.